
Custom Fit Roof Rack Kit With DK108 | RB1375S | RRRLKHD
(116 reviews)
Price: $447.17
In Stock
Custom Fit Roof Rack Kit With DK108 | RB1375S | RRRLKHD
Item # RR29JP
Our Price: $447.17
Will this fit?
To see if this custom-fit item will work for you please tell us what vehicle you'll use it with.
In Stock


- All Info
- Reviews (116)
- Q & A (0)
- Videos (4)
- Photos
Rhino Rack Roof Rack - RR29JP
- Square Bars
- Crossbars
- 54 Inch Bar Space
- Rhino Rack
- Silver
- Overhang
- 2 Bars
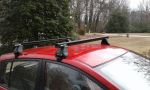
These heavy-duty, aluminum crossbars work with Rhino-Rack legs to create a sturdy roof rack. The square bars include built-in C-channels for mounting Rhino-Rack heavy-duty, contractor-grade accessories.
Features:
Rhino-Rack HD Crossbars - Silver - Qty 2:- Heavy-Duty square crossbars let you build a roof rack system from scratch
- Built-in C-channel on top of each bar is designed for mounting Rhino-Rack Heavy-Duty accessories and carriers
- Rubber strip in the channel helps to cushion load and provide slip resistance
- Built-in channel on bottom of each bar for mounting to Rhino-Rack Heavy-Duty roof rack legs
- Lightweight, extruded, structural-grade aluminum construction for strength and durability
- Silver color
DK Fit Kit for Rhino-Rack 2500 Legs - Heavy Duty:
- Padded, metal clamps provide secure grip on your door jambs
- Bolt onto leg assemblies and tighten for secure fit
- Protect door jambs from scratches and abrasions
- Powder coated for durability and rust resistance
- Molded-rubber pads are custom designed to fit the contours of your roof
- Clip onto the bottoms of your roof rack legs
- Protect your roof from scratches and abrasions
Rhino-Rack 2500 Legs - Qty 4:
- Legs help to mount Rhino-Rack crossbars to your vehicle's naked roof or fixed mounting points
- Leg bases pivot to ensure the crossbars are level on your roof
- Locks secure system to your roof
- UV-stabilized, glass-reinforced nylon is durable and weather resistant
- Allen key included to ensure legs are securely mounted to your roof
DK108 Custom DK Fit Kit for Rhino-Rack 2500 Series Roof Rack Legs - Naked Roof
RB1375S Rhino-Rack Heavy-Duty Roof Rack Crossbar - Silver - 54" Long - Qty 1
RLKHD Rhino Rack 2500 Series Leg Kit for HD Cross Bars - Qty 4
Video of Custom Fit Roof Rack Kit With DK108 | RB1375S | RRRLKHD


Videos are provided as a guide only. Refer to manufacturer installation instructions and specs for complete information.


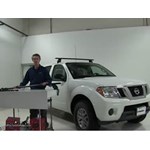
Video Transcript for Rhino Rack Roof Rack Review - 2016 Nissan Frontier
Today on our 2016 Nissan Frontier, we will be doing a test with the Rhino-Rack Vortex Aero Crossbar Roof Rack System, using part numbers RRBA137B-2 for the 54-inch aluminum black crossbars, part number RRLKVA for the leg kit, and part number GK108 for the clamps and the pads. We have already got one installed on our Frontier, as you can see here. It is our front one. Let's go ahead and do the back one together. For the back one, I have already got the leg and clamp installed, so we are just going to finish off by doing the side here. The first thing we will do .. let's go ahead and grab the leg.
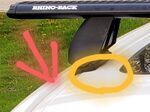
Then we will grab the top portion of our pad, where our pad is going to go on. We need to make sure that the little arrow there is pointing outward. Then we will just clamp it on the bottom here until it snaps in. Then we can grab the pad. For the pad, it has got a little arrow as well.
When we set that on our Nissan, we want to make sure that arrow is pointing forward. I will just take my pad here. We are going to push it in place, like so. Make sure that it is seated all the way around. Once we have got that seated, let's go ahead and take our bolt out here.
We will take our clamp, and position like so. We will take our bolt. I'm just going to get that started. We do not want to screw that all the way in just yet. Just get it so it is loosened up. One of the things we want to make sure that our top bolt here, this square nut, is loosened up.
Then we are going to come over to our crossbar here. I am just going to flip this upside down. Then we are going to slide that on to our crossbar. Pretty easy to do. We are just going to leave it loose for now. Then we want to refer to our fit guide. Our fit guide says that the length between the two legs needs to be 1,077 millimeters. That converts to 107.7 centimeters. What we are going to do is we are going to grab our little tape here. As I said before, we have already got this one installed and bolted down. We are going to come across to 107.7 and then set it. Once we get to 107, we are almost about to set there. Then we just want to scoot our leg up until we have got it right in that area there. Once we have got that, we are going to grab our Rhino-Rack tool and tighten that down. Once we have got that tightened, we can then take our end cap and put that in place. Now we can head on over to our Nissan Frontier. Let's get this table out of the way for us here. What we are going to do is we want to open up, or have both of our doors opened up that is. We will go ahead and set our roof rack in position. You want to do it very gently. That way you do not scratch up the vehicle. I am going to go over there and take care of that side real quick. Let's get this set up here in position. Then we will need to refer to our fit guide again. Since we have already got our front crossbar installed, we can measure from the center. We need to be 750 millimeters, which converts to 75 centimeters, from center to center. We will come around here and adjust it. Let's grab our tape here, center to center. We will need to come back a little bit here. With that side where it needs to be, we will go ahead and take care of the other side. Then we can move on from there. Alright, 75, perfect. Now we will need to come over to our weatherstripping here on our Frontier. We are just going to pull down, just kind of free that up. As you can see, our clamp is just kind of going to go right in place where it needs to be. That is where we want it. Once we get it tightened down, we will of course be able to reinstall our weatherstripping. I am not going to tighten it down all the way just yet, but now that it is seated, let's go ahead and tighten it up a little bit, just until it kind of grabs. Then just like that, we will repeat that same process. I am just going to put that back in place because I know it is seated. I will repeat that same process for the other side, make sure it clips in the spot. See how I kind of moved it there, no big deal. Grab my tape again and reset it. Before I do that, I can go ahead and tighten it down a little bit. Then I will readjust my measurement. No big deal. Alright, perfect. Now with them both in position, we can tighten them down. As you tighten them down, you want to make sure that the pad is in position and kind of stays. Make sure that it contours to the roof of the vehicle. Again, I am not going to tighten this down all the way just yet. You kind of want to get a happy medium between both sides. If you have to, you can loosen up one side if you have tightened it down too much. That looks to be about right on this side. Let's take a look at the other side. Just a little bit more and then we can re-seat our weatherstripping on this side. Close that up. Looks good. Check this side here. Perfect. Make sure everything is all sealed up and close the door. A few more steps here. We can then grab our cap here. We are going to clip it in place on the side. It is going to cover up our hardware. Then we can lock it up with our keys. We take our key and lock up our crossbars. Same thing here and then we have got it. Before we finish up here, I will kind of go over how we got our first ones set up. It is pretty simple. It is about the same way. You will have your crossbars set up and put them together. You want to follow your fit guide. Get your measurement in between and then we got our measurement for its position. The fit guide told us to start here and then measure to here. Then we got our where measurement by measuring from the center. It is a pretty unique way to get it started and get them all fixed up. That is going to complete our test fit of the Rhino-Rack Vortex Aero Crossbar Roof Rack System on our 2016 Nissan Frontier.
Customer Reviews
Custom Fit Roof Rack Kit With DK108 | RB1375S | RRRLKHD - RR29JP
Average Customer Rating: 4.6 out of 5 stars (116 Customer Reviews)
These heavy-duty, aluminum crossbars work with Rhino-Rack legs to create a sturdy roof rack. The square bars include built-in C-channels for mounting Rhino-Rack heavy-duty, contractor-grade accessories.by: Ben 05/17/2024
Ive had these racks for a year and they've been really good. They fit my 2019 nissan frontier easily. The only thing that keeps it from 5 stars is when it rains really heavy, I get a slow, occasional drip where the mount sit under the door's weather seal.
by: Mike K.12/13/2013
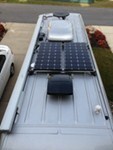
These are the perfect racks for a low profile mounting of solar panels on my Sprinter van.

by: Tom Y.03/18/2015
I got this along with the Rhino Rack 2500 series Roof Rack with the Euro Square Crossbars in a kit. They fit perfectly and were easy to install.

by: Craig10/13/2023
The rack fit well and was easy to install. Seems to be made well. The problem is the amount of road noise. I never even put the basket on. It was so loud, it roared. I repositioned it several times but the noise was way too much and I finally just removed it. I spent a lot of money for the rack and the basket and now they are in storage. I wish it would have worked out better because I thought it looked really good.
by: Jared E.03/28/2020
This works great. Very strong and reliable. Holds my ladders with ease. I’ve had it loaded down and done 80mph on the highway no problem.

by: Bill Boedeker05/05/2015
Ordered a Rhino Rack for my 2014 GMC Sierra 2500HD Denali. Rack arrived in very good shape and all items were there. Installing at this time and see no problems ahead.
by: Michael05/31/2022
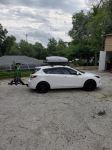
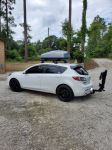
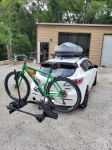
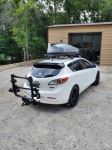
Mazda
Thanks to Etrailer, I am ready to do some serious summer exploring with my 2013 Mazda 3! Rhino Racks, Malone top box, and Kuat bike rack!


by: Eric 06/12/2023
Good quality and locks are included. The plastic lock covers are flimsy but they will keep an honest person honest.
by: Joshua06/26/2020
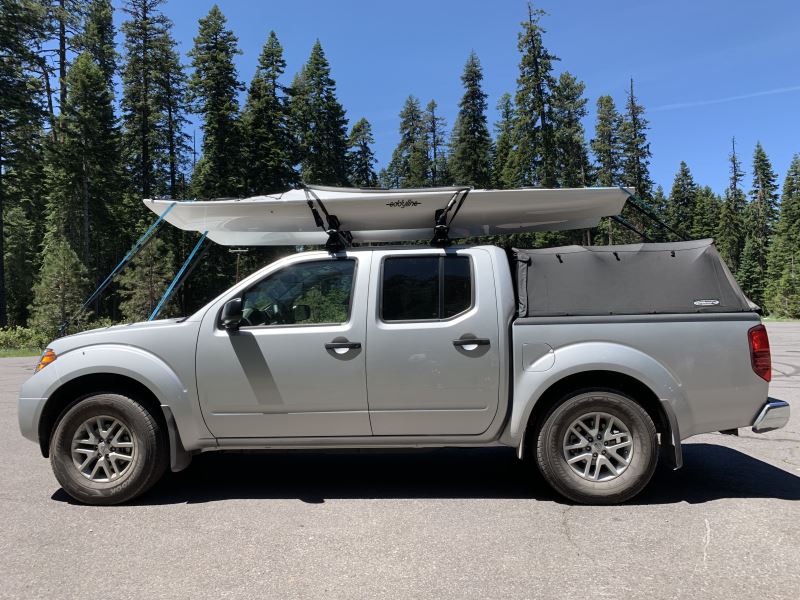
Works great and is very solid. I used the rack and a couple of their kayak racks to carry two kayaks. They are very secure, no vibration and minimal noise even at 70mph.

by: ashley10/22/2021
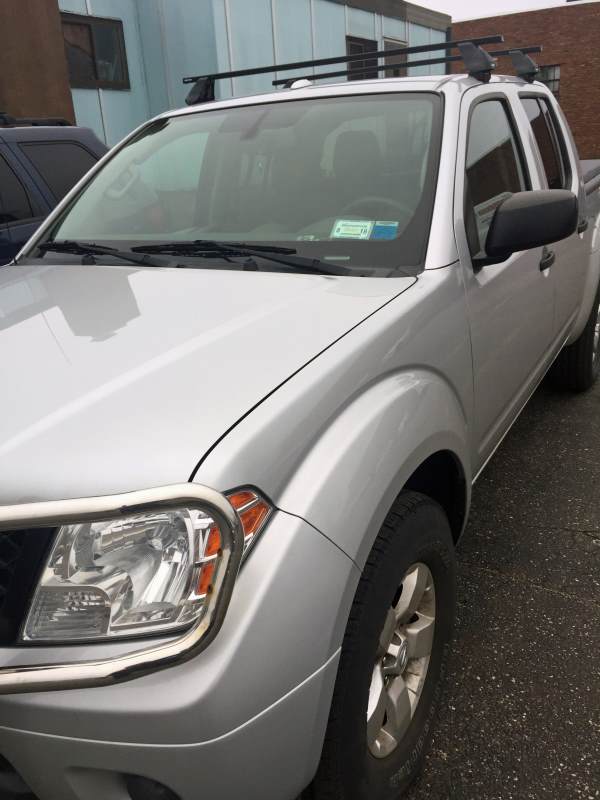
I got the roof rack mounted anyways. Better pics to come when it's all finished!


by: Mike08/01/2017
Great product everything fit perfectly. With the heavy duty bars almost all the hardware for anything you put on the rack is too short


by: Lou R01/20/2017
2012 Nissan Frontier
this rack fits perfectly on my 2012 nissan frontier, i couldnt be more happier with my purchase, thanks etrailer for making my buying experience so easy

by: William01/05/2023
Ease of order, receipt, installation and excellent customer service is what I received in this order.
Thank you, e-trailer!


by: Alexander11/16/2018
Overall great product. It does everything I hope it would do and more, minus a couple issues.
1: These leave a slight gap in the door seal allowing air to pass through on the occasional windy day. The noise from this can be a little bit abound.
2: The anti theft aspect of this product isn't great. I almost lost my racks to a thief, but they stripped the allen head due to not having the appropriate Allen key. They did manage to loosen the racks though. I got lucky.
For the money, these are great, but don't expect $1200 quality, or the quality of a professional installation bolted to the roof.
by: James01/21/2022
This kit is easy to slap on and sturdy enough to balance my skis and snowboards. I recently used the Rhino Rack on a three hour drive to a ski resort and had no issues.
by: Martin 04/05/2023
The rack is everything I imagined. It was the only one that was a perfect fit for my truck, and my canoe rides easily. It did play some unusual music for us when we had icicles hanging.
by: Amanda06/01/2018
2017 Ford F-150
This rack worked out great... I installed in on a 2017 Ford F-150. We drove 6 hrs through wind and rain with a SUP and Tandem Kayak on top. It really took a beating in a storm the whole way. One bracket was a little loose and shifted because of the wind on the Kayak, but it held together. Super happy with Rhino rack!
by: Andrea03/26/2022
I suppose it's a 1 star review until I receive the missing parts for my cargo bars. I'm hoping etrailer will send them ASAP as I have a trip in 10 days that I'll need the rack for.
by: Steve B03/19/2019
I purchased this because I needed 11" brackets and I only needed two to add to my existing setup. Other manufacturers (I could only find one) only sold packs of four at a ridiculously high price. My Rhino Rack mounts and bar arrived within a few days of my order and appear very sturdy and well made. I bought them to add a third support for an awning and a solar shower on the roof of my van. I think I found the perfect solution.
by: Mark08/14/2018
This is my second Rhino-Rack. They go on very easily and hold the bikes/kayaks and even an extension ladder very well....thanks for a great product
by: RO02/05/2017
Nissan Versa
This rack works perfectly on my Nissan Versa for carrying my two Perception Sound 9'6" kayaks. The Rhino-Racks look good to me. The kayaks can rest directly on the rubber pads on the rails, unlike the Yakama racks I had in the past that had bare pipe rails. Also, I expect I can buy parts to adapt this product to a different car without having to buy new towers. I am sorry there are not hooks or loops to attach bungees when carrying lumber. They are noisy in the wind, but less so when carrying the kayaks.


by: Casey E12/31/2020
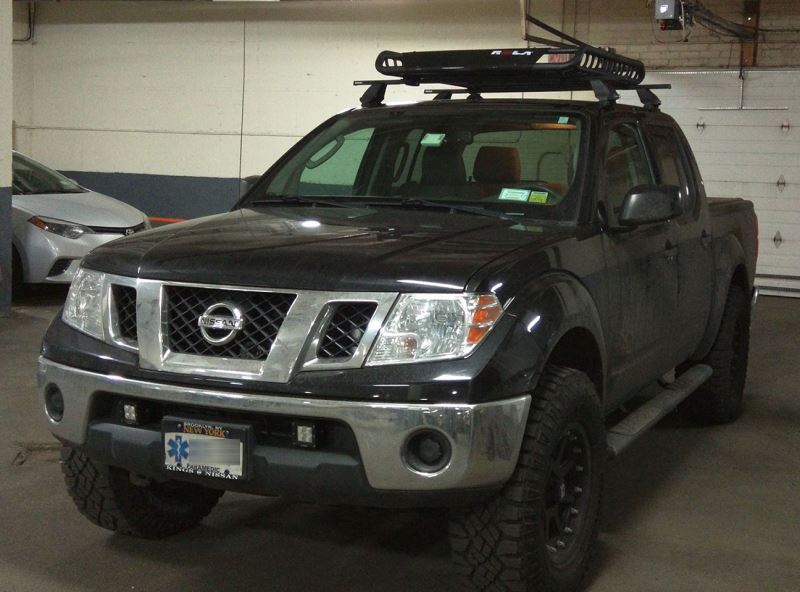
2016 Nissan Frontier
Great cross bars for 2016 Nissan Frontier. The front one needs some adjustments from time to time for some reason. There's a bit of wind noise too but you'll get that with any aftermarket cross bars. Otherwise I've used it for my kayaks and luggage cage quite a bit with no problems.
by: Elaine08/18/2020
We are very satisfied with the roof rack. Plus, the installation instructions were well described so it was easy to install. Thank you.
by: Miguel06/10/2020
Nissan Frontier
Great Product/easy installation. Fit kit was an excellent match for my Frontier and it looks great! No air noise whatsoever. Couldn’t be happier with purchase!
25
2875
Show More Reviews
See what our Experts say about this Rhino Rack Roof Rack
- Roof Rack / Crossbar Options For 2020 Ford Escape With Or Without Existing RailsI have a solution for you, however, my contact at Rhino-Rack confirmed that the Rhino-Rack Heavy-Duty Roof Rack Crossbar # RB1375 is not compatible with your 2020 Ford Escape. It looks like you have a naked/bare roof, in which case you will want to use Rhino-Rack # RR86TB. This kit comes with everything necessary for installation and is going to be your best option for your vehicle with the naked roof and no factory rails of any kind. This setup has a weight capacity of 165lbs and comes...
view full answer... - Weight Capacity and Comparison of Rhino Roof Racks for a 2011 Acura RDXI spoke with my contact for Rhino Rack and he said the weight capacity for all Rhino-Rack roof racks for your 2011 Acura RDX is 110 lbs. I think you were looking at the Rhino-Rack Heavy-Duty roof rack with the Heavy-Duty crossbars, # RB1375, the leg kit, # RRRLKHD, and Custom DK Clamps and Pads, # DK177. The Heavy-Duty crossbars will have a higher weight capacity, but once they are installed on a 2011 Acura RDX, the entire roof rack capacity drops to 110 lbs due to the limitations on the...
view full answer... - Roof Rack Recommendation for a 2015 Hyundai Santa Fe Sport with Naked RoofThe factory side rails on vehicles usually can't be installed on models that did not originally come with them but that would be a question best handled by a Hyundai dealer who will then probably steer you towards an aftermarket roof rack. So we can cut out the middle man and go right to an aftermarket roof rack. The addition of the clamps on a roof rack does not add any extra wind noise compare to models that don't have a clamp style roof rack. In fact, it is entirely possible, even likely,...
view full answer... - Roof Rack Recommendation for 2019 Hyundai Elantra and iKamperFor a 2019 Hyundai Elantra with a naked roof, I suggest the Thule SquareBar Evo Crossbars, 53" Long, # TH712400. These will mount to a GT model with or without a glass roof using using the Evo clamp feet, # TH710501 and the fit kit, # TH145112. Or, if you have a sedan, use the Evo clamp feet, # TH710501 and the fit kit, # TH145069. These crossbars have a weight capacity of 220 lbs. The weight a roof rack can support is also limited by the roof capacity for the vehicle, this is outlined...
view full answer... - Parts to Install Rhino-Rack HD Roof Rack to 2013 Nissan CubeThe 54" Rhino-Rack HD Bars # RB1375 will fit your 2013 Nissan Cube but you also need the 2500 Series Legs # RRRLKHD and the Fit Kit # DK263. The legs are what hold your crossbars and the fit kit together while the fit kit secures the whole assembly to your vehicle using clamps for the door jambs. If you check out the standard review video you can get an idea of how this will install but it's important to follow the instructions you receive with your parts as well.
view full answer... - Can Low Rider Towers Fit on Truck Cap Tracks for 2007 Chevrolet SilveradoYakima's discontinued Low Rider towers hooked onto raised side rails and then clamped onto crossbars. If you already have these towers, they do not fit the Yakima 60" Tracks for Roof Racks # Y01135 as these are horizontal track systems and not raised side rails. If you're looking for tracks for your truck, I can recommend the Rhino-Rack RTC-Style Roof Rack Tracks - Channel Mount - 71" Long # RTC18 along with Track Mount RLTP Legs # RLTP and Rhino-Rack Heavy-Duty Roof Rack Crossbars -...
view full answer... - Rhino Rack Roof Rack Fit for 2013 Ford EscapeTo install the Rhino Rack Heavy Duty Crossbars on your 2013 Ford Escape you will want to use crossbars # RB1375, leg kit # RRRLKHD, and custom clamps and pads # DK375. If you are interested in the Rhino Rack Aero Crossbars, use # RRVA137B-2, # RRRLKVA, and # DK375. I have attached an installation video of the Rhino Rack aero crossbars on a 2013 Ford Escape for you.
view full answer... - Roof Rack Recommendation for a 2007 Chevy Avalanche for Transporting LadderFor your 2004 Chevy Avalanche the Rhino Rack roof rack part numbers # RRVA137B-2, # RRRLKVA, and # DK227 has been confirmed as a fit and would work well. Your sunroof wouldn't be an issue either. I would recommend keeping it closed since it will be very loud transporting a ladder up there from the wind noise. However, I have a better solution for you in terms of a roof rack for securing a ladder. Instead I would recommend the Rhino Rack HD bar roof rack part numbers # RB1375, # RRRLKHD,...
view full answer... - Rhino-Rack 2500 Series Roof Rack for 2015 Ford Transit Connect VanOn the Rhino-Rack system made for your 2015 Ford Transit Connect van, parts # RB1375, # RRRLKHD and # DK417, you will be able to place the 2500-series leg assemblies where you need them so long as they can grip properly on the curved edges of your naked roof. This rack system's heavy-duty crossbars feature a built-in C-channel on top of each bar designed for convenient mounting of Rhino-Rack Heavy-Duty accessories and carriers.
view full answer... - Will Rhino Rack HD Roof Rack Fit 2012 Honda CR-V with Moon RoofThe Rhino Rack HD Roof Rack part numbers # RB1375, # RRRLKHD, and # DK284 is a confirmed fit for your 2012 Honda CR-V. It will fit your vehicle with the moonroof, but if your moonroof angles up when opening it could potentially interfere with the bars. You should note that crossbars typically add quite a bit of wind noise. You won't end up wanting to have the moonroof open with the bars installed as it will be quite noisy.
view full answer... - Does the Rhino-Rack HD Crossbars # RB1375 Fit a 2021 Nissan Sentra?I have a great alternative for you. Unfortunately, the Rhino-Rack Heavy Duty Crossbars # RB1375 will not fit your 2021 Nissan Sentra. For heavy-duty bars that are confirmed to fit your 2021 Nissan Sentra with a bare roof, I recommend the following parts: - Yakima HD Crossbars - Aluminum - Black - 55" Long - Qty 2 # Y01156 - BaseLine Towers for Yakima Crossbars - Naked Roofs - Qty 4 # Y28TR - HD Bar SL Adapter for Yakima BaseLine, SkyLine, TimberLine, and RidgeLine Towers - Qty 4 # Y03541 -...
view full answer... - Roof Rack and 2-Kayak Carrier for 2016 Honda Accord Sport SedanThe Rhino-Rack ROC25 Series Heavy-Duty roof rack for your 2016 Honda Accord Sport Sedan that is made of parts # RB1375, # RRRLKHD and # DK359 is indeed a confirmed fit for your car. But note that this rack's unusual bar profile means reduced compatibility of accessory items like kayak carriers. You will have fewer kayak carrier choices with this rack. Instead I suggest their Vortex Aero rack # RR32SR which features quieter aerodynamic crossbars that will generate much less wind noise than...
view full answer... - What Parts do I Need with My Rhino-Rack 54" HD Crossbars to Fit on My 2012 Ford Edge with Bare Roof?According to my research of your Rhino-Rack part number 1375, I think you are most likely referring to the Rhino-Rack Heavy Duty Crossbars -54" Long # RB1375B-2 (black) or # RB1375 (silver) which are confirmed to fit a bare-roof 2012 Ford Edge. If this is what you have, you need the Rhino-Rack 2500 Series Legs # RRRLKHD and the Custom DK Fit Kit for 4 Rhino-Rack 2500 Series Roof Rack Legs - Naked Roof # DK228. With both of these components, you will have a full roof rack system on your...
view full answer... - Carrying Plywood Sheets on a 2011 Subaru ForesterI have a solution for you, but we do not carry large enough roof baskets for this application. Instead, I'd choose a rack that is at least a little wider than the lumber you're intending to carry. This will give you ample room to support the sheet itself, and give you additional room for the tiedowns you'll need in order to keep the panels secure. I've included a link to the range of 54 inch and wider bar kits that fit a 2011 Subaru Forester, but I have a recommendation based on compatibility...
view full answer... - Roof Rack Mounted Fork Mount Bike Rack Recommendations for a 2016 Toyota HighlanderA popular roof rack mounted bike rack, fork mount, that is very stable is the Rhino-Rack MountainTrail # RBC035. This carrier is also compatible with disc brakes, accommodates bike wheels up to 3" in diameter, and uses a 9mm skewer. I have linked a video review of this carrier for you. If your bike has a through-axle then I recommend the Yakima HighSpeed, # Y02115. It is designed to hold a bike with a 12-mm, 15-mm, or 20-mm thru-axle fork without an adapter. I have linked a video review...
view full answer... - Rhino-Rack Roof Rack Recommendation for a 1989 Mitsubishi Montero with a Naked RoofYou are correct, the Rhino-Rack Roof Rack Legs that you need for your 1989 Mitsubishi Montero are part # RL280S4. These are the gutter mount feet and they are 11 inches tall. For crossbars, you can use their Heavy-Duty Crossbars, # RB1375B-2 for black or # RB1375 for silver. I have attached the installation instructions for you to check out.
view full answer...
- Comparison of Rhino-Rack Heavy-Duty and Rhino-Rack Vortex Aero Roof RacksThe Rhino-Rack Heavy-Duty Roof Rack Roof Rack have specific C-channels that are designed to fit specific Rhino-Rack Heavy-Duty accessories, like the Rhino-Rack Hi-Lift Jack and Shovel-Holder Brackets # RRRCB-RSHB-RJHB as an example. That's the purpose of the name, and the advantage of the rack. This rack is made up of the following parts: Rhino-Rack Heavy-Duty Roof Rack Crossbars: # RB1375 Qty 2 Rhino-Rack Quick Mount Legs: # RRRLT600 Qty 4 Roof Rack Leg Spacer Blocks: # RRQMHD05-2 Qty...
view full answer... - Roof Rack, Canoe Carrier and Bike Carrier for 2007 Ford Edge w/ Panoramic RoofThe Rhino Rack Heavy Duty Crossbar Roof Rack, which consists of the # RB1375 crossbars, the # RRRLKHD roof rack legs and the # DK228 clamp kit would be a fit for a 2007 Ford Edge. You'll want to be careful about opening the sunroof with the roof rack in place. The rack or accessories mounted on it might interfere with the operation of the sunroof. Although the crossbars themselves have a 140 lb weight capacity, you might be limited by the roof capacity of the vehicle if it's capacity...
view full answer... - Roof Rack Recommendation For 2005 Scion xBI understand how it can be a bit confusing so I will do what I can to help out. We do offer several different roof racks that are designed to fit your 2005 Scion xB. The main differences you will find are due to the design of the crossbars. Square crossbars can be quite a lot noisier than some of the more aerodynamic crossbars we offer. For a nice roof rack for your vehicle, I recommend the Rhino-Rack RS 2500 Roof Rack for Naked Roofs, part # RRRS434B. This system has aerodynamic aluminum...
view full answer... - 2017 Hyundai Santa Fe Sport with Panoramic Sunroof and Flush RailsRhino Rack does offer roof racks that fit the low profile flush rails you have on the roof of your 2017 Hyundai Santa Fe Sport with the part numbers # RRVA137B-2 and # RRSX032 but the HD bar kit you mentioned would only fit the versions of your vehicle without the flush rails. This is an aero bar style rack too which means you'd have minimal wind noise as well as better fuel mileage. The sunroof you have won't be an issue for sure when it's closed, but Rhino Rack recommends checking for...
view full answer... - Would Two Sets of Rhino Rack Heavy Duty Bars Double Roof Rack CapacityYou would be doubling the weight capacity of the roof rack components of the setup but most likely you'd be limited by the roof capacity as the HD Rhino Rack roof rack components do have a capacity of 220 lbs. You'd need a set of tracks like the part # RTC16, four sets of the feet part # RLT500, and two sets of the 65 inch Rhino Rack bars part # RB1650B-2.
view full answer... - Higher Weight Capacity Ladder Rack that Fits 2019 Ford F-250Since your plan is to install the Retrax PowerTrax Pro XR # RTT-80384 if you have a long bed or # RTT-80383 for if you have a short bed all you'd need to install a Yakima OverHaul HD part # Y01151-58 ladder rack which has a 500 lb capacity would be the adapter # Y01155 and that would be covered. Now if you do need more weight capacity the TracRac sliding ladder racks like the # TH43003XT-785 for short bed or # TH43003XT-000 for a long bed and these do have a weight capacity of 1,250 lbs....
view full answer... - Will Rooftop Bike Carrier, # S64720, Fit on a 1998 Ford ExpeditionThe Rooftop Bike Carrier, # S64720, will fit on Thule, Yakima, and most factory roof rack load bars that run side to side on the top of the vehicle. If you do not have a factory roof rack you can add a roof rack system to your 1998 Ford Expedition if it is an EL model and has side rails that run front to back. You can use the Rhino-Rack roof rack, # RRVA118S-2 and # RRSX100. If it is not an EL model and has factory tracks that run front to back, use # RB1375, and leg set # RLTP-2. With...
view full answer... - Longer Crossbar Roof Rack that Fits 2022 Chevy ColoradoThe crossbars of the Rhino Rack and other roof racks that fit your 2022 Chevy Colorado don't have channels on the underside that run the full length of the bar. Since this is what the rack uses to attach to the feet of the rack it means you can't use longer bars as the feet won't attach. So the best option would be the 54 inch long Rhino Rack HD bar system part numbers # RB1375, # RRRLKHD, # DK330 which is the longest bar setup that fits your truck.
view full answer... - Does Rhino Rack HD Roof Rack Fit 2011 BMW X3 with Naked Roof and SunroofThe Rhino Rack HD part numbers # RB1250B-2, # RRRLKHD, and # DK295 is a confirmed fit for your 2011 BMW X3 with a naked roof and would not interfere with the sunroof. You aren't going to want to open the sunroof with this rack installed though as it will make quite a bit of noise. If you keep the roof clean as well as the mounting pads of the feet there would not be any long term damage done to the vehicle.
view full answer... - How to Measure for Mounting Shorter-Than-Recommended Rhino-Rack Vortex Bars on a 2016 Honda CR-VWith a 2016 Honda CR-V, the appropriate Rhino-Rack crossbar system for the naked roof is: 54" Heavy-Duty Roof Rack Crossbars, part # RB1375B-2 2500 Series Legs, part # RRRLKHD Custom DK Fit Kit, part # DK284 It looks like you have the right legs and fit kit but have the shorter crossbars. This isn't a tested fit, so there's a chance it will not work. However, if your are trying this, then your solution would be the best route. Take the difference divided by 2 (3" on each side), and subtract...
view full answer... - Will the Heavy Duty Rhino-Rack Roof Rack Fit a 2015 Nissan NV 3500?I have a great alternative for your crossbar setup. Unfortunately, the Rhino-Rack Roof Rack for Thule and Yakima Tracks # Y01-140B-NT is not confirmed to fit your 2015 Nissan NV 3500. However, we do carry a similar heavy duty bar setup by Rhino-Rack that does fit your 2015 Nissan NV 3500. For this setup, I recommend the following parts: - Rhino-Rack Heavy-Duty Roof Rack Crossbars # RB1375B-2 - Rhino-Rack 2500 Series Legs for Heavy-Duty Crossbars # RRRLKHD - Custom DK Fit Kit for 4 Rhino-Rack...
view full answer...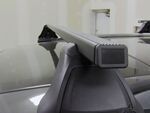
- Weight Capacity and Comparison of Rhino Roof Racks for a 2011 Acura RDXI spoke with my contact for Rhino Rack and he said the weight capacity for all Rhino-Rack roof racks for your 2011 Acura RDX is 110 lbs. I think you were looking at the Rhino-Rack Heavy-Duty roof rack with the Heavy-Duty crossbars, # RB1375, the leg kit, # RRRLKHD, and Custom DK Clamps and Pads, # DK177. The Heavy-Duty crossbars will have a higher weight capacity, but once they are installed on a 2011 Acura RDX, the entire roof rack capacity drops to 110 lbs due to the limitations on the...
view full answer... - 2023 GMC Sierra 1500 Parts for Rhino-Rack HD Roof Rack SystemIn order to install Rhino-Rack HD bars on your 2023 GMC Sierra 1500 you'll need the following parts: - 59" HD Crossbars # RB1500B-2 - 2500 Series Legs for HD Bars # RRRLKHD - DK Fit Kit # DK427 I'm not 100% sure what multi-purpose holders you're referring to but if you send me some photos of the parts you have I'd be more than happy to help you minimize the amount of parts you're needing to purchase so you can have a roof rack on top of your truck!
view full answer... - Can Rhino Rack Square Bars Be Cut Down To Fit A 2014 Scion xB For a 2014 Scion xB we recommend the Rhino-Rack Heavy-Duty Roof Rack Crossbars # RB1375B-2, which are 54" in length. As for cutting down longer Rhino Rack square bars, which I don't recommend, you would need a miter saw with a metal cutting blade and could cut the bars to your specific needs. The end caps would need to be removed first so that you could add them on once you finish cutting. You'll also want to paint any exposed metal after cutting. If you need the mounting hardware for...
view full answer... - Do Parts of Rhino Rack Roof Rack From 2012 Ford Escape Fit 2014 Ford F-150 SuperCrew Cab?I checked with Rhino Rack and the square bar roof racks that fit a 2012 Ford Escape and 2014 Ford F-150 do share the same # RRRLKHD 2500 Series legs which are for HD crossbars, so if that's what you have you would be able to use those legs on your F-150. If you have different legs there is NOT going to be a fit. Apart from that you are correct that you would need new crossbars and a new fit kit. The correct crossbars for the '14 F-150 would be the Rhino-Rack Heavy-Duty Roof Rack Crossbars...
view full answer... - Parts to Install Rhino-Rack HD Roof Rack to 2013 Nissan CubeThe 54" Rhino-Rack HD Bars # RB1375 will fit your 2013 Nissan Cube but you also need the 2500 Series Legs # RRRLKHD and the Fit Kit # DK263. The legs are what hold your crossbars and the fit kit together while the fit kit secures the whole assembly to your vehicle using clamps for the door jambs. If you check out the standard review video you can get an idea of how this will install but it's important to follow the instructions you receive with your parts as well.
view full answer... - Dual Kayak Carrier For 2017 Ram 1500 With Tonneau CoverI would recommend getting the Rhino-Rack Heavy-Duty Roof Rack Crossbars # RB1500, the Rhino-Rack 2500 Series Legs for Heavy-Duty Crossbars # RRRLKHD and the Custom DK Fit Kit for 4 Rhino-Rack 2500 Series Roof Rack Legs # DK043. I've included a video to help you install if you wanted to go that route. Then the most cost effective carrier would be four of the Malone Rack Pads # MPG314, two per crossbar. The foam pads will be less rough on your kayaks whenever you're going down gravel roads....
view full answer... - Kayak Carrier Recommendation for 2009 Ford F-150 With Factory Folding Tonneau CoverA ladder rack is one option for transporting your kayak on your F-150 that has the dealer-installed folding tonneau cover, but note there can sometimes be interference between the common mounting requirements for tonneau covers and ladder racks since both install on the bed rails. I can offer you a simple and very cost-effective option IF your tonneau cover can handle the weight of your kayak. We offer foam block carriers that are very inexpensive, simple to install and that weigh very...
view full answer... - Will the 65" Rhino-Rack HD Crossbars # RB1650 Fit on My 2010 Mazda 3 Hatchback?I have an answer for you. Unfortunately, the 65 inch Rhino-Rack Heavy-Duty Roof Rack Crossbars # RB1650 are too long for your 2010 Mazda 3 Hatchback with fixed mounting points. With that being said, you can still have shorter Rhino-Rack Heavy-Duty crossbars on your vehicle. Our installation team here at etrailer has tested these shorter bars with your vehicle so that they will fall within the required dimensions of local traffic laws. For this system, you will need the following parts:...
view full answer... - Rhino Rack Roof Rack Fit for 2013 Ford EscapeTo install the Rhino Rack Heavy Duty Crossbars on your 2013 Ford Escape you will want to use crossbars # RB1375, leg kit # RRRLKHD, and custom clamps and pads # DK375. If you are interested in the Rhino Rack Aero Crossbars, use # RRVA137B-2, # RRRLKVA, and # DK375. I have attached an installation video of the Rhino Rack aero crossbars on a 2013 Ford Escape for you.
view full answer... - Rhino-Rack Heavy-Duty or Vortex Crossbars for 2019 Ford Transit ConnectThe primary difference between the Rhino-Rack Heavy-Duty Crossbars and the Rhino-Rack Vortex Aero Crossbars has to do with what they are designed to carry and what accessories work well with them. The Heavy-Duty Crossbars feature built-in C-channels that are made specifically for Rhino-Rack Heavy-Duty accessories like the Hi-Lift Jack Mounting Brackets # RJHB. Because the bars are larger than most other systems they will not be compatible with a lot of accessories that aren't specifically...
view full answer...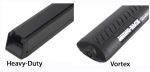
- Parts Needed To Install Rhino-Rack Pioneer Platform On 2022 Chevy Silverado 2500HD Crew CabYou will need to install the Rhino-Rack Heavy-Duty Roof Rack Crossbars # RB1500B-2 to install a Rhino-Rack Pioneer Platform Roof Tray # RR42TB on your 2022 Chevrolet Silverado 2500HD Crew Cab, since they do not offer a Rhino-Rack Backbone system for your truck. The Rhino-Rack 2500 Series Legs # RRRLKHD and Fit Kit # DK427 are needed to attach the Crossbars # RB1500B-2 on your Silverado. You will then be able to attach the Platform # RR42TB with the Pioneer Platform Mounting Kit for...
view full answer... - Roof Rack Recommendation for a 2007 Chevy Avalanche for Transporting LadderFor your 2004 Chevy Avalanche the Rhino Rack roof rack part numbers # RRVA137B-2, # RRRLKVA, and # DK227 has been confirmed as a fit and would work well. Your sunroof wouldn't be an issue either. I would recommend keeping it closed since it will be very loud transporting a ladder up there from the wind noise. However, I have a better solution for you in terms of a roof rack for securing a ladder. Instead I would recommend the Rhino Rack HD bar roof rack part numbers # RB1375, # RRRLKHD,...
view full answer... - Rhino-Rack 2500 Series Roof Rack for 2015 Ford Transit Connect VanOn the Rhino-Rack system made for your 2015 Ford Transit Connect van, parts # RB1375, # RRRLKHD and # DK417, you will be able to place the 2500-series leg assemblies where you need them so long as they can grip properly on the curved edges of your naked roof. This rack system's heavy-duty crossbars feature a built-in C-channel on top of each bar designed for convenient mounting of Rhino-Rack Heavy-Duty accessories and carriers.
view full answer... - Does a Rhino-Rack Roof Rack Using Factory Mounting Points on a 2013 Honda RidgelineRhino-Rack Leg Kit, # RRRLKVA, mounts to the roof of your 2013 Honda Ridgeline using fit kit # DK155 which are clamps so it will not use the factory mounting points. The correct bars for this application are # RRVA150S-2. All of the roof racks install the same way on your Ridgeline.
view full answer... - Will Rhino Rack HD Roof Rack Fit 2012 Honda CR-V with Moon RoofThe Rhino Rack HD Roof Rack part numbers # RB1375, # RRRLKHD, and # DK284 is a confirmed fit for your 2012 Honda CR-V. It will fit your vehicle with the moonroof, but if your moonroof angles up when opening it could potentially interfere with the bars. You should note that crossbars typically add quite a bit of wind noise. You won't end up wanting to have the moonroof open with the bars installed as it will be quite noisy.
view full answer... - Long Crossbar Roof Rack Recommendation for a 2015 Nissan Rogue with Naked RoofWe have a solution for you. Rhino Rack makes a roof rack available for your 2015 Nissan Rogue with a naked roof that will give you 59 inch long bars. For the bars you would want part # RB1500B-2 for bars, leg kit # RRRLKHD, and # DK396 for the clamp kit.
view full answer... - Which Heavy Duty Crossbar Setup Should I Use On My 2015 Ford F-350 Super Duty?I am showing that the correct Rhino-Rack heavy duty crossbar setup for your 2015 Ford F-350 crew cab is Rhino-Rack Heavy-Duty Roof Rack Crossbars - Black - 59" Long # RB1500B-2. You will also need Leg Kit # RRRLKHD and Fit Kit # DK190 to install this onto your roof. This has a 165lb weigh capacity and is 59" long. You can install accessories by clamping onto the crossbars or by using the T-slot track. I have attached an installation video showing this roof rack being installed on a different...
view full answer... - Will Rhino-Rack HD Square Bar Roof Rack System Fit A 2015 Ford F-150 SuperCrew W/ Dual Sunroofs?You are right on. The Rhino-Rack Roof Rack System that uses 59" Rhino-Rack Heavy-Duty Roof Rack Crossbars - Black # RB1500B-2, Rhino-Rack 2500 Series Legs for Heavy-Duty Crossbars # RRRLKHD, and Custom DK Fit Kit # DK427 is confirmed to fit your 2015 Ford F-150 SuperCrew with the Dual Sunroofs and water gutters. Keep in mind that it is not recommended to open your sunroofs with the crossbars installed to avoid any contact between the sunroofs and the crossbars, and you will find that you...
view full answer... - Height Added to Vehicle with Rhino Rack Foot # RRRLKHDWe've had a similar question to this in the past and we've found that the Rhino Rack HD roof racks that use the feet part # RRRLKHD and also part # RB1500B-2, # RRRLKHD add right at 4-1/2 inches of additional height that would mean the feet without the bar would be a little less than 3 inches in overall height.
view full answer... - Roof Rack and Canoe Carrier Recommendation for a 2008 Chevy SilveradoA Rhino Rack Roof Rack that includes the part # RRRLKHD would do an excellent job for carrying a 15 foot canoe on your 2008 Chevy Silverado. The rest of the parts needed to complete the roof rack would be the part # RB1375B-2 and # DK227. This is one of the strongest racks we offer so it would definitely take a lot of abuse. It would be great for carrying your canoe. For securing a canoe upside down on the crossbars I would recommend the Ratchet Grab part # RRRRG. I spoke to my contact...
view full answer... - Roof Rack and 2-Kayak Carrier for 2016 Honda Accord Sport SedanThe Rhino-Rack ROC25 Series Heavy-Duty roof rack for your 2016 Honda Accord Sport Sedan that is made of parts # RB1375, # RRRLKHD and # DK359 is indeed a confirmed fit for your car. But note that this rack's unusual bar profile means reduced compatibility of accessory items like kayak carriers. You will have fewer kayak carrier choices with this rack. Instead I suggest their Vortex Aero rack # RR32SR which features quieter aerodynamic crossbars that will generate much less wind noise than...
view full answer... - Single Bar Roof Rack and Hitch T-Load for 2019 Nissan Frontier Crew CabTo do a single bar Rhino Rack roof rack for your 2019 Nissan Frontier you'd need the # RRVA137B, # RRRLKVAH, and the fit kit # DK108. Then for a hitch mounted T-Load you could use the # RTL002 and you'd be set. There isn't a way to do a single bar roof rack using the square bar Rhino Rack you mentioned.
view full answer... - Where Do The Feet For A Rhino Rack ROC25 Roof Rack Need To Be On A 2009 Nissan Frontier Crew CabWhen installing the Rhino Rack ROC25 Roof Rack # RR26ZR on your 2009 Nissan Frontier Crew Cab, you will want to mount the center of the front clamp 260mm forward of the center of the door pillar. The center of the rear clamp will then need to be installed 750mm back from the center of the front clamp. The easiest way to do this is get both the front and rear bars installed loosely and then slide them into the correct positions. I included a diagram of where these will install as well for...
view full answer...
- Will the Rhino-Rack Vortex Aero Crossbars Fit a 2012 Nissan Frontier Crew CabYes, the Rhino-Rack Vortex Aero Crossbars, # RRVA137B-2, will fit your 2012 Nissan Frontier Crew Cab with a bare roof. To mount the crossbars, you will need the 2500 Series Leg Kit, # RRRLKVA, and the Custom DK Clamps and Pads, # DK108. This roof rack has a weight capacity of 165 lbs, however, you will want to verify the weight capacity of your trucks roof before loading any cargo on the roof rack. The vehicles roof weight capacity is often lower than the roof racks weight capacity, so...
view full answer... - Will 59 Inch Rhino-Rack Vortex Aero Crossbars Fit on a 2016 Nissan Frontier Crew Cab without RailsRhino-Rack recommends the 54 inch Vortex Aero Crossbars # RRVA137B-2 on your 2016 Nissan Frontier but that doesn't mean you can't go longer. The 59 inch, part # RRVA150B-2, will work and just be longer. You should check with your local laws to make sure you're not violating anything if they stick out too much. For your truck you'll also need the Legs # RRRLKVA and Fit Kit # DK108. I've included some videos for you as well.
view full answer... - Roof Rack Options for a 2011 Nissan Frontier Crew CabIf your 2011 Nissan Frontier Crew Cab has a naked roof, there are some options for adding a roof rack that are not permanent installations. You can use the Rhino-Rack 2500 Vortex Roof Rack with Aero Crossbars, # RRVA137B-2, feet # RRRLKVA, and the Custom DK Clamps and Pads, # DK108. If you have another type of roof (tracks that run front to back or raised rails that run front to back) there are other roof rack options. I have included a link to the roof rack main page for your vehicle....
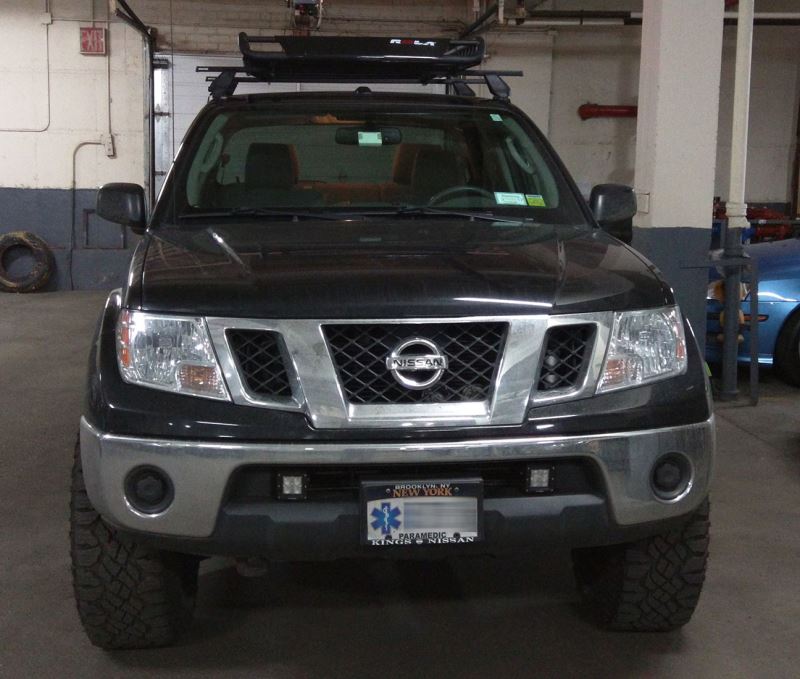
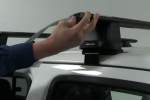
view full answer... - Photo Of Fit Kit Clamps Appears To Be Shorter Than Clamps Used On Video Of 2016 Nissan FrontierI understand how the photos are a bit deceiving when looking at the brackets that are used to secure the roof rack to the door jambs. I have attached a couple of photos that show how the brackets look with the door on the vehicle open and also what it looks like when the door is closed. The clamps are actually shaped to fit the contour of the inside of the door jamb. The Rhino-Rack 2500 Series Vortex roof rack is a nice aerodynamic roof rack. The c-channels on the crossbars help reduce...
view full answer...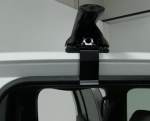
- Rhino-Rack Roof Rack and Roof Tray/Platform for a 2016 Nissan Frontier Crew Cab Naked RoofI spoke with my contact at Rhino-Rack and apparently the Pioneer trays do not attach to roof rack crossbars. They only attach to certain feet/leg kits. The set up for your 2016 Nissan Frontier is # JA8190 which requires attaching tracks to the roof. There is a Pioneer Platform, not a tray, that attaches to crossbars. It is # RR42115BF. For that you will need the following parts: Crossbars # RRVA137B-2 Leg kit # RRRLKVA Fit kit # DK108
view full answer... - Roof Rack and Kayak Carrier Recommendation for a 2016 Nissan Frontier Crew CabYes, the Rhino Rack part numbers # RRVA137B-2, # RRRLKVA, and # DK108 will fit your 2016 Nissan Frontier 4-door. The Crew Cab models are the 4 door models. The Rhino Rack Kayak Carrier part # S510 would then be a great option for carrying your kayak as well. It has a 99 lb capacity. Be sure to check the owners manual of your truck for the roof capacity.
view full answer... - Roof Rack and watersports carriers for 2017 Nissan Frontier naked roofThe roof rack systems that attach to the door jam / gutter of your vehicle are actually very reliable and sturdy. This is a common setup and I am confident you won't have issues with this mounting style; and this way you won't be drilling into the roof of a newer vehicle. For your 2017 Nissan Frontier with naked roof, I recommend going with Rhino-Rack Vortex Aero Crossbars 54" # RRVA137B-2 and Mounting Legs # RRRLKVA. These crossbars are aerodynamic which means less wind noise than other...
view full answer... - Can Two Yakima DeepSpace Cargo Boxes Fit On A 2019 Nissan Frontier Roof Rack?It looks like you were checking out the Yakima DeepSpace 10 Rooftop Cargo Box - 10 cu ft - Black # Y65RR. This fits most crossbars and will have no problem fitting on your 2019 Nissan Frontier. Since you don't have a roof rack yet, I recommend looking into the Rhino-Rack Vortex Aero Crossbars Black - 54" # RRVA137B-2 that you were looking at. You will also need Legs # RRRLKVA and Fit Kit # DK108. The box is only 23" wide, so if you used two of them side by side you would need a minimum...
view full answer... - Roof Rack and Cargo Box for 2017 Nissan Frontier Crew Cab Naked RoofRhino Rack has a great roof rack that fits your 2017 Nissan Frontier Crew Cab with a naked roof with the part numbers # RRVA137B-2, # RRRLKVA, and # DK108. This is a higher quality aero bar roof rack that rivals Yakima and Thule roof racks in terms of quality but is offered at a lower price. For load stops when carrying lumber the part # S602 would be a great option and then for a cargo box something like the Thule Force XT part # TH6357B is easy to install and use as well as can carry...
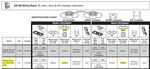
view full answer... - Correct Channel Strip Lengths for Installing the # DK108 on a 2017 Nissan Frontier Crew CabI went ahead and double checked with Rhino-Rack, and you are correct that the recommended strip channel length is 107mm for the front and 102mm for the rear crossbar when using the DK Fit Kit # DK108 on your 2017 Nissan Frontier Crew Cab. With your current fitment, there are a few different reasons to consider when mounting: - The front and rear measurements were not accurate when you measured - The front and rear crossbars were accidentally flipped so that the rear is at the front and...
view full answer...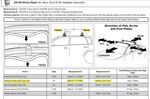
- Compatibility of the Rhino-Rack 2500 Series Roof Rack on a 2016 Nissan Frontier Crew CabFor your 2016 Nissan Frontier CrewCab I recommend the Rhino-Rack Vortex Aero Crossbars, # RRVA137B-2, Rhino-Rack 2500 Series Legs, # RRRLKVA, and the Rhino-Rack Fit Kit for the 2016 Nissan Frontier, # DK108. This is a complete kit with everything you need for roof rack. Let me know what you plan to use it for and I can make some recommendations on accessories to help.
view full answer... - Parts Needed to Mount Rhino-Rack Pioneer Platform Rack to Bare Roof of 2018 Nissan FrontierGreat question! The Rhino-Rack Pioneer Platform Rack # RR57AB is designed for vehicles with raised side rails so since you have a bare roof on your 2018 Nissan Frontier you can either use the 60" Long x 54" Wide Pioneer Platform Rack # RR39QX which comes with tracks you'll install on your roof OR you can use the 58" Long x 47" Wide Rack # RR42115BF with a roof rack that clamps to the frame of your truck. If you choose to go with the roof rack option I recommend picking up a Vortex roof...
view full answer... - Roof Rack Recommendation for a 2016 Nissan FrontierIf you have a set of raised siderails on your 2016 Nissan Frontier you would want the part # MPG216 to complete a roof rack. If you have a naked roof you instead would want the part numbers # RRVA137B-2, # RRRLKVA, and # DK108.
view full answer... - Recommended Roof Rack and Kayak Carriers for 2018 Nissan Frontier Crew CabFor your 2018 Nissan Frontier Crew Cab, I recommend the Rhino-Rack roof rack consisting of: Rhino-Rack Vortex Aero Crossbars -54" Long # RRVA137B-2 Rhino-Rack 2500 Series Legs # RRRLKVA Custom DK Fit Kit # DK108 Locking Endcaps for Vortex Aero Crossbars - Metal Cores # RRVA-LEC4 Then I recommend the Rhino-Rack J-Style Kayak Carrier # S510 and # RRS512X for your two kayaks. Finally you may want to consider the Rhino-Rack Universal Load Assist # RR-RUSL to help you safely load your kayaks.
view full answer... - Roof Rack and Fairing Recommendation for a 2014 Nissan FrontierFor your 2014 Nissan Frontier the Rhino Rack roof rack part numbers # RRVA137B-2, # RRRLKVA, and # DK108 is a confirmed fit. Since the bar is 54 inches long you would want the fairing part # RRRF4 which is 50 inches long.
view full answer... - How To Use Rhino-Rack Pioneer Platform Rack on a 2014 Nissan Frontier Crew CabI have two great option for you to use the Rhino-Rack Pioneer Platform Rack on a 2014 Nissan Frontier Crew Cab, the first is our best option but it requires drilling. This will allow you it use the biggest size tray possibly, the Rhino-Rack Pioneer Platform Rack part # RR39QX. If you don't want to drill then you can use the Rhino-Rack Universal Pioneer Platform Rack part # RR42114BF you would also need the Rhino-Rack Vortex Aero Crossbar System part # RRVA137B-2, part # RRRLKVA, and part...
view full answer... - Roof Rack Solution for 2010 Nissan FrontierSince the Q-tower racks have been phased out Yakima does not have any fits for the 2010 Nissan Frontier. For a great rack at a great price the Rhino Rack part numbers # RRVA137B-2, # RRRLKVA, and # DK108 would work well. This is a square bar roof rack at a price that is much lower than the Yakima racks yet gives you a very high quality rack.
view full answer...
Do you have a question about this Roof Rack?
Info for this part was:

Updated by:
Wilson B

Updated by:
Alex H

Edited by:
Daron K

Written by:
Bethann B
At etrailer.com we provide the best information available about the products we sell. We take the quality of our information seriously so that you can get the right part the first time. Let us know if anything is missing or if you have any questions.
Product Experts Available Now!
Call 1-800-940-8924
Thank you! Your comment has been submitted successfully. You should be able to view your question/comment here within a few days.
Error submitting comment. Please try again momentarily.