
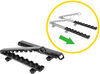
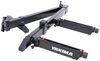
DeeZee Rough Step Running Boards w/ Custom Installation Kit - 7" Wide - Aluminum - Black
Item # DZ15321A-15336
Our Price: $877.36
Confirmed to Fit
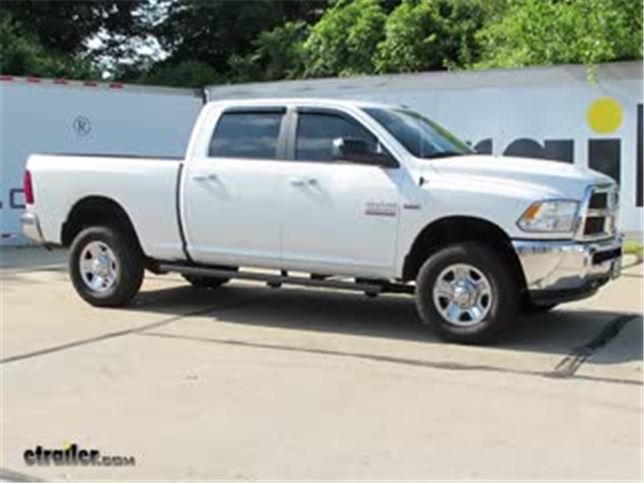
2017 Ram 2500
Crew Cab
Will this fit?
To see if this custom-fit item will work for you please tell us what vehicle you'll use it with.


- All Info
- Reviews (8)
- Q & A (0)
- Videos (2)
- Photos
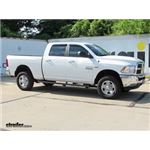
2017 Ram 2500 - DeeZee Rough Step Running Boards w/ Custom Installation Kit - 7" Wide - Aluminum - Black
- Running Boards
- Black
- Fixed Step
- Aluminum
- Matte Finish
- DeeZee
Made of rustproof black powder coated aluminum, these running boards offer unmatched traction and durability. A grated step surface provides sure footing and allows dirt and water to drain. Custom installation kit and full-length boards included.
Features:
- Running boards make it easy to get into and out of your vehicle
- Extra-wide platform offers stability
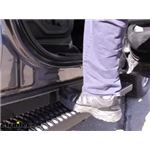
- Rugged step surface has industrial grating
- Provides unsurpassed traction for sure footing
- Allows water, mud, ice, and snow to drain off step
- Cleans easily
- Rustproof aluminum is durable and lightweight
- Black NRT powder coat provides corrosion resistance
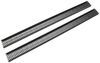
- Custom installation kit and 2 full-length step boards included
- Made in the USA
Specs:
- Step width: 7"
- Board length: 90"
- Limited lifetime warranty
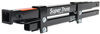
DZ15321A Dee Zee Rough Step Aluminum Running Boards
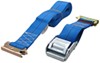
DZ15336 Dee Zee Custom Mounting Braces for Rough Step Running Boards
Installation Details
California residents: click here


Video of DeeZee Rough Step Running Boards w/ Custom Installation Kit - 7" Wide - Aluminum - Black

Videos are provided as a guide only. Refer to manufacturer installation instructions and specs for complete information.


Video Transcript for DeeZee Rough Step Running Boards Installation - 2014 Ram 2500
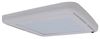
Today on our 2014 Ram 2500 crew cab, we're going to take a look at and also show you how install the DeeZee Rough Step running boards with custom installation kit. This aluminum running board is seven inches wide and has a black powder coat finish. Part number is DZ15321A-15336. Now here's what our steps are going to look like installed on our truck. Really nice clean look. I think these things look great. We've got a really rugged texture here so we're not going to have to worry about slipping.
I remember those old round tube steps, you used to kind of slip on them when you'd be getting in and out. These are also aluminum construction so that's going to be much better than the old steel style. We're not going to have to worry about that rusting and that corrosion that used to kind of make them look bad really. To add to that, we've got the NRT powder coat finish. It's going to be very very durable so even after years of use, getting in and out, we really shouldn't have to worry about any rusting. Now the industrial grading here not only is going to provide us excellent traction but it allows for that water and dirt and stuff to fall down and out so they're pretty easy to clean.
A few rain showers come through, should knock most of that off down and through there. Now our steps are going to be seven inches wide. That gives us superior area for getting in and out. As you can see as we're getting in or getting out, they're not tucked so far up underneath our truck to where we really have to stick our feet down and in there. Offers us a really good area, plenty of width as we're getting out there. As you can see, they're really nice and sturdy. Now we're going to have a couple boxes with our parts.
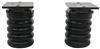
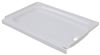
We're going to have our bracket kit and then we're going to have our running board box. That's going to be the longer one of course. Inside that box, we're going to have our end caps. They look just like this and the plates for our end caps. What we're going to do is place these right down on top, we're going to take the provided hardware, the flat washer on it and we're going to drop those right down through our holes that are just in from the outside holes, so the second hole in on each side.
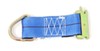
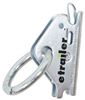
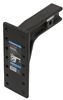
And flip that over. Place two more flat washers on and then just very loosely install our hex nut. Now we're going to have four of these to do. Got all the hardware provided for them so you want to go ahead and just get those pre-assembled. We'll be putting these on our running board a little bit later. Just want to ensure you have a little bit of a gap on each side there. Now we need to position our nut-serts in location. We've got six locations on each side we're going to placing them in and they're going to be pretty easy to find. Now with this being the crew cab model, we've got three sets on each side. You can see it's just a hexagonal shape hole. We've got on here, it's going to be right behind our wheel well. Now we come back a little bit further, just about where our two doors meet, we've got two more and then here closer to the rear of the door. These are going to be the exact same on each side. Now we're ready to take our nut-sert tool. We want to thread on one of our nut-serts and we're going to start it with the nut in position. Once we have it started, we'll get them all started then we'll come back without the nut on our tool and finish torquing them down. So we'll slide that in position. Put our thirteen millimeter, I like to use a ratcheting wrench on there. We want to hold the center bolt and then tighten down the nut. See how it's kind of a little bit lose there. Once that stiffened up like that and it doesn't wiggle, let's go ahead and back it out. We're going to do that for the five remaining holes here on the driver's side then we'll come back without the nut installed and apply our final torque to it. Now that we've got all of our nut-serts started, what we're going to do is remove that nut and you can see we've gotten rid of the nut. We're going to thread it all the way in and then we're going to finish tightening it down. Now as you tighten, it's going to be fairly easy to do until it's fully seated. Whenever it becomes fully seated, right there you'll feel a nice firming up period and that's going to be all we need to do. Now let's get that out. We'll do it for the five remaining on this side and then we can head over to our passenger side and we'll repeat the same process that we've done over here to get all of our attachment points in place. Now we're ready to grab our braces. We're going to use the v braces for our driver's side, the c braces for our passenger side. Basically we want the flat spot where our step is going to kind of come down and rest on to be facing forward. Then we can take two of our eight millimeter nuts and we're going to thread those right into our nut-serts that we've installed. Now we're going to leave these a little bit loose. That way we will have a little bit of wiggle room there and we'll do that for the two other locations on this side, then head to the passenger side and do the same thing there. Now we can grab our support bracket, that's going to fit right up on the two holes that are drilled in the pinch weld down here on the bottom. We've got a carriage bolt that's going to come through from the outside. We've got to place on a flat washer and also a nut. And again, loosely installed here so we've got a little bit of wiggle room. Do one in each of our hole locations. We want to be sure that, see how that's going to fit together right there that our bracket comes over and then hooks towards the inside of the car where we can get those aligned and attached a little bit later. Let's go through and get the other five of those installed. Now we'll attach the bracket to our support brace. We're going to use another one of our M8 bolts that has the flange on it and our provided flange nuts. Again, just loosely installed for now. Go around and do that for all six of our brackets. Now we just kind of center up our bracket there. We want to make sure that it's going to make full contact with our support brace. So we'll slide it up until we get good contact and then snug these bolts down. Now we'll move on to tightening down our carriage bolts. This we're going to use a seven-sixteenths for. Then we'll be back using our thirteen millimeter, this time socket and wrench to tighten down the bolts for our bracket to tighten our bracket to our support. All right. Let's go do it in our other six locations. Now we'll position the angled portion of our clamp, right up on top of our support bracket. We want the contour of that or that rounded corner to match the corner that's on our support bracket. Now we can set our step right down on top of those. That will kind of help hold them in position. Now we've got our upper portion of that bracket and we'll get these slid in from the end. One is going to be going to the middle section here. Now, when we get them in place these are actually going to drop right down through just like that. You can see we're using the inside-most hole, the middle hole, and then the hole just beside it. We're going to place on one of our flat washers and one of our hex nuts at each of our locations. It's good to the middle first that way you can use the opening at the back to get our back one it and we'll use the opening at the front to get our front one it. Now, we're just going to have these loosely installed for now. That's going to give us some room to make adjustments in and out and slightly back and forth. Now once we have this positioned as we tighten up out bolts, that's going to squeeze that clamp together, holding our running boards in place. Now, we're ready to get our step aligned with our vehicle. Now you'll notice we've got a little bit of overhang here in the rear. That's about what we're looking for but we do have the option to move these forward and back for our preferences. I've got the front edge lined up right with the bottom of the door at this point where the seem comes down. We could move this forward if we'd like. Our customer has actually requested that we try to get it back as far as possible. He wants to use this rear end as a step to help him get up into the truck bed so we do what we're asked to do. What we're going to do is just slide these back just a little bit. Not so much that it ruins any of the integrity but give them just a little more room. All right, then I also want to check and make sure that my step is right even with the end of my bracket. Then we'll use our seven-sixteenths inch wrench and socket and start snugging down our bolts. Now we can take our end caps, slide them right over and we can get those secured in place. Now with everything tightened down, that's going to complete our installation of the DeeZee Rough Step running boards, part number DZ15321A-15336 on our 2014 Ram 2500 crew cab.
Customer Reviews
DeeZee Rough Step Running Boards w/ Custom Installation Kit - 7" Wide - Aluminum - Black - DZ15321A-15336
Average Customer Rating: 4.5 out of 5 stars (8 Customer Reviews)
Made of rustproof black powder coated aluminum, these running boards offer unmatched traction and durability. A grated step surface provides sure footing and allows dirt and water to drain. Custom installation kit and full-length boards included.by: Mike03/22/2018
Years ago I had a jacked up truck and had a welder make me custom steps. When I saw these, it reminded me so much of the ones I had then. I waited and when I was ready I bought them from Etrailer. My past experience with Etrailer was very good.I always found that in the beginning all the types of side steps look nice, but after a while no one is able to keep them nice. These are durable. Water, dirt, snow, everything will just fall through. Granted, the truck I have them on doesn't get beat up at all, so these will last a lifetime. Not only that, its different than everyone else's. I would buy them again for any truck. P.S. I had them installed, so not sure how hard it is. Seemed easy enough , I just work a lot. Looking for durable with good looks, this is for you. Get the Black Aluminum.
by: John12/08/2019
They arrived. First nice day got outside to install. Opened boxes to lay all parts out to check off with parts sheet. NO nuts or bolts and one bracket missing. Took over 3 weeks to get missing parts. NOT HAPPY AT ALL. Way over priced also for 2 short running boards. Would have done better to just order boards for a regular van the cut off the one for passenger side. All in all I wasn't very satisfied
by: David 03/25/2021
The rough steps are perfect because they are wide and provide excellent grip with wet or muddy boots. Very sturdy and durable finish. The brackets fit perfectly on my Silverado 3500hd without having to drill holes in my mew truck.
by: Abble12/05/2020
These are the toughest running boards I have ever bought. Looks good, the soil/mud drops out the bottom, and the foot traction is great. Never slip.
by: wilpenusa05/29/2019
Perfect fit, no drilling, easy intstall, look great.
by: Tracy02/02/2022
Product is just what we needed, shipped quickly, and the price was good.
by: James 03/12/2021
by: Robert 08/07/2022
8
8
See what our Experts say about this DeeZee Nerf Bars - Running Boards
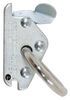
- Do the DeeZee Rough Steps # DZ15321A-15336 Require Drilling for InstallI checked the install instructions for the DeeZee Rough Steps # DZ15321A-15336 for your 2013 Ram 2500 and there is no drilling required. Basically you install crimp nuts in the truck frame to provide attachment points for the mounting brackets. I attached a picture that I took from the install instructions.
view full answer...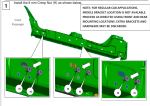
Info for this part was:

Edited by:
Leah B

Written by:
Tricia G

Expert Research:
Jameson C

Video Edited:
Joshua S

Video Edited:
Jacob T

Updated by:
Adele M

Updated by:
Mary K

Updated by:
Alex H

Video by:
Kathleen M

Video by:
Dustin K

Test Fit:
Randy B

Installed by:
David F
At etrailer.com we provide the best information available about the products we sell. We take the quality of our information seriously so that you can get the right part the first time. Let us know if anything is missing or if you have any questions.
Product Experts Available Now!
Call 1-800-940-8924
Thank you! Your comment has been submitted successfully. You should be able to view your question/comment here within a few days.
Error submitting comment. Please try again momentarily.