
To see if this custom-fit item will work for you please tell us what vehicle you'll use it with.
Thank you! Your comment has been submitted successfully. You should be able to view your question/comment here within a few days.
Error submitting comment. Please try again momentarily.
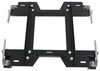
Install your fifth wheel trailer hitch in half the time with this custom bracket kit. Requires less drilling than universal kits and provides a custom fit for your Chevrolet Silverado 2500. Includes everything you need for installation.
Features:

Videos are provided as a guide only. Refer to manufacturer installation instructions and specs for complete information.
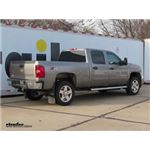
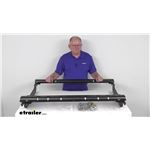
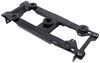
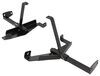
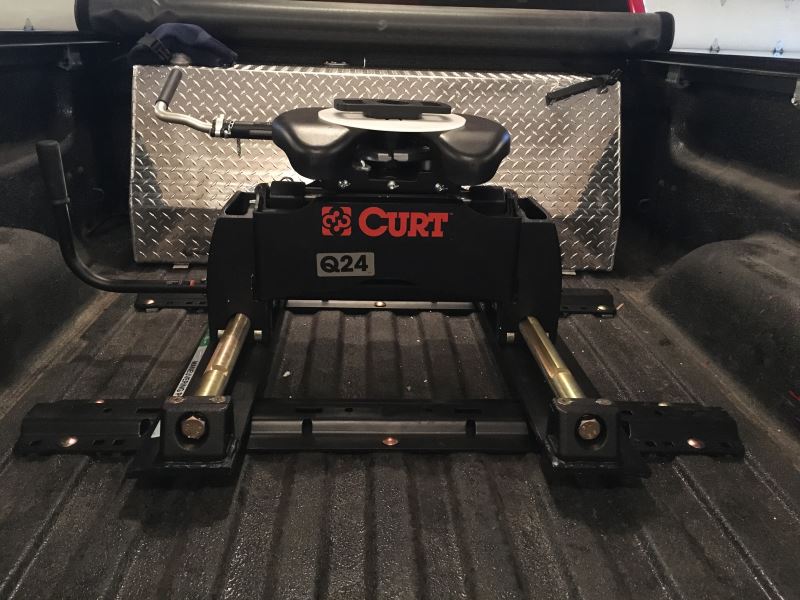
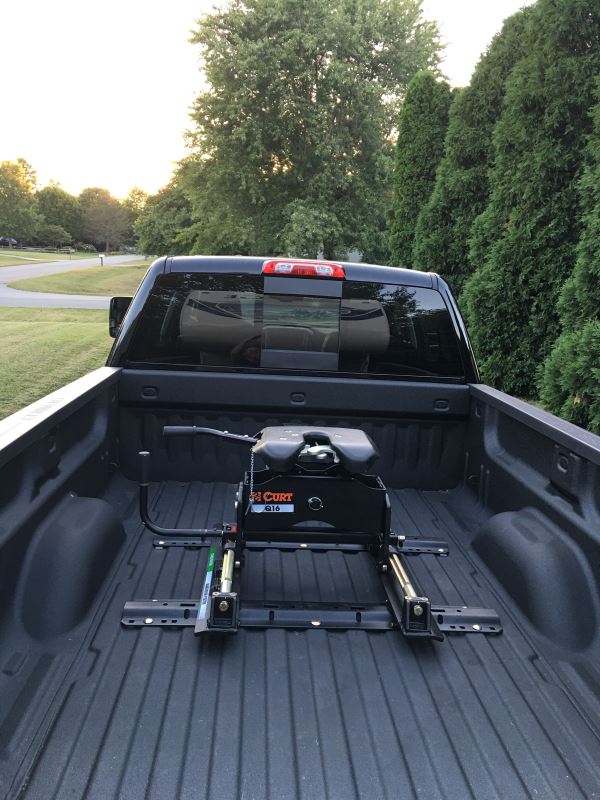
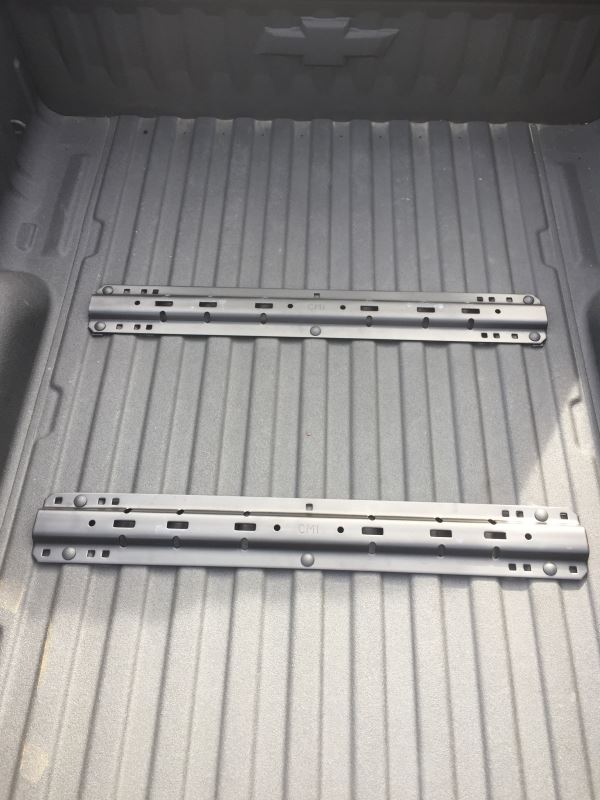
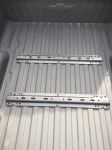
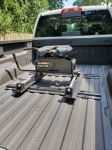
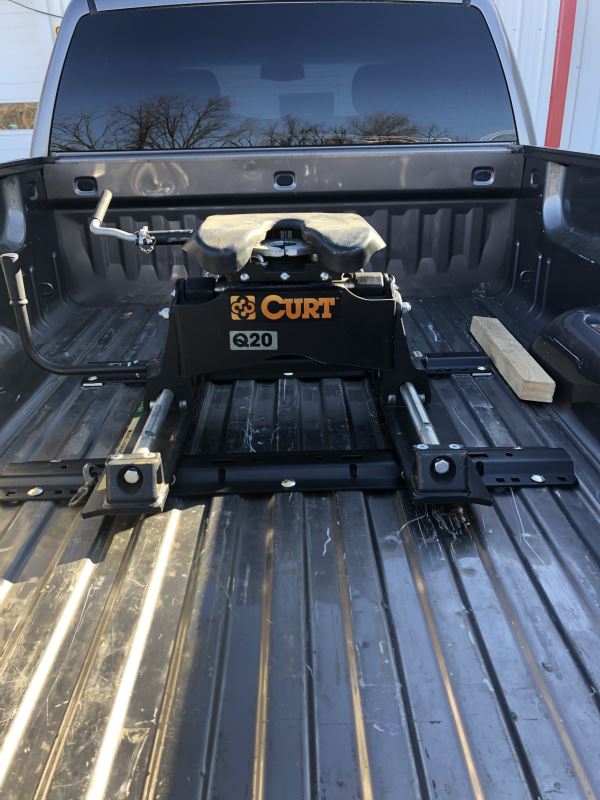
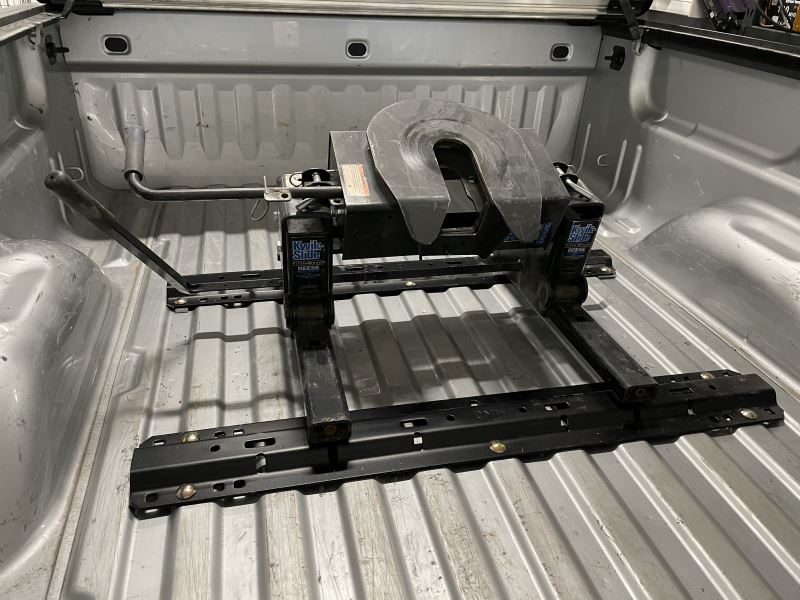
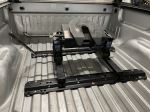
Today on our 2014 Chevrolet Silverado 2500, we're going to be showing you how to install the CURT Custom Fit, Fifth Wheel Rail Installation Kit with a carbide finish. Part number is C16411-204. Now, this is what our rails are going to look like in the bed of our truck after your installation. As you can see, they're going to provide a very nice attachment point for your in-bed styler, your above-bed fifth wheel hitches. These work out really good with just about every manufacturer. Of course the CURT but also your BMW, your Draw-Tite, the Reese, the Valley. It's going to cover the gamut.
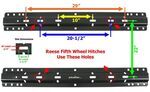
Now, we do have three with options available on our rails depending on the style of fifth wheel hitch that you plan on using. It's going to be about 10, roughly 20 and a half, and then about 29 inches center to center as they come out. These are going to be your common widths for the different capacities of fifth wheels that will drop right down in. Then we'll have the oblong holes here. Just slide your pin through and clip them on each side.
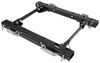
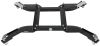
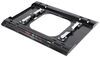
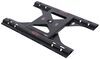
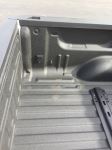
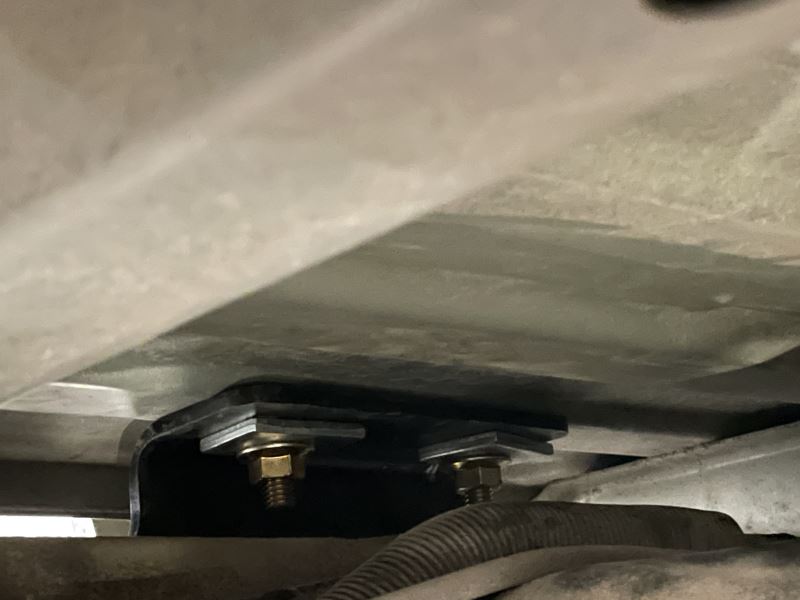
Be in there nice and securely. Now, off the bed of the truck itself, we're looking at about one inch, right in that range, that you're going to have these sticking up and over. The nice thing about that is when not in use, you can pull your fifth wheel out, so you don't have to permanently mount it in here and that'll allow you for access and use of your bed. If you really wanted to alleviate this completely, you can actually just cut plywood inserts that would be on a 3/4 inch sheet of plywood or so, where they'd be about even with the top of our rails here. Then just put a rubber mat right over the top of it, so when you need them, you can get in there, they'll be available to you, and if you require that very flat floor, it's not a terribly involved process to get it that way if you'd like. You'll see the custom fit brackets here are designed to fit right into already existing holes in the vehicle's frame, so we're not making any major frame modifications or anything like that. These are a lot better designed in the universal fit kits.
There's sometimes drilling and welding and a lot of bolting and kind of customization that comes there, where with this, you have a very simple, very straightforward side plate you'll put on. Use the existing holes to bolt it in place. It's got a nice finish to it and it offers us a nice, clean look. Now, the first thing we need to do to begin our installation is get our forward rail position. In our instructions, we're going to find the measurements and they're different whether you have a short box or a long box. Go according to the instructions.
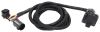
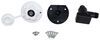
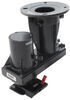
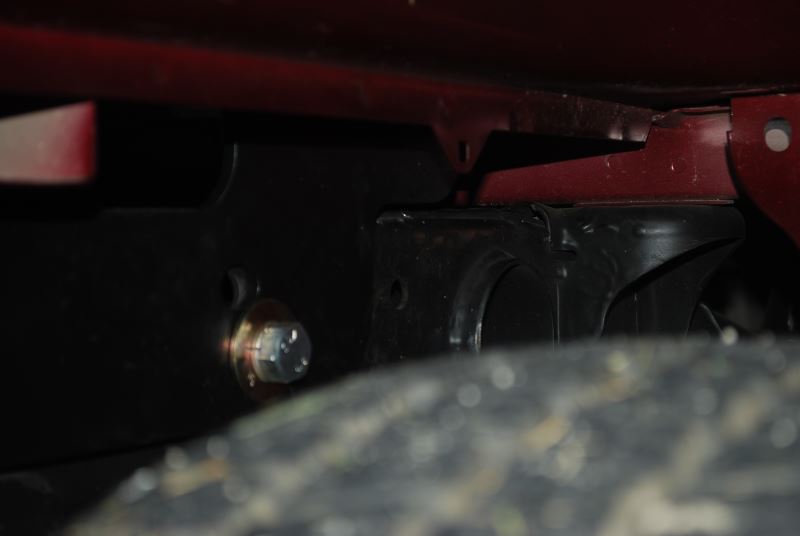
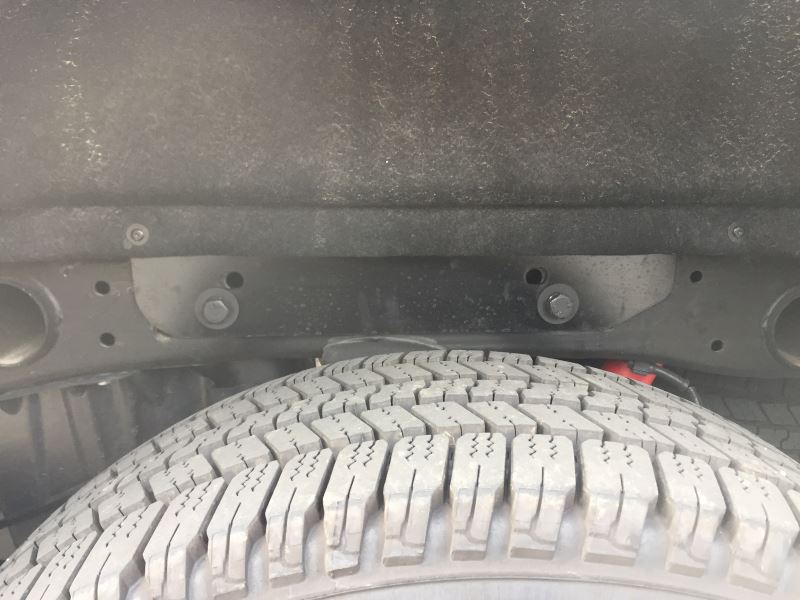
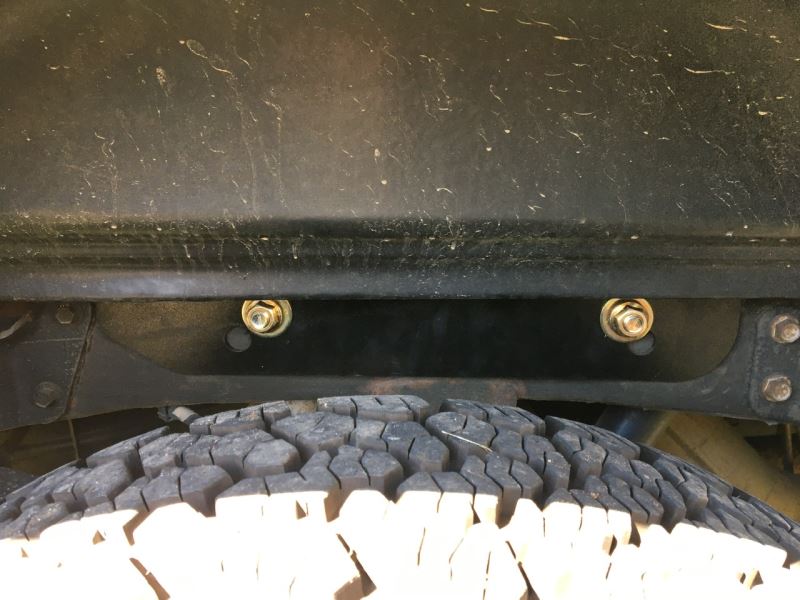
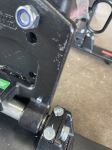
You want to measure from the rear lip of the bed to the back side of your rail. Now we also need to center our rail from side-to-side here. Now we need to take our center punch and we want to mark the center of each of these hole locations that we're going to be using. There's five on each rail. For the forward rail, we're using the four all the way out here on the outside and we're going to use the one in the middle closest to the rear of the vehicle. We kind of want to anchor our rail down so it's not going to move. Then we'll start marking the center of each of those holes with the center punch. One of the holes that we center punched, we want to drill out a 1/8 inch hole and we'll verify that they're in the right location with our side plates. Now we're ready to temporarily mock-up our side plate. This is going to be the driver's side that we're going to mock. You'll have the thicker flange in the rear that has the two holes and it's going to be a little bit thinner towards the front and they're going to hang out over the frame rail. We're going to line up our two upper holes, one here and here, with the two holes that are on our frame rail. Just like that. We just want to confirm that the hole we drilled lines up with the holes that are in there. Bracket there, the side plate. Looks like those are fine, so we'll drill out all five of them, check it one more time, and then get those enlarged. Now with those holes confirmed, we're ready to use a step drill bit. We're going to enlarge these to 9/16 of an inch. Now, it's time for us to fish wire our larger carriage bolt and spacer blocks into the frame rail. We're going to be using this whole location here and this whole location here. You can see we've got a pull wire to do that. What we want to do is start by pushing our pull wire into the frame rail, and we're going to direct it to a hole that's located about right here. It's kind of a round-shaped hole, maybe slightly oval-shaped hole, and we want that pull wire to come out of that hole. Once we've got that through there, we're going to slide on one of our spacer blocks and thread on that carriage bolt. We'll pop our spacer block in the hole and then if we start pulling on that pull wire, we'll pull that into the frame rail, and then right out of that hole location. We're going to do the same thing for that forward hole as well. We'll go though that same hole. We'll bring our side plate up and bring our pull wires through the upper hole location, and just guide our side plate on. Back that pull wire off. We'll take one of our flange nuts, just going to run that on hand tight for now. You still want to have a little bit of wiggle room there. Do the same thing on our front location. Now our next step's going to be to get our forward rail in position, here. What we're going to do on the lower portions of the bed, we're going to put in these u-shaped spacers. That gives us metal-to-metal contact all the way through the length of our bolt. We're not going to have to worry about crushing the bed. Now on the middle one, that's on the high side, so we don't have to worry about that. We're going to be putting one of those down below. Just want to get that set down right on top. Now at that point, we're going to take our 1/2 inch carriage bolts. You got probably a total of 10 of those in the kit, little bit smaller than the ones we used for the side plates. Just going to slide in. We want to make sure those u-shaped spacers fully engage them there. Now we'll head underneath and get our hardware put in place. Now for the middle one here, we're going to put the u-shaped spacer on the bottom like we talked about. We've also got a square hole spacer. This is larger than the ones that went in the frame rail, although it does have a smaller hole, and this is going to go in the bottom of every carriage bolt that we put in front and rear rail. We want that to go on the bottom and we'll finish it up with our flange nut. We'll do that for our other four locations. We'll have two on the outside, both sides. Now to determine the position for our rear rail, we need to put our preferably unassembled fifth wheel, either sliders or arms, in, want them in the correct position in the front, and we want to make sure that we've got that pushed as far forward as possible. We're going to bring our rear rail in and want to line it up with that accessory, the tab stick down right here, and then we'll shove that rail as far forward as we can. Now, if you're going to be using multiple accessories in your fifth wheel rails, you want to try them all out, make sure they're going to work. Once we've got that moved all the way forward, it's time for us to center that side-to-side in our bed just like we did that forward rail. All right, now we're ready to center punch our holes for this rail. Remember, we want to use the second from the outside hole set here, and we'll be doing the same hole in the rear there. We'll move that rail out of the way, then get those holes drilled and follow the exact same procedure that we used for the front rail. All right, now we'll go through and get our carriage bolts placed through. Since the bolts all go through the high side of the bed, we're not going to have to worry about those u-shaped spacers on the top. Those'll be going in on the bottom. All right, now to make our hardware here in the rear a little easier to get to, we're going to be pulling down this spare tire heat shield. You can see we've already removed the spare tire. That's just typically something we always do to make it easier to see on camera, but this is also going to help you out in your installation. Now, for pulling down this heat shield, we've got two 13 millimeter bolts. Just set these aside so we can put them back in later. I'm also going to be pulling out five of the bolts that hold up this upper heat shield. Where this heat shield is, there's a tab that bends down. Normally it looks like that. You can see I've had to bend it just to get my nut started up there. What I'm going to do is just trim that off and come right down that line, there. Just get rid of it. That way, we can actually get our wrench in there and actually have a chance of tightening down our bolts. All right, now with that out of the way, it's time to start snugging down all of our hardware. If you look in your instructions, it's going to give you your torque specifications. Want to be sure you get all of your hardware torqued down appropriately. Now we're ready to torque down the main bolts here on our side plates. We want to do this on both sides and again, these torque specifications are in the instructions for you. All right, now we can get our heat shield put back up into position here. Remember we had the two bolts we removed. We just want to get those back into place. With everything back in place, that's going to complete our installation of the CURT Custom Fifth Wheel Rail Installation Kit, part number C16411-204 on our 2014 Chevrolet Silverado 2500.
Average Customer Rating: 4.7 out of 5 stars (325 Customer Reviews)
Install your fifth wheel trailer hitch in half the time with this custom bracket kit. Requires less drilling than universal kits and provides a custom fit for your vehicle. Includes everything you need for installation.I had originally ordered a 11604/11607 under bed gooseneck mount for my 2019 Silverado 2500HD, but found out during initial parts fitting that an under bed rib had been welded out of position on my truck, and the side rail brackets would not fit because of it. A phone call to Curt verified my finding and they suggested going to an in bed rail mount as an alternative. I called etrailer and spoke with Bailey B about my situation and she was very quick to understand what I needed to do. She helped me place an order for a 16411/16204 in bed rail mount kit. She then emailed me instructions and UPS shipping labels so I could return the parts I could not use. I received my new kit yesterday (one day early!!) and a quick look tells me I now have what I need. Bailey B was super helpful, and the exchange process was above and beyond my expectations. Count on me for future purchases. I had hand surgery a few days ago so it will be a while before I can install this hitch rail kit. If I can edit this review then, I'll add pictures. In the meantime, I'm going to have a spray in bed liner done and I'll be ready to go. Thanks again Bailey and etrailer!
Just installed my curt 5th wheel kit,all materials are heavy duty and comes with all hardware needed. Installation is straightforward for the average DIY . The only challenge in the installation of the kit is getting the right tool to torque the rail bolts. My truck is a 2013 chevy Silverado 2500HD. I would recommend this kit.

Works great, I self performed the install on my 2018 GMC, the only issue I struggled with was on feeding the bolts through the frame with the provided threaded feeder wire on the front driverside, the trucks fuel tank location and brake lines mounted on the frame was a little challenging but worked through it. Thanks
I feel that the installation video simplifies the process to much. Attaching the frame plates with the bolt fish wire was more difficult than the video showed. I am to blame for the first bolt. We started on the left side and fished the back bolt first. I did not check to see if the wire would go through both plate and bolt once threaded onto the bolt. I just placed the plate on the wire and then threaded the bolt onto the wire and pulled or tried to pull it through the frame hole. The wire was "bunched" on part of the bolt and would not feed through the frame and the plate holes. I stretched the wire to the point I thought I was going to lose the bolt in the frame. We ended up getting the bolt back out and using the other fish wire to feed this bolt through. We made sure we could fit both the plate and bolt through together before fishing it through the frame. Once we did one the other three went a lot easier but we only had one fish wire to use.
I had watched the installation video several times and played it while we were working. The video is good but it makes the process seem to easy.
I would like to see the video have more details about this process and have 4 fish wire instead of 2 or tell people you may want to have two more on hand for piece of mind.

Jeff L.

10/1/2018
After a year and around 7,000 miles pulling our fifth wheel camper, I love the hitch. I have not had to use the sliding portion but glad we have it if we need it
Installation of this product was easy, instructions were easy to follow. Rail kit works as it’s designed. Great Kit.

Allen
1/8/2024
It been working great, have not any issues. This product was easy to install, pretty much straight forward instructions!
Last summer I made purchase of the A16 sliding 5th wheel hitch along with rails.the install took about six hours working by myself .following the enclosed instructions is important and saves time if you do it exactly as shown.I was very pleased with the delivery,it was prompt and no charge.that was great.the hitch is a slider which I think is important on a shortbed,could save damage to truck during maneuvers.my experience with etrailer has been really good and would recommend this company to anybody shopping for trailering equipment
The installation kit fit perfect but take the time to move the spare tire and the heat shield out of the way to make it easier.

Kevin L.
10/23/2017
The products have worked flawlessly no problems and thank you for checking back with me its nice when a company cares about there costumers. Next time I need any trailer products I will definitely be contacting etrailer.
Whew! Installing that Rail kit about kicked my butt! The reason why is all the trips I made from underneath the truck and back. The Rail kit is a very high Quality Product from Curt that fits perfectly in the bed of my truck. The hardware is also high quality. One downside is there isn't a lot of room to work as the gas tank on one side and the exhaust on the other side prevents easy access (gas tank in particular). It was very hard to get a wrench on the nuts unless you used a Gearwrench. After the install they are torqued to 110 ft-lb. The only way to do that was to put a 1 inch adapter on the torque wrench then put that in the open end of the gearwrench in the adapter. Then using a formula on line, convert that to what you have to ft-lb. Anyway It was worth it because I know I have a good product that will stand the test of time.
Excellent product, perfect fit for my vehicle, arrived a couple days before it was supposed to. I did not want an "aftermarket" look, which is why I ordered a kit designed specifically for my vehicle. I did take the time to remove the heat shield to gain better access to the installation bolts. The biggest challenge was installing and tightening the bolts that go through the bed; there is not a lot of room between the trucks frame and the bed of the truck. The most challenging bolts were the ones on the driver side closest to the cab of the truck due to the placement of the gas tank. Trailer wiring was plug-and-play, hardest part was drilling the 2" hole in the side of my truck bed.
This is the second one of these that I ordered from e trailer. The first one I got at the same time as the fifth wheel hitch. I install on my 2015 Silverado 2500HD. I traded that Silverado for a 2018 Silverado 3500 Z71. Kept the hitch had to leave the rails. Great product and not bad to install. Took about 2 hours. If I trade again, I will get third.
Installation was easy and everything lined up perfectly!
Box was delivered with a little damage and the contents of the hardware bag was loose in the box. After going through the parts list and realizing I was missing 1 block, we contacted etrailer and they shipped the replacement part immediately, we got it within 3 or 4 days. Install was a breeze after watching the video and fishing the bolts and blocks in the frame. Only took a couple hours total.
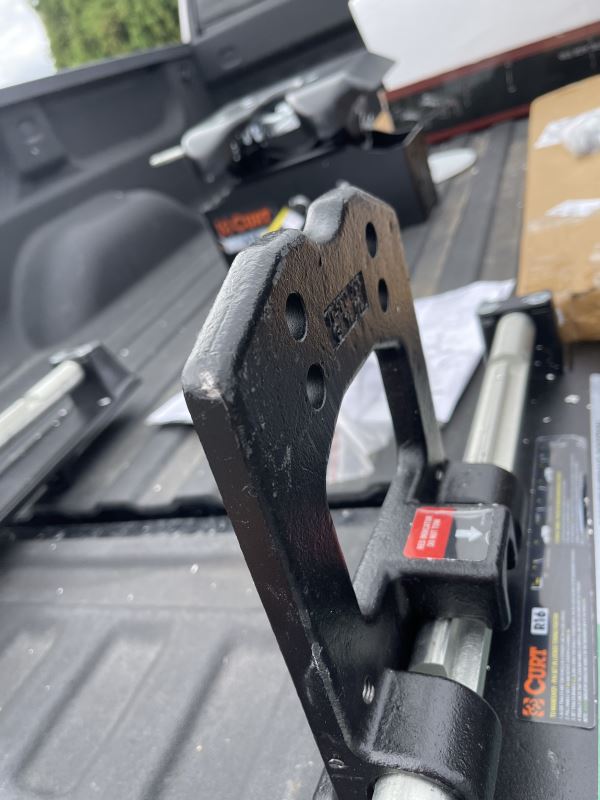
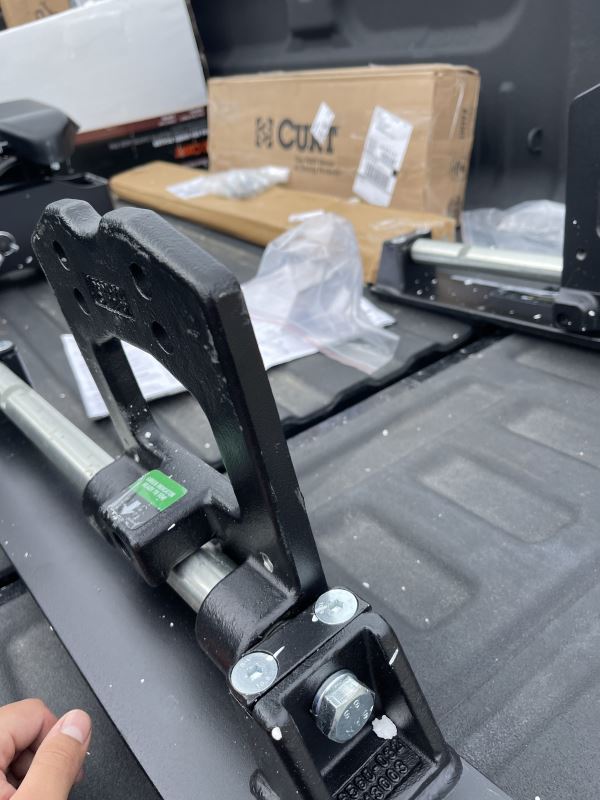
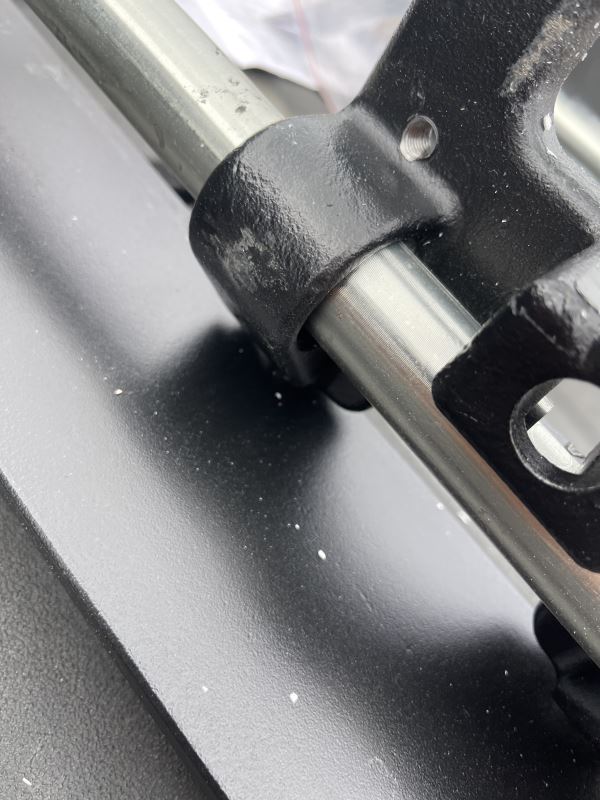
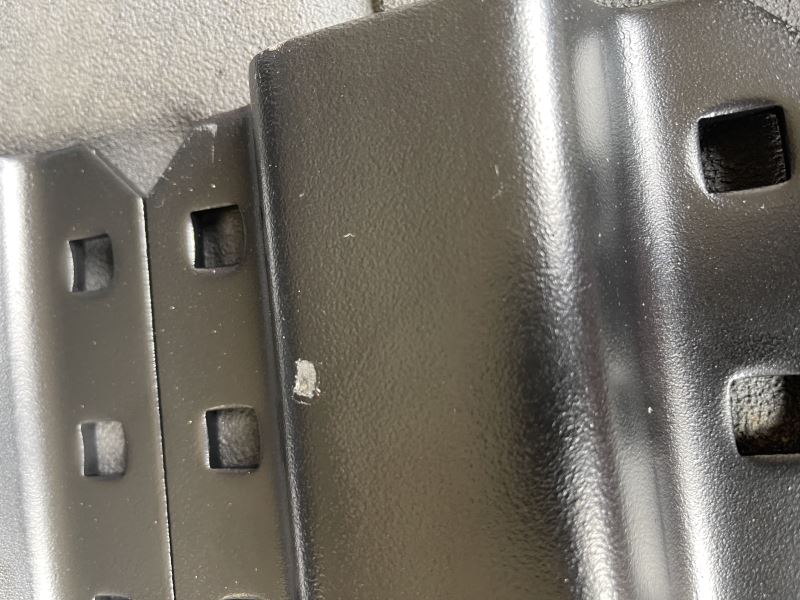
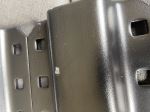
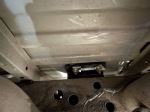
Very disappointed with the quality of parts I received from etrailer. I got parts for my 2015 GMC Sierra 2500 they look like they came out of the scratch and dent section. Like I understand that the item is heavy and it’s hard for it to stay prefect in shipping but for the amount paint missing and how beat up the parts are for [XXXX] dollars shocks me. I bought a new with wheel not a used one. This is a few photos of the many more I have hope this helps with your experience.
This is a great product, but the install time estimates are way off. I have been a mechanic in my own shop for 19 years and I didn’t remove the rear wheels or the spare tire (because) it wasn’t necessary on my truck. I have a lift in my shop and it still took me 6 hours to install it! Trying to hold the spacers while trying to get the nuts installed on the 8 outer through the bed bolts was ridiculous! Terrible place to get to, lots of bad words! I’m thinking that buying the custom kit versus the universal was a bad idea, I have installed both and it was no quicker with this kit and it was almost a hundred dollars higher. My install was on a 2013 2500hd.
Looks like good stuff went on easy fit my GMC 2500 HD 2011 perfectly the technicians, and the people at etrailer are the best. I watched their videos excellent instructions
Great product! Installation was easy and quick. Did it in my driveway! No issues with it since install.
If you do this yourself, definitely remove the wheel well liners and remove 3 of the 4 bolts holding the heat shield with one loosened to move it out of the way. Top front four nuts are the hardest to get started from under the truck. Start to finish 3 hours. Saved myself $500 for install
This bracket and rail kit was the perfect fit for my 2011 Silverado. Made the install of my hitch a breeze and allowed me to be on the road with my new trailer in no time.
Purchase went smooth,everything was in the box and installation was straightforward
Received the product yesterday and began my install. Spent a few minutes looking the directions over, which are pretty good to me at least. Took about 40 minutes due to the fish holes on the frame being difficult but over all a good product. I didn't think to get any pictures.
Kit was missing some of the bolts, nuts and washers. I had to go to Lowes and find what I needed to complete the installation.

Jenny N.
6/20/2023
The kit should not have been missing hardware. I will have our Customer Service team reach out to you.
Good kit
Directions easy to follow
Everything lined up like it was suppose to
Bought this rail setup over others because of price and that the profile is smaller than other models out there. Rails only stand 1-1/8" tall. I installed on a 2017 silverado 2500hd with an 8' box. I thought going in this would be an easy installation, but I was wrong, I feel like I had an easier time with the universal rails on my previous pickup. The shape of the brackets that bolt up to the frame make it so you can't get a wrench at the nuts anywhere but the inner side of the frame rails. The rear rail wasn't too bad to torque hardware, but the front rail hardware was a real pain to torque. Be sure to lower the spare tire. The driver side has the gas tank in the way, the passenger side has the heat shield. I found it a little easier when I removed the 1 bolt on the top of the frame holding the heat shield down, it made it so I could reach both hands up there to get the washer and nut on. Would highly recommend having a 3/4" crows foot socket to tighten the nuts that secure the rails down. I was not able to get a socket on them at all (love how the install video shows torquing the easiest nuts). I also had trouble bolting the brackets to the frame with the existing threaded holes (no fault of the manufacturer, the threads were just gunked up). The bolts that secure them are M16 (install video says 14), may want to have a tap that size on standby incase those threads are gunked up. I wish I would have spent the extra money on the Reese outboard rails (didn't because of the extra money and the large profile of the rails).
Excellent product easy to follow instructions assembled easily. Reminder unit is very heavy for one person but it can be done.
Great product.. better than my previous install on a 2006 Silverado w/separate brackets for each bolt for the Rails.
This went in like a dream.. however, with that said... watching the video from etrailer on YT showing how to install this was extremely helpful... the "real life" install is no where near as easy as they show.
The fuel tank and the bottom of the bed allow for about 5" of room to get you hand, arm and the bolts installed on the bottom of the bolts that come down from the rails. Very difficult. The passenger side also has the exhaust and a shield to contend with. Removal of the shield is a must, however the tight area between the frame rail and the underside of the bed... again, only allows for minimal accessability for the bolts.
The only bolts that were able to be torqued were the bolts on the outside of the frame rails, otherwise all other bolts were only able to be torqued to grunt specs.
Took about 3hrs, however it is way easier drilling only the 8 holes through the bed floor than into the frame...
I would suggest re-tapping the threaded studs that are on the frame. I installed this on a 3 yrs old 2017, and I had a tap to do this. W/O the tap I think the bolts would not have gone in so easy AND they most likely would have been damaged from the rust and stuff laying in the holes.
Jerome C.
3/17/2021
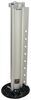
Just a year now, and this hitch is still performing great. I really like the colored indicator in the front. I thought this would be a joke at first, but hey.. it really works. I find myself looking at the connection dot right before I put the truck in drive. If anything, its another way to double check Im hooked up correctly. Really like this 5th wheel hitch
Do you have a question about this Fifth Wheel Installation Kit?
Info for this part was:
At etrailer.com we provide the best information available about the products we sell. We take the quality of our information seriously so that you can get the right part the first time. Let us know if anything is missing or if you have any questions.


David
3/10/2024
Fantastic! I was able to install the entire kit by myself as soon as my hand allowed me to. Everything went together as it was supposed to. Ive only been able to tow my 5er a few times, but getting hitched up and unhitched is a breeze, even when the truck isnt straight on to the trailer. The hitch is totally silent, with no chucking at all. I was able to set it up so I had good cab clearance that I dont need to use the Turning Point feature on my pin box. I highly recommend this hitch.