
SeaSucker Heavy-Duty Flashlight with Mount - Vacuum Cup Mount
(0 reviews)
Price: $99.00
In Stock
SeaSucker Heavy-Duty Flashlight with Mount - Vacuum Cup Mount
Item # SEA94ZR
Our Price: $99.00
In Stock


- All Info
- Q & A (0)
- Videos (2)
- Photos
SeaSucker Camping Lights - SEA94ZR
- Flashlights
- Red
- White
- SeaSucker
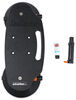
Mount this flashlight anywhere you need it in seconds. Sturdy, vacuum cup with 7" flexible arm attaches to any non-porous surface, and with the flashlight attached, helps make repairs in low light scenarios. Installs and detaches quickly.
Features:
- Vacuum cup mount flashlight lets you make repairs in low light situations
- 7" Flexible arm allows you to position your flashlight perfectly
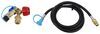
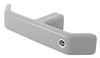
- Vacuum cup installs to metal, glass, or fiberglass in seconds - simply pump plunger
- Orange indicator on plunger lets you know when the mount is secure
- Made in the USA
Specs:
- Cup diameter: 4-1/2"
- Pull strength: 120 lbs
- Limited lifetime warranty
EL5880 Sea Sucker Heavy-Duty Flashlight with Mount - Vacuum Cup Mount


Video of SeaSucker Heavy-Duty Flashlight with Mount - Vacuum Cup Mount


Videos are provided as a guide only. Refer to manufacturer installation instructions and specs for complete information.


Video Transcript for Review of SeaSucker Camping Lights - Vacuum Cup Mount Flashlight - SEA94ZR
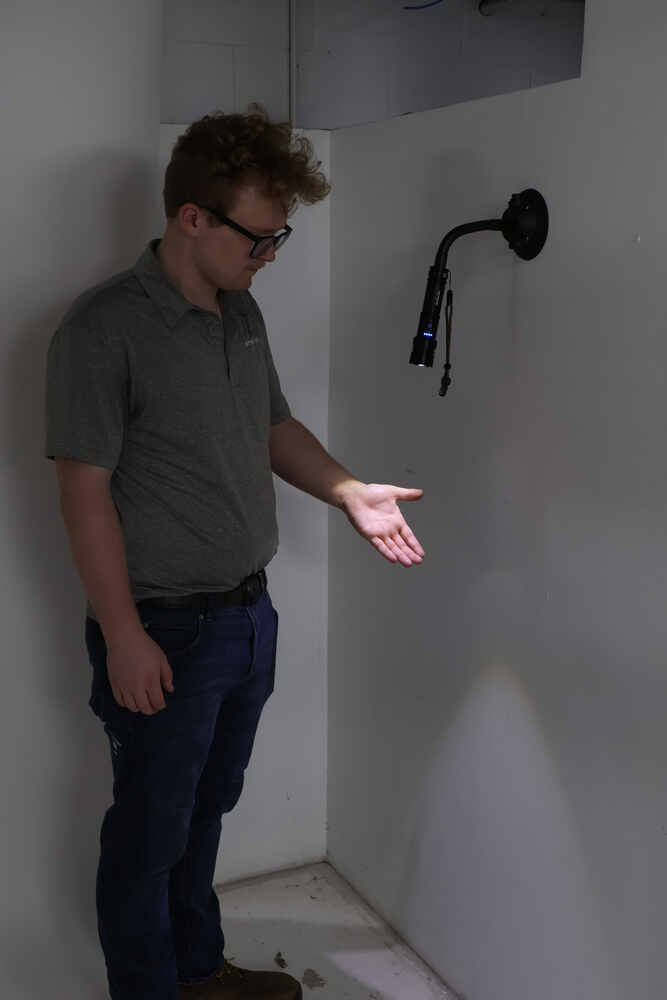
Hello everybody, this is Jeff at etrailer.com. Today, I'm gonna take a look at this Seasucker Heavy Duty Flashlight Vacuum Cup Mount. Now, this flashlight mount right here can be installed to any non-porus surface in seconds. Basically, the flashlight will attach to this vacuum mount using this flexible arm right here. And that'll allow you to mount the flashlight anywhere you need to make repairs in any low light situations. It can even help in any emergency situations.
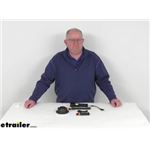
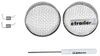
Basically, this part will include everything laid out here on the table. We're gonna go through all these parts and I'm gonna describe each one and try to show you how the light works and how it operates. But basically, it comes with this flashlight with the included wrist strap. It's an adjustable wrist strap and it can be removed if you don't want the wrist strap on there. Comes with the vacuum mount, it's a vacuum cup mount.
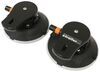
Has this protective cover on it. Comes with the seven inch long flexible arm. You can see that it's flexible to put a flashlight in whatever position you need. Comes with the USB-A to micro USB cable for charging devices or charging the flashlight. And they even include this replacement plunger, if this plunger gets dirty, damaged or wears out over time, you could have a replacement available.
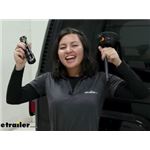
Now, we'll start with the flashlight right here. This flashlight will offer a rechargeable LED light with an adjustable beam. And you just slide this head and that's to adjust the beam either in close or widens it out. I'm gonna demonstrate that for ya. And there's you button to turn it on.
So, basically what you'll do is, you'll just push that button once and it turns the light on. And then I'm gonna go ahead and turn off the overhead lights so we can demonstrate. You can see as you slide this, you can get a narrow beam or a wide beam. If I go over to the back wall, see if that'll help any, there, you can see. And then there's your narrow, here's your wider beam. Now, if you do pish that button one more time, it's actually giving you a dimmer light. The camera might actually show it flickering but it is a dimmer light and it's adjustable also. If you push it one more time, then it gives you a strobe light. And again, it's adjustable also. And in anytime during pushing this, if you just hold this down, if you keep holding it down, it'll turn it off in any sequence, and then when you turn it back on it'll start the sequence over again. Now, the other nice thing, let me turn the lights back on so I can show you. If you'll notice, on this side of light, there's a longer light that you can turn on, and the way you turn that on is you use the same button but you give it two quick taps. So, if we do two quick traps, then the side button comes on, the front light does not. And with those two equipped taps, it'll turn on that side lot. And then if you click it once, again let me go ahead and turn off the overhead lights. If we click it on more time after you have the side light on, it'll go to the dimmer mode. If you click it another time, then it transfers to the red color light. And then press it another one and it gives you a flashing red light, so you can use it in emergency situations. And then, the same way if you go ahead and click it, that'll go off. The other nice thing on this light if we go to this other side, it has a cover, you pop out that cover, and you'll notice there's two charging ports in there. They give you a USB-A output for charging micro USB devices or you can plug in the A and then plug that into your device to charge that device. Or they give you a US, or a micro USB input, for charging the flashlight, just reverse it. Put the micro thee, plug it into USB-A and you'll be able to charge the battery in this light. And then when you're not, just put your plug back in thee to protect it. Now, we mentioned the seven inch long flexible arm. This will allow you to position you flashlight perfectly. It'll screw into the flashlight and then the other end will screw onto the housing of the vacuum mount. And it does install and detaches very quickly. Now, you'll take the one that has the washer on it, that's to go into the flashlight end. So, we'll go ahead and screw that in, and then just snug it up. And then you'll take your other end we mentioned, and right in the mount, you can see there's a screw in there. So just line it up, and we'll go ahead and get that going. And we'll tighten that up and now it's tightened down. And now you have your flashlight mounted, and again, you can see that it is flexible. And then we're gonna show ya how to install this, so what we're gonna do is pop off the cover, the protective color, now you have your vacuum cup and you're gonna pump this plunger to apply the pressure in there that's gonna hold it in place. So, what I'm gonna do is go to another camera to show you the back wall. Now, we're gonna use this wall, it's made for non-porus surfaces it attaches a lot better. This, it'll work on but it's not the best case, but I do wanna show you this. So right now, if I put this up against the wall, lets go right down here, and you'll notice the plunger on the side with the orange showing. What you'll do is put some pressure up against the cup, up against the wall, and then just start pushing that button and you keep pushing that plunger with a little pressure applied. And if you push it long enough, you'll feel it getting pressure built up in thee. Ad then just keep pumping it, and then you'll pump it enough to where you gotta let it go, you don't see any orange and now it's hold on to the surface just like that. And now you can see, you can twist your light to whatever position you need. Make sure it's tight. And then turn on your light, simple as that. That orange indicator will let you know. Now, if it's attached, and you start seeing that orange showing like it' is there, just go ahead and push it a little bit more, and it'll keep it like that. As I mentioned, this isn't the best surface. And then to remove it, there's a little tab on both sides. Just pull up on that tab and it removes it simply just like that. Very simple. Now, this part is made in the USA. Zoom back out. A few specs on it. The cup diameter on this vacuum cup is four and a half inches The pull strength when it's applied to a nice non-porus would be about 120 lbs, so it will stay in place. But that should do it for the review on the Seasucker Heavy Duty Flashlight Vacuum Cup Mount.
0
0
See what our Experts say about this SeaSucker Camping Lights
Info for this part was:

Installed by:
Jeff D

Installed by:
Evangeline M

Video Edited:
Jacob T

Edited by:
Daron K

Written by:
Alex H

Video by:
Charles A
At etrailer.com we provide the best information available about the products we sell. We take the quality of our information seriously so that you can get the right part the first time. Let us know if anything is missing or if you have any questions.
Product Experts Available Now!
Call 1-800-940-8924
Thank you! Your comment has been submitted successfully. You should be able to view your question/comment here within a few days.
Error submitting comment. Please try again momentarily.