
Thank you! Your comment has been submitted successfully. You should be able to view your question/comment here within a few days.
Error submitting comment. Please try again momentarily.


Videos are provided as a guide only. Refer to manufacturer installation instructions and specs for complete information.
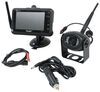
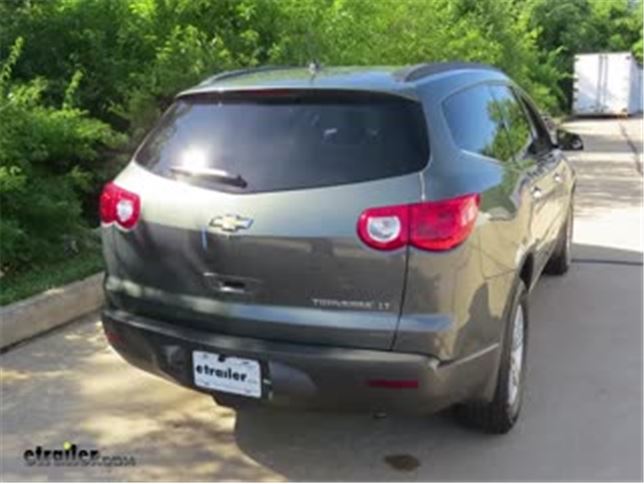
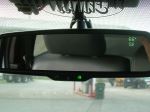
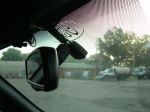
Speaker 1: Today in our 2011 Chevrolet Traverse we're going to be taking a look at, and showing you how to install the rear view safety G-series backup camera, part number RVS-776718-DOS. So here's what our backup camera system looks like. I's going to replace our factory mirror, and we're going to have a built in color digital display. Now the mirror Not only is going to look a lot like our factory mirror, but it's also going to have a lot of the same features. It has an auto dimming feature so when we're driving at night, drivers behind us won't blind us. Also it has built-in On Star capability.
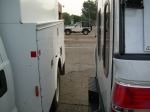
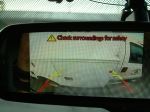
Now we're really going to benefit from our camera, is when we're backing up. Because we don't want to run into a pedestrian, our backup camera is going to keep everyone safe. Now our camera is only going to come on when we put it in reverse. When we're driving it'll look like this, or when it's in park. But when I put it into reverse, the monitor will come on and we'll be able to see what's behind us.Now our camera is going to give us some guidelines so that we can have a general idea of how close things are.
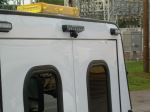
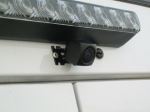
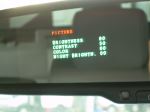
It's also going to feature a remote, that way we can cycle through all our settings and fine tune anything that we may want to. The camera in our system, we just chose to mount it to the back of our bumper. Now you can mount this anywhere, and it does have adjustability so you can get that perfect angle of viewing that you may need. The camera is weatherproof so it will stand up to the elements being at the back of our bumper here, and it does have built-in night vision to help us be safe when backing up even in dark conditions. Now that we've gone over some of the features, let's show you how we get the camera installed.
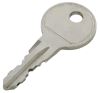
To begin our installation we're going to need to remove our rear view mirror because our monitor is going to be replacing it.If we come to the base of our mirror we're going to see that there's a fastener or a set screw. That's going to be a T-20 torque spit, and in our kit they do provide us an Allen key with a torque spit on the end to tighten up our new mirror, but it will fit our old factory mirror as well. We're going to loosen it up enough until we can slide it off. Once we have the screw removed we're going to come and pay attention to our harness that's coming to the back of our mirror. There's going to be a button right here, so we're going to push in on that button, we push in on that button, it'll release it and we can pull it out.
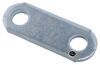
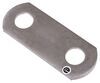
With that removed we can go to the very top, if we squeeze in on either side we can slide that cover down and slide it out of the way. We can take our mirror and slide it upwards, and it'll come right off. Now on our new mirror, that's going to be our monitor, as I mentioned we're going to have another set screw.We're going to want to make sure that's nice and loose, you don't want it to be falling out, but you want it to be nice and loose so you can slide it over the button on your windshield. Now we can take our mount and making sure it's facing the right way, we're going to go over the button on the windshield and we're going to slide it into place. You want to make sure that the tab grab it and it slides all the way into place. Give it a gentle tug to make sure it's in position, and then we can go ahead and tighten up that set screw again. You don't want to go super crazy tightening it, you just want it nice and snug so the mirror's not going to come off. Now the harness we unplugged from our mirror, that's going to be for our On Star. Our new mirror does come with On Star capability, and we're going to match up the plugs, then we can plug it in. You want to make sure it locks into place.Our On Star wiring I'm going to leave out and loose right now just so we can get the rest of everything in place. The other end is going to be for our camera cable and we're going to start routing this towards the edge of our headliner here, towards the driver side. We're just going to tuck it up underneath the headliner, then start working towards the edge of the driver side. You want to leave this end exposed, just so we can get the other end attached. The harness that we're going to be attaching to our monitor is going to have the same end on it as the monitor itself. But, on the other end we're going to have a few wires and what look like RCA cables. The reason why I'm bringing this up is because the camera cable on the camera itself is very similar, but the number of pins aren't the same, and you don't want to try to plug it in and bend any of these pins. We can take our monitor cable and there's going to be a line with an arrow, and that's going to match up with the line and arrow on our harness. We're going to plug that in, and I'm going to put a little bit of electrical tape just to help keep the connection there.Now we're going to start routing this wire, again along the headliner tucking it up underneath. Then also we're going to start running down the pillar and we're going to go as far down to the bottom of our dash as we can. When you get over to the door where your weather stripping is, it'll be a little bit easier, you just pull the weather stripping away and that way you can just run it behind this panel here. Once we get to the section where it's on the side of our dash here, I'm actually going to take this panel loose. so if we just reach behind it, we gently pull away, then it'll pop out the clips, and then when you take the rest of our harness and start routing it down through the plastic right here, so it'll then come out underneath our dash. Then we'll pull our panel away, then we can route the wires underneath the dash. To help keep my wire underneath the panel and in between the weather stripping, I'm going to go and put the weather stripping back, making sure that the wire is in the correct spot.The rest of the length of my harness I'm going to leave right here for now and we're going to get ready to mount the camera. We're going to be mounting our camera right underneath this shelf area, right above our license plate right here. We are going to need to get our wire from the outside to the inside to meet up with our monitor, but we'll worry about that after we mount the camera. The mounting plate on our camera, it does come with a gasket. We're going to go ahead and take the protective coating off. The sticky side is going to go on to the bracket itself, giving it a little bit of extra cushion. To make things a little bit easier I'm going to go ahead and remove my license plate so I can have more access to the plastic. Our camera is going to mount using some screws that are provided, but we're going to take the flat washers that are also provided in the kit, and this is how we're going to be mounting them. Just so you get an idea, we're going to be using the screw in conjunction with the flat washer, going through the bracket on our camera.Fortunately our camera doesn't have holes, it has slots, so we can actually just start screwing one screw in, and then we can slide it over, making it a little bit easier to handle. With the one screw in place, we could push our camera over, line up our new screw in the slot, and start drilling it into place. I want to mention if you look at the camera, we're going to have a screw that it's going to pivot on. You want to make sure that that screw is on the top side of the camera, that way we can adjust the camera to the proper angle, and the picture will be right side up. In order for us to get our wire through the back, we're going to have to drill a hole here in the plastic. Fortunately they do provide us with a grommet, so I'm going to be drilling a hole that's going to be roughly 7/8 an inch, but I'm going to be starting out with a small drill bit for a pilot hole. I'm going to come back with a step drill bit and drill it out to the final size.We're going to take the end of our camera cable and we're going to pass it through. We're going to push as much of the wire as you can through. Then we're going to take our grommet and push it into place. So my camera cable dropped out right behind my bumper here, and we're going to take the short adapter piece and we can go ahead and plug it in. Again, as you'll notice it's very similar to the monitor cable but it has a different amount of pins inside. We're going again, line up the notches and the arrows on our cables, and we can go ahead and press them in together. Then we're going to take a little bit of electrical tape and wrap it up to help secure it and protect it. We're going to get this end of our cable to the inside of the car. I found a grommet underneath our vehicle here, just the outside of our spare tire, right behind our axle. Now I'm going to move to the inside and make sure that there's nothing in the way so I can get through my grommet there. We move to the inside, we can go ahead and pull our cover up where our spare tire access is.We're going to need to start pulling out all the panels that are covering the floor. If we start with this panel right here just beyond the threshold . If we come to the side and we slightly lift up, we'll start releasing the clips moving our way towards the center. We can set the panel aside. The grommet we found underneath the vehicle is in quite a hard spot to reach, because it's going to be underneath our back seats. But we did find a better location once we popped the threshold off here. If we pull this sticker off we're going to see we're going to have a hole, and that hole is going to go directly underneath our vehicle. I'm going to take my drill with my step bit and I'm going to enlarge the hole big enough so that my camera cable can go through. It's never a good idea to leave bare metal exposed on your vehicle so I'm going to come back, a little clear spray paint to help protect that hole that I just drilled. Now we can go ahead and reach underneath and start feeding our camera cable through the hole.We're going to go ahead and take our female cable, the one that's going to be 33 feet long, we can go ahead and attach the cable to the male end of our other cable coming off of our camera. Again they're going to have a couple arrows on there so you can line it up correctly and put it in together, then we screw it in place making sure it's locked in. Again I want to put a little bit of electrical tape around this connection to help keep it secure and keep any dirt and debris out, and they do provide us with this cover, that I'm going to slip over before I put my electrical tape on. We're going to route this wire up towards the front as far as we can towards the other harness that we started with on our monitor. Everybody's going to do it a little bit differently, so let me run my wire and then I'll show you how I ran it. I didn't want to leave my camera cable exposed to the sharp edges of the hole that I drilled so I filled it in with some silicone, and then I'm going to let it dry now. If you need some silicone you can pick some up on our website using part number LT37467.I ran my camera cable up and through behind this panel here going up to my headliner, then I started going across. I do want to mention you are going to have your cargo tie downs to take off right here, as we can see on the passenger side. You're going to need a T40 torque's bit to remove the hook, and then you can pull it all off. I ran my cable all along the headliner and then once I got to my door I pulled the weather stripping back and continued to go along the headliner here, and I started running it across, and then I did the same thing up front. I pulled the weather stripping down, went across, and then once I got to the center post here I went down to meet up with my other wires at the bottom of my dash. I came down and here's the rest of where my cable came out. I want to mention that all the panels that I pulled off, they are just held in by clips, so you just want to be careful while you're pulling, just gently pull and the clip should release. At the end of our camera cable we're going to need to find the other adapter harness that's going to fit this as well. It's going to look like this.It's going to have the camera cable end, and then we're going to have a red, yellow, and white connector. For now we're going to go ahead and connect the camera cable side, we're going to line up the two arrows, put the connector together, and then we can secure it with a lockup. We're going to slide the cover over, and then come back with a little bit of electrical tape. Like I mentioned before we're going to have a yellow, a white, and a red. Now the red is going to be for our power that we're going to be sending to our camera. We're going to need to find the harness that has the black connector like this, and the end of it's going to have a black and a red wire. For now we're just going to be paying attention to the black connector. We're going to go ahead and plug the black connector with the red one, and again I'm going to take a little bit of electrical tape, secure the connection. Now our yellow connector, it looks like an RCA cable, we're going to find our monitor harness that we ran earlier, and we're going to have two connectors on them.One of them is going to say video-in, and one of them is going to say camera. We're going to want to connect it to the camera input, and you go ahead and plug it in, and again secure it with some electrical tape. We should have five wires left. These five wires are the only other ones we're going to be using. We're not going to be using the other yellow connector, or the white connector. On one end of our monitor harness we're going to have our filter fuse box attached with a red and a black wire coming out, as well as a green wire coming off the harness. The green wire we're going to need to tap into our reverse signal. Our red wire is going to be for our 12-volt power, but only when our key is in the on position. Our black wire is going to be our ground. Coming off of the camera end, again we're going to have a red wire that's going to be a 12-volt accessory power source, so only when the key is on, and our black wire is going to be for our ground as well. Since both of our black wires are going to be for our ground, I'm going to slip off the insulation that was on there.I'm actually going to strip back the end of my other ground wire so I have a decent amount just like this one. These wires are very thin so that's why I'm stripping back as much as I can, because now I'm going to take both my black wires and I'm going to twist them together, and now I'm going to fold them in half so that it makes it a little bit thicker. Since we are going to need to ground this, I'm going to be crimping on a ring terminal. If you don't have any of these you can pick one up on our website using part number 44-5356A. I'm going to crimp it into place. Fortunately we have a factory ground right here, right below our harness. I'm going to take this bolt out and secure my ground. I'm using a 10 millimeter socket to remove that bolt. Go ahead and reinstall that bolt. Our green wire like I mentioned before, we're going to be tapping into our reverse signal. Instead of running the wire all the way to the back, since we just came from there, we do have our wire harness here which somewhere in here our reverse light bulb signal will be in here. I'm going to start testing these and I'll let you know which wire it is.We tested our wires and we came to find out that this lime green wire with no stripes, it's just a solid lime green wire, with he vehicle in reverse, you get power, and if we put it in park we lose power. This lime green wire right here, that's going to be our reverse signal. I pulled my wire away from the harness a little bit, and I'm going to come to it, and I'm going to snip it in half, and now I'm going to strip back both ends. I'm going to be using heat shrink butt connector, and that's just going to give us a little bit more protection against corrosion, or any kind of moisture buildup. I'm going to crimp it on to my reverse wire, and you want to be careful not to cut or to mash any of the other wires while you're doing this. We have one end connected to our reverse wire, and at the other end I'm going to take my green wire, and I'm going to wrap it around the other end of my reverse signal wire. Then we'll put it into the other end of our butt connector. Then we'll crimp it into place. Quick tug, make sure everything is secure.I'm going to be using a heat gun to shrink down my connector. I just want to mention if you're using an open flame, you want to be extra careful not to burn the wires or the connector itself. We should have our two red power wires left. I'm going to strip back a little bit more off of this one, just so I have a little bit more room to work with. I'm going to do the same thing I did with my ground wires, since they're both going to a 12-volt power source, I'm going to tie them together and then fold the wire in half. I'm going to take another one of my blue heat shrink butt connectors, and I'm going to crimp it on to the end of my wire. We're going to have to find a 12-volt power source that's only on when our key is in the on position. We don't have a whole lot of room so we are going to need to pick up some extra wire. I had some sixteen gauge wire laying around, and if you need some you can pick some up on our website using part number DW02359-1, and that's wire by the foot. I'm going to take one end of my extra wire, and I'm going to strip it back, and I'm going to crimp it on to the end of my two power wires.In order to get our wire that we're going to need to get our 12-volt power source from we're going to be tapping into the fuse panel underneath the hood. To get through from the inside to the outside underneath our hood, we're going to need to remove this panel. We're going to have one, two, three push pin fasteners that's holding it in place. You can use a flat head screwdriver or a trim panel tool to remove them. These clips, if you pull out the center section first it will release the clip and then the rest of it will come out. Just like that. We're going to set this panel aside. If we come to the firewall we're going to notice a large grommet right here. If we can we're going to grab it and break it loose, which will allow us access to the engine bay. To make sure that our wire doesn't get damaged, I'm going to take a razor knife and I'm going to cut a slit so that my wire can feed up into the grommet and pass through.I'm going to take my airline tube now, and I'm going to pass it through, I'm going to push it through enough that I can grab it on the other side in the engine. Go ahead and take our power wire, started feeding it into our airline tube, and secure it with some electrical tape. Now we can go into the hood and start pulling our airline tube through. We want to pull all the excess wire out, and make sure that it doesn't get tangled up. I'm going to zip tie my power wire here to one of my factory wires, that way it just help keep it secure and keep it from falling down. We need to route our wire over to the passenger side where our fuse box is going to be. Our power wire is going to be tapping into a fuse that only gets power when our ignition is in the on position. With an extra set of hands we're going to start testing our fuses and I'll let you know which one we're going to use. If we come to the very front of our fuse panel where all our 15-amp fuses are, and towards the driver side, we go over to this 10-mp fuse here, this is going to be labeled for our rear camera.With the ignition on, we are receiving power here. We'll go ahead and shut it off and make sure that we don't have power when the ignition is off. As you can see with the ignition off we're not getting any kind of power source from this fuse, so this will be the fuse that we'll tap into. I'm going to pull this fuse out using a pair of needle nose pliers. Now that we know that that fuse gets power when the ignition's on, we're going to turn the ignition back on and figure out which side is getting power. With the ignition in the on position, one side that's going to be getting power is going to be our hot side, and the side that's not getting anything is going to be our cold side. It looks like the side closest to the back of the vehicle is going to be our hot side. We're going to need to remember that. Here I have a fuse tap. We are going to need to get one of these in order for us to install our camera. In our fuse tap, if we're looking at it the terminals closest to the prongs sticking out is where we're going to put our factory fuse back in. The top fuse location, that's going to be for our accessories, so I'm going to go ahead and put another 10-amp fuse in there as well.The reason why we needed to find out the hot and cold side is because it determines how we're going to put our fuses in place. The easiest way to remember is you want the hot side to connect to the terminal that is farthest away from the wire, so we're going to want it on this terminal to be our hot side. Before we put our fuse tap in, I'm going to se it aside for now, and I'm going to estimate about how much wire I'm going to need. Then we can go ahead and cut it and strip back our end. Our fuse tap already has a butt connector installed, so we can go ahead and take our wire, insert it into the butt connector, and crimp it down. When we went to put our fuse tap in, we figured that we we're not going to be able to clear this relay right here, so we're actually going to be using this fuse right above the rear camera, and that's going to be for our ignition. I already tested it and we know that it only gets power when the ignition is on, and the hot and cold side are the same as our rear camera. I'm going to go ahead and put my fuse temp right here.I'm going to put it into place. Before we start tidying up our wires and putting everything back I always recommend that you start your car and test the camera, and make sure everything's working. If we start our car and put it in reverse, we can see that the monitor and camera are both working. With that working we're going to go ahead and start tidying all our wires up, and putting all the panels back in place. Then we'll start to zip tie up all our wires and clean everything up. All the excess wire that I had coming from the back that met up up here, I'm actually going to bundle it together, and I'm going to lift up my carpet and I'm going to put it underneath my carpet, underneath the floorboard. That way it's out of the way, and I don't have to worry about it interfering with my pedals or anything else. I'm going to put our weather stripping back and just in general start tidying everything up. We're going to make sure that the wires going through the slit on our grommet, then we're going to put it back into position.Once we get our grommet back in place, we're going to seal up that cut that I made for my wiring with that silicone I was using earlier. Then we'll put all our panels back, including the one underneath our dash. My On Star plug and wires, I'm going to tuck up underneath my headliner, that way I don't have to worry about them hanging down and interfering with anything. You may have some things in the way underneath your headliner, just going to have to find a spot to tuck them up underneath and out of the way. Now we can take that cover that we took off in the beginning, we're going to slide it up around our headliner like that, then we can take the bottom piece making sure that we go to the inside of the outer top cover, and it'll lock into place. Then we can slide the cover over our mirror. Then we can put all the panels in the back. Finally we can put our license plate back in place. That will finish up our look at the rear view safety G-series backup camera, part number RVS-776718-DOS, on our 2011 Chevrolet Traverse.
Average Customer Rating: 4.7 out of 5 stars (14 Customer Reviews)

Has worked every time transmission put in reverse, picture clear and accurate to proximity. Unsure if it was a problem with the onstar section of the mirror, one time lost signal on a trip, but later worked flawlessly. Defiantly will keep you out of trouble when backing up.
One of our Technicians has about 20 years in truck aftermarket setup and thought that this rear view camera was as good as it gets. In all, the quality, installation flexibility, video quality and adjustments made this product something that we will purchase again. The compass and temperature were a bonus as well as remote control adjustments for grid lines , brightness and such. This shipped very quickly and all components are well labeled and packed. The directions are easy to follow. Our installation is mounted below a safety warning LED light so it is protected but something etrailer might think about is a surround escutcheon type thing for added protection.
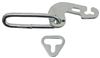
This style of camera in the mirror solves a lot of location problems on the dash. A good engineered product that should outlast the vehicle its installed on. I had good service from Etrailerr and the item was delivered intact and promptly.
I have been very happy with this product. It has had no issues, however this instruction manual could use some improvement. The unit has functioned flawlessly so far.
I bought this because my daughter and I had both backed the truck into the camper parked in the driveway. So far, it has worked for its purpose. It does not work as well as the factory setup in my Ford Escape. The main problem is seeing the image in the rear view mirror when the sun is bright. I also need to put on my reading glasses to see the image clearly (if I could drive with the seat back another 3 inches I would be fine). The auto-dim feature of the mirror works great.
After the initial install, I moved the camera from over top of the license plate to the bottom of the bumper beside of the hitch receiver, having cut a notch in some of the plastic trim so it would not block the view. That was a huge improvement.
When installing on a mid 2000s Ford Superduty, there are some good videos online for removal of the A-pillar trim and grab handle. There is a wire under the dash related to PTO functionality that provides power only when the key is switched on that you can use to power the unit. Run the cable to the camera under the sill plates (these are in the bottom of the door opening) to the back of the cab before exiting to the underside of the truck. Coil the excess wire here and zip tie it. When having major engine work done, point this wire out to the mechanic in case he has to lift the cab to do the work -- there will be enough extra wire to allow him to do this without disconnecting anything.
This product works great as a backup camera and mirror but the Bluetooth audio mic/speaker quality leaves a lot to be desired. Never could get the speaker loud enough, it would play audio over the stereo and the microphone picked up a lot of background noise.
No problems. Works as advertised. I use to have a wireless camera, but that would disconnect now and then, or pick up some ones security camera when driving by. Wired connections are the way.
Great choice. Works very well. My truck lacked 3 things that I had gotten used to having - compass, outdoor air temp gauge. and rear view camera. This solved them all! Takes some trial/error to get temp probe in right spot.
auto dimming backup mirror works great. had a local shop install it---I'll never be without a backup camera in any car I own
Great unit. My only recamindashion would be to watch the instal video and get everthing needed to install in one ordre.
Still happy with my purchase after one year. It is a quality item I installed in a 2009 Honda Pilot for which install I wrote a guide on the Pilot forums. Cheers!
WORKS GREAT...smooth install with the helpful video on your website
Do you have a question about this Backup Camera?
Info for this part was:
At etrailer.com we provide the best information available about the products we sell. We take the quality of our information seriously so that you can get the right part the first time. Let us know if anything is missing or if you have any questions.


Larry S.
6/9/2019
work just as great now as it did when first Installed.