
Thank you! Your comment has been submitted successfully. You should be able to view your question/comment here within a few days.
Error submitting comment. Please try again momentarily.
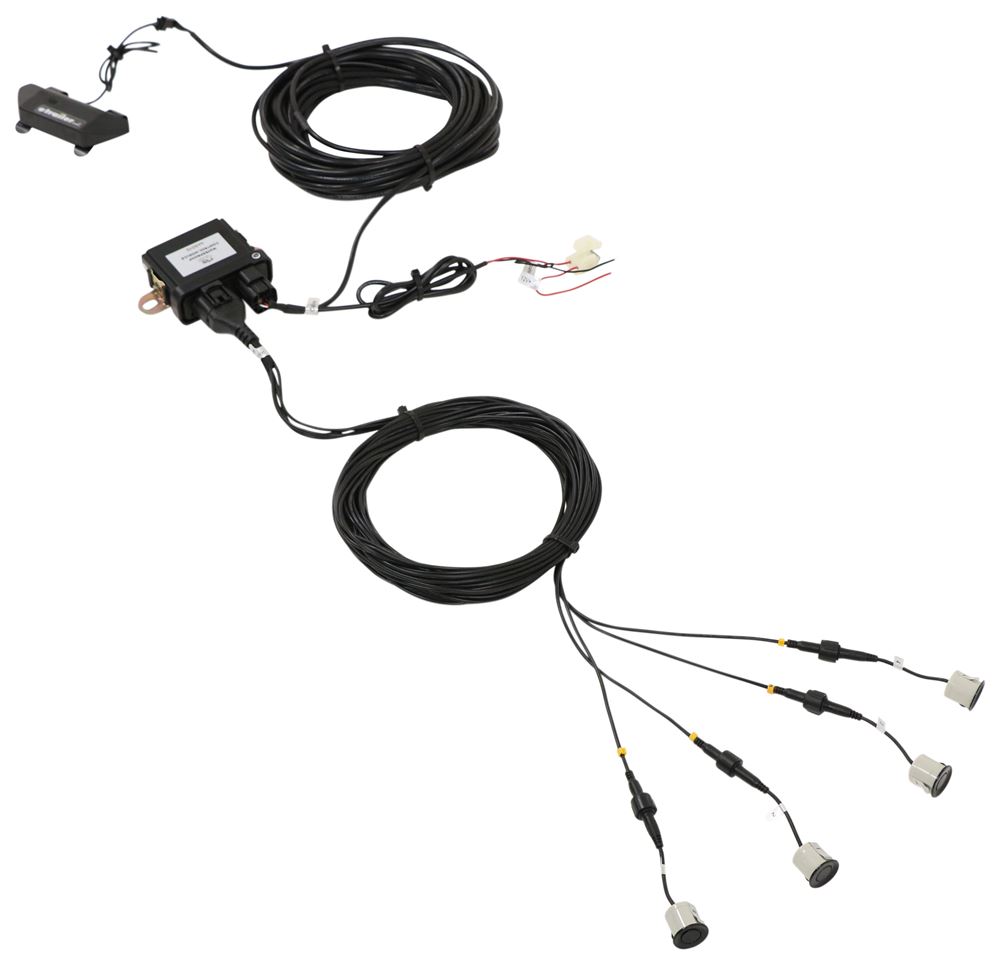
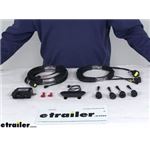
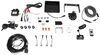
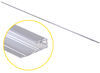
This sensor system includes 4 sensors that mount on your vehicle's rear bumper to detect obstacles. Includes visual and audible alerts, waterproof cabling, and ECU.
Features:
Specs:
 Alternate Instructions
Videos are provided as a guide only. Refer to manufacturer installation instructions and specs for complete information.
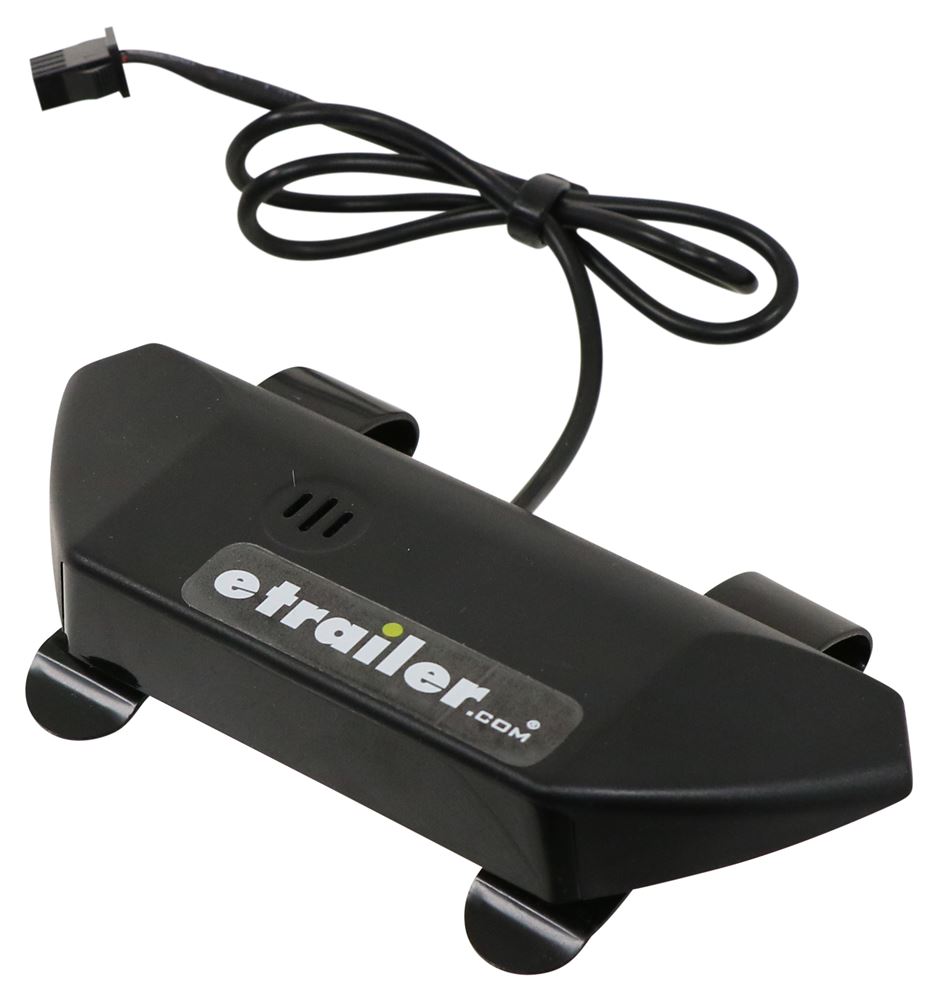
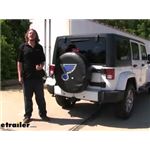
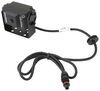
Hi there Jeep owners. Today in our 2016 Jeep Wrangler Unlimited, we're going to be taking a look at and showing you how to install Rear View Safeties backup sensor system you've probably ridden in a vehicle before with audible backup sensors. With this system, you can easily add it to any vehicle that doesn't have an existing set of backup sensors.And what's nice about adding it yourself is you've got a lot of options to choose how you want to use it. We've currently got our system installed on a Jeep just as a typical backup system. All four sensors are located in our bumper and we've got a service cart currently located right behind the vehicle, and you can see here that our system's detecting it, indicating that we have an object nearby.As you can see here on our display, as I go closer, the audible beeps will increase in intensity and they'll beep closer together and our number will decrease on the display, and as we go further away it will decrease in intensity as well as the number. And once we get far enough away, our system will go blank and it won't beep anymore.Here you can see at the back of our Jeep we've got our four sensors, there's one in each corner and there's two here in the center, and this will give us complete coverage across the back of our Jeep so we know when we're backing up it's going to detect it.On your display, you'll have two clips that come with it, and these are great for flipping into a headliner or helping you get it mounted.
On the bottom, we're going to have two switches. Here on the right we're going to have our volume intensity. There's three settings, off low and high, and then on the left we're going to have our display output orientation, and that just depends if you want to mount it like this on your roof or if you want to mount it down on your dash.We'll begin our installation at the back of the vehicle by choosing the location where we want our sensors to mount. We've decided to mount our sensors with two in the center of our bumper here and two on the outside at the angled portion. Now again, you can mount these wherever you'd like.
We're just trying to get the most coverage as possible at the back of the vehicle to ensure that it's going to be able to detect anything when we're backing up and that there's no point that's going to be left exposed without that audible coverage.The location that you've marked to put your sensors, we'll need to drill out to either 21.5 millimeters if you don't use the grommets that come included with the kit, or to 25 millimeters if you use the grommets that come in the kit. We're going to be using the grommets, so we're going to drill it to 25 millimeters, but before we do, we're going to start by drilling a small pilot hole to ensure that there's no components behind the bumper here before we enlarge it.Now that we've drilled it completely through and we verified there's no components, we can go ahead and enlarge the hole to your 25 millimeters to be used with the grommet. We're going to continue straight through to the other side because we're going to need to be able to feed the wiring from our sensor back through this side, so we're going to need a decent size hole to be able to get the connector through. We'll now repeat that process starting with your small pilot hole bit and then enlarging it with the remaining three holes.Depending on where you decided to mount sensors, you may need to take a file to clean up some of the rough edges after drilling it. We'll now insert our rubber grommets into the holes we drilled.
You'll note here that one side says up on it, so I'll make sure that faces up. And if you look at the orientation, the two flat spots is going to be on each side if that is up. You could potentially put it upside down. Just make sure you got it there when you start.It's going to be a little tight going into the hole, but that's okay. We want it to be a tight fit to ensure our sensors stay in place.
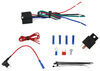
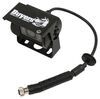
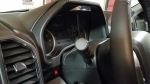
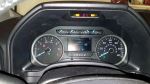
And then you repeat that for all of your remaining holes. Now if you chose to mount yours in the side like we did on the angled part here in the black, your drill bit's not going to be able to drill all the way through like we we're towards the center, so we're going to have to come on the inside underneath here and we're going to have to drill out a hole so we can get our wiring fed to our sensor. We're going to do that for the other side as well.We're going to start by using number one on the hole on our passenger side, and then working our way from the passenger side towards the driver's side, feeding in numerical order our wires through the holes. Then we're going to repeat that for all our remaining holes. We'll now attach our sensors. You'll notice each sensor has a number labeled on it. We're going to match that up with the number of the wire that we poked through. You also want to notice on the back of our sensor, it says up on there, so when we go to insert it, keep that in mind. We're going to connect them right now. They simply push together and then use the nut that's pre attached on your harness end and thread it onto your sensor.Now we're going to slide it in, paying careful attention to that up mark. And we're going to work it into our grommet. Now this is going to be a tight fit. That's okay. It's what we want. We don't want our sensors falling out. So just gently push it in. Now that we've got it all the way in, we'll repeat that for all of our remaining sensors.Next we're going to mount our module. We're going to do this just in front of the rear axle where our evap canister is. We're going to mount it to the bracket here towards the center of the vehicle in this orientation with our connectors towards the middle because we can just kind of route those up and over to get those to the front, and this will keep it out of the way nice and safe. There's no mounting hardware included with your module, so you will have to provide your own. We're just going to be using some self tapping screws.At this point, we can take all of our sensor wiring that we connected here at the back. We're going to clean it all up, so we've gone ahead and ran it down our frame across the back towards the driver's side using zip ties and wire clamps along the way. If you need zip ties or wire clamps, you can pick those up here at etrailer.com. Once we got it over to the driver's side, we then started working it forward, staying on our frame rail, avoiding anything excessively hot and any moving components. We stayed on top of the frame rail all the way forward until we hit our fuel filler neck here. From here, we zip tied it to the fuel filler neck, ran it over towards the center of the vehicle, and from here we bundled up our excess wiring and zip tied it to the top of our evap canister. And we've got our connector here right next to our module. We just come off this open hole and we'll plug it right into the large connection.Now we'll take the other harness that comes in our kit. This has two different wire looms coming out of it. One is going to go up to the front of the vehicle where we're going to route it inside for our monitor, and the other one is going to connect to our wiring coming off of our taillight assembly for our reverse signal. So we're going to go ahead and plug that into our module here, and we're going to start by running the wire towards our reverse light. So with this one, we're just going to go up, we took it over our fuel fill neck, zip tied it to the clamp at the bottom of the vehicle here, and then routed it up above our axle. Once we get to this beam here, we zip tied it to this beam and then ran it straight across.Now we've got our wiring hanging down here just outside the side of the frame rail. What's nice about this is just above where this wiring is, is the access point to our driver's side taillight.A little note, you may need to extend your wiring a little bit depending on where you decided to mount your module and also where you want your fuse to end up. So we extended ours just a little bit to make our fuse be in a more accessible location in the future. If you need some wiring, you can pick that up here etrailer.com. We used heat shrink butt connectors to make that extension and that's going to keep out any moisture to ensure a long lasting connection. You can also pick up heat shrink butt connectors here at etrailer.com.We're now going to remove our driver's side tail lamp assembly so we can get our wiring routed to it and make that connection. We're going to use a Phillips head screwdriver to remove the four screws located in each corner. We've gone ahead and reached down and then we pulled our wires up. Again, because where we had routed them, there's an opening right there. And we'll now connect it to our taillight assembly here. We want to connect it to our back up bulb's wiring, so if you flip it over here, this is our back up bulb right here. And we're going to have two wires we're going to connect, our power and our ground. Our power's going to go to the white wire with the green stripe and our ground's going to go to either of these two black wires.Now we'll take our quick splice. We're going to position it over your wire. We've got it over our power wire there, and we'll take our power wire here. We're going to push it in the other side and then we'll use a pair of pliers or channel locks to squeeze the quick connect down. We're going to repeat this with our black wire by using the quick splice to connect it to one of the other black wires.Now you should note in the instructions it says to connect it to constant power, and it actually says that right here on the sticker, on the power wire as well. We're going to connect ours to our reverse light because that way the system is only going to operate when we have our vehicle in reverse. You could choose to connect it straight to battery power like it recommends. However, your system will be running all the time if you do it that way. And this could be bad for you if you, let's say park it in the garage, you pull in, you shut your garage door, and you got out the vehicle and you didn't realize it, but once you got out and the door finally shut all the way, the door was triggering your reverse sensors and now you've got a dead battery in the morning.So to get around that and to make it operate only when we want it to operate, we're going to do it this way. Because there are some other issues with hooking it to other circuits, like say you hooked it to a key power circuit. So it was only on when the key was on. That means it's going to operate at all times when the key is on, so if somebody comes up close to you in traffic or you're sitting at a stoplight, it may detect them, and that could be kind of annoying. So it's just important to determine how you want the system to function.We're going to go ahead and close those shut and we've now got our connection made here. We can reinstall our taillight assembly. And now with our taillight back in place, we're ready to route our wiring up to the front. We routed it across here. From there, we went on top of the frame and then we came down and then we went down the side of the frame to this hole here. From here, we went inside the frame and we just routed it all the way down and staying inside the frame until we get up to this point here. We came out the hole here in our driver's side fender well and then we just pushed it up into our engine compartment from there. If you're wondering how we got it in the frame, we used a fish wire. A fish wire is just anything that's semi-flexible but also semi-rigid that you can push down and tape your wiring to and then pull it back.We then pulled it up and we zip tied it to the wiring harness in the back of our horn here and we went through the open grommet here on our firewall. Now this vehicle has an automatic transmission, so this is typically the grommet you'd find where your manual transmission's master cylinder would go. We just went through that grommet right there. Once we got it through the firewall, we went ahead and removed this side panel here. It just pops right off. You can stick a screwdriver in and it pops out, and we ran the wire up and we came out behind our dash right there. This way we can plug into our display. And this is a good point to test everything out and make sure it's all working properly.We've gone ahead and turned the vehicle on and place it in reverse. You can see that our display's illuminated. I'm going to go ahead and walk in front of the sensor and you can hear there that it has detected me. So we know it's all working properly. At this point, all we need to do is button up our wiring with some zip ties and clean everything up.And that completes our look at Rear View Safety's backup sensor system on our 2016 Jeep Wrangler Unlimited.
Average Customer Rating: 4.8 out of 5 stars (6 Customer Reviews)
This sensor system includes 4 sensors that mount on your vehicle's rear bumper to detect obstacles. Includes visual and audible alerts, waterproof cabling, and ECU.Overall, the installation went well. The video helped lot. I chose to not use the clips on the console, and mounted it underneath on the top of the bezel around the instrument cluster. The on/off switch was kind of hard to get to, so I incorporated my own switch on the dash. By running a separate ground wire through to the dash to that switch, I was able to achieve this. I use the on off switch when hooked to a trailer. This unit seems to fill my backup sensor needs, without an extra effort to install. Works pretty good too.
great product , a lot less expensive than factory
My order arrived quickly and was pleased with the cost. The installation video on the website is informative. I have yet to install the back up sensor system but expect it to go smoothly. Purchased for a 2019 Ford Transit 250.

I installed it on the front of my truck,to see the vehicle in front of me,when I park.dont want to get too close.

Do you have a question about this Backup Camera?
Info for this part was:
At etrailer.com we provide the best information available about the products we sell. We take the quality of our information seriously so that you can get the right part the first time. Let us know if anything is missing or if you have any questions.


Michael B.
2/13/2021
Still working as good as the day I installed it.