
Thank you! Your comment has been submitted successfully. You should be able to view your question/comment here within a few days.
Error submitting comment. Please try again momentarily.

Videos are provided as a guide only. Refer to manufacturer installation instructions and specs for complete information.
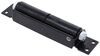
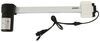
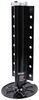
Speaker 1: Today on this 2018 Toyota Avalon, we'll be having a look at and showing you how to install the Rear View Safety Blind Spont Sensor System, part number RVS-BES02.Here's what our blind spot detection system look like installed on the rear of our vehicle. Keep in mind, it's going to look identical on the other side. We'll have one sensor for each side of the vehicle. Here's what it looks like inside of the vehicle. We'll have two indicator lights like this one, which typically you'll mount on your A pillar so you can see them easily while you're driving. The one on the driver side will be for your driver side blind spont, and the one on the passenger side will be for your passenger side blind spot.Now, the reason you're going to want this system is if you have a vehicle that's not factory equipped with blind spot indication, this does make it a lot safer when you're trying to drive down the highway and change lanes.
You don't want to accidentally merge into somebody or change lanes into them if they're in your blind spot. This will alert you to their presence. Now we'll give you a brief example of how it's going to work on the driver side of the vehicle. Passenger side's the same way.I'm going to walk towards our blind spot zone, and you'll see the light come on. You'll notice the light comes on when someone's in the blind spot area.
Now, if we turn on our driver side turn signal and we go towards our blind spot area, we'll get an audible beep to go along to alert us to their presence. Now we have a dash-mounted speaker to alert us with a beeping noise when something is in our blind spot when the turn signal is on. We can disable this by sliding a switch on it to the off position, and we have a low volume level and a high volume level.Now, what sets this apart from other options out there on the market is that this is a very simple install. It provides a very clean and factory-like appearance, and we don't have to worry about finding a place to mount cameras or display screen, so we have a very uncluttered dash. It also involves a lot less wiring than some other systems out there.
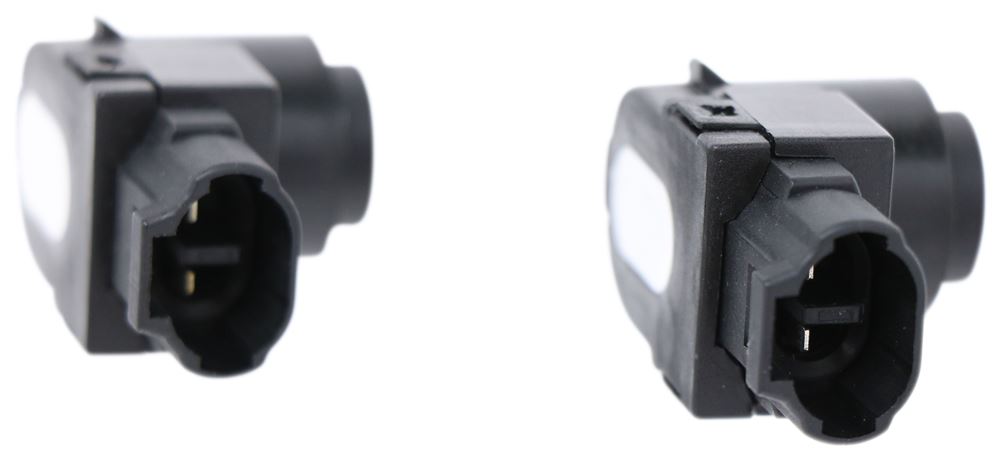
It's a very cost-effective solution for you.To begin our install, we went ahead and made a mark on the back bumper where we're going to need to drill a hole to mount our sensor. We made sure we made the mark according to the instructions, and we've already verified that there's nothing that's going to interfere with the sensor behind the bumper cover of this area. Now keep in mind, everything you do on one side you're going to repeat on the other side. Now we're going to take our larger diameter hole saw, line it up with the mark that we made, and drill our hole.Now we'll get our sensor oriented for installation. We'll first start off by taking our wiring harness here and plugging in the back of a sensor.
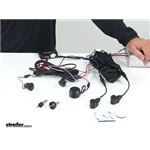
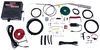
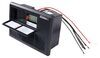
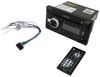
It only goes in one way. Now we'll take our grommet here, the flat side will face against the sensor here and just wrap around it like that. This is ready to be installed now.Our mount for the sensor, there's an arrow. This needs to face up in the vehicle. This will go into the bumper like this, be on the outside of it, and then our sensor only goes in one way. It'll go in like this and lock in place into here. Now our arrow's facing straight up. We'll take our bracket and just push it until it snaps into our bumper, like so. Now we'll take our sensor, go up from underneath our bumper cover, and lock it into the bracket. Just push it until it snaps into place. Snapped in, we're good to go.Now we need to determine where we're going to mount our indicator lights inside the vehicle. Now typically, you'll want to have these on the A pillar. We're going to mount ours on this flat surface here, in this general area. Now, in order to do this, we're going to have to remove the A pillar from the vehicle and we'll show you how to do that now. We're going to grab our weather stripping on our door and pull it away from our A pillar. Now we can grab the A pillar and we'll pull it away from the vehicle.Now, we have this tether here. This holds the A pillar in place in case our side impact air bag ever has to deploy. That way, this doesn't come and injure us as this air bag comes down. We'll have to remove this tether. It's actually pretty simple to do. We can just grab the end of it, and we'll twist it 90 degrees. Once we get in the slot here, we'll be able to push it down and then work it out of the A pillar, like that. Now we can grab the A pillar and pull it towards us and off the dashboard and out of the vehicle.Now, on the back side of our A pillar, right where we want to mount our indicator we actually have a good mark from the factory that we can use to drill our hole. There's a circle with an N and an A over it. We'll use our small hole saw and go right through the center of that mark. This will ensure that we're symmetrical on both sides of the vehicle. We're going to go through the back side because this is wrapped in fabric. We don't want to fray our fabric. Now we'll start to go through with the actual hole saw itself through the plastic, and we'll stop once we start to hit the fabric. Now we'll take a utility knife and just kind of lightly score our fabric. We'll go in kind of a cross pattern, just like that.Now, since we're working on the driver side A pillar, we're going to use our indicator light that has the black wire and the other wire with the white stripe. The passenger side will get a black wire one that has a red wire as well. We'll push the connector through the front and out the back. Now, this has a triangular indicator on it. I'm going to line up the base of the triangle so it's parallel with the base of the A pillar. Then I'll just push it into position. As you can see, by notching our fabric the way we did, it's completely flush against our A pillar, no fray sticking out anywhere. Here's what it looks like pushed through on the back. You can see it barely sticks out any, so we don't have to worry about any interference on our A pillar with anything that's behind it.Okay, with all of our indicators and sensors now mounted, we can work on the process of wiring. We'll take out our trunk panel here and set it aside. On the driver side of our vehicle there's this rectangular black box. This is the cabin vent that, when we close the doors on our vehicle it'll let the excess air pressure go out so you don't have to worry about having your windows pop out of your vehicle. This is where we're going to pass the wires through that are going to go to our sensors on our fascia.We'll take this connector here that's labeled number two, this is our long connector. We'll stick this one through first. We'll just push it through the vent and it'll come out behind the vehicle underneath. Once we have number two pushed through all the way through, we'll get to number one. That's the shorter one that comes off our main harness. This is the one that goes to our driver side sensor, so we'll push this through as well, as well as some of our harness.Now we're underneath the vehicle on the driver side. Here's where our wires came out. If we look straight up, we can see the wiring harness for our sensor. Now, the outside of it's threaded. This end will plug into it, and then we have this nut which will screw onto that threaded section and lock it into place. We'll go ahead and do that, we'll show you what it looks like once we're done. Here's what it looks like all connected with our screw fastener now tight to secure our plug.Okay, our wire for our passenger side connector, we routed over our exhaust, securing it with a few zip ties. You can pick those up on our website if you need some. We went above this plastic panel here, securing it with our zip tie again, and we connected it to our sensor the same way as we did on the driver side. With everything connected, we pulled our excess slack back into the trunk of the vehicle. That way, nothing's hanging down below and it's away from our exhaust.Now we need to get access to our turn signal wires in order for our sensors to work properly. The easiest way to do that is to get to our turn signals in the rear of the vehicle. We need to remove this threshold here first in order to gain access to the hardware that secures our taillight assemblies. To do that, we'll remove our cargo tie down hooks. We push down on this part in the middle and we can pull out. Then we have a plastic push pin fastener. The way these work, there's a center section that we can pop out with a trim panel tool. Then pull the entire clip out. We'll do the same on both sides of the vehicle.With those removed, we can lift up on the threshold and pull it out of the vehicle. Now we can pull our carpet back. Just kind of fold it out of the way, and we have access to our wiring behind our taillight assembly. Now we're going to remove this covering over our wires so we have access to our wires. We'll just use a pair of scissors for that, making sure we don't cut any wires underneath. Once we have it cut back enough, just cut that off and we have plenty of wire to work with now.Now we turned our turn signal on on the driver side. We're going to test and see which one of our wires is for our turn signal. We have determined it's this green wire with the yellow stripe. We'll go ahead and cut this green wire with yellow stripe right in the middle. We'll strip back some insulation on both ends now. Now we'll take some wire. You can pick this up on our website as part number 16-1-1. It's sold by the foot. You'll probably need about 20 feet, so order a quantity of 20. It'll be black wire. For our purpose, we're using some colored wire that we have lying around to make it easier to explain the video.We'll use yellow wire on our left side. We'll strip back some insulation. We're going to tie this in with one end of our factory wires. We'll use a butt connector. These are heat shrink butt connectors, you can pick these up on our website for 14 to 16 gauge wire. Crimp it down, and the other end of the factory wire will go into the other end of the connector, and it'll get crimped down as well. Now we use a heat gun to shrink down our butt connector. You can pick up one of these on our website, too. Here's what our butt connector looks like shrunk down.Now on our passenger side, we peel back our carpet same way as we did on the driver side and remove some of our covering over our wire. Now we'll test and see which wire is for our turn signal over here. Okay, and just like on the driver side of the vehicle, it's a green wire with a yellow stripe. We'll turn our turn signal off now, we can make our connection. We'll cut this wire right in the middle, strip back insulation from both ends.Now we'll take some green wire, strip back some insulation from one end of it. Now we'll twist that together with one of the factory wires. Doesn't matter which end, just one of them. We'll place the butt connector over the wires that we just twisted together and we'll crimp it down. We'll place the other factory wire in the other end and crimp it down as well. We'll repeat the process of using our heat gun to shrink down the butt connector. Here's what it looks like on the passenger side of the vehicle with our connection made.Our green wire, we routed along where our threshold covers, along this factory wiring harness, securing it with zip ties along the way. Then we took a green and yellow wire, brought along the side here behind our carpet on the driver side and placed them through a grommet there, along with the wiring harness that goes to our sensors in the bumper.The grommet is right above our driver side rear seat shoulder area right here. The wires came through there. We pulled back on our interior panels and routed the wires alongside this factory wiring harness that runs underneath our thresholds. It comes out on our B pillar here, still following the wire harness. Then on the driver's seat area, you see we used clips to hold the wiring harness in place. We just clipped the wires down inside of that, and we have it coming out right in this area here where we can start making all of our connections.Now, with all of our wires now routed that need to go to the back of the vehicle, we can put these panels back together. They simply just pull up to release from the vehicle. There's no special fasteners or anything you have to worry about. You just got to pull up on them gently, and you can get them out. With our interior panels put back together on the inside, we can do the same in the trunk.All right, with our panels back throughout the car, we drop down our pull wire from our dash in the very top where the A pillar was, and we connected the short wiring harness here that has the black wire and the black wire with a white stripe on it as well. We taped it to the pull wire, and now we'll pull this up to connect to our indicator on the driver side. We'll now plug the indicator into our wiring harness on our A pillar. Here's what it looks like with the connection made.Okay, now we can reinstall our A pillar. Once you have it clipped in the bottom of the dash, you're home free from there. We'll reinstall our tether. Getting your tether back in place can be a little challenging. We have it in, we can make sure it rotates 90 degrees. That way, it'll grab ahold of the pillar and we can snap it back in place. Weather stripping will go back on. We routed our connector for the passenger side indicator light behind the center console, up, and repeated the same process to make our connection and we reinstalled the A pillar.This black wire right here, this is our ground wire off of our harness. We crimped on a ring terminal and attached it to this stud that holds our fuse box in place. There isn't a nut provided, so we use an M6 by 1.0 nut to secure the ring terminal. Our brown wire in our harness, this is our left turn signal trigger. We connected that to the yellow wire that we brought up from the rear.Our purple wire is our right turn signal trigger. We connected that to the green wire that we brought up from the rear. This white wire here, this is for a light trigger which will dim our lights on the indicators when our headlights are on. This way, we're not blinded at night by a bright indicator light. We connected this to a fuse tap, which we have available on our website, to the taillight fuse.Now, the way these work is you remove the original fuse. This tap goes in place, and you can reinstall the original fuse to protect that circuit, and you'll have a new fuse that you put in to power the accessory. Now, the original fuse I removed is a 10 amp like this. They're short legs. You'll need to use a standard 10 amp ATM fuse. The last wire connection that we need to make is our red wire. This goes to an accessory ignition source. We used another one of our fuse taps and removed the 7-1/2 amp fuse for the accessory ignition fuse and replaced that with a new ATM style 7-1/2 amp fuse and made our connection that way.We mounted our speaker using the provided double sided tape on the bottom right hand section of our dash, making sure we didn't put it over our air bag. That plugs into our wiring harness here, that has the orange and purple wire. We then plugged our two wiring harnesses into our control box. This white connector here is from the wires that go to the sensors in the back that we routed forward earlier, that plugged into the white socket. This black one here is for the LED indicators that we mounted into our A pillar, and also has the wires that we mounted for our connections in the fuse box and for our speakers, and that will simply plug into the black socket.Okay, we went ahead and mounted our control box to the side of our fuse box using the provided double sided tape, and then we tucked up the rest of the wires with a couple zip ties and stuck them up behind the dash so they're not going to interfere with our feet as we're driving. That'll complete our look at and showing you how to install the Rear View Safety Blind Spot Sensor System, part number RVS-BES02 on this 2018 Toyota Avalon.
Average Customer Rating: 1.0 out of 5 stars (1 Customer Reviews)
This was by far the worst purchase I have ever made. This product is more of a hazard
when driving then a help! I had it professionally installed on my 2021 GMC Canyon. If I use my turn signal, the buzzer goes off then while driving road signs, mail boxes, trees , shrubs and almost anything on either side of the road set the indicator lights and buzzer off. I would highly recommend trailer discontinue carrying this product as it is Junk
Do you have a question about this Backup Camera?
Info for this part was:
At etrailer.com we provide the best information available about the products we sell. We take the quality of our information seriously so that you can get the right part the first time. Let us know if anything is missing or if you have any questions.


Jenny N.
1/28/2022
I reached out to the manufacturer about the performance of the camera and they had a few follow up questions. Would you be able send a photo of where the sensors are mounted? Does the system buzz when at stops as well?