
Thank you! Your comment has been submitted successfully. You should be able to view your question/comment here within a few days.
Error submitting comment. Please try again momentarily.
Customers prefer these similar products
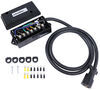
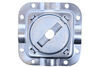
This trailer wiring junction box provides a fast, easy way to connect your trailer's wiring to either a 6-way or 7-way connector. Makes replacing your trailer's connector simple.
Features:
Specs:
Videos are provided as a guide only. Refer to manufacturer installation instructions and specs for complete information.
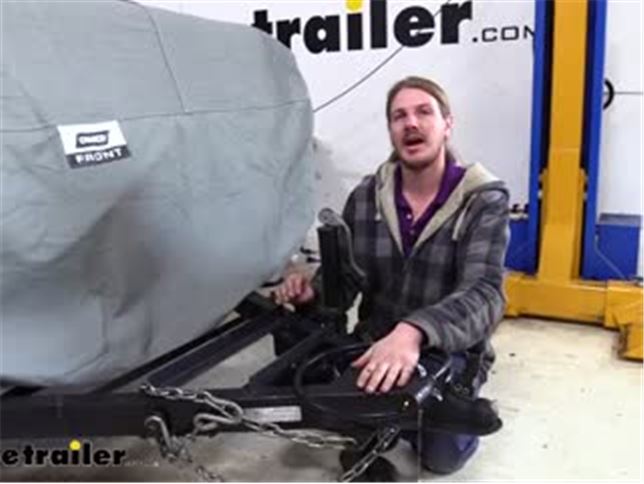
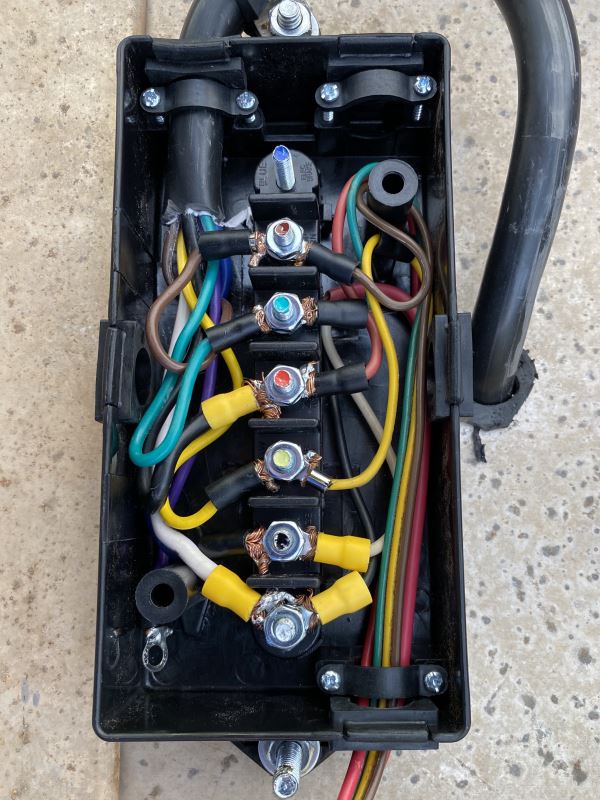
Hi there neighbors. Today we're going to be taking a look at etrailer's wiring junction box. It has seven studs on it.So, you have a spot for each wire on a seven-way connector. But you're not limited to using this with the seven-way, you can also use it with six-ways, five-ways, and four-ways. You'll just have some open studs so you can use for other accessories. Having a junction box in your trailer makes performing any maintenance much easier, as well as adding additional accessories.
Because you have multiple studs, and on this box they are color-coded for the particular wires that are coming out of your seven pole connector, and that makes it easy to make connections to whichever circuit you may need to.So, let's say you're adding brakes to your trailer. We can add the brake wire that we need for our brakes coming off the blue stud, which comes from our brake controller in our vehicle. To the back we can easily add those or for doing any repairs or maintenance we can easily get in here to do that. The yellow one here is for your reverse circuit. We don't have reverse lights on this trailer, but if we wanted to add reverse lights in the future, it'd be really easy.
So, we can just run the wire up connection to here. And you can do other things with other accessories just in its intended purpose. So, while this is for the reverse light circuit you could say, put a backup camera on the back of your trailer, and wire it up to here. So, whenever you pull it down and reverse, it turns the backup camera on. So, you can see when backing up your trailer.Another benefit of having a junction box is it just helps keep things nice and neat.
We've got all our wires in this box and all the grommets and entry points. Seal it up to keep it protected against the elements which allows us to just have a more reliable wiring circuit on our trailer. And it also is great for repairs. If our seven-way here we're to get damaged, we may need to replace it. And a lot of times you're just cutting your wire, and then you're just butt splicing it in.
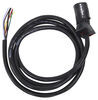
But then you've got a section of wire now that has butt splices in it that could potentially get tugged or pulled. Where with a junction box here, we can run a new wire from our seven-way, right into the junction box, which is a nice short length, just enough to get from the front of our trailer to our connector. And we can have it completely solid all the way with no butt connectors in between. Because we can connect it right to our studs here.It also comes with all the ring terminals you'll need to get your connections set up to the post, which includes the trailer side and your seven-way side. We've currently got our box mounted on the frame at the front of the trailer, but you can Mount it really in any orientation that works best for you. There's five different entry and exit points on your box here that you can access. We've got top and bottom on the long part. We've got two on the one side, which is what we're using in and then right back out, and we do have one on the back if you wanted to go in with one and pass straight on through. When screwed down tight, our cover will keep out any dirt, debris and moisture ensuring long lasting connections of all of our studs and components hooked to them. Now it does come with the screws for the cover here, but it does not come with screws to get it mounted onto your trailer. And that is likely due to, depending on the location that you want to put it on your trailer, there's different mounting options.We just use self tapping screws and ours to get it mounted into our frames. It's this enclosed, but if your frame wasn't enclosed, you have the option to drill holes and then Mount it up with nuts and bolts, or if it you we're putting in inside of an enclosed trailer or something like that, you could use the wood screws to run it into there. We're going to show you how to take a new seven-way, and get it all wired up. As well as upgrading our trailer from the wiring that just runs down the frame to a junction box. So we can easily add accessories and test things in the future. We're going to start by mounting up our junction box. We're going to be placing ours underneath the storage area here for where you'd have your batteries. We can put it right here on the frame and we're just going to be using some self-tapping screws to get it mounted up.These don't come included with the junction box, but you can fix them up at your local hardware store. The best place to Mount your junction box to somewhere where it's going to be out of the way, but also protected against anything that's going to hit it. So, typically on the inside of your A-frame is a great place, or if you want to put it underneath the trailer on the frame, that's another good spot as well. Depends on where your wiring's located, where you might want to do that. Since ours is popping out of the hole in the frame here, putting it near there's a great option because we can easily bring it right out of that frame into the box here, and then wire up our new seven pole connector and everything right to the box. And this will give us an easy access point for adding any accessories or performing any testing if we have to do any maintenance on the trailer. We're just going to run our self-tappers in. So, I'll get it mounted up. It's going to hold it in the place where we want it and just start running them in.We now need to access the wiring here so we can bring it into the junction box to start making our connections. So, you may need to peel back some sheathing and things like that. So, we're going to go ahead and peel some back here so we can get that off, or you just peel it back however you're sheathing maybe set up. We need to make sure we've got enough length to get into our box and make all the connections. Just like that, should be plenty about there. And we can go ahead and cut all of our wires. Now if you have a battery hooked up or anything, you may want to disconnect your battery, or turn off your battery disconnect however you need to do it to ensure you don't accidentally short out your powers and grounds and things like that. We don't have a battery on our trailer right now, so we're okay. We're just going to go ahead and cut all these. Now that we've got everything cut, we can strip back each one of the wires that we just cut.We can now take each of the wires that we stripped back, and we're going to crimp on one of the small ring terminals that come included with your junction box. We only have six here, you may have seven on yours if you have a circuit for backup lights on your trailer, we do not on this one. And we're just going to repeat that process until they're all crimped. On your thicker wires it may be easier to get their yellow ones on there is, they are ever so slightly bigger than our black ones. Now most of your wiring does have sheeting on it, but if you have a section that doesn't, you may want to wrap it in electrical tape. I'm just wrapping a small section here for where it's going to pass through the junction box, because you do clamp it down tight. So, this give us a little bit more solid surface to clamp to. We do have multiple access points on our junction box. They just slide out and these are where we can slide our wiring in.They'll also have on the edges clamps that hold our wiring in place to act as a relief break. So, we're going to go ahead and remove the screws on the clamps so we can put our wiring in. You can really just take off the one screw if you want, and then you can just twist this piece aside. And you do also receive new grommets that come in your kit. That will slide in place where the old ones were, but these ones have a hole in them. So, you can pass all your wiring through there as well.And we will just start color matching our wires to the appropriate studs. I'm going to slide them all down underneath there to keep them out of the way. After we remove the nut, there's also a washer on this. Slide that off and you can slide your wire on, and then follow it up with the washer in there. We're just going to leave it loose for now, because we are going to have to add more. That's just going to hold it in place. For now just follow down the line, just matching up our wires. Once you've got everything connected here, when you wire up your seven-way, and you want to make sure you match all your functions appropriately for how they're hooked up to your seven-way end. Now that we've got everything loosely connected here on this side, we can start building our new seven-way end that we're going to connect over here.You can reuse your old one if there was nothing wrong with it. Where you had cut it, you can just then resplice it back up, matching those wire colors back up. But since ours was damaged, we're going to be making a whole new one. And we'll go ahead and walk you through that too. Here we've got our old seven-way connector. You can see it's all busted up. We're going to be making a new one. And the easiest way to make a new connector is to just wire it up exactly as your old connector was, just use it as a reference if you can. So, since we still have something left, we can use it. And if not, then you can just wire it up per function. And we'll go over the functions at the end for each one of the outputs. So, that way, if you don't have a reference with your old one, you can make your own completely new.There are a couple of screws, usually that hold the wires in place. And there is typically another screw located up here on your seven-way. That parts been busted out on this one so there's nothing holding that part there. But this holds our wires so we do need to loosen this up back here, and that will allow you to push the wires forward, revealing the backside of your connector.And this is where we're just going to start using this as our reference and wiring everything up. We're going to go ahead and take our connector and loosen up the bar screw here at the back just to get that out of the way. And if you feel for over, there's a small set screw there, we also need to take that out. In a lot of cases, you don't have to take it all the way out. You can just loosen it up and that'll be enough to slide the front portion out. So, then we're going to go ahead and take our wire, feed it in through the back. Then take that out as well and make it a little bit easier.Getting the wire fit in and our wire should push the end out just like that. Since we took that set screws we're just going to go ahead and just keep pushing it through a little bit until we've got enough to where we can work with our wire here. It's a little bit easier to slide it through first, before cutting it. And that way you also can ensure that down inside of here, we're going to have the sheathing where we're going to be pinching it down. So, we really don't want to strip back the wires here too far, we're only going to go probably about to there.And we're just going to use our razor knife to cut that. You can go ahead and peel it back. And then we're just going to use our wire cutters here to just snip the rest of this off. Just want to be careful not to cut your wires. Now that we've got all of our wires exposed, we're going to strip back each one of these wires. So, here we've got our two ends holding them side by side so we can compare the two. And we're just going to start making connections. Easiest thing to do is to just pick one color, and then just start with that one. That way you can just work your way around from there. So, if we match them up, we can see black is going to this one here. So, we're just going to start, hooking our black wire up there. This is going to be our power circuit for the auxiliary power to charge the battery.There is a small plate underneath the screw, and you make sure that your wire gets pinched between the plate when you tighten it back down. Just going to slide that up in there and then tighten it up. Now that we've got that one secure, we're just going to use our old connector here as a reference and just work our way around connecting the rest of the wires. So, we're going to go ahead and go counterclockwise and the next one we have here is green. So, we're going to just move on, if not for our green following that order.We started with our black wire, which is our 12 volt charged circuit. And then moving counterclockwise we move on to our green wire, which is our tail light running circuit. We then move on to the red next, which is our left turn stop circuit. Next is our white, which is ground. Then blue, which is our brake signal circuit for our brake controller. And we have Brown after that, which is going to be our right turn circuit. And then lastly, we have the yellow wire, which is in the center and that is for our backup light circuit. With everything connected, we just slide the two ends back together, and then we can start reassembling the lock in the set screw.We're now going to take the other end of our new seven pole wire. We're going to strip back some of the sheathing and separate out the wires, and then strip them back so we can put it into our junction box. You need to make sure all of our wires are going to reach. So we're going to take off a decent little section, probably about six inches. And we're just going to take that right off. When I'm cutting, I'm not cutting very deep. I actually run my finger down it to prevent the blade from going too deep. It's an easy way to control it because once you score it like that, even if you didn't cut all the way through a lot of times, you can just pull it off like that. And we're going to use our snips again, to cut off any of the sheathing here.Now just like on the trailer side, we're going to take each of these wires we stripped back, and we're going to crimp it on ring terminal so we can connect it to the junction box. Go on ahead and removed the grommet from where I want to place my new seven pole wiring, and slid on the grommet that has the hole in it that comes in your kit, and go ahead and bring it around. We'll need to do just like we did before and loosen up the screws here on the hold downs. One of them is going to have to come completely out. We've got our wiring slid in. We're just going to tighten that clamp back down.It's working back and forth, tighten it down evenly. And now we can connect to all of our wires to the appropriate spots here on our junction box. Again, the biggest thing is that the functions are matching, not the wire colors, for this particular one. Here, I did wire it in a way that our wire colors are going to match up with their appropriate function. So I can just match up each of my wire colors. And since you're adding your own junction box, I highly recommend that you set it up, so that your wires match up properly too with the appropriate colors. It just makes things easier in the future. We'll just remove the nut and washer that we had loosely installed from before. And we're just going to slide each one on and then reattach the circuit with that washer and nut. We're just going to do that all the way down and then we'll come back and finish tightening them once we've got each one put in place.It's a little bit easier to work with your wires while everything's still a little bit loose. We can now go back and tighten them all up. Once we've made all of our connections. We're going to use an eight millimeter socket to tighten down the nuts, find it easiest for you to start doing it with the socket by hand. And then you can go back with your ratchet, and finish snugging it down afterwardsWith our yellow one there, you'll see it just has a single wire go into it that's coming from our seven-way. But what's nice about that is that if we wanted to, we could easily add reverse lights to our trailer. And We've already got a stud right there that we can wire the lights up to, and they're ready to work. Now we've got all of our connections made, we can test it out to make sure everything's working properly. We're going to go ahead and hook it up to our tester. But if you wanted to, you could also hook it up to your truck to make sure everything's working properly. We've got our tester plugged in. Now we're just going to run through the functions. We've got our tail lights there. We have our left turn, our right turn, as well as our brake lights. Now for our electric brakes, and 12 volt, and backup light circuits.It's actually easier to test those at the junction box. Since we don't have backup lights and we can't physically see the electric brakes and everything, we can just test it here on the box. We wired up our blue wire for the electric brakes, so I'm going to go ahead and turn those on and we can see it's powered up. And I turned it off, on. So, our electric brake circuit's working properly. We wired up the black wire to our 12 volt power circuit. So we're just going to come over here to this. This is where we would charge our batteries from this, but the batteries are removed from this so we can't test that either. But when we turn it on, we can see it lights our test light, showing that we do have power here on our 12 volt charge circuit. And lastly is our reverse circuit, which we don't have reverse lights on here. That's this blown yellow pin. And we're going to go ahead and set the tester to backup lights and then test that.And that's all working properly as well. So we've tested all the functions that our trailer has and they're all working. And then we tested the extra pins for accessories we can add in the future. And all of those are working properly. With everything all wired up, we can put our cover back on. I'm just going to double check all of our grommets and make sure they're in place. Because they do like to slide around on you when you're working inside the box, and I'll make sure all those are in place. We can just slide our cover on, and then we'll attach it using the included screws. With our junction box installed, and everything all wired up, that completes our installation. And that completes our look at etrailers wiring junction box, with seven studs inside..
Average Customer Rating: 4.8 out of 5 stars (92 Customer Reviews)
This trailer wiring junction box provides a fast, easy way to connect your trailer's wiring to either a 6-way or 7-way connector. Makes replacing your trailer's connector simple.
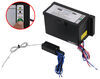
I wanted an electric jack on my enclosed trailer. This involved rewire and conversion to 7way pigtail to fit OEM vehicle plug with power. This led to adding circuit board and battery inside and LED light strip. Jack etc now functions without requirement for vehicle plug in, charges when towed or battery tender. Jack, junction box and pigtail all etrailer purchases.
Received this quicker than anticipated, very high quality and larger than expected. Plus, it came with spare parts, such as mounting screws, two types of rubber grommets (solid and pass through) and ring terminals for both sides of the junction box. Overall very pleased with the “cheapest” box I could find, so I’m glad I ordered two so I can rewire both my trailers.
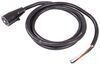
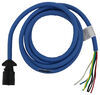
Been very happy with the 90 degree wiring harness over the past year. It saved running the 7 pin connector over the tailgate. Replacing the 7 pin connector with new Junction box helped in cleaning up the mess in the old box. The new 7 pin wiring harness is lighter & more flexible. All 3 products are still working well and have saved me time & functionality.
Purchased this junction box before and was very pleased with it (size, construction quality, etc.), so I bought another one for a rewiring job on an older trailer.
My trailer came with a standard household junction box and all the wires were connected via twist on connectors. When my 7-way failed I decided it was time to upgrade. I searched around and decided that the etrailer 7 terminal junction box was the product for me. Installation was fairly easy and it is nice that the studs are color coded. The kit comes with a few ring connectors, but I ended up buying different ones (smaller size) as well to assist in the hook up. My installation required the use of three entry points. 7-way on one side, the majority of the trailer wires from the other side, and two large diameter hot wires were fed up through the bottom. I was worried that all 20 wires would not fit. But the box has enough room to route the wires so that they can be evenly distributed onto any given post. In the end, it is a much cleaner solution than what was originally supplied by the manufacturer
Everything was pretty easy to install and having new wiring improved the performance of our trailer.
I have a 6 x 12 trailer with a flat 4 connector. I've had enough of fiddling with the flat 4 and poor connections. I decided to upgrade to an RV 7 wire plug and use this box to make a clean and protected installation for my lighting system. I'm very impressed with the quality of the box and the installation kit that comes with it. I will be installing it this weekend.
The team at etrailer has helped restore my faith that customer service is alive and well. Fresh on the heels of a very frustrating experience with a local shop, etrailer did what the other would not. They delivered the parts in a timely manner and kept me informed throughout the process. With this care on the front end, I am confident that I would see the same care in resolving a problem. I do not often need the products of this company but if the opportunity arises, I will be a returning customer.
Got one junction box for my car hauler and after installing it decided this was the best thing for wiring and ordered one for the Wells Cargo. Beats the heck out of butt connectors and electrical tape when you need to track down a problem.
I have never seen junction box for trailer wiring quite like this one. It was perfect for my application and replaced a "household" one a previous owner installed ( poorly I might add!) A quick and easy install and it is a neat and clean set up. I can't imagine any issues with it ever, but if there was, It would be very easy to troubleshoot a problem, or add a circuit.
I didnt like that you have to make sure to leave enough wire slack to be able to open the battery door since it has the indicator lights
Everything you need to relocate electrical splices from a crowded emergency break away battery box to separate junction box. Now adding accessories to the trailer is very easy.
I highly recommend etrailer for any of my trailer needs
Great folks to work with! Everyone at etrailer actually wants to help you, unlike most places now! I ordered a part and immediately received an email stating that the part was back ordered but that they had a suitable substitute for less money. I called and my order was adjusted, credit card charge was updated for the lessor cost and part was sent the same day!
I found that this is a good link when a new or replacement plug with the optional heavy duty coiled harness is installed to be able to connect to the original wiring harness. It gives you the ability in the future to quickly diagnosis electrical issues that could arise.
Junction box was perfect then and perfect now over a year later.
product arrive on time and was a breeze to install. Instructions were clear and all parts were present. I have ordered other parts from etrailer before and had the same great experience. Any parts I may need in the future for any of my trailers will be ordered from etrailer again.
loved this system on my last trailer neatest job I have seen, no tape to come undone
Used it for train horn setup
Made rewiring a snap. the down side is the crimp terminals are over sized for the smaller wires so you'll have to double over the wire to get a good solid crimp
This is exactly the right item for upgrading & organizing trailer wiring.
Love this junction box it makes troubleshooting so much easier
Appears to be a quality junction box with good seals. We'll how it holds up over time.
Exactly what I needed to straighten out the mess that is the OEM wiring of STEALTH trailer
This junction box makes the wiring a lot neater than before.
I have bought from etrailer and I'll buy from them again always great service and fast shipping and great products.
Do you have a question about this Accessories and Part?
Info for this part was:
At etrailer.com we provide the best information available about the products we sell. We take the quality of our information seriously so that you can get the right part the first time. Let us know if anything is missing or if you have any questions.


Jim B.
4/18/2022
One year follow-up review: junction box is holding up well and all seals are intact. Cant ask for anything better.