Bearing Kit, 15123/25580 Bearings, GS-2125DL Seal

Thank you! Your comment has been submitted successfully. You should be able to view your question/comment here within a few days.
Error submitting comment. Please try again momentarily.
- All Info
- Reviews (141)
- Q & A (0)
- Videos (2)
- Photos
etrailer Trailer Bearings Races Seals Caps - BK3-110
- Bearings
- Standard Bearings
- Bearing Kits
- 6000 lbs Axle
- Bearing 15123 and 25580
- etrailer
- Race 25520 and 15245
Features:
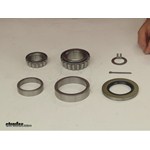
Kit Includes:
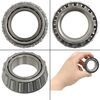
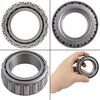
- One Inner Bearing and Race
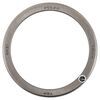
- One Outer Bearing and Race
- Grease Seal
- Cotter Pin
- EZ Lube spindle washer
| Seal | |||
BK3-110 Bearing Kit, 15123/25580 Bearings,10-10 GS-2125DL Seal
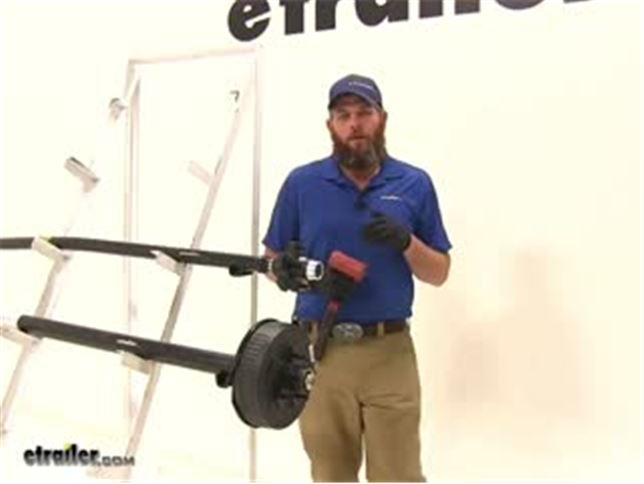

Videos are provided as a guide only. Refer to manufacturer installation instructions and specs for complete information.
Video Transcript for Trailer Bearings Races Seals and Caps Rebuild
Speaker 1: Today we're going to take you through the rebuild process on a couple of hubs. We've got an idler hub, and here we've got a hub and drum assembly. Works with electric rigs, but this can also work for just standard discs, if you've got a disc brake style setup.Basically what we're going to show you is how to get all of the bearings out. How to remove the seal. How to remove the race's if they're damaged, then get them replaced in the proper manner. We'll show you how to use an easy loop hub, which we have here.The first thing we are going to need to do is, get the grease cap off the end.
It can have either a rubber plug in it like this one does, or it can be a solid metal cap.These are pressed fit in there, basically by tapping on them on the back side. To remove them, a deadbolt hammer is typically what we're going to use. We're just going to start tapping as we go around. You'll see a little separation start right here, and slowly it'll work it's way off.Now the next step's going to vary a little bit depending on your axle setup. Do you see this is going to have a keeper that goes around the nut.
And that prevents that from being backed off, or removed. A lot of times you'll have a castle nut, which will have just little tabs that stick off, and there will be a cotter pin that passes through it. Just depending on your application, you need to get the keeper for the nut off. This style we just kind of pry out. A cotter pin you would just remove of course.Once we have that off ...
We'll start to take off the nut here, and the washer that's in behind it. Now yours should look a whole lot more dirty than this. There should be a lot of grease packed in, and through the hub, this one's brand new. We thought it'd be nice to show you the components before the grease was on .. Of our washer that comes off.And then here we're going to have our outer bearing.
Continue to pull that. We're gonig to have our inner bearing here. That sits in the backside of the hub. And we didn't put it in yet, we will show you how to put it in. But a seal would typically be covering the backside here. We'll show you how to use a seal removal tool, or another tool. To get that pried up and out. To get an access to that inner bearing.Now for a drum style like this, that process for disassembly is going to be just the same. One thing to keep in mind if you're using a disc brake setup. You'll have to remove the caliper before the disc is going to come off.Now once we have the spindle exposed, as we said this is going to be really greasy. We want to get all the grease removed, and the first thing we'll do is inspect it. We want to make sure that it looks just like what we have here. Everything's nice and smooth. We don't see any kind of discoloration, or any marring on the metal. Indicating that our bearing's got hot.If you do have any of those symptoms, at this point it's time to replace those bearings. You don't want to repack them. Get new bearings, and put in there. You might have a bearing that's come apart in here. Another surface to ensure is in good condition, is where your seal is going to go. That helps seal all the grease inside of our hub. With a damaged or broken seal, that grease is going to seep out. Either out of the hub, or in this case into our brake assembly.Now if your axle has brakes, we're also going to check the disc. Make sure it doesn't have any issues, or your hub. And this is going to be a hub and drum assembly. The brakes are going to ride on this machine surface. You're going to check that for signs of excessive heat, discoloration, or cracking. And this is our magnet surface. We'll check that surface for the same issues.Now inside the hub regardless if it's a disc brake, it's a drum brake like this. Or just a standard idler style hub. You're going to have an outer race. Would be right here, it's a small tapered piece of metal your bearing sits in, and rotates on. That's basically the outer portion of the bearing.You have the same thing here on the backside. This is called the inner race. Now if those show any signs of wear, overheating, or cracking. Those are also something we'll need to replace, which we'll show you how to do in just a minute.Now, with your brake assembly exposed, if you do have electric brakes like we have here. It's a good idea to check all the components for wear, cracking, maybe missing pieces. Check your pad thickness to make sure those are in good shape. Basically if you have a non working brake assembly and you put everything back together, you're just going to have to take it apart and do it all over again to get back to the brake assembly. This gives you a really good option to be able to change them out.And most applications are going to use a four, or maybe a five bolt flange to hold them in place. And you'll just remove the lock nuts, or sometimes you'll have a hex nut with a lock washer. You want to remove those, and then simply slide your assembly off after you cut the wiring.The friction material itself should also be checked for any kinds of cracking, or overheating. If you have any grease inside the system at all, it's likely it's gotten on those pads. It's a good idea to get those changed. Now as far as the removal of the races go, it's going to be just the same whether we're using an idler style hub like we have here. A drum brake like we have here. You can basically see where the idler is, here in the middle of the hub. It's going to go all the way around there, and we just have this extra material here to provide our braking surface.Now if you're doing a disc brake style job again, it's going to be just the same here with the races living inside of the actual hub portion. You'll just have the discs there for the brakes to make contact. We're going to use this little bit smaller one, it's a little bit easier to manage to show you how to get these out. We've talked about where the races are. The outer here, the inner being closer to the inside, but on the backside of the race there's a little lip. That lip's meant to stick out just a little bit further than the hub, and provide us an area to put our tool on, and help to drive that out.If you look all the way through there on that inner race, you'll see that little lip that sticks out just from the hub slightly, and it gives us enough area to use our tool on. Now generally to remove these you're going to use a punch, similar to this. Some guys will use a screwdriver. Or a piece of pipe. If you have a piece of pipe that's small enough to fit inside of that diameter, you can take that down through and allow it to rest on that lip.Use our punch, and then just need a hammer. And we'll start working that out. We're going to tap all the way around. Kind of equally, and evenly apply the force to get it to come on out of the bottom for us.You can see now as it starts to come out there's going to be a little gap created between the hub and the race. And we can just keep going, bringing it on out. Then you can inspect the inside of the hub surface there. Make sure no damage or anything has occurred, and repeat that same process for the outer race if you plan on removing and replacing that one.Now in the outer flat edge, you can see we're going to have our tapered edge on this side. If we roll our race over to the flat side, typically there's going to be a manufacturers part number on there. That will help you identify which race it is, that you need to go back in your system. If those are rubbed off, worn off, if you can't read them. You can measure the outside, to outside diameter of the race here. It's a good idea to use a micrometer to get it exact.Now here's your basic micrometer. And again, the outside of the race is what we're going to need to measure. You want to go . I set the thickest point there. Looks like this one's going to be about 1.98. That's going to be the measurement you'll want to supply.Now while we've got this out, let's also look at the proper way to measure our bearing. Instead of the outside for the bearing, we need to measure the inside diameter. That's going to be pretty simple. Let's pull that out, find the largest measurement we can. Which here, looks like it's going to be 1.03. With that information, we'll be able to get the correct bearing, and the correct race, so they'll fit together properly and make a full bearing kit for us.Now here's the race, we're going to show you how to get this put back in. Basically just going to press fit inside of our hubs. We need to get it down on there. Kind of like that. And you'll have a couple options. A lot of times you're going to see do it yourself or at homer, just going to use a wooden block. Just place it on there. That's going to get you started, but at that point you'll struggle in getting it to go all the way down into it's seat.Now to take care of that problem, there are several seal drivers that are available. Seal and race drivers that are available out there on the market. It's designed to fit down inside of our race, inside of our hub and get it down there where it needs to go. This is part number ptw83020, has several different sizes, even if you have multiple trailers it's going to do the job.Now the side with the angle on it, is designed to fit down inside of our race. If we use the other side, that's going to be for driving your seal into place. Just want to hold it, and take it on in with your hammer. You'll see, you just want to insure that our race is all the way up against that line on the hub where it's supposed to mate to.Now when it comes time to pack your bearings you're going to have several different ways of doing this. You can just use your hand, is the traditional method. That's going to be the method probably reserved for the very occasional trailer work kind of situation. If you do it once or twice a year, probably get away with it that way.Next you would go to a, kind of a sandwich funnel style almost. If you look inside of there, you can see the bearing. It's located between the two pieces. Just use a grease gun. Start filling that with grease, and that's going to fill our bearing for us. And the third, with this one you're just going to place your bearing down and in. It should be pretty close to center. And then we've got our cone her that's going to go down and secure that.Now I think this style, wastes a little bit more grease than what this style will. This has a dust cap. You can see, you can keep your grease in there, put your dust cap on there and save it for later use. This will be if your going to do it every couple years. And this particular style would be if you're a more regular user.Let's start by showing you how to use a bearing packer. Similar to this. Again, we've just got our grease inaudible 00:11:07 here on the top. And then just slowly start to fill it. Now I like this style quite a bit. I think even regular users might enjoy it, because you can get a really quick visual look at that bearing. You're not going to have to overdo it, or have to much grease.You can kind of see in there now, we're starting to get grease to come out of it. Couple more pumps, we'll be good. You can see we've got grease coming out all the way around. Where all of our bearings are. Got a little bit of excess there. Just take that around the outside of it. And then we should be able to lift it off. And now you can see what we we're talking about. Just a little bit of excess there, that you're just going to wind up wasting.Now we'll take our bearing, we're going to place it right down in our race. And then we'll cap off the back with our seal. Right now our seal's going to fit in just like our race did. It's going to have a little bit of a pressure fit to it. Now very often in this situation, I see people using the four by four method. Kind of here, just placing that on and tapping it. As an option though, if you do have one of these. You can see that's designed to fit right on the top of the seal. And help drive it in.The biggest thing here is, just going to be getting it driven in squarely. You can see, this side's in a little bit further than this side. I'm going to start this side first. Now since we didn't have the opportunity to show you before, we're going to take a look at pulling a seal. Now this is a seal puller, we carry this on our website part number ptw1219. This is meant to hook underneath the seal. And then you kind of pull up on it, and just like our race you'll have to work all the way around that edge. Just bringing it out a little at a time.If you don't have that available. Another option would be a screwdriver. You just kind of get that under the seal, and turn it. And see, that'll allow you to also pop that out. We've taken care of our race. Our inner bearing. Our seal. The last component, before we put our hub back in place is going to be our outer bearing. Now with this bearing, I'll show you the hand packing method.This is definitely . Slightly dirtier method than the bearing packer. When we get grease on our hand we want to look at the larger side of the bearing. This is the smaller side. We have a larger side In between the inside and outside there's a gap. We can see our rollers in there. We want to grab that, and use that gap and shove grease inside of it. Now this is going to take a little bit, you want to work in the same spot until you get the grease pushed all the way through. We can see on the top there we've got a little bit starting to come through.And once we push it in the bottom, and you see it start coming out the of the top in those little drips, it's going to indicate that, that section's fully packed. Just need to work all the way around their outside edge now and do the same thing. Alright, once that's all the way around . The bearing will be ready for use.Now one more thing I like to do. We can see our inner bearing there, and our outer bearing. Well between the two, got a pretty big gap in there. If you'll take a . Pretty good amount of grease. We're just going to go all the way around. See how we can go all the way around the inside and just line that really well. The more grease we have in here, the less chance we have of any moisture getting in there, which can cause corrosion, rust, pitting. Pretty much things we do not like when it comes to bearings, races, and hubs.Put plenty of grease in there. And then this one does have the easy lube spindle, that'll even fill it in more. Now we can get our assembly slid on. I like to keep my thumbs on that outer bearing, just to prevent it from . inaudible 00:15:28 pushed off there. Now we can put on the original hardware that we removed, in taking off our hub the first time. In our case, we had our washer and our nut.Now most commonly you'll see pliers similar to this being used. We basically want to get that tightened down. Once it's fully tightened down you'll feel some resistance in the hub. We back it off just slightly. That'll give us a little bit more freedom of motion there. Something you don't want however . Is any movement in, or out on your hub. You want to be sure that everything is compressed, and you don't have what's called end play. Which would be the play in and out.Once we've got that set, then you'll put on whatever tight keeper yours came with. Get that put back in place. Now with an easy lube style hub, you're going to place your grease gun on the end, and then you can just fill the remainder of that hub up.Now for your typical applications, you're either going to have a solid cap, or a cap that'll have a rubber plug in it. A solid cap's going to be for an axle without the grease inaudible 00:16:51 here on the end. Goes on there. Just knock it on with your rubber mallet. Same with the one with the plug. Just gives you a removable area there, be able to cap that off.We'll show you how to put that on. Now as alternatives as well, a lot of times on boat trailers and marine kind of situations. You'll see a bearing buddy. This is going to apply a little bit of pressure on the grease, you'll fill it up. This kind of comes out just a little bit. That applies constant pressure on the grease to make sure we don't have any air, or anything like that. Then there is also an oil bath hub available. Now this is going to be for use with seals that are going to be designed specifically for oil bath use. You'll have to change that seal.We're using a double lip seal. There are also single lip seals available. Of course a double lip seal is going to give you just a little additional security. Keep that in mind when you order. But let's get this knocked on there now so you can see how that works. We just want to take the cap, we're going to center it. This is going to be very similar to what we did with the seal. And then just gently start tapping it around the outside. And it'll seep down on there for you.It's really going to be the same thing that you'll do with any of the end caps. Now with this side done, it's a good idea to take care of all the other hubs. Get them all on the same maintenance schedule. And as long as you'll periodically check the grease, take your trailer out for a trip occasionally. Just to keep everything lubricated. It should extend the life of these parts, and give us years of good service.
Customer Satisfaction Score:
97% were satisfied with this product
3% of customers were not satisfied
- Wrong item was ordered
- Arrived Damaged
- Did not arrive in time
Customer Reviews
Bearing Kit, 15123/25580 Bearings, GS-2125DL Seal - BK3-110
Average Customer Rating: 4.8 out of 5 stars (141 Customer Reviews)
Great products for my trailer. Jesse D in customer service was very helpful went above and beyond to find the right product for my trailer. Including contacting the axel manufacturer to be sure I got the proper parts!! Awesome CSR!
Etrailer always has easy ordering and plenty of tech info available if needed!

I put these bearings and caps on my 16 foot car hauler and they work great. Nice and quiet and a reasonable price. Thanks ETrailer
I mistakenly ordered the wrong set of bearings for my trailer and when I got my confirmation email I realized my mistake. I called etrailer right away and explained what happened and they were able to get the right bearings out to me with no delay. Very happy!!
Etrailer's web site is a snap to navigate and very easy to identify and order the high quality replacement parts for my boat trailer. I received email update when the package shipped with estimated date for delivery, which ended up being 5 business days. Outstanding! I highly recommend Etrailer.

I purchased these as spares to carry in the truck in case of a bearing failure on the trailer on the road. You have to have these ahead of time, because on the road, 1) you will probably not know your bearing size, which may be different for inner and outer, and 2) good luck finding them at 6:00 at night. I never have had to use them, but you need to research which hubs your trailer manufacturer used on the trailer (Dexter is common), and then find bearing specs from hub manufacturer, and then order spares from etrailer.com.
9,000 lb. boat and tandem trailer.
Came faster than expected and everything is an exact replacement.

Excellent service and product ! Thank y ou
The people at etrailer know there stuff!!! Thanks for the expedited shipping!!!

You are fast at getting things out. And appreciate not being asked the next day rate how I liked the product. A year later is right. I’ve had time to use my new bearings and they work great.
Etrailer is a great company to work with.
The bearing kit was an excellent choice and it was packaged very well. They have educational YouTube videos, not only about this product but also on the installation process.
They are also a company who strives on communication. I was informed when my order was shipped, when it would arrive and when I had a concern they were quick to help me find a solution.
Thank you for helping me with my RV needs.
Just what I needed to fix my trailer, thanks Jake!
Extremely helpful person made sure that I had the right kit for my non-standard trailer axles. Package arrived on time with all parts correct and present.
Very satisfied and recommend highly.
Cannot even find the smallest thing wrong with any order I’ve ever placed with etrailer. They get it right every time. Between them and repairclinic they’re easily the best online stores out there.
Seth

7/5/2021
Still strong. Great stuff from etrailer.
Seals were loose and bare - no protection what so ever - in large box with brakes and bearing kit. Seal in bearing kit is not for my axle and etrailer has yet been able to help me determine if bearing kit is for my axle.


Jenny N.
1/18/2022
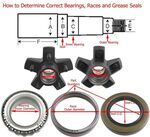
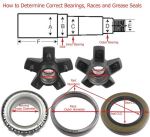
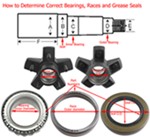
I will have our customer service team reach out to you. The best way to determine if a bearing kit is right for your trailer is know the inner and out bearing numbers as well as the dimensions of the seal. If you do not know this information then measuring the inner diameter of the bearings plus the inner and outer diameter of the seal with a micrometer or dial caliper will help determine what you need. We have a FAQ that goes more into detail that you can see below.
Helpful Links
Nice job "e-Trailer"; received this "heavy" order very promptly; did not expect it so quickly in view of how other retailers/ manufacturers/ on-line businesses are behind in fulfilling orders. Packages (3) came all intact, well packed and product received in great condition. The order included:
> 5-Leaf Slipper Spring w/ Hook End for 6,000-lb Trailer Axles (2)
> U-Bolt Kit for Mounting 8,000-lb, Round Trailer Axles - 8" Long U-Bolts (2)
> Tandem-Axle Trailer Equalizer Kit for 2" Slipper Springs - 10-1/8" Long Equalizers (2)
> Dexter Nev-R-Adjust Electric Trailer Brake Kit - 12" - Left and Right Hand Assemblies - 6K (2)
> Mounting Bolts and Hardware for 12" Brake Assemblies (2)
> Bearing Buddy Bearing Protectors - Model 2441SS - Stainless Steel (Pair) (2)
> Bearing Kit, 15123/25580 Bearings, GS-2125DL Seal (4)
> Optronics LED Combination Trailer Tail Lights - Submersible - 40 Diodes - Driver and Passenger Side.
These items are being utilized in the total suspension replacement of a 10,000 gvwr tandem axle trailer. Good sized job for a DIY'er. I expect that it will give my JD 2038 tractor a smooth and safe ride as it is towed/ hauled down the highway.
Thank you.
I would/will strongly recommend to a friend/relative or associate.
( I'd take a picture of the "project", but there is a vicious rain storm occurring outside; perhaps one or two pics to follow at a later time).
BEST PRICES. EXELLENT CUST SUPPORT
Everything about making the order was easy the price was right shipping was perfect
very poor packaging parts were damaged and missing, everything was just thrown into a large box nothing was individually wrapped on the inside. I don't know why I use this company this is not the first time this has happened


Jenny N.
9/15/2022
I will share this review with our shipping department managers. We are always working to improve our packaging. Our customer service team will reach out to you.

Great product
Great value. Good customer service. I would recommend them for all your trailer needs.
Bearing kit arrived on time and in good condition.

Steven T.

9/29/2022
Installed new bearing kit for my Dextor easy lube axle. Everything fit properly and performed well for more than 10k miles.
I received the parts (bearing kits)on time and very easy online ordering process. I would recommend them as I have ordered with them previously with excellent results
Roy B.

3/26/2020
The product worked out great I will continue to order from etrailer
The inner bearing was exactly what I needed and fitment was great. The kit I chose was a shot in the dark due to the only identifying number was on the inner bearing race. The outer bearing was wrong and the lock washer wouldn't work but that's nobody's fault. Turns out the local part store had the exact outer bearing I needed, a 1987 Mercury uses the same outer bearing. Etrailer.com has the best deal around for a bearing kit!!
My Bearing kits arrived in just 5 days. Great service. They shipped the same day I ordered. All are in Great condition.

Ronald

11/6/2018
Great product, Everything is rolling smooth
See what our Experts say about this etrailer Trailer Bearings Races Seals Caps
- Replacement Bearing and Grease Seal Kit for a Coachman Chaparral CamperWe have a few different kits for you to check out depending on the weight capacity of your axles and the inner diameter of your grease seal. If you can confirm the weight rating of your axles and the inner diameter of your grease seals then you just need one of the following kits: 2.125" ID Grease Seal: - 5,200 lb Axle # BK3-310 - 6,000 lb Axle # BK3-110 - 7,200 lb Axle # BK3-210 2.250" ID Grease Seal - 5,200 lb Axle # BK3-300 - 6,000 lb Axle # BK3-100 - 7,200 lb Axle # BK3-200
view full answer... - Recommended Bearings and Seals for a Dexter R11 4,500 lbs EZ Lube AxleYes, I can. I have listed them below: 031-029-02 Bearing is item # 15123 031-030-02 Bearing is item # 25580 Dust Cap item # 21-42-1 and Rubber Lube Plug item # DC-RP Adjuster Plugs for 10" and 12" Brake Assemblies item # BP10-220
view full answer... - Does the 6,000 lb Trailer Hub and Drum # AKHD-655-6-K Come with RacesThe etrailer Trailer Hub and Drum # AKHD-655-6-K does include the races # 25520 and # 15245 for the inner # 25580 and outer # 15123 bearings. If you don't already have the bearings and grease seal # GS-2125DL then we actually have all of them in the kit # BK3-110 which also includes the races. I have attached some videos that you can check out as well.
view full answer... - Replacement Bearings, Races and Seals for an Old Frehauf Trailer with 15123 Outer BearingsYou will most likely need the Bearing Kit, 15123/ 25580 Bearings, 10-36 Seal, item # BK3-100, or Bearing Kit, 15123/25580 Bearings,10-10 Seal, item # BK3-110 for your replacement parts, since your outer bearing is a Timken 15123. Races for the these bearings are the # 15245 Race, for 15123 Bearing, and the # 28521, Race, for 28580 Bearing. The only way to really tell which bearings, races and seals you need for sure is to remove the hub and record all of the part numbers you can find....
view full answer... - Replacement Hub Bearing Kit For a 1980's Cradle Right Boat TrailerWe do have 2 different bearing kits available for you with those bearing and races that you are needing. They will include both inner and outer bearings, and races but there are 2 different grease seals that are commonly used with your axle spindle. The Bearing Kit # BK3-100 includes a 10-36 grease seal which will fit a 2.250" diameter spindle. The Bearing Kit # BK3-110 includes a GS-2125DL grease seal which fits a 2.125" diameter spindle. If you can not find this information on your...
view full answer... - What are Inner and Outer Diameters of Grease Seal that Comes with Bearing Kit # BK3-110I can't find any info on the 21353 seal that you have. Can you get me the inner and outer diameter of the seal so that I can see what the closest match is to what we carry? The seal in the part # BK3-110 has an inner diameter of 2.125 inches and an outer diameter of 3.376 inches. If you need a different seal what you can do is determine the dimensions you need by measuring the bore of the hub where the seal installs and then measuring the diameter of the spindle where the seal rides and...
view full answer... - Replacement Bearings Needed for a 2007 Silver Fox 26' TrailerI do have a way for me to recommend the correct bearings (and seal if needed) for the axles on your 2007 Silver Fox 26' trailer, but unfortunately we don't have a a list of part numbers that were used on your trailer. The most common 6K hubs use either Bearing Kit # BK3-110, which has Inner Bearing # 25580, Outer Bearing # 15123, and Grease Seal # GS-2125DL, or the Bearing Kit # BK3-100 which uses the same Inner and Outer Bearings, but uses the Grease Seal 10-36 instead. This seal can...
view full answer... - Replacement Trailer Brakes, Bearings, and Seals for Dexter 6K Trailer AxlesWe do have brakes for the 6,000 pound Dexter axle on your 2013 Open Range Roamer. That size takes 12" x 2" brakes. For a set of self-adjusting brakes in this size I recommend # AKEBRK-7-SA. The bearing kit for the 6k Dexter axles will be either # BK3-100 or # BK3-110. There are a couple of differences between these two sets. Set # BK3-100 includes a cotter pin and a 10-36 seal which has an inner diameter of 2.250 inches and outer diameter of 3.376 inches. Set # BK3-110 includes a cotter...
view full answer... - Bearing Kit Recommendation for Lippert 5,200 lb AxleFor a Lippert hub 5,200 lb capacity like part # 8-201-9UC3-EZ the bearings needed are # 25580 and # 15123. We have a bearing kit that has these as well plus the races and a new seal # BK3-110. I attached a help article down below on replacing bearings for you to check out as well.
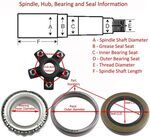
view full answer... - How to Measure Grease Seal's Inner DiameterThe Replacement Inner Trailer Hub Bearing for 15123 is item # 15123. It has a inner diameterof 1.250. The matching race is # 15245. Since your other bearing measures 1.750" it is a match with, Replacement Trailer Hub Bearing - 25580 Item # 25580. The matching race is # 25520. The above bearings and races are included in bearing kits # BK3-100 and # BK3-110. You will need to measure on your spindle where the seal sits for its inner diameter location, that is marked "B" on the attached...
view full answer... - Bearing Kit with 15123 and 25580 Bearings for a 2006 Four Winns Boat TrailerThere are a couple of options that having bearings 15123 and 25580 (the other numbers are the associated races). We have # BK3-100 which includes seal 10-36 which has an inner diameter of 2.250 Inches and outer diameter of 3.376 inches. And we have # BK3-110 which comes with a tang washer and seal GS-2125DL which has an inner diameter of 2.125 inches and outer diameter of 3.376 inches. I have linked videos of both sets for you so you can see all of the included parts.
view full answer... - Upgraded Equalizers and SumoSprings for 2023 Grand Design Momentum 23GSince the parts are different for your 2023 Grand Design Momentum 23G we will go a slightly different route. You currently have a standard # TREQ104 equalizer on the trailer. That means the best fit is going to be the Dexter E-Z Flex Suspension Kit # K71-652-00. This includes the upgraded shackles, wet bolts, and bushing so there is no need to purchase them separately. I have this kit on my Jayco which you can see in the installation video below. For the SumoSprings you will need the #...
view full answer... - Bearing Kit to Use as Spare for Dexter 5,200 lb Trailer AxlesThe bearing kit part # BK3-110 that you referenced is the correct kit your Dexter 5,200 lb axles. This comes with all of the bearings, races, and seals you mentioned. I also attached a link to a rebuild video for this for you to check out as well.
view full answer... - Bearing Kit For Dexter 6,000lb Axles On 2020 Grand Design Reflection 320MKSThe bearing kit # BK3-210 that you mentioned is specifically for 7,000lb axles. For your 2020 Grand Design Reflection 320MKS fifth wheel with Dexter 6,000lb axles, the correct bearing kit will be either # BK3-100 or # BK3-110. # BK3-100 uses a seal with an ID of 2.250", whereas the # BK3-110 uses a seal with an ID of 2.125". You may need to measure your seal using a tool such as the 4" Carbon Fiber Digital Caliper # PTW80157 in order to correctly match up your bearing kit. I have included...
view full answer... - Switching 5 Spoke Hub to 6 BoltThe Dexter Trailer Hub and Drum for 5200 and 6000 lb axles, part # AKHD-655-6-K uses the same bearings as your existing hub, and therefore would be a good replacement 6 bolt hub for you. This hub does not include the bearings, races and seals which are available as part # BK3-110. Each kit contains 1 inner and outer bearing, 1 inner and outer race, the grease seal and the cotter pin.
view full answer... - Determining The Correct Replacement Grease Seals And Bearings For A 1996 Shoreland'r Boat TrailerThere unfortunately isn't a way for us to look up the bearings and grease seals for your 1996 Shoreland'r boat trailer so you'll have to remove the hub and measure the spindle and hub in order to find the correct size, unless you can still make out the part numbers etched into the faces of these components. Using a set of calipers # PTW80157 you'll want to measure points B, C, and D on the spindle for the inner diameters. For the outer diameters you can measure the outside of the bearings...
view full answer... - Bearing Kit for a Dayton Fayette 9254 C I wasn't able to find anything about specifications for a Dayton Fayette 9254 C. The bearing kit you were looking at item # BK3-110 will fit the dimensions you gave me. The kit is for a 6,000 lbs axle.
view full answer... - Bearing Kit for Dexter 6,000 Pound AxleThe correct bearing kit for your 6,000 lb Dexter axle is either the # BK3-100 or # BK3-110. The difference between the two is the grease seal. The # BK3-100 uses a seal with an ID of 2.250", and the # BK3-110 uses a seal with an ID of 2.125". You will need to look for the part number on your current grease seal or measure the inner diameter using a digital caliper like the # PTW80157 to find out which is correct. See the diagram below for where to measure.
view full answer... - Replacement Brake Assemblies For a 2003 Keystone Montana 3655FL With 6,000LB AL-KO AxlesTo verify if you will be able to use the Electric Trailer Brake Kit # AKEBRK-7-SA on your 2003 Keystone Montana 3655FL 5th wheel you will need to verify that you have a 5 bolt brake flange on your axle. You will be able to verify this by looking at the brake flange on the backside of your hub and will not need to remove the hub. Be sure to check both axles as it is possible one may have been switched out. There are some AL-KO axles that require the Dexter Electric Brake Kit # 23-105-106-09...
view full answer... - Replacement Grease Seals And Bearing Kits For a Dexter 6,000LB Trailer AxleWith your axle you will need to pull one of your hubs to verify the correct size grease seal. The Grease Seal # GS-2250DL is the common size used on Dexter 6,000lb axles currently. This seal has an inner diameter of 2.25". If your seal/spindle is 2.125"id you will need the Seal # GS-2125DL. The Dexter Electric Trailer Brake Kit # 23-105-106 can be used with either size grease seal. They simply identify that they are sized for a 6,000lb axle. We do have the Bearing Kit # BK3-100 that...
view full answer... - Bearing Kit Recommendation for Lippert 6k and 7k AxlesFor a Lippert 6k axle you have two options. The part # BK3-100 and the part # BK3-110. The difference would be the size of the inner diameter of the grease seal. The part # BK3-100 comes with seal that has inner diameter of 2.25 inches and the part # BK3-110 comes with seal that is 2.125 inches. For a 7k axle by Lippert you would want the part # BK3-200 if the seal diameter needed is 2.25 inches or part # BK3-210 for inner diameter of 2.125 inches.
view full answer... - Bearing Kit For Dexter 8-133 HubWe do have the correct bearing kit for your Dexter 8-133 hub; what you will need is the following: - Bearing Kit # BK3-110
view full answer... - Bearing Kit For Trailer With Bearings 25580 & 15123First, thank you so much for those measurements they were extremely helpful, and with that we know you have bearings # 25580 and # 15123. There are two bearing kits that use these bearings, with the only difference being the inner diameter of the grease seal they use, so you will need to measure that as well to find the correct one: - Grease Seal 2.125" Inner Diameter: Bearing Kit, 15123/25580 Bearings, GS-2125DL Seal # BK3-110 - Grease Seal 2.225" Inner Diameter: Bearing Kit, 15123/...
view full answer... - Recommendation For Replacement Spindle And Bearings For Older TrailerI did some research and it sounds like you have a 5,000-lbs to 6,000-lbs axle with inner bearings like Item # 25580 and outer bearings like Item # 15123. I recommend Bearing Kit Item # BK3-110 that includes everything you need to replace your bearings and seal. Based on your information, it sounds like the replacement spindle you need is like Item # TRU57FR. I have included a link to our spindle department so you can look at other possibilities. Spindles are welded for installation...
view full answer...
Do you have a question about this Trailer Bearings Races Seals Cap?
Info for this part was:


At etrailer.com we provide the best information available about the products we sell. We take the quality of our information seriously so that you can get the right part the first time. Let us know if anything is missing or if you have any questions.













Kirk P.
7/26/2018
Still working perfectly. No problems at all.