
THIS ITEM IS NOT A FIT FOR
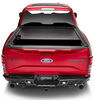
2019 Ford F-250 Super Duty
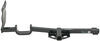
Custom DK Fit Kit for 4 Rhino-Rack 2500 Series Roof Rack Legs - Naked Roof
Item # DK468
Retail:$136.06
Our Price: $120.98
You Save: $15.08
2019 Ford F-250 Super Duty
Will this fit?
To see if this custom-fit item will work for you please tell us what vehicle you'll use it with.
In Stock


- All Info
- Reviews (3472)
- Q & A (0)
- Videos (2)
- Photos
Rhino Rack Roof Rack - DK468
- Fit Kits
- 4 Pack
- Rhino Rack
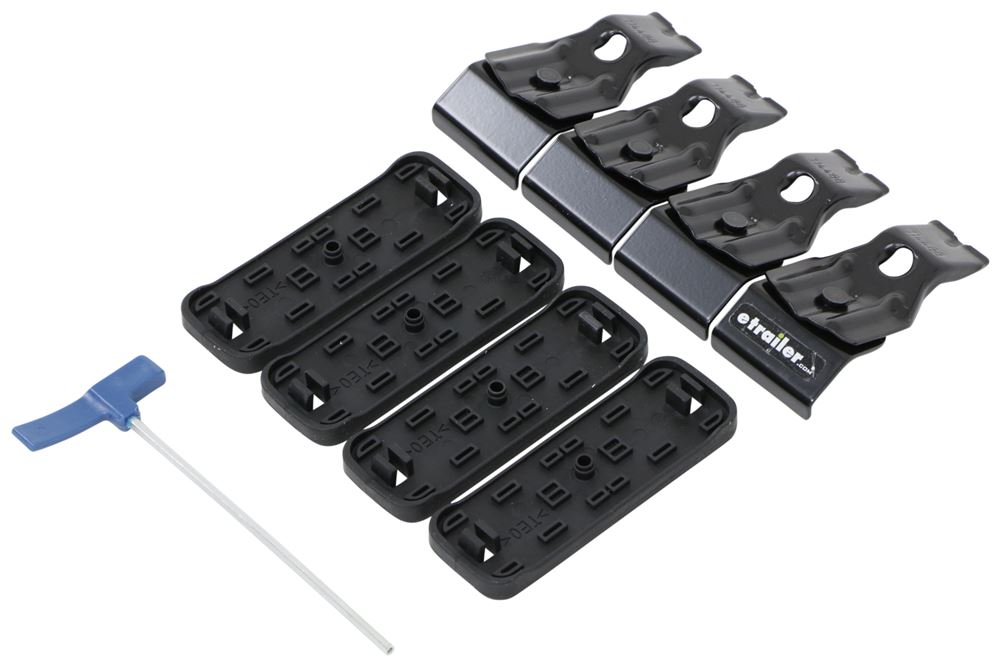
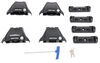
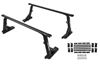
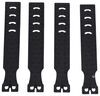
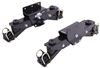
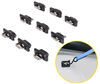
This custom fit kit lets you mount 4 Rhino-Rack 2500 legs to your vehicle with a naked roof. Clamps mount to legs with bolts. Includes 4 clamps and 4 pads.
Features:
- Custom fit kit lets you mount 4 Rhino-Rack 2500 series legs (sold separately) on your vehicle with a naked roof
- Padded, metal clamps provide secure grip on your door jambs
- Bolt onto leg assemblies and tighten for secure fit
- Protect door jambs from scratches and abrasions
- Powder coated for durability and rust resistance
- Molded-rubber pads are custom designed to fit the contours of your roof
- Clip onto the bottoms of your roof rack legs
- Protect your roof from scratches and abrasions
Specs:
- Quantity: 4 clamps and 4 pads
- Limited lifetime warranty
DK468 Custom DK Fit Kit for Rhino-Rack 2500 Series Roof Rack Legs - Naked Roof
Installation Details


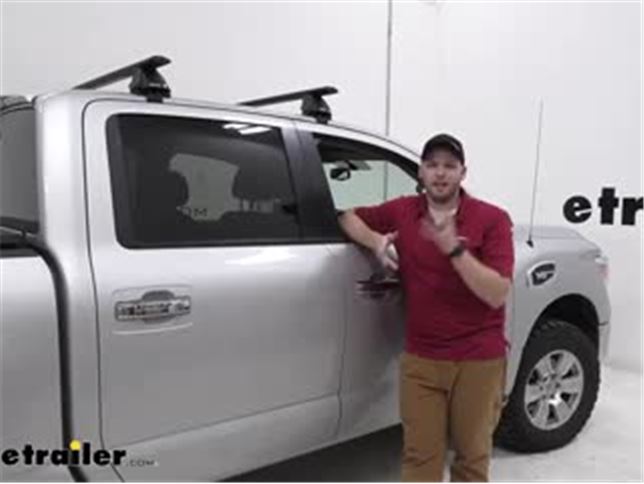
Video of Custom DK Fit Kit for 4 Rhino-Rack 2500 Series Roof Rack Legs - Naked Roof

Videos are provided as a guide only. Refer to manufacturer installation instructions and specs for complete information.


Video Transcript for Rhino Rack Roof Rack Installation - 2017 Nissan Titan
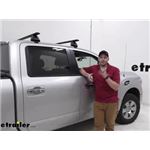
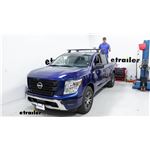
John: Hey guys, John, here from etrailer.com. Today we have our 2017, Nissan Titan we're test fitting the Rhino-Rhack's Vortex Aero roof rack system. This is designed to help add extra cargo carrying capacity to our vehicle. So maybe we have our bed completely full, or we're wanting to transport a kayak, which won't fit in the bed of our truck. We can toss it up here or add a cargo basket to get extra cargo carrying capacity, as well as use our hitch and maybe our truck bed.The Vortex Aero Crossbars come in black, as we have installed on our Titan today, as well as silver. Both of these options are available here at etrailer.com.
They have an aluminum construction, so they're lightweight and durable. Plus we don't have to worry about them rusting over time. Even though they are lightweight, our roof rack does have a weight capacity of 165 pounds.However, I do recommend checking out your owner's manual just to make sure we're not going over any weight ratings that the manufacturer has. Our Vortex Crossbars have an aerodynamic design. This is an upgrade from the traditional round or square crossbars, and this is going to help reduce wind noise and drag compared to those other styles.Our Vortex Aero system does come with lot cores here for our legs.
And then we also have a plastic lock core that can be upgraded, but it's out here on our cap for our crossbar. If we unlock it, we can remove it. And now we gain access to the T-slot area on the crossbar. This is used to mount different accessories that'll have the T-slot bolt with it. Normally or older accessories will just have a clamp, but some newer ones, we can utilize this for just more of a clean fit.
We'll just slide the T-slot in there, then trim the top rubber, a rubber strip here to make it look natural. And this rubber strip is used to help cut down on wind noise and drag. There'll be a whistling sound without this rubber strip installed. So it's a really nice feature that Rhino-Rack includes with the crossbar.Rhino-Rack did think of our vehicles' protection when it comes to their roof racks. This bottom part of the fit kit here, this is rubber, and so it won't damage our paint as well as this clamp.
It actually has a thin piece of rubber here so we don't have metal touching our vehicle. Let's get some measurements here to see how this interacts with the roof of our vehicle. From the roof to the bottom of the crossbar, is about three and a half inches. You shouldn't really have any problems mounting any accessories on here. There's plenty of room for any clamps that we'll use.And then from the roof to the top of the crossbar sits, about four and three quarter or five inches. That's a good measurement to keep in mind for if you want to keep this installed on top of our vehicle when we pull into a garage or something like that, or if we have an accessory that we want to mount on here. We can take the height of the accessory and then add five inches so we know how high that's going to sit on our vehicle.Rhino-Racks clamp system here, sits nice and secure in our vehicle. I can actually grab the Crossbars over the legs and our entire vehicle moves when I shake it. That just gives us some peace of mind of how secure this is fitting to our vehicle. Now that we've gone over some of the features of this crossbar system, let's go ahead and install it together.We'll start off by removing the cover on our leg. Use the included keys and it will swing out to the left. And then we will move over to our fit kit here, which has three pieces, the plastic piece, rubber piece, and then our clamp. Won't mess with our clamp till we get the crossbar up on the roof. But the plastic piece has an arrow, as well as the rubber pieces. It has an arrow. If we refer to our instructions, it tells us how these need to be oriented according to how we mount the crossbar to our roof rack.So we will put the rubber piece in place. You just got to kind of move the lips around and make sure it sits on there, nice and tight. And then our instructions say it had this arrow pointing outwards. So you just press the clips to secure on our foot. Next we'll grab our crossbar and then we will take the measurement tabs that go underneath. There are the measurement strips that go underneath the crossbar. They're stored on the crossbar so when we open up the package, make sure you get them out. And then these have measurements on them and we'll refer to our instructions for exactly where we need to cut these. So that gives us an exact measurement for where our legs will be mounted on the underside of our Crossbars.For our application today, we need to clip at 157. And once you make your clip. I'll just take a razor blade here and just kind of flatten everything out. Make sure there're no pieces that are sticking straight up, because then what we got to do is put our leg and butted up right up against this plastic piece.So got everything straightened out, place the zero and first we push that all the way to the track till it stops. Now we're ready to add our leg to the underside of our crossbar. With our leg we have this T-bolt here and we're going to need to loosen up the screw. So we'll flip our leg over and then use the included tool to loosen up that bolt. And now the T-bolt sits more loose. We can slide it right on to our crossbar.Say it, and then cruise, and we're going to slide this all the way up to the measurement, the rubber strip that we just cut. We use the tool and just tighten down that T-bolt again. And then we use the tool, this actually is a little unique. It has a slight curve to it. We're going to tighten down this bolt until it straightens out. Once it straightens out, now we know we have the right torque on that bolt.Insert this, the remaining strip, then we're going to cut that off and clean it up a little bit here and we will repeat the same process for the other side of the crossbar. Now that we have the legs on the bottom of our crossbar, it's time to install the rubber strips. There will be four that are actually hidden inside the Crossbars. We'll take the cap off, turn the crossbar upside down the fallout, and we will just feed them through. We've already got three of the strips installed. So it's bottom up end to end. You'll kind of wiggle it back and forth because there's a groove here. So try to feed one through one end of the crossbar T-slot and just kind of feed it back and forth until it lays flat here. Any bubbles, just push in and again, feed it back and forth. Now that we have it all in place, we will go ahead and cut off any excess and then we place on our cap. And now we are ready to toss our crossbars up on top of our roof.A few things I'd like to note before we set it on top, make sure that the Rhino-Rack sticker is going to be facing forward for a vehicle. And then there are some stickers included with your kit and you can put the sticker under each of the feet so that we can remember exactly how it's sitting on our truck. So if you take the crossbars off, we need easily put them back up. We already have our front crossbar mounted. According to the instructions, there will be measurements on where we need to place it here between our. We'll measure from in between our doors here up and now we'll place the rear bar. We'll take a measurement from our instructions to figure out where we need to have this rear bar sitting. Kind of set it in the general area, measure from the center of the front crossbar back to the center of your rear crossbar.That looks good. So we'll move to the driver's side now and move that leg around till it's sitting where it needs to be as well. Now that we have our rear crossbar in place, we will loosen up this bolt here, and we'll take our clamp from our foot pack, our fit kit. We'll put it through this hole here on the clamp and then get it started in the nut that's already sitting in our leg. Now this vehicle is a little bit tricky, most vehicles, there won't be a rubber strip here, or we'll look at this piece of trim and it just pulls right down. This rubber piece though is permanently installed on the truck. And so we're going to lower this outer lip and feed our clamp in there. And then just need to push it down and try to get this corner as tight up against the vehicle frame as we can.So this is definitely something where we're going to get it started on one side and then moved to the other side and get it started over there and just moved back and forth until we have the clamps sitting tight up against the vehicle. So let's get in tight. Let's move to the other side and then we'll just keep working back and forth until it sits nice and tight like we have here at the front. On the driver's side, this is kind of what we ran into before or having a little trouble getting this clamp to sit well. So we're just going to take a spacer tool here. We have a couple of different options here at etrailer.com and we're just going to try to push down and make enough room for this clamp to sit comfortably against our doorframe. Another thing I had to do is while I'm tightening down this clamp, right, tighten this down, and I'm just kind of pulling our crossbar a little bit to try to get to fit.Right, normally on other vehicles that don't have this upper lip, it's not this interesting to install, but this one's just, this specific vehicle is a little different. So you have to play with this rubber piece to get it to sit nice and tight up against the vehicle. Just so we know that we're not. Our crossbars aren't going to be moving around and that's why we're heading down the road. So we're going to make sure it's seated properly behind the seal. Also, one thing I just figured out is, I had this clamp that's actually sitting on top of one of these ridges, is causing the clamp to sit at an angle, which was also causing problems.So make sure you don't do that when you're installing it and just get it up a little snug. And we're just going to go back and forth on the other side, tightening down until we get this torque. This torque tool we do as we tighten it down and this line will actually straighten out and that tells us that we have our bolts tight enough. And with everything torqued down, we can place our covers back over our legs.Awesome, and now we are ready to install accessories to carry our kayaks or bikes or ladders, anything else down the road with our vehicle. And that's going to conclude our test fit of the Rhino-Rack Vortex Aero Crossbar system on our 2017, Nissan Titan. Thanks for watching.
Customer Satisfaction Score:
96% were satisfied with this product
4% of customers were not satisfied
- Wrong item was ordered
- Received too many
- Did not arrive in time
Customer Reviews
Custom DK Fit Kit for 4 Rhino-Rack 2500 Series Roof Rack Legs - Naked Roof - DK468
Average Customer Rating: 4.7 out of 5 stars (3472 Customer Reviews)
This custom fit kit lets you mount 4 Rhino-Rack 2500 legs to your vehicle with a naked roof. Clamps mount to legs with bolts. Includes 4 clamps and 4 pads.by: Andrew07/07/2023
Received quickly and everything was as described. Assembled and installed with ease. Everything functions great and the wind fairing completely killed the crossbar whistle.


by: Andrew08/03/2022
Seamless installation. The instructions were well thought out and easy to follow. A year after installation the contact points are solid as when first installed. The rack system matches the truck and gives it a great look.


by: Wayne09/01/2022
Fits beautifully! Easy directions. The additional instruction sheets that were specific to MY truck made this whole process stress-free.


by: Donald02/10/2024
Scratches right out of the box. Fits good and works.
by: Ronald03/21/2023
I love the roof racks and use them all the time carrying ladders or building materials
by: Ian 07/25/2023
2023 Nissan Titan
These fit the truck really well!
by: Tri04/29/2023
This rack has been perfect. After a year of ownership it’s still going strong!!
by: Raymond09/15/2022
The product is sturdy, well built and attractive. On its own, only a four. Your video installation instructions got you the 5th star, as the printed instructions from Rhino were a complete waste of paper.
by: Carl 09/22/2022
Great product, I've never used the clamp down style before, but they are just as solid if not more so than the bolted down ones.
by: Joe 05/13/2021
Nissan Titan
Roof rack is a perfect fit on my 2021 Titan. Ski rack will be used for my surf fishing rods.
by: Van06/03/2022
Roof rack fits perfectly. Came with missing the rubber pieces but a replacement was sent quickly. Thanks
by: Cody 08/23/2021
Great on everything all around well handled by the whole team
by: Tim06/07/2019
2017 Nissan Titan
Product works great for my 2017 Nissan Titan.
by: CA03/30/2017
2017 Nissan Titan XD
Actually arrived 2 days ahead of schedule. Thanks
by: Mary09/18/2023
by: Zachary 01/29/2024
by: Stephen 10/06/2022
by: Wayne 09/17/2020
by: Igor 12/19/2023
by: Phuengboon10/30/2022
by: Nigel 04/04/2021
2021 Nissan Titan
by: Daniel 07/14/2022
by: Jerry F. Pennsylvania05/14/2023
This was a great purchase. I originally ordered roof crossbars from somewhere else and immediately returned them. They were a universal fit and were not secure at all when they were tightened down. They were from a third seller on Amazon. I found these on etrailer and I am glad that I made the purchase. I did not want to spend the money at first that these cost, but am glad that I did. The install was easy and the crossbars are very secure and hold up well with the cargo basket installed. They were well worth the money. Can't wait to try them out when we go camping. Thank you etrailer.


by: William01/05/2023
Ease of order, receipt, installation and excellent customer service is what I received in this order.
Thank you, e-trailer!


by: Howe10/09/2022
Takes a little while to assemble the rack bars.
The stickers are great I can mark the positions after measuring the distance between the bars.
One of the screws is underneath the bar; it is hard to reach to tighten the bars.
Finally, I got the roof rack installed and it looks good.


25
2715
Show More Reviews
See what our Experts say about this Rhino Rack Roof Rack
- Does Roof Rack Clip for Rhino Rack on 2017 Nissan Titan Clamp Around Weather StrippingThe clips of the Rhino Rack roof rack you mentioned # RRVA150B-2, # RRRLKVA, and # DK468 clip around the corner of the roof line like in the picture I attached. It doesn't actually clip around the weatherstripping as that's below that portion.
view full answer...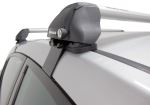
- Rhino Rack Roof Rack that Fits 2017 Nissan Titan XD with Naked RoofRhino Rack does have a roof rack that fits your 2017 Nissan Titan XD with a naked roof with the part numbers # RRVA150B-2, # RRRLKVA, # DK468. With these three part numbers you'd have everything you'd need to install a Rhino Rack roof rack.
view full answer... - Rhino Racks Roof Rack Components Needed to Install Roof Rack on 2017 Nissan Titan XDThe Rhino Rack Fit Kit # DK468 is a confirmed fit for a 2017 Nissan Titan XD. The other components you would need are the cross bars part # RRVA150B-2 and the feet part # RRRLKVA.
view full answer... - Roof Rack and T-Load Bar for Hauling 2 Kayaks on a 2017 Nissan TitanI recommend using a Rhino-Rack set up for your application. This includes the Vortex Aero Crossbars # RRVA150B-2, the 2500 Series Legs # RRRLKVA, and the DK Fit Kit # DK468 for the roof rack. Then you need the Rhino-Rack T-Load Hitch Mounted Load Assist and Support Bar # RTL002 which fits a 2" hitch. The parts above give you a full 2-bar roof rack which can be useful for multiple applications but if you are only wanting a 1-bar roof rack you need parts # RRVA150B, # RRRLKVAH, and # DK468H.
view full answer... - Is The Rhino-Rack ROC25 Roff Rack Compatible With A 2011 Nissan Titan Crew Cab The Rhino-Rack ROC25 Roof Rack for Naked Roofs # RR26XR unfortunately are not a compatible fit for your 2011 Nissan Titan Crew Cab. The only fits currently available for your truck would be for a camper shell roof over your truck bed, like the Rhino-Rack Aero Bar Roof Rack for Camper Shells # Y02-480B.
view full answer... - Will Rhino Rack Vortex Aero Roof Rack Fit 2022 and 2023 Nissan Titan Crew CabThe Rhino Rack Vortex Aero Roof Rack is confirmed to fit both the 2022 and 2023 Nissan Titan crew cab. You will need the following for the complete roof rack: -Rhino-Rack Vortex Aero Crossbars - Aluminum - Black - 59" Long - Qty 2 # RRVA150B-2 -Rhino-Rack 2500 Series Legs for Vortex Aero Crossbars - Naked Roofs or Fixed Mounting Points - Qty 4 # RRRLKVA -Custom DK Fit Kit for 4 Rhino-Rack 2500 Series Roof Rack Legs - Naked Roof # DK468
view full answer... - Rhino Rack Roof Rack that Fits 2017 Nissan Titan XDThe Rhino Rack fit kits will not work with Thule feet like what you have. Since Thule does not have a roof rack for your 2017 Nissan Titan XD confirmed as a fit your best option is a Rhino Rack roof rack part numbers # RRVA150B-2, # RRRLKVA, and # DK468 which does fit your vehicle.
view full answer... - Aero Roof Rack for 2019 Nissan Titan XD Crew Cab for Transporting Skis and KayaksAll of the quietest roof racks share a similar feature, a wing-like bar shape called either aero-style or elliptical. We offer a cost-effective roof rack of this type for your Titan XD that will work great for skis and kayaks. It comes from Rhino-Rack, one of the industry leaders in aftermarket racks. Their Vortex Aero roof rack, made of parts # RRVA150B-2, # RRRLKVA and # DK468, consists of lightweight 59-inch aluminum aero-style crossbars along with the leg assemblies and custom fit...
view full answer...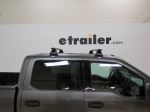
- Recommended Roof Rack for 2017 Nissan Titan XD Crew Cab For KayaksThe best roof rack option for your 2017 Nissan Titan XD Crew Cab is the Rhino-Rack, which is made up of parts # RRVA150B-2, # RRRLKVA, and # DK468. This rack will not damage your Nissan's paint when you want to remove it. The crossbars are aero shaped to minimize wind noise, and give your truck a sleek look. To carry your kayak and paddle board I recommend the Thule DockGrip Kayak and Stand-Up Paddleboard Carrier w/ Tie Downs # TH895. This can carry a single kayak or SUP, has a weight...
view full answer... - Can Two Rhino-Rack Fishing Rod Carriers Fit on a 59" Roof BarYou can use two # RR574F with the 59" roof bars # RRVA150B-2. The external length is 25-5/8" so two of them will fit great on the 59" bars. The other components that you will need to complete your roof rack for your 2021 Nisan Titan are the Rhino-Rack 2500 Series Legs # RRRLKVA and Custom DK Fit Kit # DK468.
view full answer... - Rhino Rack Roof Rack Recommendation for 2017 Nissan Titan XDRhino Rack has a confirmed roof rack solution for your 2017 Nissan Titan XD but they do not offer replacement fit kits for the older style of rack you currently have. Instead you would need to go with the part numbers # RRVA150S-2, # RRRLKVA, and # DK468 which is a confirmed fit.
view full answer...
Do you have a question about this Roof Rack?
Info for this part was:

Edited by:
Tyler C

Expert Research:
Jameson C

Video Edited:
Joshua S

Video Edited:
Jacob T

Updated by:
Wilson B

Updated by:
Alex H

Written by:
Daron K

Video by:
Jon G

Video by:
Charles A

Test Fit:
Aidan B
At etrailer.com we provide the best information available about the products we sell. We take the quality of our information seriously so that you can get the right part the first time. Let us know if anything is missing or if you have any questions.
Product Experts Available Now!
Call 1-800-940-8924
Thank you! Your comment has been submitted successfully. You should be able to view your question/comment here within a few days.
Error submitting comment. Please try again momentarily.