
Summer Starts Here - Save up to 70%
To see if this custom-fit item will work for you please tell us what vehicle you'll use it with.


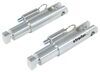
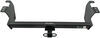
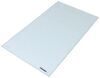
Designed specifically for heavy-duty applications, direct-connect brackets install onto your vehicle's frame to provide attachment points for a motor-home-mounted tow bar. Front arms are easily removable when not in use.
Features:
Note: Direct-connect base plates will work only with the Roadmaster tow bars that slide into a trailer hitch, such as the Nighthawk, Sterling, Blackhawk, Blackhawk 2, Falcon, and Falcon 2. These base plates will not work with tow bars that require a hitch ball.
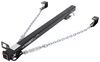
Direct-connect brackets do not require a crossbar because of the heavy-duty nature of your vehicle's frame. Thus, installation is simplified, the hookup process is faster, and the total appearance is enhanced.
Note: The EZ Hook safety cables included with Roadmaster's Sterling tow bars will not work with direct-connect base plates. These cables connect to an anchor plate on the Quick Disconnect crossbar, which will not be present when you are using these base plates.
The drawbars, or front arms, on the direct-connect base plate kit are simple to mount and remove, easily securing with pins. Once the drawbars have been removed, the remaining brackets are virtually invisible. On most automobiles, the brackets are mounted within the grille, where they remain not only unseen, but protected from scrapes and scuffs as well.

Videos are provided as a guide only. Refer to manufacturer installation instructions and specs for complete information.
Today in our 2015 Scion XP we're going to be taking a look at installing the Roadmaster MX Base Plate Kit with removable arms, part number 1187-3A. This is what it's going to look like once it's installed. As you can see they're a nice black power-coated finish. Once we've removed our tow bar ends, it's virtually invisible. You can just slide it into place, you install your pin and clip. It does give you an area to attach your safety chain loop.
These base plates are custom fit, designed for whatever particular vehicle you may have and they're going to be a bolt on design, not requiring any welding. Some do require drilling, this particular application does not. Now, let's show you how to install it. Our first step in our install is we're going to remove our front fascia. We're going to start by removing this plastic filler panel right her at the top. It's going to be one, two, three, four, five clips.
For these clips we're just going to take and push down in the center, then you can remove it. Slide this out of the way. We're going to set that aside. We have a couple more clips we're going to remove. We're going to have these two here one here, and two more on the other side.
These you can use a screw driver or panel tool, just pop up the center. Then we'll remove, there's 10mm bolts, one, two, three, and four. Now we can go to the sides of the fender welds and remove a couple of screws there. We'll have one 10mm bolt up top, then there's a clip right here. Go ahead and take out the 10mm bolt or screw, we can take our flat blade screwdriver, turn this to release it and we'll take out this clip, that's going to release it off the back. Then we'll repeat this process for the other side as well.
We're going to have eight screws on the bottom of our fascia that are 10mm, as well. So go ahead and take those out. You want to make sure you have it all loose. Then we can grip firmly and just pull out on our fascia, we do that on both sides. Now we're going to remove our plugs for our fog lights before we can take it out. We'll squeeze up on this little tab at the bottom, pull back our light. Do that same thing on the other side. Then we can set our bumper cover somewhere safe until we're ready to reinstall it. Now, we can remove our foam absorption pad. We're just going to pull it out. This is not going to be reinstalled. We're also going to need to remove this bumper core and before that we're going to take these wire clips that are on here and we're going to pry them up out of our bumper. We have one more on the other side over here. Once they're out, we're going to have two 14mm headed bolts on top, two on the bottom, on either side and we'll remove this bumper core. Now, it's not going to be reinstalled either so we'll set it to the side and give it back to our customer. We want to leave one in partially so the bumper won't fall down while we're loosening the other side, then we can remove the last one. We'll repeat this process on the other side. Now, we can remove our loose bolts that we're holding up our bumper and we're just going to sit this off to the side. Now, we'll take our new base plate and we're going to set it into position where we removed our old bumper core using the original hardware. Now Roadmaster does recommend that you put Loctite on all the bolts that we're going to be installing in the vehicle, as well as the ones that go into your factory holes. So, we're going to use some red Loctite, available on our website, part number LT37420. We're going to put some on each of the bolts and we'll thread them in. Repeat this process for the other side. Once we have all of our bolts with Loctite, we're going to run down all the bolts. Now we can torque down our base plate bolts to the specifications listed in our instructions. Now, we're going to have some brackets that are going to go in a frame and bolt up here and they'll also bolt from the bottom side of our frame rail and attach at those two points. Now, one quick tech tip. You want to go ahead and clean out your threads. You can either run the bolt in or out or if you have a tap, just tap it out, make sure you get all the paint out of the threads. You may encounter a little bit of the body touching here, not allowing us to slide in, so you might have to take a grinder and grind off on your vehicle if it's going to be in the way. Now on this side it's going to clear just fine, we're on the passenger side. We're going to take our 1/2" bolt with lock washer, put on our Loctite and we're just going to start this one into the hole leaving it finger tight so we can still move around our bracket. Then we can go down to the bottom side and install our 1/2" bolt, lock washer, and this one will have a flat washer as well. Just a little bit of Loctite on there as well. You're going to go up through your existing hole in the frame and we'll run down our bolt. Now we're going to tighten up the one on the top side first in order to push it back and seat it into position, then we can tighten up the one on the bottom. Now we'll take a 19 or 3/4" socket, whichever you have, they'll both fit and we'll run down the bolt on the front of our bracket. Then we can tighten up the one from the bottom side, making it snug and we'll get ready to torque them down. We'll torque these two bolts to the specification listed in our instructions and we'll torque down this last bolt on the passenger side, then we can move over the the driver's side where it's a little bit different operation. As you can see, the gray part here is our body of our vehicle, our bracket doesn't fit. So, we're going to take a grinder and grind out this excess so our bracket will slide into place. Now once we have it ground out nice and wide so it'll slide through there, we're going to slip our bracket into place and we'll start out bolt into position. It'll be our 1/2" bolt with our split lock washer and some red Loctite. We're going to leave this nice and loose. We can go to the bottom side where we have to remove a bracket before we can put our other bolt in. We'll take out this 12mm bolt, carefully bend it down. We need to install our 1/2" bolt, lock washer and flat washer into this bottom hole right here. We'll put our Loctite on there, as well. Now we can go to the top and snug up our bolt going to the front of the frame first, followed by the one on the bottom. Now we can torque them down to specifications listed in our instructions. Once we have this lower one torqued down, we can reinstall our bracket and bolt. As you can see, we have plenty of clearance between our metal line and our bolt. Now we can torque our last bolt into place. We're going to take some supplied zip ties and we're going to tie our wiring to our base plate. Now one note, you want to make sure you have all of your wiring behind the base plate and if it's on the outside, you can just unplug the three plugs and reroute it behind. So, we're just going to take one, go around rewiring and we just want to keep it so it doesn't flop around behind the grill. We can trim off our excess and if you need to use a couple more it's not going to be a big deal, just go ahead and pick up a couple extra zip ties because you want to make sure you don't have anything coming in contact with any moving parts. Now, in your instructions, it's going to show you where you need to trim out your grill to allow your base plates to come through, but it's a good idea to hold it up and look exactly where it's going to land so you have a better idea of where you're going to cut it. Now we've determined we need to remove these two center bars here, about two-thirds of the way across. You can just slice right through it. I'm going to go all the way to the end. I'll just trim this piece out. We'll do that from both sides. We can always trim it out a bit more once it's in place. Then we'll take our fascia and place it back on our vehicle and we're going to see how much more we're going to have to trim. Looks like we'll be okay there. We just have to clear it up a little bit before we snap it back into position. Push them in until they snap. Now we're going to take our four bolts that go along the top, it's going to be the one with the shoulder and we'll start them in the holes and take our 10mm socket and we're going to tighten those up, take our large clip, snap it back into position there and we'll have two more on the end. Then we take our filler panel, we'll put that into place. Those screws that we previously pushed down the center on we're going to push them right back through so they go into place and just snap the centers down. Now you want to tuck our fender liner back in place and we'll take our back screw and then our clip. We'll just slide into position and it snaps in. Now we can move onto the bottom. We can reinstall our clips, our screws into our clips. Now we're going to need to trim back a little bit more so we can get our pin in place. We can take our base plate arm, place it into position. We can slide our pin in on the backside and that allows us to put our pin in place. That's going to do it for our look at an install of the Roadmaster MX Base Plate Kit with removable arms, part number 1187-3A on our 2015 Scion XB.
Average Customer Rating: 4.8 out of 5 stars (377 Customer Reviews)
Designed specifically for heavy-duty applications, direct-connect brackets install onto your vehicle's frame to provide attachment points for a motor-home-mounted tow bar. Front arms are easily removable when not in use.
The base plate was easy to install.
No issues with the installation.
The instruction could be a little better on the trimming of the grill.
This is the second base plate I have installed. This was by far the easiest. No holes to drill, just bolt it on. Video was spot on and used this while installing base plate. Also want to thank George at etrailer for expediting shipment,
Product is fine, but the packaging was almost destroyed. I would suggest you ship the bolts and nuts in a seperate box, as there were some missing.
fits perfect and works amazing!
Excellent service -- ordered online afternoon of July 13; shipped same day and arrived two days later. etrailer video was helpful in outlining steps for installation - especially fascia removal prior to actual install. Installation took about 3 1/2 hours which includes fascia/grill removal and reinstall. Did need to secure additional fender clips to reinstall fascia - many broke during removal as almost 20 years old -- available aftermarket from Dorman. Order arrived correct with all parts/no damage. Fit was excellent. Will order from etrailer again
I originally purchased a Blue Ox baseplate to install since I already had a tow bar. Upon removing the front grill, I was surprised to find the used Element I had purchased already had the front bumper caps removed and 2 braces installed. Thanks to the photos on etrailer reviews and product info, I was able to determine that the vehicle had previously had a roadmaster baseplate installed! I purchased this unit and it fit perfectly onto the already installed braces. Seems very solid and high-quality so far.
The coupling pin point end up being too low relative to the ground. . Therefore to remain within the required 3 inch horizontal limit for the tow bar, a 6 inch drop must be added to the towing vehicle. This creates a significant problem for a motor coach. On rises and falls of the road surface ( speed humps, etc.), the drop of 6 inches creates a rub condition between the drop hitch, safety cable, brake air lines and the road surface. If the adapters where engineered to be extended and the pin coupling points were raised 3-4 inches, the problem would be solved. It appears this designers considered aesthetics more than integrated functionality. Other than the fact that I must disconnect the tow vehicle, remove the tow bar and remove the drop hitch to traverse forward in situations and on many occasions , it is a functional base plate.
This whole system is great!!! Even being a female, it takes less than a minute to connect or disconnect, just a couple of small receivers stick out of the front of the car. And they are removeable when not towing. My brother even bought a set for his Class C. It is difficult to back up in the Class C, IT is ok as it is quick to disconnect, so no worries.
Easy install, remove factory tow hooks slide new brackets in, mark and drill 2 half inch holes for each bracket install and torque all bolts, simple install quality Roadmaster product with excellent workmanship.
Easy install, instructions were clear
I have it it over a year now and preforming flawlessly!Install went well. this so much easier than when I was using a tow dolly. flat towing is really the only way to go
it was delivered in a timely manner, I was able to do the complete installation by my self in my driveway. I love the ease of use, I can connect and disconnect in minutes. I would recommend it to anyone who is going to be towing a dingy!!
Easy to install. Works great. Probably have 5,000 miles or more now towing with no issues.
I was shocked at how easy and precise fitting this base plate installed on a 19 year old 2005 Honda Element AWD with +180K miles! I didn't have to trim anything. I did have to use a smaller but same thickness washer on the inside passage side frame rail as the supplied washer was hitting a factory stop plate which I didn't wish to mess with.
Received my order and it contained all parts required to install. Installation was a breeze because each part fit as it was suppose to per installtion instructions which were also very easy to understand. Will do more buisness with etrailer in the future!!
Easy installation and works as intended. Quick delivery. I’m very satisfied!
Works great . The only problem was having to take the bumper off the Escape . But that’s not the Roadmaster’s fault . The installation was not hard and the instructions were great.
Another great product from etrailer. Arrived on time came with everything I needed. Had to trim a little more plastic trim than I expected but it’s all good. Took me about 3 hours including the wiring to the tail lights and breakaway switch for the brake buddy.
The tow bar worked exactly as expected - Excellent! I towed my Jeep behind my motor home from Tennessee to Maine without any problems! Can't wait to use it again!
Very good fit. Easy to install. Directions were fairly easy to follow. Will be towing behind our Winnebago Journey. This is my 3rd baseplate from trailer. Great company and customer service.
the base plate kit fit very well, I had to do a little bit of grinding but after that it all bolted up well and fits great
The parts are correct but didn’t come in the oem packaging that uses styrofoam padding. They clanked around in the etrailer box and the powder is scratched up pretty bad.
Knowing how Roadmaster takes pride in their packaging to receiving them in this condition is pretty disappointing. There was not even paper wrapping them up. The cardboard box is in perfect shape.
I was able to install this with the included instructions and video. I thank the company for checking on me one year after I purchased it. I would definitely shop at e-trailer again!
Do you have a question about this Base Plate?
Info for this part was:
At etrailer.com we provide the best information available about the products we sell. We take the quality of our information seriously so that you can get the right part the first time. Let us know if anything is missing or if you have any questions.


Thank you! Your comment has been submitted successfully. You should be able to view your question/comment here within a few days.
Error submitting comment. Please try again momentarily.