
To see if this custom-fit item will work for you please tell us what vehicle you'll use it with.


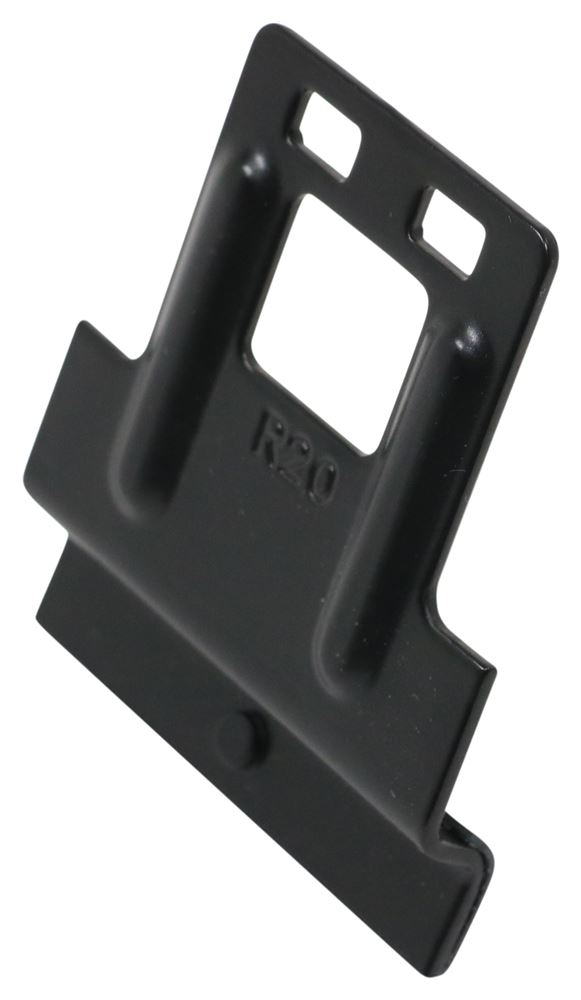


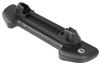
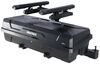
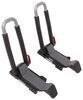
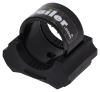
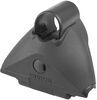
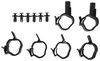
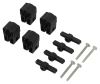
These custom clips and pads let you mount Yakima RidgeLine towers on your vehicle with flush, factory side rails. Clips attach to hooks in tower assembly and tighten together with a single bolt. Kit includes 4 clips and 4 pads.
Features:
Specs:
DropHook System Installation
Custom-fit RidgeClips let you mount RidgeLine towers (sold separately) to your vehicle with flush, factory side rails.
The clips are easy to install - simply attach them to the hooks inside the towers. Once the clips are installed just sit the towers on top of your flush rails and tighten them down. The inner and outer clips in each tower tighten with a single bolt to ensure an even, secure grip on your rails.
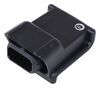
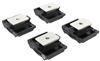
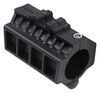
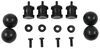
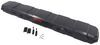
The included molded rubber pads protect your side rails from scratches and abrasions. The pads easily clip onto the bottoms of the towers and are specifically designed to fit the shape and contour of your flush side rails.
Videos are provided as a guide only. Refer to manufacturer installation instructions and specs for complete information.
Speaker 1: Today we have a 2018 Kia Sportage, we're gonna be test fitting the Yakima CoreBar Roof Rack System. This is gonna be consisting of part numbers Y00421, these are the 50 inch long CoreBar crossbars. Part number Y00145, this is the RidgeLine Tower for the flush side rails. Finally, part number Y06021, this is the RidgeClip Fit Kit for this particular vehicle.Now when it comes to these bars, it combines two things; the aerodynamic shape of the JetStream bars from Yakima with the strength of the RoundBars that you'll find from Yakima as well. This can carry a wide variety of accessories while freeing up space inside your vehicle such as bike racks, cargo baskets, or cargo boxes. And this utilizes the fixed mounting points to attach to your roof rack system on your flush mounted side rails so this eliminates a lot of headaches that you get with other roof rack systems such as having to measure from center to center and make sure everything's nice and neat at the spots right here and it's ready to go.
It does have nice thick padding where it makes contact with your factory side rails as well as on the clips that go around it. With our end caps here, we do have these plastic knockouts that you can remove and replace with the Yakima SKS Lock Core System so you can make this secure to your roof as well as key inaudible 00:01:21 with the accessories that you're hauling.We have the front bar installed already, let's go ahead and show you how the rear bar goes on. We have it partially assembled on our table here. We'll show you how the rest of it goes on. In front of me is all the stuff that's gonna come with the kit.
We have the tower, the clips, the fit kit for the bar, and the tightening tool to make sure everything gets tightened down to its proper torque. We'll start with our tower and we'll start installing it onto our bar. We'll take our plastic bracket, which pushes into place onto the top, you hear a little bit of a click. Then we'll loosen up this right here in the center and flip it upside down, you'll see a hole there. There we go.Then we'll slide on our metal bracket onto our bar.
This is what's gonna enable our tower to attach to our bar. Then we'll line up the hole with the screw and we'll tighten this down until our tool here will give you two to three audible clicks. This when you know it's torqued. Now it's still pretty tight to the bar so we'll go back to that screw that we loosened up earlier and just loosen that up little bit more because we want some maneuverability with our tower. Then we'll take our end cap, push that in as well.
Loosen it just a little bit more. There we go. Then we'll take the pad from our fit kit and that pushes into the bottom here and just snaps into place, like so.Now we can set this onto our flush mount side rails. Now right now, we're not gonna have it in a specific set place. We're gonna try to kind of eyeball it to keep it with the front portion, let me show you on the other side so you can see it better. With the two holes here, you wanna go with the hole more towards the front so we'll kinda try to line it up with that. There we go. Make sure it's sitting right on top of our flush mounts, there we go, like so. inaudible 00:04:23 just a hair here.Alright, now we can start taking our clips and installing those. For our front clip, you'll see just the one. The rear clip, you'll have the two plus the notch that fits into that fixed mount. So lift up and it hooks on like so. We'll have to open up the door here because this one's kinda tricky you kinda have to eyeball it to get it in properly. Lift up just a little bit . You'll be able to see this a little bit easier on the other side, there we go. The rear part, as you can see, is the hardest part. Alright, once we have those lined up, our next step is to take our tightening tool and tighten down the clamps to the flush mounted side rails then make sure our rear clamp matches up with that mount. Alright, there we go. Maybe I'll close the door so I can a little bit closer here. As we tighten it down, you can see the clamp moving closer and closer to the flush mount and repeat this on the other side.So our next step is we're gonna measure for our crossbar overhang and that's from this point out. We're gonna make sure that that's the same measurement on both sides, that's why we haven't tightened down our towers to our bar yet.Alright, with that done, we'll take our tool and tighten our tower down to our bar.Then our final step is we're gonna take our end caps, we'll put those in place. It's very easy, they just snap in. You take the two hooks on the bottom, match them up like so. Now we're ready to load up our gear and hit the road. But first, let me give you a couple quick measurements and this is gonna give you an idea of the height that this adds to your roof. As you can see, with these towers here, that adds quite a bit. From the center of the roof to the bottom of the bar is gonna be about four and a quarter inches and from the center to the top is gonna be about five and the 3/8 inches, so from center to the top, center to the bottom. When you have your bike racks or your cargo baskets installed, fully loaded, just keep that in mind when you're pulling into your garage. Also, these bars do have a combined carrying capacity of 220 pounds, however, you always want to go by your vehicle's manual and figure out how much weight it can take up on the roof and go by the smaller of the two numbers.There you have it for the Yakima CoreBar Roof Rack System on our 2018 Kia Sportage.
Average Customer Rating: 4.9 out of 5 stars (44 Customer Reviews)
These custom clips and pads let you mount Yakima RidgeLine towers on your vehicle with flush, factory side rails. Clips attach to hooks in tower assembly and tighten together with a single bolt. Kit includes 4 clips and 4 pads.
No complaints. Except I wish we used it more. Everything went well, their assistance in selection was great and the install went flawlessly.
1 year later and still love my Yakima JetStream system. I've mostly used them to transport my kayak however I've also been able to transport some big box store items as well. They are very versatile. There is a t-track option as well as wrap around attachments. I've use ladder attachments, eyebolts, and Thule Hullavator in t-track. I've used Malone MegaWing and Yakima Skybox as wrap around attachment. What I really like about the t-track system is that you do not need to cut out the rubber track insert. You simply slide over the rubber, which allows you to adjust your system, on the fly, to load what you need to carry.
The product works, and seems durable.
The downside is that the clips aren't locked into place on the towers. They just kind of dangle there until you get them maneuvered onto your rails and tighten them. They often fall off their hooks when making shifts and adjustments with the rack, getting it into place. I've yet to find a way to get the clips into place while the towers are sitting atop the rails. You basically have to take the whole rack and both towers off, reset the clips and gently place into position again while the clips dangle there. Only to be knocked off their position by the rail itself when trying to place and becoming a 2 oz. chunk of metal falling onto your roof sheet metal.
Because of the 'rona-induced supply chain interruptions, I was unable to purchase all of my Yakima components from etrailer, but I did get these, and they are typically excellent Yakima components. Well-made, easy to install, good directions, no problems.
I've been a Yakima roof rack consumer for over 33 years and the RidgeLine Towers are not my favorite. They work for my short trips locally and I am hoping will continue when I do my cross country trips. My biggest issue is it is hard to keep the clips on the little hooks in the towers while installing. Especially the ones on the inside of the towers where it's hard to see when mounting on my roof. I don't leave the rack on my car 24/7. That means I'm messing with those dangling easy to knock off clips every time I need my rack. Yakima needs to come up with a locking system to keep the clips on their hooks. Just one little bump and the clips come off the hook. Directions say to have 2 people, I don't have a spare person around to always be available to help when I need my rack. All my previous Yakima systems have been single user friendly. Once they are on, they've stayed put thankfully. I carry 1-2 kayaks on a 33 year old round crossbar that still has the original end caps. I take care of my stuff. At least Yakima has allowed the continued use of my originally purchased crossbar. Grateful for that.
I needed crossbars for my new 2018 Mazda CX5, which came with flush side rails. The RidgeClip Fit kit for RidgeLine Towers used with Yakima crossbars are vehicle specific, and worked great. The installation (10-15 min) is super easy. The whole setup looks cool, and performed great (I strapped 160-lbs rooftop tent on them!). Removing everything is also super easy (10 min tops). Highly recommend.
I gave it five stars for the rapid delivery. This set fits my Telluride. However be forewarned that the ridgeline product that goes with these clips needs some re-engineering to make it easier to install. I have been a Yakima user for over 4 decades and this is the only one that I have ever criticized.
I chose the Yakima roof rack, because It spanned 50 inches, rather than the leading competitor's 47 inches, making it better for tying down 4 ft x 8 ft sheets of building material. It also seemed to be about half the price. It took me about 2 hours to put it all together and mount it on my car. The instructions were all visual and there was one little pic I didn't understand, but the equipment seemed to go together correctly anyway. Now that it's adjusted, it should be fairly easy to remove and replace next time. I did need to put on super tacky gloves to get the covers off. Although it seemed unnecessarily complicated, I would still choose this product again.
The Yakima roof rack system for my 2019 CX9 with flush mounted rails worked out great, and etrailer customer service was excellent. My first choice was to purchase the Thule system but after digging deeper, I realized that the Yakima was much easier to install. Changing my mind to Yakima was very easy even though the Thule system was almost ready to ship. One suggestion that I think will help with the installation. Add some blue masking tape to the backside of the inner ridge fit clip to temporarily hold it in place. Once secured, the tape can be removed.
This Yakima rack system for my 2017 Kia Sedona works great and are rock solid. I have two Kayaks I take to the lake, river, and beach house for vacations. Dena was extremely helpful and kept me up to date on everything. It’s very seldom to find a company with reps that actually care about the customer!!!! Please keep this going! The shipping was fast and easy and I had them installed within an hour in this Georgia heat! The only thing missing was the etrailer stickers......... ;p I would definitely recommend this product from etrailer for any of you rack needs!!!
The RidgeClip Fit Kit made instillation with the Ridgeline Towers a breeze. The clips are great quality and slid into the Towers easily.
Everything arrived in a timely fashion and the instructions were simple to follow. The fit is good and look forward to many years of use. Kayaks are awaiting for racks to arrive. Thanks for a great product
Etrailer had a yakima part I needed that the actual Yakima site didn’t have!!! Fast shipment, no hassles.
good product, instructions could be better.
This clips were easy to install and work well.
Just what I needed to attach racks to my 2017 cx 5 . Tip of the day , periodically check torque with supplied driver .
I was impressed with the ease and speed with which my order was placed, shipped and delivered. While the rack hasn't yet been installed (it's a Christmas present), the package contents are as expected. I appreciate the professionalism in the handling of this order.
Had the parts I needed when I couldn’t find them anywhere else and they were delivered on time.
Product came sooner than expected.
Ashley E. Was the representative I spoke to. I have a lot of experience in the industry and she was well informed and was a great help.
They worked!
Do you have a question about this Roof Rack?
Info for this part was:
At etrailer.com we provide the best information available about the products we sell. We take the quality of our information seriously so that you can get the right part the first time. Let us know if anything is missing or if you have any questions.


Thank you! Your comment has been submitted successfully. You should be able to view your question/comment here within a few days.
Error submitting comment. Please try again momentarily.