
To see if this custom-fit item will work for you please tell us what vehicle you'll use it with.
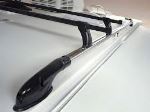
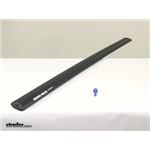
Aerodynamic, aluminum crossbars let you build an aftermarket roof rack for your vehicle. Full-length bars provide plenty of space for carriers and accessories. Vortex strips in C-channels reduce wind noise. Theft-deterring plastic locks included.
Features:
Rhino-Rack Vortex Aero Crossbars - Black - Qty 2:Videos are provided as a guide only. Refer to manufacturer installation instructions and specs for complete information.
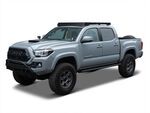
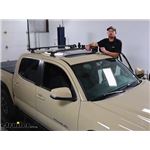
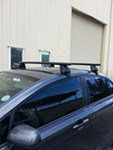
Hey everybody, Ryan here at etrailer. Today on our 2017 Toyota Tacoma, we're gonna be showing you how to install the Rhino Rack Roof Rack System. But before we get into that, let's just take a couple of minutes, check this out and make sure it's gonna work for you. So this particular system is going to be designed for the Tacomas that have a naked roof or you know no factory rails installed at all. If yours has something like that, be sure to use our fit guide and there's definitely gonna be an option or a solution for you. But with that said, what our neighbor did here today, he was looking for something a little more permanent in terms of having a roof rack.
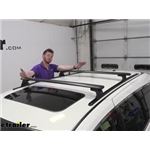
So prior to these, he had a different style that would actually kinda clamp to the sides there and just wasn't really too crazy about it, you know. A lot of people that end up putting roof racks on tend to just leave them on and it makes sense. And that's what he was looking to do. And and with this setup, it's just a little more cleaner and more of a factory type option, at least in my opinion. I think that's kind of the look it puts off.
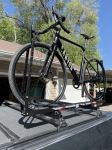
But with that said too, you know, since it's not just, you know, since the system isn't just clamped on, it's actually bolted to the roof this thing is gonna be really secure. Having a roof rack system up here though is really gonna help to open up your opportunities on what you're gonna be able to do with your Tacoma. You know, these aren't a full size truck so they don't have a ton of space to work with and these are really popular. You know, people go out and you know, have fun with them and do a lot of different things with them. So you know, whether you're trying to use a kayak carrier, a roof box, a roof basket, maybe a bike rack set up up here, skis, snowboards, all types of different things, this is gonna allow you to do that.
And even, you know, I see a lot of these Tacomas being used as work trucks. And so what you can use in conjunction with this is let's say a ladder rack, right You got a ladder rack on the back, you know, like I said they're not very big trucks, they're not super long, a lot of times you can set them ladder racks up to where you know you can have a longer ladder come up and support it, you know, using the roof rack. So the possibilities are endless. One of the things as well with this, with these crossbars at least, is the shape of 'em. So they're relatively low profile and what that's gonna help with is helping to reduce that wind noise, you know, a little more aerodynamic, cut through that air a little bit better and you won't hear 'em as much as some of the other types, you know, the round or square ones whenever you're driving down the road.
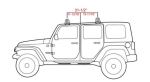
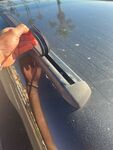
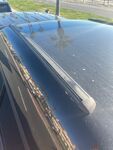
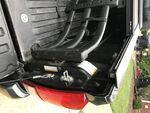
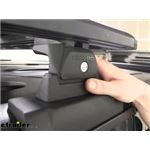
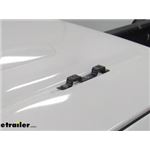
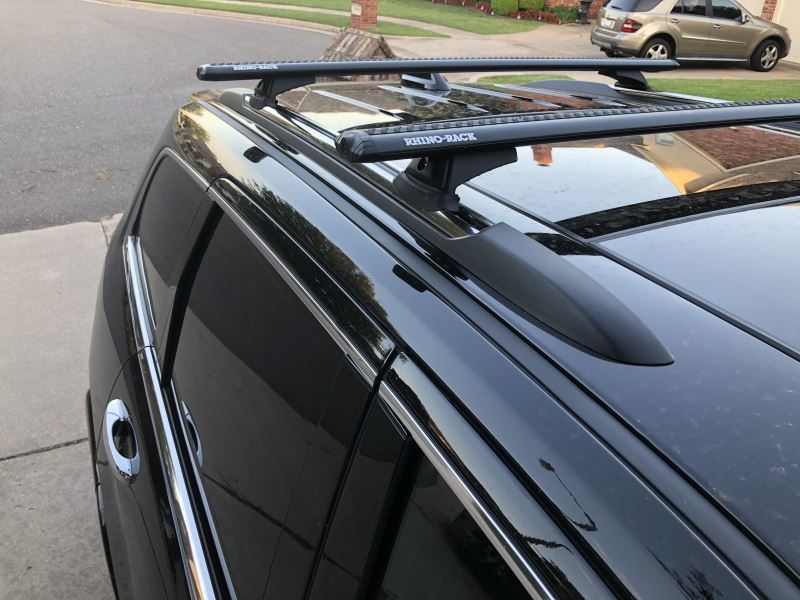
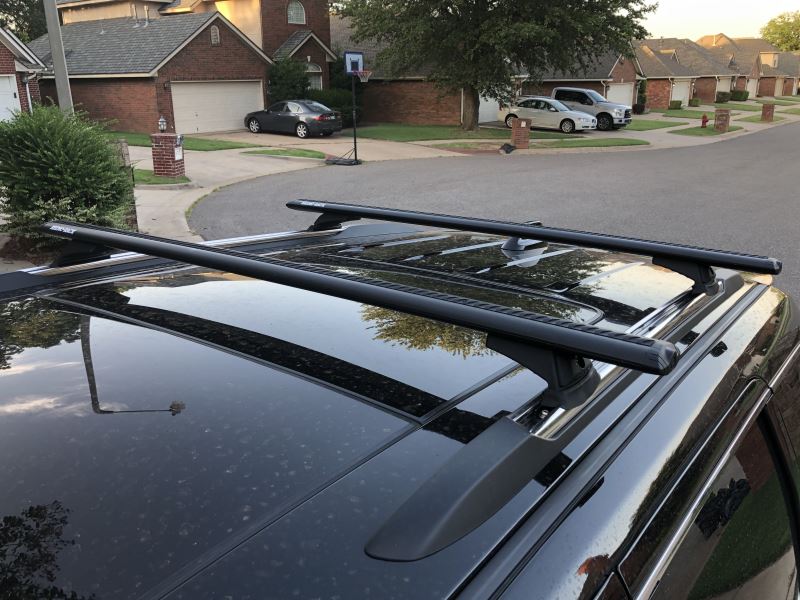
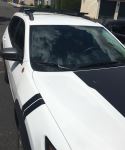
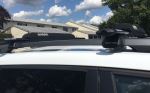
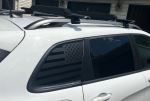
So our Tacoma is equipped with the sunroof and I know I was kind of curious if it would be able to just kind of go up into that vented position without hitting the rack and the answer is yes. So that's it all the way opened as far up as it'll go. And doesn't have any clearance issues. It is kind of close though like I could get my hand underneath there. So just something to think about. I know some type of roof mounted accessories use clamp on style. So like I said, just think about that. If you have a clamp on style and that clamp's pretty thick, you might just wanna be careful and pay attention if you do decide to vent your sunroof whenever you have that accessory on. Now as far as opening the sunroof, let me hop down here, there's no issues at all with that because it kind of just slides right into the roof almost. So definitely no interference. And even if you have a clamp on style accessory, more than likely you should be able to completely open it up like we did just now. As far as how high these are gonna sit above the roof, they're actually pretty low profile. So I'll just go right in the middle here, at least on the front. Push that down. It's gonna be about 3 1/8 of an inch. So not really taking up a whole lot of space. And you know, that can be useful if let's say maybe you're putting a roof basket or a a roof box up here and you wanna load it all up before you hit the road and be able to pull into your garage at night or something. You know, you can use that in conjunction with the the height of that box or basket or whatever to help figure out, you know is this gonna clear my garage or or have any clearance issues. With these being fixed, you know, they're directly bolted down to your vehicle you're not gonna be able to adjust the crossbar spread and so you kind of get what you get and that can matter sometimes depending on you know what type of accessories you end up wanting to put up here. Some of 'em want 'em to be a certain width or within a certain parameter, something like that. So just kinda give you something to work with. If you go from the center to the center that's gonna be right at 28 inches. So honestly that's usually right in the money for just about all the types of accessories. You know, it's a pretty good number there. And I mentioned those clamp on style ones which you can use but this also has a T track in it, so you peel these little guys out here that's where you can put your T track accessories. So if it's something that you know you're gonna keep up here or use a lot or it's only one and you can put them up there get 'em positioned how you want and then you can always trim these pieces and you know trim around 'em and pop 'em back in there just to help keep everything kinda sealed up and help keep that wind noise down a little bit. These are gonna be available in a couple of different colors as well. So we have the black ones here today which I personally like. I think they would match just about any vehicle on the road, but there's some silver ones too. So you know, if that's what you're looking for, they're definitely available. But you know, aside from that, at the end of the day a roof rack system that I actually like. You know, it's super solid, it's not going anywhere. You don't have to deal with trying to set up these temporary brackets and all this stuff. And although the initial install is a little more time consuming, it's worth it, you know, especially if you plan on using this a lot 'cause you won't have to deal with any of that stuff in the future. But kind of speaking of the installation, definitely time consuming. It's not so much that it's really complicated per se. The part that I probably had the most trouble with is just trying to figure out what to do at the very beginning, you know. So once you kind of figure out how to set one of 'em up, the rest are much easier. You know, it gets easier as you go on. So hopefully you know, our install video can get you going in the right direction and give you a little guidance, make it easier on you. If I had to give one pointer though, make sure you got sharp drill bits. 'Cause where you drill into, this channel here, the metal is is really solid so drill slow and you know try not to burn up your bits. But if you plan on putting this on yourself, feel free to hang around. We'll go ahead and get started on it now. To begin your installation not a bad idea just to kinda lay out all your parts and pieces, make sure you got everything, kinda organize 'em, you know. But what we're gonna have to do on the roof there's gonna be a piece of channel that we can pull out and that's because these are gonna have to get mounted to the roof of our vehicle and those will provide us with attachment points. That way we can mount eventually these pieces to it followed by these. So just wanted to kind of give you a visual here and what we're gonna be dealing with. We're gonna be working right on top of our Tacoma. I like to put painter's tape kind of around it that way we don't actually scratch paint or anything like that while we're working. but could have our rubber piece that we need to pull out. Our weather stripping, really nothing to it, just at the end here, carefully take a screwdriver. Sometimes you can even grab it with your hand and this is just gonna peel up completely. And we'll work it all the way off and get it out of our way. And set it to the side. In this ditch, this opening where weather stripping was, that's where our ditch brackets are gonna sit and eventually get secured down into there. So I referenced our instructions on the measurements that we need to take. So you'll measure from the top of the windshield glass, you know, back put a mark and then you know continue on to that second measurement and put a mark. Really helps if you have a metric tape measure. It just makes it a little easier, but it can be done with the standard one. Just you'll have to pay a little bit more attention there to get it spot on. But you know, find 'em, put the reference marks and then we can kind of go from there. With our marks made, you know, the center hole there in the ditch bracket that's going to be centered on that mark. and just to try to help keep everything constant, I have a 13/64 force drill bit. It's just over a quarter inch size that I'm gonna lay here and kind of but it up to it. That way we can have a constant. You know, if you do this for every one, it's pretty much splitting the difference and getting the centered exactly. If you do this for every one, we know that they'll all be the same, you know, so I think that'll help out a little bit. But I'll get that centered up and you can mark out the three holes there. Get our drill bit and if you have one of these stopper collars, you can put that on, you know, that way you don't drill completely through. Just be careful if you don't. But we're gonna drill out our holes here. So I like to start with the one in the middle and kind of go from there. And this is a really hard steel so drill slow and apply some good pressure to it and just take your time. (drill motor revving) Once you get that middle hole drilled out, what I like to do is just take one of the Huck rivets that they give you and just kind of put that in there. 'Cause sometimes when you're drilling, you know, it might get knocked off course just a little bit. And so I just like to use it as a reference here. So it looks like we're still in pretty good shape. So I'll go ahead and get this one drilled out. Do the same thing, check it, and finally this last one. Let's get all three of them drilled on out. You know, you want to put some type of protective paint or something over that bare metal. So I got a little primer stick thing here that I will push in there, get a layer on it. And you know, once I get this done we'll give it a few minutes to dry and then we can come back and get ready to secure our bracket. So I'll give that a few minutes to dry and now we can put on this butyl tape here. And what I like to do the center of it, just take one of the rivets that they give you, push that through, clear out that hole and then peel off one side and just simply stick this lining up the hole in the butyl tape with the holes that we drilled. And this will just kind of help keep everything sealed up and prevent water seeping in and and stuff like that. Go ahead, grab your ditch bracket again and take the Huck rivets and I'd just like to, you know, push all three of 'em into place. That way it kind of holds where it needs to. And you're gonna wanna use a rivet gun. I have a pneumatic one. I'd assume you could use a regular handheld one too. Wouldn't see why not. What you're gonna do is go ahead get all these rivets hooked. At this point you can take the mounts here and I like to use this little rubber gasket. I don't think you absolutely have to, but I don't really see why you wouldn't, because it will kind of help, one look better, especially once you get the rest of the weather stripping back on and help kinda keep everything sealed up. So pop that on. And then you're gonna have two bolts that are gonna secure this. I have this type of bolt here and you will put on a split lock washer and a flat washer. And they even give you the special tool that you'll need. So what I like to do is kind of get it crushed through there and get 'em started. Sometimes they're kind of hard to find, you know, so make sure when you're turning this you're not cross running it. Don't force it. If you feel it start, you know, get it going a turn or two. And then go to the, start the other one there. So I got this completely secure, nice and tight. In the center there you can take this nice little rubber stopper and that just kind of pushes into place. And then you can grab this part and if you unlock it, you now have these two red handles and when you squeeze them in, you can see these end pieces kinda come in with them. So hold that in. Actually looks like, squeeze 'em in, you can kind of push forward actually and it holds it in like that. But you'll line that up (plastic snapping) (plastic snapping) (plastic snapping) and that will snap into place like so. We'll just put the cover back on. With this one done, what you're gonna do is repeat, you know, that exact same process, not only for the one in the back, but for the two on the other side of our truck as well. So we'll have, you know, all four corners completed before we worry about getting our crossbars on. Once we get all the corners set up where we're gonna attach our crossbars, we can get these going. So pull the end cap off. There'll be a little key stashed in there and these pieces which will eventually go on the bottom. In that case you're wondering this is the top side where it's labeled. This will be facing up towards the sky. And then inside of here there should be (metal clanking) some strips. And with these you're just going to place 'em into the tracks and kind of fill 'em all the way. And so what, kind of a trick I figured out if you take some soapy water, spray them down real good, you can kinda get this started. About like, let's say about halfway here. And then I kind of peel up maybe an inch or two on that end. Gives you something to grab onto and you can just work that, you know, all the way down to the other end there. So it's at the edge, and I'm just gonna do that same thing until these will be completely full. They usually give you extra. So you might have to trim one to length to fit at the very end there, but you know really nothing to it. Got that, you know, rubber strip ran all the way down there and take off the other end cap and we should be ready to actually get this in place now. So the way this is gonna work, you can see on these parts here, there's gonna be this square nut, I guess you'd call it with a bolt coming through. And then there's kind of this guide or this track. So if you look at our crossbar you know, those divvies there are gonna kinda ride in that groove and then this square piece is gonna sit inside of here and that way when you tighten it up it's gonna draw the crossbar down to this. So just to kind of make this easier to see what's going on, I'm gonna remove this just so we can show you. Can definitely do it, you can get to the bolt from down here, but like I said we'll just show you what's going on. That's the bolt that you're gonna be working with. So just loosen it up. You don't have to do it all the way. you just want it enough to where, you know, the crossbar could be able to slide in there. So we'll just do it like this. Actually you can definitely do this with this on still, but why not So it'll slide in like that. All right and then put this back on. All right, just like that. We're not gonna tighten that nut or that bolt just yet. We want to do the same thing on the other side of our vehicle. And that's so we can still have this adjustability you know, we can work from side to side. So I'll get that one done same exact way and we can go from there. If you have both of the sides started, I showed you could slide it. You're gonna want to find the proper amount of overhang, you know, how far is this piece gonna overhang from this And not really much to it there. You just wanna split the difference and have it be the same on each side. So I like to find, you know, find that point and then if you have a a square like this, find it really useful. You know, you can kind of just quickly check, like that, lock it down, then check the other side and you'll never really lose that spot. So it kind of, you know, makes it easier on you. So I got it squared away and then that Holland key that was under here, just tighten it down and that's what's going to lock that in place and prevent it from moving. And from there, if you remember those pieces that we had removed and held onto, you're just gonna cut those length to slide into the bottom tracks, you know, so everyone, you know, it's just something you'll just kind of have to do by feel, at least that's how I do it. And these ones are actually a little bit easier to go in than the ones on the top, little different material. And we get that covered up flat. Obviously do the same thing the other end of it. And then if you did take this stuff apart, go ahead and put it back together. And finally the end caps here. And so with our front one done gonna do this exact same process for the rear crossbar. So once you're all put together, what you can do is take your original weather stripping and cut at the length. You know, I just hold it up and kind of eyeball a length and my thought is trim it longer than you need, a little bit longer and you can always trim it down to kinda fit perfect. But with this stuff it just kinda snaps, snaps right back into place. And that'll finish up our look at and our installation of the Rhino Rack Roof Rack System on our 2017 to Toyota Tacoma.
Average Customer Rating: 4.8 out of 5 stars (99 Customer Reviews)
Aerodynamic, aluminum crossbars let you build an aftermarket roof rack for your vehicle. Full-length bars provide plenty of space for carriers and accessories. Vortex strips in C-channels reduce wind noise. Theft-deterring plastic locks included.Indeed they were the wrong parts in the box marked demo on them.
The new parts came and I was able to
Put it on my car with no problem!!
Thank you for listening to me and helping me problem solve. It looks great on my car and I'm ready to load the kayaks now!!
Kalie is a gal that sent me some return labels so I'm going to put that on the box and send it back to you guys!
etrailer.com's videos and additional customer support made the purchase of a Rhino Rack system from them for our 2010 Malibu a no brainer. The rack fit the car perfectly, and with the videos and clear instructions that came with the kit, I got it installed on the car with only one misstep. The instructions came the the measurements in centimeters and inches. I didn't have a metric tape measure, and ended up messing up converting fractions to decimal.
My Daughter is going to college 500 miles away and is moving into an unfurnished apartment and needed to pick up some small furniture that wouldn't fit in her Malibu. She purchased several items from Facebook Marketplace and was able to transport a twin bed and mattress, a medium sized desk and some dining room chairs (in several trips) with no problems.
The only thing I can think of to improve the installation would be to have the Inches measurements in decimal or to include an inexpensive metric tape.
Wow! It's a real well made and engineered product and was delivered fast. I got it so I could remove it due to garage door clearance... It is heavy duty enough to carry our boat and 2 kayaks. The key lock, pivot system and removal system were well thought out and so easy.
Rhino-Rack installed on my 2022 Jeep Cherokee. There was wind noise (whistling) when all the rubber spacers were not installed, now it’s very quiet. I also installed the Yakima fishing rod//Ski holder. I wound up deviating from the directions and using the third lot, so the clamps would close on the bar. So far so good, without the fishing rod holder it’s low profile enough to get into garages, etc. Fast delivery on the products.
Great sturdy rack. I put it together myself and have already started using it. I was concerned that it would cause leaks in the door the way it has to mount..but its Florida and its rainfall in the past few days and no leak! The weak link would be the end caps..two do not lock on and im concerned the will fly off at some point.

I love it works amazing on my 2017 Hyundai sonata sport 2.0T
You have to order the cross bars and connector hardware separately. I also ordered the end cap locks.
I consider myself a pretty good DYI person and it took longer than I expected according to other reviews on here to get everything installed and overlapping the same on both sides.
Once installed the crossbars are very solid. I do get noticeable wind noise at say 70+MPH.
I installed these on a 2020 Jeep GC Overland and they look and function great! Was a bit concerned about the sun roof retraction with the bars, but there is plenty of clearance. No issue.
I for sure recommend the Rhino Rail crossbars. Etrailer is a great site to get the bars. Given the COVID issues and supply chain breakdowns retailers are facing, they still had everything I ordered to me in a very reasonable time frame.
I bought the complete set (mounting points, mounts and aero cross bars) looking for a less expensive approach for a rack to carry my sea kayak. The equipment shipped quickly from or via etrailer. The instructions that came with the whole kit leave a little bit to be desired and a little bit of mechanical interpretation is needed to figure out what parts you need and which you don't. The whole set went together relatively easily in an hour or so. I remove the bars, mounts and mounting points when not in use which is a bit time consuming and fiddly. I had to replace the mazda 3's roof moulding which was continuous with one that had the necessary pop out pieces to accept the rack but this was not costly nor a big job. Overall, I am pleased with the rhino rack and it looks just fine. The one area it could be improved is wind noise - at some speeds there can be quite a heavy drone either off the bars or mounts. The bars do have rubber inserts to smooth out the surface across the width of the car. I suspect it might be the mounts which have the inboard side of them completely open so the air flowing along the car goes over this open space like you would have happen when you blow across the top of a bottle. I am going to try to cover the sides with gorilla tape to see if this makes a difference. Apart from that, I am quite happy with the etrailer ordering, delivery and the Rhino rack in general.
I bought this rack for my son who is a rower so he could take his single shell and oars to regattas using his new Chevy Cruz. First trip from Wyandotte, Michigan to Boston, Massachusetts and back was great. A learning curve to get in the right spot on roof but very sturdy & strong. He is looking forward to many regattas with this car and roof rack. Very Satisfied with etrailer and the rack itself and thank you for the quick shipping.
These crossbars were easy to install, are sturdy when installed and look great on my factory side rails when installed with the SX Series legs. The standard end caps are an all-plastic affair and use a little key to engage a cam lock. That plus the distance from the end of the crossbar to the nut that tightens the foot onto the rail keeps things relatively secure. Most people probably want to opt for proper locking end caps, though.
The rubber vortex strips look nice and give items something grippy to rest on. I haven't tried a load test yet but did drive around in moderate wind on the highway in multiple directions. Other than a slight whistle at 70 mph, you'd never know they were there. Overall, real happy with the product and looking forward to hauling some stuff around with them.
Easy to install. The pins on the legs clamp perfectly into the fixed points on the car's flush rails. This is a nice low profile set up. The top of the crossbar is about 4" above the roof glass and does not interfere with opening the sunroof. This is a very sturdy setup for our Thule Motion XT XL. etrailer shipped extremely fast. Very pleased with my purchase.
My inital thought of these crossbars were that they were going to be too small. Two of the other big makers call for 53" min and 60" recommended. However after installing, 49" is a perfect fit for the Cayenne I feel. The rack is extremely quiet (make sure you use the channel rubber on top and bottom) The Cayenne is fairly quiet car inside and it was one of my big concerns but I only hear what sounds like a slight rush of air, no buzzing or whistling at all.
The downside to this rack is I think the black paint is too thin. Just laying it on the pavement while setting up caused scratches to appear. Silver would be the way to go if your getting these, or spray them plastic.
My Rhino-Rack Aero 2500 roof racks fit solidly on my 2007 Honda Civic EX. I was really impressed with the construction and strength of the rack system. Also the versatility of the 'legs' with a swivel pad allow them to fit any roof pitch perfectly. The clamps are so solid, nothing could knock these racks off. I added a paddleboard attachment and went surfing today. The black racks also look great with the black trim on my silver Honda. Great product at a much better price than Yakima or Thule.
Received the roof rack on the date promised, it was well packaged and all parts required were included. Everything fit together very well and the instructions were easy to follow. The rack looks good on the car. Once the rack is installed and the included decals in place it only takes a few minutes to remove it and reinstall. This is important for me because we will only use the racks to transport our kayaks the rest of the time they will be removed and stored.
There are two small items that can be improved. First the legs are different lengths yet nowhere in the instructions does it tell you where each size goes. Second I own 10 tape measure and not one of them is in meters and I do not care how good your eyesight is you are not going to be able to measure to 53/64". If the measurements are critical you should ensure customers in the US have measurements they can use or include a MM tape measure.
Overall this is a very good product that I would purchase again and recommend to friends.
Love these aero bars. Perfect for on my 2018 Grand Cherokee Trailhawk. Run fairly quiet and perform as expected. As always the customer service from etrailer was top notch.
Used the cross bars once with a kayak. Black paint easily scratched showing the metal underneath. Was told this was normal wear and tear. The product was bought less than a week ago. Would not buy again.
The product info on your website led me to believe that the vortex strips were included with the bars. They were not. I have always bought Yakima in the past and will in the future.
I wish the description had mentioned that you had to drill holes and put rivets in the roof. I didn't want to do this for the first time myself and went to 3 shops that all refused to do so because they didn't want to be responsible for any leaks. I'm sure they are fine if you are willing to install them yourself. I ended up ordering the OEM rack and installing that myself. It used the pre-existing threaded mounts.
Easy to read instructions, easy to install. Watched the install video a few times just to be sure! They do whistle a bit at highway speeds, but certainly not unbearable. In fact, I was surprised as to how quiet they are. It's to be expected, especially when paired with kayak j-racks. So happy with this purchase and I would definitely recommend them!
I spent a week reading reviews and forums to find the right one for my 2019 Jeep Cherokee that I just bought a few weeks ago. I just have to overthink everything but it paid off. I just received them this morning and installed them myself! First time for everything! It was really easy. The only part that was frustrating was the very first part... sliding the rubber pieces into the crossbars. They would not slide very well so I ended up using a bit of oil to make them slide better. Other than that, installation was easy and quick. I LOVE the looks of them. Very gorgeous!!! Thank you so much!! Very happy with the end result!!
These are cross bars ONLY and are useless without other hardware. This could be presented in a more clear way. I will be returning and buying a complete cross bar set elsewhere
The quality is very good. Ordering was easy and installation using the video made the process so simple. Glad I order them from here instead of somewhere else.
I haven't extensively used this rack yet, but so far, it is excellent.
Avoid my mistake and buy this rack first... Last summer, I purchased a much cheaper off-brand roof rack that was supposed to fit my car. I figured the off-brand rack couldn't be that different from the more common brands, such as Rhino Rack. Long story short, I was wildly wrong. It was nearly impossible to install, and once installed, I didn't trust it with my wind surfboard on it. This rack, however, was easy to assemble and install and is rock solid. I have zero fear of my board or the rack leaving the party before we get there.
Looks a great and we’re super easy to install.
2021 Jeep Grand Cherokee L 4x4 Limited
The bars look and feel great. They have such a tough presence while still being aerodynamic. I love the look of the rubber grip strip on top and I like how the rubber strip on the bottom ends have graduations so you can easily match the overhang with the other side. They feel incredible strong, no bend in the them at all. If the platforms were a bit more robust this thing would outshine all the competition. However, it competes with every other system at a much lower price point so that gets 5 stars in my book.

Do you have a question about this Roof Rack?
Info for this part was:
At etrailer.com we provide the best information available about the products we sell. We take the quality of our information seriously so that you can get the right part the first time. Let us know if anything is missing or if you have any questions.


Thank you! Your comment has been submitted successfully. You should be able to view your question/comment here within a few days.
Error submitting comment. Please try again momentarily.