
To see if this custom-fit item will work for you please tell us what vehicle you'll use it with.
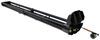
Extremely quiet, aerodynamic crossbars attach to Yakima towers to create a stylish roof rack for your vehicle. Rubber strips in T-slots push down to load carriers or accessories - no need to trim. Full-length aluminum bars maximize carrying capacity.
Features:
Yakima JetStream Crossbars - 50" Long - Black - Qty 2:Videos are provided as a guide only. Refer to manufacturer installation instructions and specs for complete information.
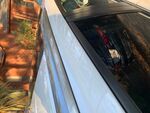
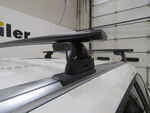
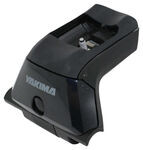
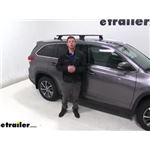
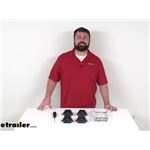
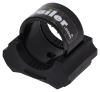
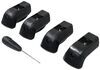
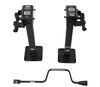
Adam: Hi everyone. Adam at etrailer.com. Today we're going to be taking a look at the Yakima roof rack system on our 2019 Toyota Highlander.So on this specific system, we have the skyline towers, which are going to be these guys right here, with that nice cap. And the landing pads are going to be the skyline landing pads as well. And that's going to allow you to use your flush-mounted rails of your Highlander to put these on. It's really, really simple.
Really all you've got to do is just undo that cap and it comes off. We actually do have a cap that comes and goes over these whenever you're not using them. Just to show you guys, I'll actually go and grab one real quick.That's the one thing I really do like about this roof rack system. There's not a whole lot to it, and whenever you're not using it .. Look at that.
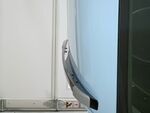
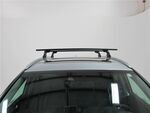
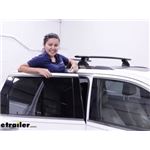
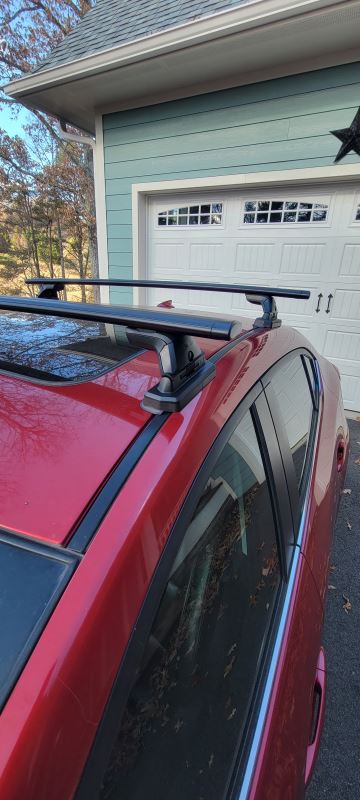
It's like it's not even there. Super cool, super convenient. You can just take it off like that, put your bars on there like this, lock it down into place, and then you're ready to go. It's really a quick system, and what I would definitely recommend to somebody who's got a Highlander.So these specific crossbars that we have right now are called jet stream bars, and they're going to have a nice aerodynamic feel to it. Kind of looks like a airplane wing.
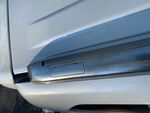
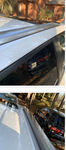
A little bit thicker in the front, a little bit skinnier in the back, helps that air just travel over it a little bit easier and smoother, so you won't have some of that road noise whenever you're going down the road, and also some of that drag you might have. This isn't going to really hinder your gas mileage all too much when it comes to cross bars.But these are going to be made of aluminum and they are the 50 inch crossbars as well. The powder coated finish is going to help it resist against rust and corrosion. And you will have about 165 pounds of carrying capacity on these bars, but always look on your Highlanders owner's manual to make sure that it will be able to handle that much weight.So these cross bars are pretty wide, but not that thick. So a lot of those accessories that are going to wrap around your bars, I think you'll be fine.
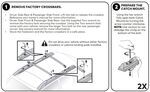
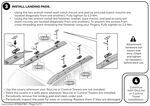
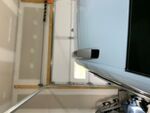
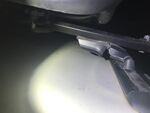
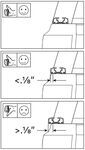
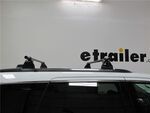
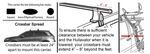
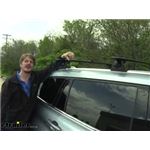
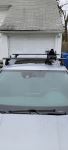
So we're going to do a quick measurement, about three and a quarter inches long and only about maybe an inch thick. But a lot of these crossbars are going to just accept your T track accessories. Right here, all you've really got to do is just take your cap off, just push down on this rubber and you'll be able to slide all your attachments on there.We have a bunch that you can do. I would probably recommend for this vehicle, just a roof mounted cargo basket, just to get a lot of that stuff out of the inside, up and on your roof so your passengers will have a lot more room, just to move around whenever you're going on longer trips.Of course a kayak carrier will be ideal, just because, how else are we going to carry a kayak on this Highlander Probably it has got to be on the roof. So we do have attachments for that as well. There's a bunch of them to choose from, so be sure to pick the one that's right for you. We're going to go ahead and measure just from the top of our roof to the bottom of our bars. Going to be about four inches from the top of our roof to the bottom of the bar, but then it's going to be about five and a quarter inches from the top of our roof to the top of our bar.Also, another thing to think about is just whether our sun roof is going to be able to open and go underneath these bars here. With all that amount of gap, we're going to be plenty fine. We don't have to worry about this not being able to open and us losing the functionality of our sunroof.So there's two different things I need to go over with you guys. One is that these are available in silver as well, so if you like that color a little bit more, maybe it'll go better with your crossbars, or whatever color that your vehicle may be. There is two different colors to choose from, so that's good to know.Also, we do have optional locking cores, so pretty much what locks this bar to our actual vehicle right here does not come with anything that's got to have a key or anything like that. And you can buy those separately. Put that in there real quick, just to give you that added comfort. Other than that, it's actually pretty easy to install. Everything's pretty much in the kit that you need. So let's just go ahead and show you guys how.Alrighty, so we have our front ones already installed, but we have all the equipment, hardware and tools that we need to get to back installed. So that's what we're going to go ahead and do right now. So the first thing we want to do is grab a trim tool. If you don't have one of these, you can use a flathead, if you want. You might make a little bit of a scratch, but there's a little plate here. Put it in the little slots like that and work our way to get this little bracket out. Put that to the side for later.Now what we want to do is we're going to take this portion of our kit. It is going to have an R on it. These are going to mean rear. The other ones on our front had an F on them. And what we're going to do, they're really going to just fit in one slot the best. The other way isn't really going to line up too good. So be true to just do that, get it nice and seated down into place.Then we can take our second portion. We are going to have to take these caps off. They just pop off like that, and we're going to line those up, and then we're going to take a bolt and a lock washer, go down in there, and it's going to thread into the factory hole that they have already provided. Just start threading them down. Try to get it as straight as possible, once you start really torquing them down. Give it a good shake, make sure it's nice and secure, and once you do, you're pretty much done with that. And just for now, I'm just going to put this little cap on here like that. And we can do that same installation process on the other side.All right. So all we really need to do is start getting our towers put up onto our bars. And to do that, first things first, we just need to take our tower here. We're going to have a little piece like this. It's going to have a little bit of teeth on the bottom end here and that's going to be facing a little teeth on the top end of our feet.Just get those teeth lined up, just like that. Snap it into place. Now, take your little T track here. It's going to go down in there. You've got to make sure you line up the bolt with the hole. Then we can flip it upside down. Do our best to tighten it down. Perfect. We can do that same exact thing for the other foot.So before mounting our tires onto our bars, we want to make sure we have them in the right orientation. The rounded portion right here is going to be facing the front of your vehicle, and of course, the more slim edge is going to be facing the back. With that in mind, we can take our towers here. We're going to flip it around like so, and I'm actually going to put this one on backwards and slide it all the way down to the other end. Just fit it within that track, slide that down and then put this one on directly, just like this.All right. So now we're going to do is just replace our cap and then we're going to throw it up on top of our vehicle. To get the right fit.Now the only really thing we need to figure out is just make sure that our cap is going to be open on the end. This is going to allow it to seat down into our little feet here . just like that on both sides.So now's a good time to get the spread from our bars, from our feet all the way to the edge here, nice and even on both sides. And once we do that, you can go ahead and take your tool and just tighten this up. Let it snap real quick, and then you can go ahead and just close this cap, just like that. I want to do the same that on the other side.So now that you have all those steps done, just go ahead and give it a good shake, make sure everything's staying into place, how it should, and if so then you're ready to either load up some of your accessories or just get down the road.Well, everyone that just about does it for our look at the Yakima roof rack system on our 2019 Toyota Highlander.
Average Customer Rating: 4.8 out of 5 stars (225 Customer Reviews)
Extremely quiet, aerodynamic crossbars attach to Yakima towers to create a stylish roof rack for your vehicle. Rubber strips in T-slots push down to load carriers or accessories - no need to trim. Full-length aluminum bars maximize carrying capacity.Super happy with my purchase from e trailers purchased yakima roof rack. Knowledgeable sales rep.Help me through the process on purchasing my roof rack Recommended to anyone quality parts
Very easy to replace. Fit perfectly. I had a slight disaster with roof rack and Yakima showdown but fortunately replacing the landing pads was all that was needed. Very happy about the ease of finding, installing and using.
For a 2015 Mazda 3, 4 door sedan.
I used the 50" jetstream bars with the skyline towers and the #22 Landing Pads.
Went together easy, great quality, very solid feeling! And, easy to remove and install when needed.
These crossbars were easy to install and adjust. Be sure to get all the pieces you need. There is no mention of the Landing Pads necessary to use these.
Very nice quality towers. Very heavy duty! They have a cool "snap" on / off mechanism for quick removal and installation.
Fit our Subaru Forester perfectly. Install was a breeze.
All I can say is wow!! Outstanding customer service from shipping overnight, to follow up the next day to make sure the package arrived safely and was the appropriate part!! Customer service all stars!!! Thank you so very much!!

Still look and work great after a year. Fantastic investment and they didn't reduce my fuel economy. They don't produce a lot of wind noise either.
You guys provide great products and excellent customer service.
Thanks
I chose Yakima because I had one in the past and they were always reliable. Thule was my next choice but didn’t like the look of 53’ crossbars on my car. I really appreciated the easy to follow instruction that made installation a breeze. The kit came complete with everything I needed to install right out of the box. I purchased the 2 Hightower bike racks to go with the roof rack system and plan to safely secure both bikes for our trips. It was a bit heavier than I anticipated (combined with the bike carriers) which will hurt my MPG but having easy access to disassemble the bike carriers when not in use made it a no brained. Additionally, I love the look of the system on my car.
I waited several weeks for roof rack to arrive after ordering online. I am accustomed to Thule racks, but could not find any towers/bases to fit the 2019 Santa Fe. Once here, the Yakima rack mounted with ease and I look forward to hauling kayaks or basket on the roof.
Thank you etrailer.
Great bars and easy installation on my 2012 Prius C
The yakima jetstream crossbar looks beautiful. Quality is great. Took my vehicle for a test drive, and i didnt hear anything loose or broken from the bars. Very satisfied with the product and the instructions were great. It was my first time installing a roof rack too.
Yakima SkyLine Towers are well-designed and well-executed. They easily fit into the Yakima Landing Pads and form a tight fit when closed. And they also fit nicely into the Yakima JetStream Crossbars when following the Yakima instruction manual and various YouTube videos. I did run into a snag at first where I found the rubber seal on one SkyLine Tower getting caught on the JetStream Crossbar track, but after that I was careful not to let that happen with the other towers.
I find the appearance of the Yakima SkyLine Towers to match their level of quality in materials and design.
Lightweight and actually quite quiet with no attachments on them. With my bike racks there is a fair amount of noise but it doesn't come from just these. Mine is on a 2011 BMW 335.
The installation was super easy, and despite a long time stuck in shipping the delivery itself was extremely fast, and the package arrived in spotless condition. The manuals were very easy to follow, and the end result is absolutely amazing. I love that there's a rubber piece in the top rail that doesn't need to be cut, which makes it a very flush and smooth fit. I also love the modularity and the weight that it can handle, especially for the stuff i plan on carrying.
first try was missing what was needed
Etrailer helped. It was great!
not installed yet but everything was delivered on time and in good condition
Great company. Fast delivery.
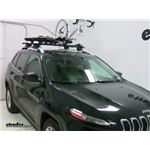
Super solid rack and the only one that fits the Jeep Cherokee without rails well and looks good too. Easy to install and worth the price
the product was exceptional. I would recommend it to anyone, who has a vehicle with a naked roof. It is a solid as a factory installed rack. Josh went out of his way to get me a replacement torque screw driver because the first one from Yakima was working properly.
Very happy with our purchase. I love how easily you can remove the entire rack easily. Too bad the locking mechanism comes separately but we are still happy with what we received.
Great product. Great service.
very informative and great work


Do you have a question about this Roof Rack?
Info for this part was:
At etrailer.com we provide the best information available about the products we sell. We take the quality of our information seriously so that you can get the right part the first time. Let us know if anything is missing or if you have any questions.


Thank you! Your comment has been submitted successfully. You should be able to view your question/comment here within a few days.
Error submitting comment. Please try again momentarily.