
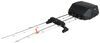
Thule WingBar Evo Roof Rack for Fixed Mounting Points - Black - Aluminum - Qty 2
Item # TH29QG
Our Price: $659.85
Confirmed to Fit
2011 Jeep Grand Cherokee
Will this fit?
To see if this custom-fit item will work for you please tell us what vehicle you'll use it with.


- All Info
- Reviews (201)
- Q & A (0)
- Videos (5)
- Photos
Thule Roof Rack - TH29QG
- Aero Bars
- Crossbars
- 53 Inch Bar Space
- Thule
- Silver
- 2 Bars
- Overhang
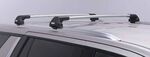
Premium, aerodynamic crossbars attach to Thule feet to create a quiet, stylish roof rack for your vehicle. Dual rubber strips in T-slots let you easily mount accessories - no trimming required. Simple to center and install with integrated scales.
Features:
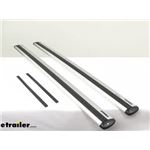
Thule WingBar Evo Crossbars - 53" Long - Silver - Aluminum - Qty 2:- Quiet, low-profile crossbars let you build an aftermarket roof rack for your vehicle
- Pair with a Thule foot pack and a fit kit to create a complete roof rack
- Works with Evo Clamp, Evo Raised Rail, Evo Flush Rail, Rapid Traverse, and Rapid Gutter foot packs
- Tapered TrailEdge shape creates an extremely aerodynamic roof rack system
- Dual rubber WindDiffuser strips help control air flow over bars to dramatically reduce wind noise and vibration
- Aero-style bars reduce drag to help maintain fuel efficiency
- Full-length crossbars maximize space for carriers and accessories
- Bars accommodate accessories that mount in the T-tracks or clamp around the bars
- Works with most universal-mount bike, water, snow, and cargo carriers
- QuickAccess T-tracks let you easily install channel-mounted accessories
- Simply pivot SwingBlade endcaps up and slide accessories into T-tracks
- Bottom T-tracks let you easily install bar on Thule feet
- SmartSlide slidable scale on bottoms of bars help center rack on your roof and double as under-bar aerodynamic cover
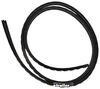
- Included rubber strips let you fill gap between outer edge of foot and end of bar
- Heavy-duty yet lightweight aluminum bars are durable and rustproof
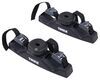
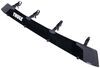
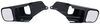
Thule Evo Fixpoint Feet - Qty 4:
- 4 Heavy-duty feet mount Thule Evo crossbars to your vehicle with fixed mounting points or tracks
- Pair with 2 Thule crossbars and a fit kit to create a complete roof rack
- Work with Thule SquareBar Evo, WingBar Evo, SlideBar Evo, and ProBar Evo crossbars
- Fast, click-in installation with included torque tool
- Fit kit clips simply click into place inside feet
- Single attachment point lets you tighten crossbars to feet and feet to rails simultaneously
- Torque limiter key indicates when the rack is properly attached to the vehicle
- One-Key System locks (sold separately) secure feet to your vehicle
- Galvanized steel with black powder coat is rust resistant
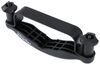
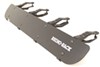
Fit Kit for Thule Evo and Edge Fixpoint Feet:
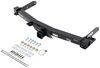
- Custom-fit clips and pads let you mount Evo Fixpoint or Edge Fixpoint feet on your vehicle with fixed mounting points
- Easy installation - does not require drilling
- Remove factory side rail plates and install fit kit pads with included hardware
- Slide molded rubber pads to protect the surface of your vehicle from scratches
- Easy to remove when not in use
- Includes 4 pads, 4 mounting brackets, and hardware
710701 Evo Fix Point Feet for Thule Crossbars - Fixed Mounting Points - Qty 4
187003 Custom Base Clips and Pads for Thule Evo Fix Point and Thule Edge Fix Point Roof Rack Towers - Qty 4
711400 Thule Wing Bar Evo 135 Aluminum Cross Bars - 53" Long
Replaces Thule THARB53


Video of Thule WingBar Evo Roof Rack for Fixed Mounting Points - Black - Aluminum - Qty 2

Videos are provided as a guide only. Refer to manufacturer installation instructions and specs for complete information.


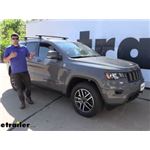
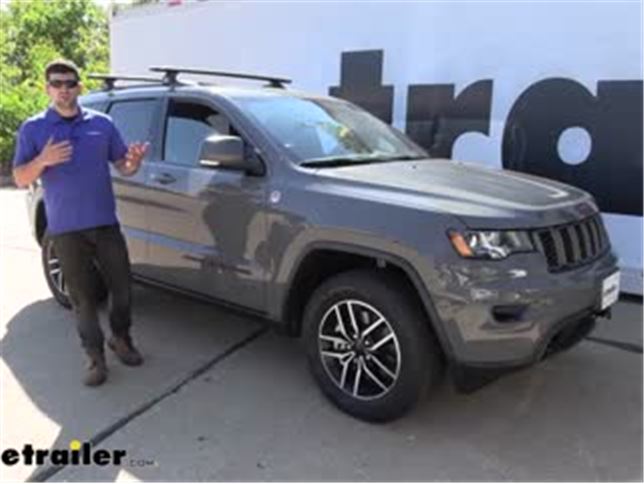
Video Transcript for Thule WingBar Evo Crossbars Installation - 2021 Jeep Grand Cherokee
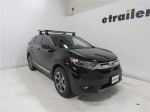
Hey everybody, how's it going Today, we're gonna be going over, and showing you how to install, the Thuli Evo Crossbars System, here on our 2021 Jeep Grand Cherokee. So, let's take a closer look at our roof rack system here. The first thing we're gonna notice, is the shape of our crossbars. So, there's a few different types of Aero crossbars on the market, Thule however, are the only ones with this airplane wing shaped crossbar. Now, what this does is, it does a couple of different things. Number one, provides the best aerodynamics, therefore we're gonna get the best, or the least amount of wind resistance.
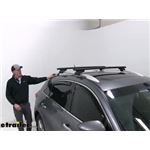
You're not gonna have to worry about as much wind noise. And number two, because of the wind resistance, we're gonna have the best miles per gallon saving. Some crossbar systems, When you add the bulky square crossbars, they're gonna catch a lot of wind, therefore creating drag and reducing your miles per gallon. So, if you have a panoramic roof on your Grand Cherokee, it's a great feature, and we don't wanna lose it with a roof rack installed. Therefore it's important that it still works with the system in place.
And, as you can see here, there are no interference issues whatsoever. So, going further into the crossbars, we're gonna have an end cap on each side, which we can flip up. And this is gonna reveal the start, or the end rather, of the integrated channels in the top of the crossbar. So, depending on what type of accessories you're using, some of them use wraparound clamps, where they attached to the bottom of the crossbar and set on top, or so of them actually use a T-bolt, and they just simply slide into the track. So, if you have those T-bolt mounted accessories, we could easily use them with this crossbar system on this vehicle.
For some vehicles, where there's not a lot of space between the top of the roof and the bottom of the crossbars, those T-bolts are a must. Therefore, it's nice to be able to utilize them here with these Thule crossbars. So, right now our system that we currently have installed, has the black crossbars, which I think looks really well here on our Grand Cherokee. However, there is still an option for silver bars as well. So either one you prefer, whichever is gonna match your vehicle better, is what I recommend.
I'd also like to point out that our crossbars here are gonna be 53 inches long, which is the recommended size for this vehicle. So touching a bit more on that recommended bar size of 53 inches, this is really a great length for this vehicle here, because it provides us with the necessary overhang that certain crossbar accessories require, and it's also gonna allow us to fit as much stuff as we can on the roof here. We did fit several bikes up here, a cargo box, and a couple bikes, a couple of kayaks. Really the possibilities are endless with this bar size here. We shouldn't have any issues running out of room. So, another feature of this crossbar system that I really like, is that it can be locked with additional metal locking cores, purchased separately. We'd simply remove these black plastic plugs here, and insert our metal locking core, offer security for our roof rack and accessories. So, we talked about all the various things we can throw up on our roof here. There is one stipulation, however, we need to be aware of. And that's gonna be the weight capacity of our system here, which is 165 pounds evenly distributed across both crossbars. However, that may not seem like a lot, but I don't think you're gonna be maxing that out with the space we have available here. That's gonna be plenty for you to carry your favorite accessories. So in regards to installation, this is very simple. All the tools we need are gonna be included with our kit, and it's gonna mount into a factory fixed point on the vehicle here. And the great thing is, we actually have a couple of different to choose from, depending on what accessories we're carrying, But, as you can see, there's actually minimal contact. So, there's really no chance at all to cause any damage to the roof of our vehicle. So, a roof rack is gonna be composed of three separate components. We have the crossbar, which is what we have here. We have the mounting feet, which is what you see right here. And then finally, we have the fit kit. So both the crossbars and the mounting feet are sort of universal, if you will. The fit kit is gonna be the component that's gonna be specific to your Grand Cherokee. So, now that we have all of our components ready and laid out in front of us, we can begin assembly. First thing we're gonna do, is we're gonna flip our crossbar over. Just one little note I wanna make at this time, before we start, is that our crossbar is sort of shaped like an airplane wing. The larger round portion needs to be facing the front of the vehicle. So, keep that in mind during assembly. Where we're gonna flip the crossbar over, and on each end we have an end cap we have to remove. If we simply depressed that section there, we should be able to pull it straight out. We have one on each side. We also have a little adjuster here. You just wanna make sure that's all the way in. Next, we're gonna take one of our mounting feet here. So, that's what this part looks like. And we're gonna go ahead and slide that into the channels in our crossbar. So, we want sort of this unfinished side to be facing out, like so. We'll slide it in about halfway, and we'll do that same thing on the other side with our other mounting foot. Once we have both of our mounting feet installed, we can reinstall our end cap here, so we don't have to worry about the mounting feet sliding off the crossbar while we're working. So, next we need to grab our fit kit here. So the first thing we're gonna grab, is our little rubber pads here. So, although they may look the same, there is a difference. We're gonna have two of each in our kit. Two are labeled 46 and two are labeled 45. One is for the driver's side, the other's for the passenger's side. So, next we're gonna grab the number 46 pad here. We're gonna be working over on the passenger's side, where we're just gonna clip this in place. There's gonna be a little groove here on the bottom, that's gonna line up with the notch on the foot. So, it's kind of hard to see, but once you get your hands on it, it will definitely make a lot more sense. But, we're just gonna place that over the little channel, just like so. And then, the next thing we're gonna do is, we're gonna take our metal car clip here, that looks like this. We need to do some assembly first. So, we need to take a couple of different things. We're gonna have a socket head cap screw, a split lock washer, and then one of these little rubber spacers here. So, how this works is, we're gonna take our socket head cap screw, our split lock washer, place that over there, like so. We're gonna stick it through the top of the metal car clip, and then we're gonna hold it underneath with our rubber washer here, just like that. Once we have that done, we can go ahead and insert it into the foot pack assembly here. So, we're gonna be lining up these two holes with the two rubber ears on our pad. It's pretty simple to understand. The raised portion here on the car clip, is gonna be facing out away from the vehicle. Just like that. Next thing we're gonna do, is secure our metal car clip and our rubber pad here to the foot pack assembly, using the hardware that comes with the feet. You're gonna get these smaller socket head cap screws. There's gonna be one on each end here. So, you're gonna have to line up three different pieces of material here. That rubber pad, the metal car clip, and then there's gonna be a threaded rod inside the foot pack assembly. So, just hold everything together and begin threading to line everything up. So, our aim right now is just to get them both started. We don't wanna tighten them down all the way, because we still wanna be able to move the foot inside the crossbar, like so. So we're just gonna get them started here, without snugging them up just yet. Now, we're just gonna repeat that same process on the other side. The only thing that's gonna be different, is we need to make sure that we're using the rubber pad labeled 45 for the driver. So, next thing we're gonna do is we're gonna come up to the roof of our vehicle here, and inside the channels here, these glossy black channels, you're gonna have a few different Torx bolts. So, these Torx bolts are gonna be spaced throughout these rails here. And these are the various points we can use to mount our roof rack. We'll have a couple at the front, one in the center, and then one at the rear. So, we're gonna go ahead and show you the rear. So, we're gonna take the Torx security bit here, that comes in the fit kit pack. And we're gonna use this to remove that Torx screw there on the roof, just like so. So, we're gonna have one on each side. We need to remove them both, for both the front and rear crossbar. So now, once we have our crossbar assembly partially assembled, we can go ahead and set it up on the vehicle here, and mount it to the points that we just removed the Torx bits from. So, I will say if you have an extra set of hands, that will help you with the step, but it is possible to do by yourself. So, now what we need to do, is we're gonna take the Allen head that comes in our fit kit. We're just gonna simply tighten down that cap screw into the factory fixed mounting points. Now, I will say this part is kind of tedious, because you don't have a lot of room to move your wrench, but just be patient, take your time, make sure we don't cross thread that bolt there, and we can get it attached to the vehicle. And obviously, we have to do this on both sides. So, the next thing we're gonna do, once we have both of those bolts tight, we have the fit clip of our mounting feet securely attached to the roof, we need to center our crossbar on the roof here. There's a couple of different ways to do that. The easiest way is just to simply measure from this point of the mounting feet to the end of the crossbar, and just make sure that's the same on both sides. Once we have it centered, we can tighten these two outer Allen bolts here, using the hex wrench that comes with the mounting feet kit. So, these are gonna actually tighten the crossbars to the mounting feet, so they can't slide back and forth, side to side. And then once we get this side buttoned up, we'll just simply repeat that same process on the other side. So, now the last thing we need to do, is take one of our covers here, slide it over the mounting foot, like so, and if you have the plastic lock cord, we're just gonna take a flathead screwdriver, turn that to lock it in place. If you opted for the metal lock cores, which are sold separately, you'd install those using the keys that Thule provides. Now we'll go ahead, and install that same cover on the other side. And we'll repeat this entire process for the other crossbar system. And that's gonna do it today for our look and installation of the Thule Evo Crossbars system here on our 2021 Jeep Grand Cherokee..
Customer Reviews
Thule WingBar Evo Roof Rack for Fixed Mounting Points - Black - Aluminum - Qty 2 - TH29QG
Average Customer Rating: 4.8 out of 5 stars (201 Customer Reviews)
Premium, aerodynamic crossbars attach to Thule feet to create a quiet, stylish roof rack for your vehicle. Dual rubber strips in T-slots let you easily mount accessories - no trimming required. Simple to center and install with integrated scales.by: Joel03/07/2024
JeepGrand Cherokee
I'm using these Thule Evo Fixpoint Feet #710701 in conjunction with the FitKit #87003 to mount my DropRack XL to the rooftop of my 2021 Jeep Grand Cherokee. Eventually I'll get a Thule Rooftop Cargo Box to transport our RV camping supplies for which we don't have enough room in the Jeep or our Aliner RV camper. For now, I'm also using the setup to transport 4' x 8' plywood sheets for a DIY home project. This is the perfect solution for a multi-use application that'll enable us to accomplish more projects around the house as well as on the road.


by: Randyka02/13/2024
Mazda
Install was pretty straight forward. I did have to drill holes on the roof gutters for the fixed point bolts (2024 Mazda 3 5dr). Shipping was delayed by a month but it was not due to etrailers fault.
by: Jim 10/17/2023
Whisper quiet, no discernible effect on MPG, easy to use with our Thule box and racks, and looks absolutely great. Great purchase and way worth it!
by: 12/23/2023
Audi Q7
Got exactly what I needed! Perfect fit on the 2024 Q7.


by: Mark 10/12/2023
I feel that the service I've received from e-trailer was superb. They made excellent suggestions and I'm looking forward to getting the new rack installed ... again, with their video help!!
by: Tamara 05/30/2023
This was the part I needed to add Thule kayak lift to my roof rack. System costs a fortune, but all is well made and works great.
by: David 02/07/2024
Excellent! Worked perfectly with the feet from my other vehicle!
by: Gregory 09/22/2023
Easy to install and hold crossbars very securely.
by: Glenn 05/26/2023
The Thule crossbars are a great fit. The end-caps needed a good tap with a rubber mallet to seat into place, but they are incredibly strong and easy to install.
by: Wayne06/08/2023
I would have appreciated being informed that the Thule Wingbars were not in stock!
by: Michael05/25/2021
Kia
Thule rack looks great on my Kia Telluride. The pieces took a while to get to me because they were on backorder but it's not etrailer, they were on backorder everywhere. I messed up a piece of the rubber while installing and etrailer sent me another one free of charge. Would definitely recommend etrailer.

by: Lynn06/17/2022
I’ve had my Thule roof rack for a year. It’s sturdy and easily handles two kayaks. Love it!


by: Adam 03/31/2023
Very pleased with order. Shipped fast, not damaged, all parts accounted for. Easy install, very sturdy, and attractive design. Slight wind noise but that was expected compared to not having a roof rack.
by: Chris07/29/2020
I love my new roof rack! It looks good, works great, and the video link attached to the email made installation a breeze! I highly recommend this rack.


by: John08/01/2020
BMW X5
etrailer.com was excellent to do business with. Their website is informative, complete and easy to navigate. Phone service to help confirm availability of my product and their general knowledge of their products was impressive. Product arrived on time and in good shape. Their order tracking system is also very good. I’m very pleased with the Thule Wingbar Evo 135 racks For my BMW X5 with flush roof rails. They are super sturdy, solidly mounted and look good on the vehicle. Mine will be mainly used for surfboards and SUP’s. The assembly and installation was a breeze. The included written instructions would have been sufficient for a seamless installation but I also watched one of many YouTube videos that demonstrated very clearly every step of assembly and installation for this specific set of racks.
Love the racks!! I highly recommend etrailer.com for your roof rack needs.
by: Sameer11/11/2020
Superb experience with etrailer.com. From order to delivery in 2 days. All components in perfect condition and very useful video links to help assemble and mount. I am very impressed by the overall customer experience so far given by etrailer!

by: David 07/28/2023
Product arrived quickly. Easy to install. Works as expected.
by: Greg@80811/21/2020
2018 Toyota 4Runner
Solid crossbars for my 2018 4Runner. Didn't notice any lag or noise on the freeway.


by: Jeffrey 07/25/2023
Holds everything we need and it looks g reat!
by: David 07/28/2023
Good shipping. Good install. Good produ ct.
by: Steven01/29/2021
Honda Civic
Car: 4 door Civic sedan
Bought this as a set along with a set of locks. They did not have the locks in stock, so when I went ahead of canceled that portion of the order, they were able to process and ship it out the next day. It took roughly 1 week for it to arrive.
Following the instructions they provide you with was fairly simple, there was a QR code scan for a video that you can watch as well. I assembled this along with ski carriers that I had as well. I did struggle a little bit with the spacing I needed to fit my snowboard, but it wasn't too much of a hassle.
After assembling it, I was impressed with how it looked and also how stable and tight it was when I was trying to shake it around. As for the test drive, I was very impressed with how there was no wind whistle and they did not fall off (peaked at 70mph).
Overall, I would say it's definitely worth it to buy a good quality cross bar set. And more importantly it was worth it to purchase it from a retailer that does a good job processing and shipping your order without any issues!
by: Joseph08/22/2021
2017 Acura MDX
I really love my roof rack I got from this site. At first, I was having a heard time trying to figure out the right fit for my 2017 Acura MDX. I did a research only and watched videos on youtube. I even purchased the same thule roof rack from [online vendor] but it wasn't the right fit. When I made my way to this site, they not just have the right recommendation, but they also have the right parts for my vehicle. If I ever needed anything for my vehicle and they have it on this site, I will have no trouble getting it from here. I am a happy customer and I just wanted to say thank you!
by: David 07/28/2023
All good: shipping, install, product.
by: Alyssa12/12/2021
Jeep
Good quality and easy to set up on my 2016 jeep Cherokee! Happy with the new cross bar setup!


by: Darrell S.07/12/2020
My Thule roof rack is everything I expected it to be, I’m very pleased. I had a very good experience dealing with etrailer and will definitely do business with them in the future
25
1051
Show More Reviews
See what our Experts say about this Thule Roof Rack
- Parts to Install Older Thule Hullavator TH897XT on Thule WingBar CrossbarsIn order to install your older Thule Hullavator TH897XT the Thule aero WingBars, you are correct that an M6 x 30 is needed, as well as the nut and a washer. The exact parts are as follows: - Replacement Socket Head Cap Screw - M6 x 30 # TH919063054 - Replacement Square Nut # 853-7557 - Replacement M6 Washer # 951061254
view full answer... - Recommended Roof Rack for 2023 Kia Sportage with Bare RoofThe roof rack I recommend for a 2023 Kia Sportage with bare roof is the Thule WingBar Evo Crossbar System composed of part # TH711400, part # TH710501, part # TH145050. This system uses custom fit door clips which clamp onto the door sill for a tight, custom fit. The crossbars have an aero shape for the best wind resistance and they have integrated channels so you can use all of your favorite accessories.
view full answer... - Thule Wingbar Evo Roof Rack that Fits 2021 Volvo XC90Thule does have a Wingbar Evo roof rack that fits your 2021 Volvo XC90 but the feet and fit kits have been totally changed since you bought the rack that you currently have and the older style has not been tested on the 21' XC90 because of that so only safe recommendation I can make is the current Thule roof rack that fits your vehicle: Thule WingBar Evo Crossbars # TH711400 Evo Flush Rail Feet for Thule Crossbar # TH710601 Fit Kit for Thule Evo Flush Roof Rack Feet # TH186028 If your...
view full answer... - Best Roof Rack For 2022 Honda CR-V With Bare RoofFor your 2022 Honda CR-V with a bare roof, the best roof rack is going to be from Thule, and there are a number of reasons for that. The rack's WingBar Evo crossbars are 53 inches long, which is important because they are longer than other options for your Honda so you have the most space possible to mount any accessory. The WingBars are also super quiet, easy to use, highly durable, and have a refined aesthetic so they look great on your CR-V. The complete rack is made up of the following...
view full answer...
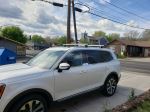
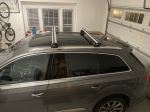
- Thule Roof Rack Differences For 2023 Kia TellurideThere are indeed a couple options for a Thule roof rack for your 2023 Kia Telluride, with the difference being the crossbars and how they mount. I have added a couple photos for you showing the difference in how they look (note the photos are of the crossbars in silver but they also come in black). One of them will have flush-mounted crossbars which are shorter (front bar is 41" long & rear bar is 37-1/2" long) but give your '23 Telluride a bit more overall contoured look, while the other...
view full answer...
- Recommended Roof Rack For a 2023 Toyota CorollaI recommend the Thule WingBar Evo roof rack for your 2023 Toyota Corolla. This is one of the few roof racks which allows you to use the channels without trimming the rubber trim. You will need the following parts to complete the rack. Thule WingBar Evo Crossbars - Aluminum - Silver - 53" Long # TH711400 Evo Clamp Feet for Thule Crossbars - Naked Roofs # TH710501 Fit Kit for Thule Evo Clamp Roof Rack Feet # TH145209 The Thule One-Key System # TH450800 will provide you with 8 lock cylinders....
view full answer... - Thule Hullavator 897 And Hullavator 897XT Compatibility IssuesThe brackets on the Thule Hullavator 897 and the Thule Hullavator 897XT are not the same. The first generation Hullavator was designed to only work with Thule square bars, so it will not work with your Thule WingBar Evo. The updated model, 897XT, was designed to work with square and elliptical shaped crossbars. If you have the correctly shaped bracket you will be able to mount your Thule Hullavator 897 to your Thule WingBar Evo Crossbars - Aluminum - Silver - 53" Long - Qty 2, part # TH711400....
view full answer...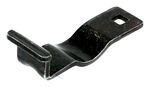
- Options For Mounting The Thule Caprock Platform To A 2018 Land Rover DiscoveryYou do not have to install crossbars in order to use the Thule Caprock platform tray # TH98YE. For your 2018 Land Rover Discovery. You would only need the Thule Evo Feet # TH710601 and fit kit # TH84JV. The Caprock platform can be mounted directly to the evo feet. We consider the rails on your vehicle to be the "flush mounted rails". Thule does make a crossbar adapter # TH53YE, which can be used to mount the platform to a crossbar. If you already have a roof rack with an aero bar, you...
view full answer... - Thule Roof Rack for 2021 Jeep Grand Cherokee with Black Flush RailsA few years ago Thule totally redid their roof rack designs which means there isn't a way to install an older Thule set of crossbars on your 2021 Jeep Grand Cherokee. Best option would be an all new Thule roof rack for your vehicle with the Wingbar Evo part numbers # TH711400, # TH49SC, # TH53ZE.
view full answer... - Best Roof Rack For 2023 Kia Telluride With Flush Mounted RailsAbsolutely; the best roof rack for your 2023 Kia Telluride with flush mounted rails is from Thule. This is the best rack for your Kia because it gives you a quieter ride than any other rack, is extremely durable, and also super easy to both install and use. The parts that make up the Thule rack that fits your '23 Telluride with flush mounted rails are the following: - Thule WingBar Evo Crossbars - Silver # TH711400 or Black # TH711420 - Evo Flush Rail Feet for Thule Crossbars # TH710601 -...
view full answer... - Parts Needed To Install Thule WingBar on 2016 Toyota 4RunnerIn order to use the Thule WingBar Evo Crossbars part # TH711400 on a 2016 Toyota 4Runner you must use the Evo Raised Rail Feet # TH710401. The Evo Fixpoint Feet # TH49SC won't work since they are for roofs with fixed mounting points and you have raised side rails.
view full answer... - Roof Rack for 2020 Toyota Tacoma Double Cab/Crew Cab for Kayak CarriersWe can absolutely get you pointed in the right direction with a roof rack for your 2020 Toyota Tacoma Double Cab (which is what Toyota calls their Crew Cab) so you can add the Yakima JayLow Kayak Carrier with Tie-Downs # Y04073. The best roof rack for your '20 Tacoma is from Thule, for a few different reasons. Most importantly is that it offers the largest crossbars for your truck, the 53 inch WingBars; this is important because not only does it give you the most space for your kayaks,...
view full answer... - Correct Thule Crossbars for 2015 Toyota Tacoma Double Cab Roof RackThule no longer makes the AeroBlade crossbars, having changed a couple years ago, and the new bars are the WingBar Evo crossbars. The correct size Thule crossbars for your 2015 Toyota Tacoma Access Cab are the 53 inch Thule WingBar Evo Crossbars - Silver # TH711400 or Black # TH711420. The reason you have to go with that size and not the shorter is the crossbars bars have slots on the underside of them so if they are too short (or too long) they won't be able to fit the foot pack. Here...
view full answer... - Which Thule Roof Rack Will Fit A 2015 Subaru Legacy?I have a solution for you, but 141761 is an old part number that is no longer available and Rapid Traverse Feet # TH480R is not going to work with Fit Kit # TH145193. You would instead need to go with the recommended setup for your 2015 Subaru Legacy which is Fit Kit # TH145193, Evo Clamp Feet # TH710501 and then either Thule Wingbar Evo 53" Crossbars Silver # TH711400 (also available in Black # TH711420), or Thule SquareBar Evo 53" Crossbars # TH712400.
view full answer... - 2022 Lincoln Aviator Thule Roof Rack OptionsThe Thule roof rack kit that fits the flush rails on your 2022 Lincoln Aviator includes the following parts: 53" WingBar Evo Crossbars - Black # TH711420 or Silver # TH711400 Evo Flush Rail Feet - # TH710601 Fit Kit - # TH66RV Or for the WingBar Edge you need the following: 41" WingBar Edge Crossbar - # TH86SC (you need 2 of this) Flush Rail Feet - # TH89SC Fit Kit - # TH66RV You can use the Lock Core Kit # TH450400 to add locks to either roof rack setup I mentioned above.
view full answer... - Recommended Roof Rack For A 2023 Audi Q7 Hi Betsy, Since your Audi Q7 comes with flush mounted rails you'll need the following roof rack components: Thule WingBar Evo Crossbars - Aluminum - Black - 53" Long - Qty 2 # TH711420 or # TH711400 for silver Evo Fixpoint Feet for Thule Evo Crossbars - Fixed Mounting Points and Tracks - Qty 4 # TH49SC Fit Kit for Thule Evo Fixpoint and Edge Fixpoint Roof Rack Feet - 7005 # TH52RE I've attached a short video below where Aiden will walk you through the installation process.
view full answer... - Roof Rack Recommendation for Leer Camper Shell that Allows for Adjustable Bar SpacingI recommend the Thule Roof Mounted Top Rack System # THTB60. This system includes 60 inch long tracks that are permanently mounted to your camper shell roof. This system includes all the mounting hardware and a drill bit. Once installed you'd have ability to slide crossbars forward and back like you are wanting. You can then use the Thule fit kit # THKIT3101, the feet, # TH460R. The crossbars you choose depend on the width of your camper. For a set of 53 inch bars you'd want the part...
view full answer... - Best Roof Rack for Multiple Uses on 2019 Honda CR-V with Naked RoofThe best roof rack for your 2019 Honda CR-V with a naked roof to help you manage your active lifestyle is from Thule and consists of: - Thule WingBar Evo Crossbars # TH711420 (Black) OR # TH711400 (Silver) - Evo Clamp Feet for Thule Crossbars # TH710501 - Fit Kit for Thule Evo Clamp Roof Rack Feet # TH145046 The Thule rack is the best for you because the way it fits on your '19 CR-V allows you to use the full length of the 53 inch crossbars, which means you can use a multitude of accessories...
view full answer...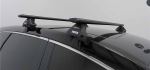
- Roof Rack Options For 2019 Volkswagen Atlas With Raised Side RailsSo there are a couple of good option for a roof rack that fits your 2019 Volkswagen Atlas with the factory raised rails. The rack will only consist of a couple parts - the feet and the crossbars - and the two options I recommend considering are from Thule and Rhino-Rack. The parts for both that fit your '19 VW Atlas are the following: Thule - Thule WingBar Evo Crossbars - Silver # TH711400 or Black # TH711420 - Evo Raised Rail Feet # TH710401 - (Optional) Thule One-Key System Lock Cylinders...
view full answer... - Roof Rack For 2020 Chevy Equinox With Naked RoofWe do have a roof rack system that will fit your 2020 Chevy Equinox beautifully, even without it having any rails or other mounting spots. Your Equinox has what is referred to as a naked roof, and there is one option I really like for your Equinox, which is from Rhino-Rack. The parts that make up the rack and fit your car are the following: - Rhino-Rack Vortex Aero Crossbars # RRVA126B-2 - Rhino-Rack 2500 Series Legs # RRRLKVA - Custom DK Fit Kit # DK488 The reason I like the Rhino-Rack...
view full answer... - PaceEdwards SuperGoove Tonneau Cover Roof Rack SolutionThe Rhino-Rack Vortex Crossbar System for Retrax XR Series and Mountain Top EVO-M Tonneau Covers, part # RRVA180B-RRRLT600, used along with the Adapter Kit for Rhino-Rack RTL600 Legs, part # RRT-FK1 was designed to fit the tracks on your Pace Edwards SuperGroove tonneau and would work great with your bike racks. The Rhino Rack roof racks are similar in quality to the more expensive racks like Thule and Yakima but are at a better price. For a Thule rack you'd need: - Fit Kit for Thule...
view full answer... - Inno Basket Compatibility with Rola Roof Rack For 2010 Jeep Renegade Trailhawk.The Inno Shaper 100 Roof Cargo Basket # INXA569 would work with the DISCONTINUED Rola Sport REX Series Roof Rack 59686 you mentioned but it is no longer available. Instead, you can use your Inno cargo basket with the Thule WingBar Crossbars # TH711400, which attach to your raised rails with the Evo Raised Rail # TH710401 feet. This will be a great combination for your 2010 Jeep Renegade Trailhawk.
view full answer...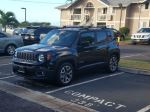
- What Roof Rack and Rooftop Basket do You Recommend for My 2016 Jeep Renegade with MySky Roof?When considering a roof rack system and basket for your MySky system on your 2016 Jeep Renegade, it is important to know the clearance height requirement for the panels to open. While I unfortunately do not have that information, from my research and looking at videos of the MySky opening, it looks like the panels never raise higher than the factory raised rails on your roof. With that being said, a crossbar system that will provide you with additional height on top of the rails you need...
view full answer... - What Is The Lowest Profile Roof Rack For A 2023 Mazda CX30 With Factory Flush Rails?Removing the factory rails will definitely be the way to go if you want to have the roof rack sit as low as possible. This way the towers can sit directly on the roof, as opposed to sitting on top of the rails. Removing the rails is actually something we recommend fairly frequently for a 2023 Mazda CX30. For you I recommend the Thule WingBar Setup. The towers and crossbars will add only about 4-1/8" of height to your roof. This consists of the following parts; Thule Wingbar 53" # TH711400 Evo...
view full answer... - Thule Roof Rack Components Needed For A 2004 Honda CR-V The Fit Kit for Thule Podium-Style Roof Rack Feet # THKIT3050 is just the small feet that attach to the factory roof rack mounting holes. I've attached a picture below of what's included. For a full roof rack you would need the following components: Fit Kit # THKIT3050 Evo Feet # TH49SC SquareBar Evo Crossbars # TH712200
view full answer...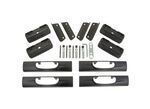

- How to Attach Thule Caprock Platform Roof Tray to Thule Tracks on Leer 100XR Truck CapYou can attach the Thule Caprock # TH98YE directly to the tracks on your Leer 100XR. What you will need is the Evo Fixpoint Feet for Thule Evo Crossbars # TH49SC along with the Fit Kit for Thule Evo Fixpoint and Edge Fixpoint Roof Rack Feet - 7004 # TH42KE.
view full answer... - Parts Needed to Switch a Thule WingBar Evo from a 2012 VW to a 2022 Toyota Rav4 w/ Flush RailsIt looks like you will most likely need new feet as well as the fit kit. From what I can find, most 2012 VW's with a bare roof used the Evo Clamp Feet for Thule Crossbars # TH710501. The fit kit for the 2022 Toyota Rav4 with flush mounted rails uses the Evo Fixpoint Feet for Thule Evo Crossbars # TH49SC. Fit kit and feet for Thule WingBar Evo on a 2022 Toyota Rav4 with Flush Mount Rails: - Fit Kit for Thule Podium-Style Roof Rack Feet # TH78RE - Evo Fixpoint Feet for Thule Evo Crossbars...
view full answer... - Roof Rack and Canoe Carrier Recommendation for 2009 Honda CR-VFor your 2009 Honda CR-V with a naked roof the Thule Wingbar Evo rack part numbers # TH711220, # TH49SC, # TH72KE would be a great option confirmed to fit that's really well made, easy to use and quiet. Then for a canoe carrier the Thule Portage Canoe Carrier # TH819 would be a really great option.
view full answer... - Thule Evo Roof Rack For a 2023 Subaru Crosstrek Without Raised Rails To Carry Hullavator Kayak RackSince your 2023 Subaru Crosstrek does not have raised rails you are going to need a whole new roof rack since the Thule Rapid 450R Feet # 753-3399-02 are only going to fit vehicles with raised rails. I recommend sticking with the Thule roof rack system so you can use all the same keys for the rack and your Thule Hullavator Pro Kayak Roof Rack # TH898. You will need the Thule WingBar Evo Crossbars # TH711320 paired with the Feet # TH710601 and Fit Kit # TH25KE if you have the flush rails....
view full answer... - What is Needed to Transfer Thule SquareBars from One Car to a 2020 Toyota Highlander w/ Flush RailsIf the Thule square bars you currently have are the Thule Evo square bars, then you can use them on your 2020 Toyota Highlander. In order to do so, you will need to get the correct fit kit and feet for your Highlander. - Evo Fixpoint Feet for Thule Evo Crossbars # TH49SC - Fit Kit for Thule Evo Fixed Point Roof Rack Feet # TH22RE If your current bars are not the SquareBar Evo's, then you would need to get a new rack. You can use the above feet and fit kit, paired with the Thule SquareBar...
view full answer... - Best Roof Rack for Thule Hullavator Pro Kayak Carrier on 2019 Toyota RAV4 with Flush RailsI recommend using the Thule WingBar Evo Crossbar System composed of part # TH711320, part # TH49SC, and part # TH78RE on your 2019 Toyota RAV4 for the Thule Hullavator Pro Kayak Roof Rack part # TH898. This is an excellent, custom fit bolt-on system that provides you with aero crossbars that are great for hauling all your favorite rooftop mounted accessories. The aero crossbars are also very quite and don't affect mpg's near as much as other shapes.
view full answer... - Thule Roof Rack for 2021 Jeep Grand Cherokee with Black Flush RailsA few years ago Thule totally redid their roof rack designs which means there isn't a way to install an older Thule set of crossbars on your 2021 Jeep Grand Cherokee. Best option would be an all new Thule roof rack for your vehicle with the Wingbar Evo part numbers # TH711400, # TH49SC, # TH53ZE.
view full answer... - Parts Needed To Install Thule WingBar on 2016 Toyota 4RunnerIn order to use the Thule WingBar Evo Crossbars part # TH711400 on a 2016 Toyota 4Runner you must use the Evo Raised Rail Feet # TH710401. The Evo Fixpoint Feet # TH49SC won't work since they are for roofs with fixed mounting points and you have raised side rails.
view full answer... - Fitment Of The Thule Squarebars And The Thule Rapid Podium 460R Feet On A 2011 Subaru ImprezaYes, the Thule SquareBar Evo Crossbars # TH712300 will work great with the Evo Fixpoint Feet # TH49SC, and the fit kit # THKIT3068 on your 2011 Subaru Impreza. These crossbars measure 50" long, 1-1/4" wide, 7/8", and has a maximum weight capacity of 220-lbs.
view full answer... - Recommended Roof Rack For A 2023 Audi Q7 Hi Betsy, Since your Audi Q7 comes with flush mounted rails you'll need the following roof rack components: Thule WingBar Evo Crossbars - Aluminum - Black - 53" Long - Qty 2 # TH711420 or # TH711400 for silver Evo Fixpoint Feet for Thule Evo Crossbars - Fixed Mounting Points and Tracks - Qty 4 # TH49SC Fit Kit for Thule Evo Fixpoint and Edge Fixpoint Roof Rack Feet - 7005 # TH52RE I've attached a short video below where Aiden will walk you through the installation process.
view full answer... - Recommended Roof Rack for a 2023 Land Rover Defender w/ Tracks Using a HullavatorI would be happy to list out the Thule roof rack, with Evo crossbars, you will need to use a Thule Hullavator item # TH898 on 2023 Land Rover Defender but I have no idea what crossbars or rails you currently have. It doesn't look like you ordered them from us so I can't accurately answer whether or not they'll work on your Land Rover. This roof rack requires your Land Rover to have tracks preinstalled on the roof from the dealer. We don't have an option for a bare roof. Thule WingBar...
view full answer... - Roof Rack Recommendation for 2016 Jeep Grand Cherokee to Fit with Thule Hullavator Pro CarrierThanks for the info! Since your Rhino-Rack RVP Roof Rack # RRRVP27 has crossbars which end in the feet we need to get you a roof rack that has overhanging crossbars on your 2016 Jeep Grand Cherokee in order for you to fit the Thule Hullavator Pro # TH898. For this I recommend the Thule WingBar Evo roof rack setup as it's easy to use and setup plus it has a dual rubber insert for the top channel so you don't have to trim the rubber insert to install an accessory, like the Hullavator Pro,...
view full answer... - Which Roof Rack System To Carry Inno Roof Box On 2020 Jeep Grand CherokeeA great option for your 2020 Jeep Grand Cherokee is the Thule Wingbar Evo Roof Rack System which uses Thule Wingbar Evo 53" Crossbars # TH711420, Feet # TH49SC, and Thule Fit Kit # TH53ZE. This roof rack system will work with you Inno Cargo Carrier and offer a 165lb weight rating.
view full answer... - Best Roof Rack for 2018 Jeep Grand Cherokee Altitude With Black and Chrome TracksWe have the perfect roof rack for your 2018 Jeep Grand Cherokee Altitude with the black and chrome flush-mounted tracks and it won't require you to use clamps, it will simply install on top of those tracks. The best roof rack for your '18 Grand Cherokee is from Thule and consists of: - Thule WingBar Evo Crossbars # TH711420 (Black) OR # TH711400 (Silver) - Thule Feet # TH49SC - Thule Fit Kit # TH53ZE This roof rack is the best option for your Grand Cherokee because of how easy it is...
view full answer...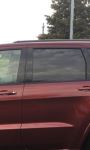

- Will Rhino-Rack Vortex Aero Crossbars Fit Thule Feet on 2023 Toyota BZ4XRhino-Rack Vortex Aero Crossbars like the # RRVA126B-2 will only fit Rhino-Rack feet. Unfortunately, since Rhino-Rack does not make feet compatible with your 2023 Toyota BZ4X the only solution is to sell your old crossbars and completely replace the roof rack. For the Thule WingBar Evo roof rack you will need the following: -Thule WingBar Evo Crossbars # TH711320 -Evo Fixpoint Feet for Thule Evo Crossbars # TH49SC -Fit Kit for Thule Evo Fixpoint and Edge Fixpoint Roof Rack Feet # TH74CE The...
view full answer... - Parts Needed For Thule Roof Rack on 2023 Land Rover Defender 110 Factory TracksWe do have the feet you need to install your # TH711320 on the 2023 Land Rover Defender 110 with factory tracks. According to Thule, you need the Feet # TH49SC and Fit Kit # TH94CE.
view full answer... - Will Thule One Key System TH450400 Fit Rapid Podium Feet TH460RYes the Thule One-Key Lock Cylinders part # TH450400 would work in the Rapid Podium # TH49SC that you mentioned.
view full answer... - Roof Rack for 2022 Toyota RAV4 with Flush RailsSince your 2022 Toyota RAV4 does not have raised roof rails and instead most likely has flush rails which are just slightly raised "bumps that run from front to back you could use the Thule Wingbar Evo Edge # TH89FE, # TH49SC, and # TH78RE An option to convert your roof to having raised rails is not available.
view full answer... - Fit Kit And Feet Needed To Install Thule Square Bar Crossbars On A 2024 Toyota RAV4Hi Betsy, If your 2024 Toyota RAV4 has flush mounted rails that run from the front to back then you can use the Fit Kit - 7055 # TH78RE and Evo Fixpoint Feet # TH49SC to mount your Thule square bars. The recommend crossbar sizing for your vehicle is 50" so you'll want to double check the length of your bars to ensure they'll fit. If not, then you'll need part # TH712300 for the correct length square bars. If you have a different rail setup or a naked roof then let me know and I can...
view full answer... - Roof Rack Recommendation To Mount Thule Hullavator Pro To A 2019 Toyota Rav4 HybridYou are correct that with flush roof rails, you will need a roof rack to mount the Thule Hullavator Pro Kayak Carrier and Lift Assist # TH898 to your 2019 Toyota Rav4. I recommend the Thule WingBar Evo Roof Rack Kit which includes the following: 50" WingBar Evo Crossbars - # TH711320 Evo Fixpoint Feet - # TH49SC Fit Kit - # TH78RE Lock Core Kit - # TH450400 (optional) Attached is a review video of the Hullavator Pro for you to check out!
view full answer... - Roof Rack Recommendation for Fixed Mounting Points on Roof of 2022 Toyota RAV4We do indeed have roof rack fit options that would work great for your RAV4. I really like the Thule WingBar Edge Roof Rack, which has flush crossbars that provides a low profile, factory appearance. The WingBar Edge rack would consist of the following parts: WingBar Edge Crossbars - # TH89FE Edge Fixpoint Feet - # TH29SC Fit Kit - # TH78RE If you'd prefer a longer crossbar with more room for bikes, cargo trays or kayaks, the Thule WingBar Evo roof rack would be a better option for you....
view full answer... - Recommended Roof Rack for 2020 Toyota RAV4 with Flush Mounted Side RailsBoth Yakima and Thule have roof rack fits for the flush rails on your 2020 Toyota RAV4. I personally like the Yakima roof racks more because they have some adjustability in the legs to get the most custom fit. Thule is nice as well and might be a little easier to install initially but that's just because there isn't any adjustability in the legs. Here are the parts you'll need either way: Yakima (recommended): 50" JetStream Crossbars - # Y00425 SkyLine Towers - # Y53TR Landing Pad 23 -...
view full answer...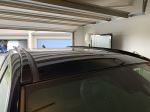
- Thule Replacing Old Square Bar and Podium Foot Pack With SquareBar and Evo Clamp Foot PackThe Thule Podium 460 you referenced for old square bars has been discontinued so that is why the expert answers suggest using the Evo Fixpoint Feet # TH49SC for use with the new Thule SquareBar that have a slot in the bottom like the aero style bars. The old Thule square load bars have been discontinued and replaced with the SquareBar like # TH712400. This bar is not designed for the older wrap around style mount but will use the channel mount like the aero bars were already using....
view full answer... - Thule Roof Rack for 2021 Jeep Grand Cherokee with Black Flush RailsA few years ago Thule totally redid their roof rack designs which means there isn't a way to install an older Thule set of crossbars on your 2021 Jeep Grand Cherokee. Best option would be an all new Thule roof rack for your vehicle with the Wingbar Evo part numbers # TH711400, # TH49SC, # TH53ZE.
view full answer... - Parts Needed To Use Thule WingBar Edge Roof Rack On 2020 Jeep Grand CherokeeThe Thule WingBar Edge Roof Rack composed of part # TH89FE and part # TH29SC will require the Fit Kit for Fit Kit for Thule Evo Flush Roof Rack Feet part # TH53ZE for a 2020 Jeep Grand Cherokee but that's all. The WingBar will work with pretty much all Thule accessories such as the SnowPack.
view full answer... - Roof Rack Recommendation for 2016 Jeep Grand Cherokee to Fit with Thule Hullavator Pro CarrierThanks for the info! Since your Rhino-Rack RVP Roof Rack # RRRVP27 has crossbars which end in the feet we need to get you a roof rack that has overhanging crossbars on your 2016 Jeep Grand Cherokee in order for you to fit the Thule Hullavator Pro # TH898. For this I recommend the Thule WingBar Evo roof rack setup as it's easy to use and setup plus it has a dual rubber insert for the top channel so you don't have to trim the rubber insert to install an accessory, like the Hullavator Pro,...
view full answer... - Which Roof Rack System To Carry Inno Roof Box On 2020 Jeep Grand CherokeeA great option for your 2020 Jeep Grand Cherokee is the Thule Wingbar Evo Roof Rack System which uses Thule Wingbar Evo 53" Crossbars # TH711420, Feet # TH49SC, and Thule Fit Kit # TH53ZE. This roof rack system will work with you Inno Cargo Carrier and offer a 165lb weight rating.
view full answer... - Best Roof Rack for 2018 Jeep Grand Cherokee Altitude With Black and Chrome TracksWe have the perfect roof rack for your 2018 Jeep Grand Cherokee Altitude with the black and chrome flush-mounted tracks and it won't require you to use clamps, it will simply install on top of those tracks. The best roof rack for your '18 Grand Cherokee is from Thule and consists of: - Thule WingBar Evo Crossbars # TH711420 (Black) OR # TH711400 (Silver) - Thule Feet # TH49SC - Thule Fit Kit # TH53ZE This roof rack is the best option for your Grand Cherokee because of how easy it is...
view full answer... - Recommended Low Profile Roof Rack for 2019 Jeep Grand CherokeeFor a low profile roof rack for your 2019 Jeep Grand Cherokee the best fit will be determined by the rails or lack of rails on your vehicle. If you have the naked roof with no side rails, the Yakima JetStream Crossbars - 60" Long # Y00426, BaseLine Towers # Y28TR and BaseClip Fit Kit # Y06121 will be the best option. If you have black and chrome flush mounted side rails I recommend the Thule WingBar Edge system which includes the Crossbars # TH89FE, Fixpoint Feet # TH29SC, and Fit Kit...
view full answer... - Thule Roof Rack that Fits 2022 Jeep Grand Cherokee Summit New Body StyleTo install a Thule roof rack on your 2022 Jeep Grand Cherokee Summit WK new body style you'd need the following: Fit Kit part # TH53ZE Wingbar Evo 135 # TH711420 Fixed Point Evo Feet # TH49SC This will work great with your Thule cargo box.
view full answer... - Low Profile Roof Rack and Ski Carrier Recommendation for 2015 Jeep Grand Cherokee with E-GroupWe have great roof rack solutions for the 2015 Jeep Grand Cherokee with the E-Group package. The E-Group Package is designated by chrome rail above the black railing on the roof. For a roof rack confirmed to fit the best option is the Thule roof rack for 2015 Grand Cherokee that consists of parts # TH712400, # TH49SC, and # TH53ZE It has Thule SquareBar Evo Crossbars. Then for a low profile ski rack the Fatcat like part # Y03096 would be your best option as it would add the least amount...
view full answer... - 2020 Jeep Grand Cherokee Thule Roof Rack Lock Core KitThe lock core kit # TH450400 is what you're looking for. This gives you enough lock cores for each leg of the Thule WingBar Evo roof rack for your 2020 Jeep Grand Cherokee: Crossbars - # TH89FE Feet - # TH29SC Fit Kit - # TH53ZE If you let me know what you plan on using the roof rack for I'd be more than happy to make a recommendation for you!
view full answer... - Roof Rack Recommendation for 2019 Jeep Grand Cherokee with Rails with Chrome CenterFor a roof rack confirmed as a fit for your 2019 Jeep Grand Cherokee with flush rails that have chrome center sections the Thule WingBar Edge roof rack part numbers # TH89FE, # TH53ZE and # TH29SC is the kit you want. This is a confirmed fit, gives you the OEM looking crossbars that mount flush to the feet of the rack and has crossbars that are aerodynamically shaped so that they aren't loud either.
view full answer... - Recommended Thule Roof Rack and Ski Carrier Parts for a 2019 Jeep Grand CherokeeThank you for the details! The Thule ski carriers come with locks so you can either order all of the parts and wait to see what the key number is so you can order matching cores or you can go ahead and get the Thule One-Key System Lock Cylinders - Qty 6 # TH450600 which gets you enough matching lock cores to fit a Thule roof rack and ski carrier right away. For the roof rack part numbers Thule only has a fit if your flush rails have the black and chrome track - if they are only matte black...
view full answer... - Can I Safely Use a RoofNest Condor RTT on a 2021 Jeep Grand Cherokee with a Thule Roof RackGreat points to bring up, and it's always best to do a lot of research before investing in equipment! According to my research the Chief roof products for your 2021 Jeep Grand Cherokee use 6.14" wide "planks" (that's what they list them as), while the RoofNest Condor Overland RTT mounts to a roof rack using U-Shaped brackets. The brackets look to be designed for standard crossbar sizes so the only way to get it to fit around the Chief system is with the adapter kit from Chief, but I'm...
view full answer... - Recommended Roof Rack For 2021 Jeep Grand Cherokee w/ Flush Rails For Rooftop TentOkay, so there is definitely a roof rack that will work for your 2021 Jeep Grand Cherokee for a rooftop tent, but not a 180 lb tent as there isn't a roof rack with that capacity. So I went ahead and spoke with Roofnest about it, and they essentially said that most people just go ahead and use the tent anyway. That said, for safety, I absolutely recommend going with a different rooftop tent, one that falls within the 165 lb capacity of a roof rack. That can be either of the other Roofnest...
view full answer... - Thule Roof Rack for 2021 Jeep Grand Cherokee 80th Anniversary EditionI've found online where some people with your vehicle were able to install a set of the OEM roof rails that Thule does make roof racks for but it is super odd that your 80th anniversary edition 21' Grand Cherokee has a non-function roof as-is. The Mopar number is 68311296AB_68311297AB. Once that's installed you can install a Thule Wingbar roof rack part # TH711420, # TH49SC, # TH53ZE which is compatible with the Thule Hullavator # TH898.
view full answer... - Recommended Thule Locks to Secure Thule Roof Racks and Accessories Welcome back! To secure your Thule WingBar item # TH29QG you will want the 4-lock Thule One-Key System Lock Cylinders item # TH450400 or the 8-lock item # TH450800 if you have other Thule accessories. Getting the 8-pack will allow you to lock your roof rack and Thule accessories with the same key.
view full answer...
Do you have a question about this Roof Rack?
Info for this part was:

Written by:
Matthew S

Edited by:
Daron K

Updated by:
Alex H
At etrailer.com we provide the best information available about the products we sell. We take the quality of our information seriously so that you can get the right part the first time. Let us know if anything is missing or if you have any questions.
Thank you! Your comment has been submitted successfully. You should be able to view your question/comment here within a few days.
Error submitting comment. Please try again momentarily.