
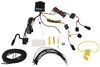
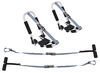
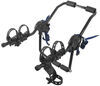
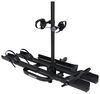
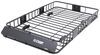
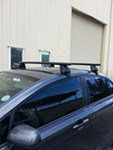
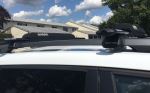
Rhino-Rack Vortex Roof Rack - Fixed Mounting Points - Black - Qty 2
Item # RR67FE
Our Price: $487.43
Confirmed to Fit
2020 Hyundai Santa Fe
Will this fit?
To see if this custom-fit item will work for you please tell us what vehicle you'll use it with.
In Stock


- All Info
- Reviews (173)
- Q & A (0)
- Videos (4)
- Photos
Rhino Rack Roof Rack - RR67FE
- Aero Bars
- Crossbars
- 49 Inch Bar Space
- Rhino Rack
- Black
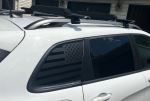
- Overhang
- 2 Bars
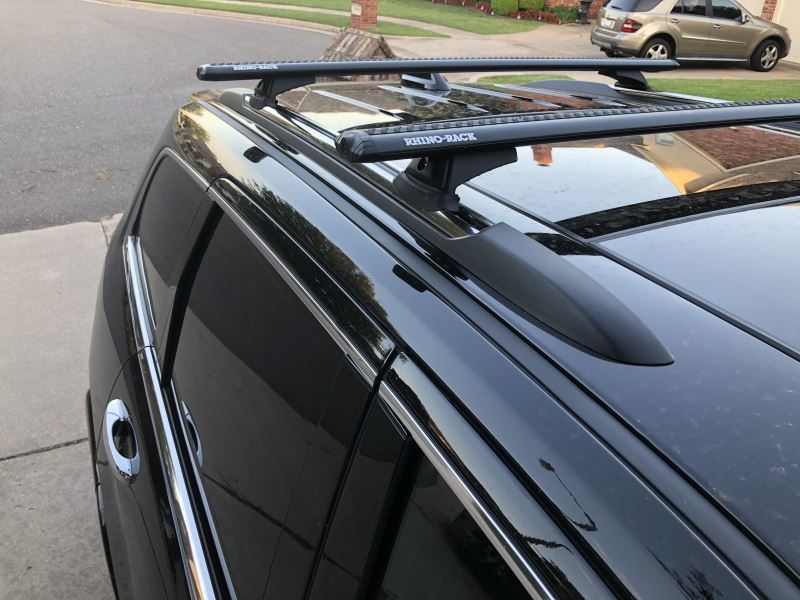
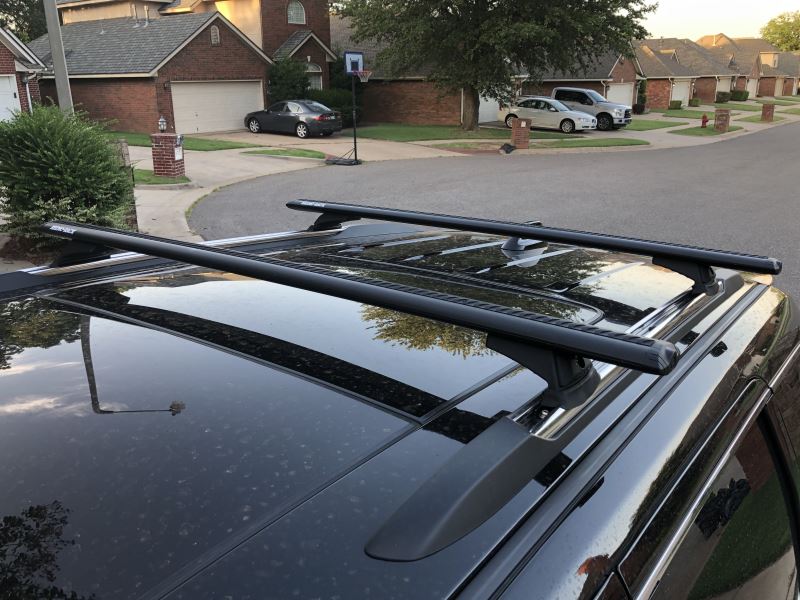
Aerodynamic, aluminum crossbars let you build an aftermarket roof rack for your vehicle. Full-length bars provide plenty of space for carriers and accessories. Vortex strips in C-channels reduce wind noise. Theft-deterring plastic locks included.
Features:
Rhino-Rack Vortex Aero Crossbars - Black - 49" Long - Qty 2:- Sleek, low-profile crossbars let you build an aftermarket roof rack for your vehicle
- Slim, elliptical crossbar shape helps to create an extremely aerodynamic system
- Full-length bars extend past roof rack legs to maximize space for carriers and accessories
- Top channels let you add channel-mounted carriers and accessories
- Clamp-on accessories mount conveniently around bars
- Rubberized Vortex strips in top channels dramatically reduce drag and wind noise
- Keep dirt and grime out of crossbars
- Provide cushioning and slip resistance for your cargo
- Bottom channels allow easy installation to Rhino-Rack roof rack legs
- Rulers in channels help to center crossbars on your roof
- Lightweight, structural-grade anodized aluminum bars are rustproof
- Internal H-shaped extrusion provides exceptional strength
- Plastic lock cores with universal keys deter theft of channel-mounted accessories
- Can be upgraded to all-metal locks (RRVA-LEC2 - sold separately) for added security
- Matte black finish
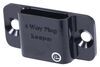
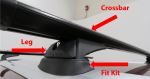
RCP Fit Kit for Rhino-Rack RC and RV Legs - Fixed Mounting Points:
- Custom fit kit allows you to mount Rhino-Rack RC or RV legs on your vehicle with fixed mounting points
- Threaded studs screw into fixed mounting points to provide attachment point for legs
- Legs slide onto studs and secure with hex bolts
- Molded-rubber pads are designed to fit the contours of your roof
- Protect your roof from scratches and abrasions
- Precision-molded inserts cover bases when the legs are removed
Rhino-Rack RCL Legs - Fixed Mounting Points - Qty 4:
- Low-profile legs mount Rhino-Rack crossbars to your vehicle with fixed mounting points
- Locking covers secure roof rack to your vehicle
- Included Allen key ensures legs are securely attached to your roof
- Internal compartment houses Allen key when not in use
- UV and weather-resistant, glass-reinforced nylon construction
RCP68-BK Custom RCP Fit Kit for Rhino Rack RCH, RCL, RVH, and RVL Series Roof Rack Legs - FMP
RCL4 RCL Legs for Rhino Rack Vortex Aero and HD Crossbars and Pioneer Trays - FMP - Qty 4
Replaces Rhino-Rack RRRLCP29
VA126B Rhino Rack Vortex Aero Aluminum Cross Bar - Black - 49" Long
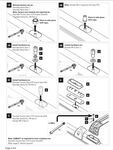
Video of Rhino-Rack Vortex Roof Rack - Fixed Mounting Points - Black - Qty 2


Videos are provided as a guide only. Refer to manufacturer installation instructions and specs for complete information.


Video Transcript for How does the Rhino Rack Custom Fit Roof Rack Kit fit on a 2023 Hyundai Santa Fe?
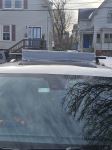
Hi, Matt with etrailer. If you're looking for an option to give you a little bit more storage space on your 2023 Hyundai Santa Fe, especially if you are trying to haul those longer items, anything like skis or kayaks, stuff that's not gonna really fit in the back of your vehicle or things that are just gonna be a little bit too dirty or items like that, then the Rhino-Rack roof rack is gonna be a great option for you. So let's check it out. To help illustrate what I'm talking about, we threw a ski carrier up here with a ski and you can really see the length of this, and that's something that's definitely gonna be an uncomfortable drive if you have it in your vehicle. 'Cause while the Santa Fe does have a lot of storage in the back, those longer items are gonna be pretty difficult. Not to say that you can't put a basket or a box up here, you're probably gonna be good on space most of the time.
But if the case ever does happen where you do need to just a little bit more space, you can put a box or basket up there too. It's also important that you're looking at the correct kit because what we have today is a roof with a flush rail on it. Now the Santa Fe is gonna have two options. Typically, that's gonna have a naked roof and a flush rail option. And you can tell the difference is with the flush rail, you have up top a rail that you can grab onto.
Now with the naked roof, you're not gonna have anything up here, it's just gonna be flush and flat. But we can dive a little bit deeper into this roof rack. And this is gonna be pretty nice because this is gonna come in this three parts. So we're gonna have the crossbars up top and then we're gonna have the tower that connects to it and then the fit kit that attaches the whole system to your roof. So let's take a closer look at the roof rack.
So these are gonna be 49-inch aero crossbars. So that's gonna tell you how long they are. And the aero vortex bar is gonna have the shape to it where it tapers on each end, that help would be more aerodynamic that help reduce that wind noise. Now if you look up top, we're gonna have these weather strips it comes with. And what these are designed to do is also help reduce any wind noise and prevent any debris from building up in here, because this T channel up top is designed to mount other T channel accessories.
And the downside to that though is with these strips, you actually have to cut those down the size to really work with any gear you have up here. And at the very end, we're gonna have this end cap. This end cap's gonna have this tool right here at the very end. You actually have to use an included tool to remove this and that's just built there or put there for some extra security so no one can come by and take off your T channel accessories. And beneath that, we're gonna have a tower that connects to our crossbar and we're also gonna have a T channel underneath here. And it does come with some extra weather strips so you can put it here so you don't have as much wind noise coming through. And this end cap really hides all the hardware behind here. And really the only hardware that is hiding is a bolt that comes down and secures your fit kit to your roof. I do like this because it actually does come with a lock just for that extra security so no one can come by and take your roof rack. And the fit kit is giving us a really good fit today. And this looks very flush to our flush rail and we're gonna have this rubber pad at the bottom which is gonna help prevent any scratching from occurring. Now let's get a few measurements just to see how this is gonna live on top of your roof. So the first measurement I'm gonna get is gonna be the distance underneath our crossbar and that's gonna be at a little bit above 3 1/2 inches, which is pretty good. Now it is something to consider if you have a sunroof on the front of your vehicle and if that sunroof expands up and let's say you have some pretty bulky clamps on your crossbars, they could make contact, but with how high this sits up, I wouldn't worry about it too much, won't be as likely. But if there is a chance, then I'd recommend just leaving your sunroof down. As with the overall height, that's gonna be about 3 1/2 inches, which is gonna sit up kind of high. What I'd recommend doing is taking the total height of your vehicle plus your crossbars and if you have any accessories on top of that, include that, so you know what areas you can make it under. Now another measurement we might wanna get to is gonna be the overall distance. That's gonna be from the front crossbar to the front of the rear crossbar about 27 1/2 inches. And since this is a fixed-mounting system kit and what makes a fixed-mounting system kit is how it attaches to your roof. We have bolts that grab on to specific locations so they won't be able be moved around any. That's important to know because you need to know if it's gonna work with whatever equipment or gear you have. And we are gonna have a little bit of overhang with this, which I'm actually kind of fine with because it's not a whole lot. You're not gonna be very likely of hitting your head on this. And what this is actually gonna offer you is if you have those ski carriers or kayak carriers, you can actually shift that over to the edge and you can place them up here just so they're a little bit easier to reach. And we're also gonna have a weight capacity of up to 165 pounds, which is pretty standard. I'd recommend though check what your roof is rated for and then go from the lowest rated component. You can actually find your roof's weight capacity in your owner's manual. Now something else to think about with this kit is gonna be the end caps. Now I was working with these end caps earlier trying to tighten or lock 'em into place, and I was actually is struggling a bit. I think part of that is just the location of how tight the spot is. I actually had to grab some needle nose pliers to lock this down. So definitely think about that. That might be a struggle that you might have to face too. And if that is gonna be an issue for you, then I'd recommend only installing this one time on your roof if you don't wanna keep dealing with it. Now there's gonna be another option out there too if you don't really wanna mess with these locks, then you could check out the flush option of this. That's gonna be the Rhino-Rack RVP roof rack. And what's nice about that one is it's gonna offer you more of a clean look. But the downside is that one's installation is kind of difficult as well, mainly about how the bolts line up with our flush rails. So each one is gonna have some difficulties to them. I think at the end of the day though, these are a bit easier to work with. And I don't mind a lock that is a little bit difficult to work with sometimes too. Especially since we do have this overhang, so if you want to access our skis or kayaks a little bit easier, then this is gonna be do just fine. But if you are curious to see what this installation looks like, just stay tuned and I'll walk you through the process. To start off the installation, we're gonna lay everything out and I already have the rear crossbar installed, but it's gonna be the same process on the front side too. So in front of me, I have a crossbar, I have two of our towers and their end caps along with a set of keys. We're also gonna have the hardware for our fit kit. Then we're gonna have some included tools and some tools that will be required. Now one of your included tools, or two of them, is gonna be, one, this is gonna be the tool that you remove your end cap width, and then this is gonna be the tool that helps you tighten down your towers to your crossbar. We're also gonna have this pin tool that I recommend grabbing just to remove the tabs on your flush rails and then you're gonna need a 10-millimeter wrench. Now you could grab a socket and a wrench too, but majority of it you would just need a wrench. Also recommend grabbing some masking tape just to make this a bit easier, so you don't scratch anything up, and some measuring tape so you can help make sure everything's even. The first thing I like to start with is just prepping the crossbar. So the way we're gonna do that is we're gonna make sure this is flipped over with the belly side facing up. We're gonna use this tool to take off our end cap and set that aside. We're then gonna grab the tower, make sure this block is pretty loose and place it in this channel. Just slide through and grasp on. Now before I put that all the way on, I'm also gonna grab this bolt 'cause you put this on later on but it's gonna be much more difficult. So I like to start off with this and then place it through. And another trick is just that when this does kind of fall down, just push it a little bit over to the side so it doesn't fall within that channel. And then I recommend tightening this down a fair bit. Now we don't wanna tighten it down too much, we just wanna tighten it down enough where we can still make our adjustments. So just loosen that up just a bit. Once this is done, you can repeat this process on the other side. With our crossbar prepped, we're gonna start prepping our roof, and this is where you're gonna want that masking tape. Now this isn't required, it's just to prevent any scratching from occurring, but I'm gonna grab that pick tool or pin, whichever you have. If you don't have one, you can find one on our website and we're just applying pressure inside one side and then go into the other side so we can release this and remove it. With that out of our way, I'm just gonna take off this masking tape. You see that there's a bolt in there. And now I can actually place this nut on here. It's gonna have a cylinder side on one side and a hard edge on the top. And we just screw this into place, hand tight at first. After when it's sufficiently hand tightened, then I can go in with my wrench and tighten it down the rest of the way. And this is where that socket might come in hand a little bit more than just a wrench. Now with our roof prepped, we wanna check out our fit kit and see what order you place everything. So on the bottom, you're gonna have this rubber pad and you're gonna have this opening in the center which is gonna go over that nut we just placed. On top of that, we'll place this flat-rounded plastic section and might kind of grab onto it and it should just contours to the shape of that rubber pad. And then on top of that, replace your last piece that really connects you tower. And the way this is all gonna seat in together is you're gonna have this hole that's gonna go through that bolt. To really show you what I'm talking about, I'll just place it there now. Put in that opening and that bolt will go through and then attach to that nut that we just put on our roof. And now we can place it on top of our roof. Now I'm holding the fit kit in place on this side. You can do that if you want or you can just leave it on top of your roof like I did for the passenger side. I'm just gonna try to line everything up roughly and more than likely we will have to make some adjustments later on. Now adjust these so each side is kind of lined up with your fit kit. And what we really wanna do now is if I notice, if I try to push my bolt through, it's not going all the way. If I lift this up some, we can see. Lemme just, lemme just kinda try to realign this. There we go. We're still a little bit forward. That's why we left the tower a little bit loosened up, and now we can tighten this down. This can be a little bit tricky just to do with your hand 'cause it is a tight squeeze. You might have to rotate it a bit just to make sure everything's lined up. Right now we are grabbing slightly, but I'm gonna go in and out with my wrench, try to get this down a little bit more. As you're tightening in it, you're finally get to a point where it's starting to get a little tight. At that point, I recommend going to the other side and repeating this process just so everything is gonna cinch down, and then you can tighten them down everything so it's even on both sides. And then you'll get to a point where you're getting it all the way tightened down. And once it's tightened sufficiently, I can grab a tape measure and measure our overhang, 'cause we wanna make sure this is the same on both ends. If it's not, since we tighten both sides, we can make some adjustments pretty easy. All you have to do is just pull or push on it a bit and you can make your adjustments. Once things are even on both ends, you have two options. We have to tighten down this tower to our crossbar the rest of the way. You could either just take this off, making sure you keep the measurements of where the tower is placed and then tighten them down that way, which is gonna be a lot of work, but you can do it and then you can place it back up here and everything will be tightened down. Or the way I like to do it is we'll just grab a L Allen key and then just try to match it up underneath here and tighten it into place. Now this way can be a little bit tricky just trying to find or line up everything, but I think is a better option than having to take off your whole roof rack and then tighten it down that way. And when everything's tightened down, I recommend just pulling or pushing on it, making sure you have a good fit. If it feels good, then you put everything back into place, making sure we have our end cap back on there, tightened down, and then putting on our end cap. And then at that point, you can pretty much load it up with whatever gear you have and take it off for a ride. That was just a look at the installation and some of the features of the Rhino-Rack roof rack on our 2023 Hyundai Santa Fe. I'm Matt, thanks for watching.
Customer Reviews
Rhino-Rack Vortex Roof Rack - Fixed Mounting Points - Black - Qty 2 - RR67FE
Average Customer Rating: 4.6 out of 5 stars (173 Customer Reviews)
Aerodynamic, aluminum crossbars let you build an aftermarket roof rack for your vehicle. Full-length bars provide plenty of space for carriers and accessories. Vortex strips in C-channels reduce wind noise. Theft-deterring plastic locks included.by: Mindy06/28/2022
Indeed they were the wrong parts in the box marked demo on them.
The new parts came and I was able to
Put it on my car with no problem!!
Thank you for listening to me and helping me problem solve. It looks great on my car and I'm ready to load the kayaks now!!
Kalie is a gal that sent me some return labels so I'm going to put that on the box and send it back to you guys!


by: Anthony01/25/2024
2015 Jeep Grand Cherokee
Great bars. It's my second pair. Both on jeep Grand cherokee. The pair I put on my 2015 overland didn't whistle at all. This pair I put on my 2020 trailhawk whistled starting at 20mph and changed pitch throughout the acceleration process and while causing. I bought a fairing and the problem is solved. At least for now. I put the fairing on wit the label in. Looks better and Rhino Rack isn't paying me to advertise. The fairing they recommended seemed small but works so go with whatever they recommend.

by: Mark08/19/2019
etrailer.com's videos and additional customer support made the purchase of a Rhino Rack system from them for our 2010 Malibu a no brainer. The rack fit the car perfectly, and with the videos and clear instructions that came with the kit, I got it installed on the car with only one misstep. The instructions came the the measurements in centimeters and inches. I didn't have a metric tape measure, and ended up messing up converting fractions to decimal.
My Daughter is going to college 500 miles away and is moving into an unfurnished apartment and needed to pick up some small furniture that wouldn't fit in her Malibu. She purchased several items from Facebook Marketplace and was able to transport a twin bed and mattress, a medium sized desk and some dining room chairs (in several trips) with no problems.
The only thing I can think of to improve the installation would be to have the Inches measurements in decimal or to include an inexpensive metric tape.


by: Richard11/12/2022
Rhino-Rack installed on my 2022 Jeep Cherokee. There was wind noise (whistling) when all the rubber spacers were not installed, now it’s very quiet. I also installed the Yakima fishing rod//Ski holder. I wound up deviating from the directions and using the third lot, so the clamps would close on the bar. So far so good, without the fishing rod holder it’s low profile enough to get into garages, etc. Fast delivery on the products.


by: Roseanne08/12/2014
Great sturdy rack. I put it together myself and have already started using it. I was concerned that it would cause leaks in the door the way it has to mount..but its Florida and its rainfall in the past few days and no leak! The weak link would be the end caps..two do not lock on and im concerned the will fly off at some point.

by: G07/21/2023
I love it works amazing on my 2017 Hyundai sonata sport 2.0T


by: John08/02/2020
You have to order the cross bars and connector hardware separately. I also ordered the end cap locks.
I consider myself a pretty good DYI person and it took longer than I expected according to other reviews on here to get everything installed and overlapping the same on both sides.
Once installed the crossbars are very solid. I do get noticeable wind noise at say 70+MPH.
I installed these on a 2020 Jeep GC Overland and they look and function great! Was a bit concerned about the sun roof retraction with the bars, but there is plenty of clearance. No issue.
I for sure recommend the Rhino Rail crossbars. Etrailer is a great site to get the bars. Given the COVID issues and supply chain breakdowns retailers are facing, they still had everything I ordered to me in a very reasonable time frame.


by: Duncan06/24/2023
I bought the complete set (mounting points, mounts and aero cross bars) looking for a less expensive approach for a rack to carry my sea kayak. The equipment shipped quickly from or via etrailer. The instructions that came with the whole kit leave a little bit to be desired and a little bit of mechanical interpretation is needed to figure out what parts you need and which you don't. The whole set went together relatively easily in an hour or so. I remove the bars, mounts and mounting points when not in use which is a bit time consuming and fiddly. I had to replace the mazda 3's roof moulding which was continuous with one that had the necessary pop out pieces to accept the rack but this was not costly nor a big job. Overall, I am pleased with the rhino rack and it looks just fine. The one area it could be improved is wind noise - at some speeds there can be quite a heavy drone either off the bars or mounts. The bars do have rubber inserts to smooth out the surface across the width of the car. I suspect it might be the mounts which have the inboard side of them completely open so the air flowing along the car goes over this open space like you would have happen when you blow across the top of a bottle. I am going to try to cover the sides with gorilla tape to see if this makes a difference. Apart from that, I am quite happy with the etrailer ordering, delivery and the Rhino rack in general.
by: Augustus m11/05/2018
I bought this rack for my son who is a rower so he could take his single shell and oars to regattas using his new Chevy Cruz. First trip from Wyandotte, Michigan to Boston, Massachusetts and back was great. A learning curve to get in the right spot on roof but very sturdy & strong. He is looking forward to many regattas with this car and roof rack. Very Satisfied with etrailer and the rack itself and thank you for the quick shipping.


by: Corey05/06/2016
These crossbars were easy to install, are sturdy when installed and look great on my factory side rails when installed with the SX Series legs. The standard end caps are an all-plastic affair and use a little key to engage a cam lock. That plus the distance from the end of the crossbar to the nut that tightens the foot onto the rail keeps things relatively secure. Most people probably want to opt for proper locking end caps, though.
The rubber vortex strips look nice and give items something grippy to rest on. I haven't tried a load test yet but did drive around in moderate wind on the highway in multiple directions. Other than a slight whistle at 70 mph, you'd never know they were there. Overall, real happy with the product and looking forward to hauling some stuff around with them.


by: Kevin09/09/2021
Easy to install. The pins on the legs clamp perfectly into the fixed points on the car's flush rails. This is a nice low profile set up. The top of the crossbar is about 4" above the roof glass and does not interfere with opening the sunroof. This is a very sturdy setup for our Thule Motion XT XL. etrailer shipped extremely fast. Very pleased with my purchase.


by: SwimBikeRun09/11/2020
My inital thought of these crossbars were that they were going to be too small. Two of the other big makers call for 53" min and 60" recommended. However after installing, 49" is a perfect fit for the Cayenne I feel. The rack is extremely quiet (make sure you use the channel rubber on top and bottom) The Cayenne is fairly quiet car inside and it was one of my big concerns but I only hear what sounds like a slight rush of air, no buzzing or whistling at all.
The downside to this rack is I think the black paint is too thin. Just laying it on the pavement while setting up caused scratches to appear. Silver would be the way to go if your getting these, or spray them plastic.


by: Leonard Gale06/17/2017
My Rhino-Rack Aero 2500 roof racks fit solidly on my 2007 Honda Civic EX. I was really impressed with the construction and strength of the rack system. Also the versatility of the 'legs' with a swivel pad allow them to fit any roof pitch perfectly. The clamps are so solid, nothing could knock these racks off. I added a paddleboard attachment and went surfing today. The black racks also look great with the black trim on my silver Honda. Great product at a much better price than Yakima or Thule.


by: Joe A12/05/2016
Received the roof rack on the date promised, it was well packaged and all parts required were included. Everything fit together very well and the instructions were easy to follow. The rack looks good on the car. Once the rack is installed and the included decals in place it only takes a few minutes to remove it and reinstall. This is important for me because we will only use the racks to transport our kayaks the rest of the time they will be removed and stored.
There are two small items that can be improved. First the legs are different lengths yet nowhere in the instructions does it tell you where each size goes. Second I own 10 tape measure and not one of them is in meters and I do not care how good your eyesight is you are not going to be able to measure to 53/64". If the measurements are critical you should ensure customers in the US have measurements they can use or include a MM tape measure.
Overall this is a very good product that I would purchase again and recommend to friends.


by: Craig08/23/2022
Love these aero bars. Perfect for on my 2018 Grand Cherokee Trailhawk. Run fairly quiet and perform as expected. As always the customer service from etrailer was top notch.


by: Grant01/20/2024
Hyundai
Installed Rhino Rack platform on a Hyundai Kona. This kit made the transition from factory rails. Nice fit!
by: Kyle05/26/2023
Used the cross bars once with a kayak. Black paint easily scratched showing the metal underneath. Was told this was normal wear and tear. The product was bought less than a week ago. Would not buy again.
by: ELSA08/30/2018
Easy to read instructions, easy to install. Watched the install video a few times just to be sure! They do whistle a bit at highway speeds, but certainly not unbearable. In fact, I was surprised as to how quiet they are. It's to be expected, especially when paired with kayak j-racks. So happy with this purchase and I would definitely recommend them!


by: Filiberto01/17/2024
The only complaint I have about the crossbars is that it causes a high pitch sound. I've been meaning to contact you about a possible solution. Pls advise.
Other than that they are just fine.
by: Candy08/06/2022
The quality is very good. Ordering was easy and installation using the video made the process so simple. Glad I order them from here instead of somewhere else.


by: Kimberli S. 07/16/2019
I spent a week reading reviews and forums to find the right one for my 2019 Jeep Cherokee that I just bought a few weeks ago. I just have to overthink everything but it paid off. I just received them this morning and installed them myself! First time for everything! It was really easy. The only part that was frustrating was the very first part... sliding the rubber pieces into the crossbars. They would not slide very well so I ended up using a bit of oil to make them slide better. Other than that, installation was easy and quick. I LOVE the looks of them. Very gorgeous!!! Thank you so much!! Very happy with the end result!!


by: Ralph D.08/05/2022
Looks a great and we’re super easy to install.
2021 Jeep Grand Cherokee L 4x4 Limited


by: Jon05/22/2023
I haven't extensively used this rack yet, but so far, it is excellent.
Avoid my mistake and buy this rack first... Last summer, I purchased a much cheaper off-brand roof rack that was supposed to fit my car. I figured the off-brand rack couldn't be that different from the more common brands, such as Rhino Rack. Long story short, I was wildly wrong. It was nearly impossible to install, and once installed, I didn't trust it with my wind surfboard on it. This rack, however, was easy to assemble and install and is rock solid. I have zero fear of my board or the rack leaving the party before we get there.
by: Jack10/19/2020
The bars look and feel great. They have such a tough presence while still being aerodynamic. I love the look of the rubber grip strip on top and I like how the rubber strip on the bottom ends have graduations so you can easily match the overhang with the other side. They feel incredible strong, no bend in the them at all. If the platforms were a bit more robust this thing would outshine all the competition. However, it competes with every other system at a much lower price point so that gets 5 stars in my book.


by: Joseph06/15/2023
These are cross bars ONLY and are useless without other hardware. This could be presented in a more clear way. I will be returning and buying a complete cross bar set elsewhere
25
3281
Show More Reviews
See what our Experts say about this Rhino Rack Roof Rack
- Replacing the Factory Roof Rack on a 2014 Honda CR-VAll of the roof racks for your 2014 CRV will have the fixed mounting points you referenced that are 31-3/4 inch spread. To give you a better quality system than the factory system you referenced, I recommend the Rhino-Rack system. This kit consists of: Rhino-Rack Vortex Aero Crossbars - 49" Long - Qty 2 # RRVA126B-2 RCL Legs # RRRCL4 Custom RCP Fit Kit # RRRCP33-BK The biggest limitation of this system is its mounting location. The weight capacity is 165 pounds on the 2014 Honda CR-V,...
view full answer... - Roof Rack Recommendation for a 2015 Nissan Rogue with Naked RoofFor your 2015 Nissan Rogue the Rhino Rack roof rack that consists of part numbers # RRVA126B-2, # RRRLKVA and # DK396 has been confirmed to fit your 2015 Nissan Rogue. The clamps of the included fit kit are specifically designed to fit the profile of the door jambs of your vehicle and would work well. For a J-style kayak carrier that would work well with this rack I would recommend the Rhino Rack part # S510. I attached a review video for you to check out as well. Be sure not to exceed...
view full answer... - Roof Rack and Cargo Basket Recommendation for 2003 Ford Ranger EdgeSo the Rhino Rack roof rack you mentioned part numbers # RRVA126B-2, # RRRLKVA and # DK191 is a great option for your 2003 Ford Ranger Edge, but the Curt cargo carrier part # C18115 that you mentioned only fits a select few crossbar spreads and none match the spread the Rhino Rack would have on your truck of 27-1/2 inches. Your best option for a cargo basket will most likely be the Rhino Rack Cargo Basket part # RMCB as it will fit crossbar spreads of 21-30 inches
view full answer... - Recommended Roof Rack for a 2012 Ford Focus Sedan SEThe roof rack that I recommended for you 2012 Ford Focus Sedan SE is the Rhino-Rack Vortex Aero Crossbar System part # RRVA126B-2, part # RRRLKVA, part # DK307. This is my favorite roof rack because it has all of the same basic core features (aero crossbars, custom molded door clips, padded feet, etc.) as the other top tier brands such as Yakima/Thule but at a fraction of the cost. The Vortex Aero Crossbar System also come with locks whereas they would be extra for Yakima/Thule. I have...
view full answer...
- Availability of Yakima Q Tower Fit Kit for a 2011 Chevy ImpalaI do have a roof rack solution for you, but unfortunately there are no Yakima roof rack options for a 2011 Chevrolet Impala which means there will be no fit kits for their Q Towers. Our most popular option for a 2011 Impala is the Rhino-Rack Roof Rack which consists of the Rhino-Rack bars # RRVA126B-2, 2500 Series Legs # RRRLKVA, and Custom DK Fit Kit # DK187. This is a square crossbar design that offers a 165 lb weight capacity though you will want to consult your owner's manual to...
view full answer... - Roof Rack Recommendation for 2018 Nissan Rogue with Naked RoofFor your 2018 Nissan Rogue with a naked roof you'll need to install a roof rack so that you can mount the carrier/basket you have in mind. For that the Rhino Rack roof rack part numbers # RRVA126B-2, # RRRLKVA, and # DK396 is what you'd need. What I really like about the Rhino Rack roof racks is that you get the higher quality of the more expensive racks but at a better price. The Rhino Rack roof basket part # RMCB02 is a really solid option for a basket as well.
view full answer... - Rhino-Rack or Malone Roof Rack for 2017 Nissan Pathfinder With Raised RailsHands down the better option for your 2017 Nissan Pathfinder with raised rails is the Rhino-Rack over the Malone AirFlow2 Roof Rack # MPG216. The Malone is really a more universal type of fit that is an all-in-one with bars that are smaller in diameter and height than the Rhino-Rack and not at the overall level of quality. If you were looking for a rack that you'd just use occasionally it would be fine, but since you are using things like a rooftop tent and awning, it seems like you're...
view full answer...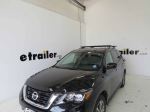
- Roof Rack Recommendation for 2008 Mercedes GL450 to Carry Thule MoabThe Rhino Rack Vortex roof rack part numbers # RRVA126B-2 and # RRSX100 that you referenced is a great choice for your 2008 Mercedes GL450. This confirmed fit rack is easy to install, has aero shaped bars which means minimal wind noise and also is compatible with your Thule MOAB.
view full answer... - Best Roof Rack To Carry Thule Motion XT Roof Box On A 2015 Toyota SiennaThe Thule Motion XT Rooftop Cargo Box # TH629907 is an excellent choice. This cargo box is perfect for transporting skis and snowboards, luggage, and other cargo on the roof of your vehicle. The Motion XT XXL offers all the great features of Thule's Force series in a more compact and aerodynamic package. It has a convenient handle with supporting lifters that make the lid easy to open and close, even with one hand. It also includes a keyed-lock system with a red strip that indicates that...
view full answer... - Recommended Roof Rack for 2019 Volkswagen Jetta (All Models)The roof rack I recommend for a 2019 Volkswagen Jetta (All Models) is the Rhino-Rack Vortex Aero Crossbar part # RRVA126B-2, part # RRRLKVA, and part # DK424. This system is a great option because it has most of the same features as other top tier options like from Thule and Yakima but at a fraction of the cost. There are aero crossbars which offer the best wind resistance and locks for security. There will be no issues with security. It will do a wonderful job of carrying kayaks. If you...
view full answer... - Roof Rack Recommendation for Installing Roof Mounted Cargo Basket on 2012 Honda CR-VIn order to use the Thule # TH859XT Roof Mounted Cargo Basket, you will indeed need a roof rack to provide an attachment point to the vehicle roof, as the basket can't attach directly. If your CR-V has the roof rails that run front to back along the sides of the roof, Rhino-Rack offers a roof rack that would work great for you. You'd assemble the rack using these parts: • 49 Inch Vortex Aero Crossbars # RRVA126B-2 • RCL Leg kit, part # RRRCL4 • Fit Kit for existing holes in the rails...
view full answer... - Can The Thule Force XT L Rooftop Cargo Box Be Installed Onto The Roof Of A 2019 Audi Q5?The Thule Force XT L Rooftop Cargo Box - 16 cu ft - Black AeroSkin # TH6357B fits crossbars that are no more than 3-1/2" wide and no more than 1-11/16" tall. It also requires a crossbar spread of 23-5/8" - 33". Crossbar spread is the distance between crossbars measuring from center to center (see attached photo). As long as your crossbars meet these requirements then it will work well for you. If you do not have a roof rack installed then I recommend looking into a set of aerodynamic bars...
view full answer...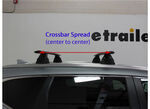
- What Parts are Required for Rhino-Rack Vortex Aero Crossbars on a 2015 Ford Focus?With the naked-roof style rack attachment on your 2015 Ford Focus, the parts are sold separately from the crossbars themselves. For the Rhino-Rack Vortex Aero Crossbars # RRVA126B-2, you will need two things in addition to the crossbars: 1. Rhino-Rack 2500 Series Legs # RRRLKVA 2. Custom DK Fit Kit for 4 Rhino-Rack 2500 Series # DK307 You can also upgrade the locks to all-metal security locks with Rhino-Rack Locking Endcaps # RRVA-LEC4 As far as your worries about quality, Rhino Rack...
view full answer... - Which Roof Cargo Basket For 2015 Toyota Prius v W/ Rhino-Rack Vortex Aero Roof RackThe Rhino-Rack Roof Rack System for your 2015 Toyota Prius v that uses 49" Rhino-Rack Vortex Aero Crossbars # RRVA126B-2, Rhino-Rack 2500 Series Legs for Vortex Aero Crossbars # RRRLKVA, Custom DK Fit Kit for 4 Rhino-Rack 2500 Series Roof Rack Legs # DK195 would not work with the Curt Roof Mounted Cargo Basket # C18115 as it requires a 15", 22", or 29" crossbar spread and this system has a 27-9/16" crossbar spread. Instead I recommend the Yakima LoadWarrior Cargo Basket # Y07070 which...
view full answer... - What is the Weight Capacity of a 2014 Kia Sorento Factory Roof RackI checked the owners manual for a 2014 Kia Sorento and it indicates that the roof rack capacity is 220 pounds, evenly distributed. You will want to double check your owners manual just to be on the safe side. If you do not have crossbars then you can add some. It does sound like you at least have the side rails that run front to back. I have included links to the roof rack crossbars that will fit. It appears that for 2014 Sorentos there are raised side rails and flush side rails. the...
view full answer... - Roof Rack Recommendation for a 2000 Buick LeSabreThe Rhino Rack you referenced that consists of part numbers # RRVA126B-2, # RRRLKVA and # DK061 comes with everything needed to install the rack on your 2000 Buick LeSabre. Installation instructions are included with this roof rack for you to check out as well.
view full answer... - Roof Rack and Cargo Basket for a 2021 Ford Bronco Sport Big Bend Edition I would be happy to help you set your 2021 Ford Bronco Sport Big Bend Edition up for tailgating. The 2021 Ford Bronco Sport Roof Rack by Rhino Rack you referenced is a great rack and is confirmed to fit your Bronco. The Roof Rack Includes: Rhino-Rack Vortex Aero Crossbars - Aluminum - Black - 49" Long - Qty 2 item # RRVA126B-2 Rhino-Rack SX Series Legs for Vortex Aero Crossbars - Raised Factory Side Rails - Qty 4 item # RRSX100 The Aero Crossbars have a 165 lbs capacity. The custom-fit...
view full answer... - Roof Rack Fit for 2018 Subaru LegacyWe do have several roof rack fits for your 2018 Subaru Legacy, but the crossbar you mentioned is a fit for a 2016 Chevy Spark. For your Legacy, the most economical option we offer would be square crossbar rack from Inno, which would consist of the following parts: Square profile 54 inch long crossbars, part # INB137 Roof Rack Feet, part # INSUT Vehicle Specific Fit Kit, part # INK439 The downside to square bar roof racks is that they're not very aerodynamic, so they can be pretty noisy....
view full answer... - Roof Rack Recommendation for a 2010 Honda Civic CoupeSportRack just does not have a fit for the 2010 Honda Civic 2-door coupes but that is not necessarily a bad thing. The SportRack roof racks are semi-custom, not true custom fit roof racks. As such they will never fit as well as a custom roof rack and with a roof rack fit is everything! For a cost effective custom fit roof rack that will fit your Civic I recommend a Rhino-Rack Euro-style roof rack using the following parts: Crossbars # RRVA126B-2 Feet # RRRLKVA Fit kit # DK153
view full answer... - Fit of Rhino Rack 2500 Series Roof Rack 2012 Hyundai ElantraThe Rhino Rack roof rack that fits your 2012 Hyundai Elantra 4-door with a naked roof consists of: Rhino Rack Crossbars, part # RRVA126B-2 Leg Kit, part # RRRLKVA Vehicle specific clamp kit, part # DK301 To install crossbars on your roof, those are the only parts you'd need. Rhino Rack also offers numerous accessories like bike racks like # RBC035, ski/snowboard carriers like # RR574, kayak carriers like # S512 or baskets in numerous sizes. I've provided some links with more information.
view full answer... - How to Install a SportRack Explorer Cargo Box on 2016 Nissan Rogue with Bare RoofYour 18 cubic foot SportRack Explorer Cargo Box needs to mount to a roof rack, so step one is to select an aftermarket roof rack system for your 2016 Nissan Rogue with bare roof. The link provided will show you all roof rack options for your vehicle. Among the more cost-effective choices is the Rhino-Rack 2500 Series Roof Rack consisting of parts # RRVA126B-2, # RRRLKVA, and # DK396. This aero bar system provides excellent compatibility with most rooftop accessory items such as cargo...
view full answer... - Best Way to Haul my Kayak with my 2014 Honda Odyssey with a Naked RoofI have a solution but with your van as the doors slide they would interfere with the straps running through the track area the doors slide in. Instead it will require a roof rack system to attach the Malone Rack Pads for Crossbars part # MPG314 to allow the kayak to rest on. This rack consist of the parts: # RRVA126B-2, # RRQMVA10, # RRRTV168, and # RRRLT600 Not only will this allow you to attach pads but a ton of different roof top accessories for different hobbies. I also recommend thinking...
view full answer... - Best Roof Rack For 2020 Ford Edge With Glass Vista Roof and Flush Mount RailsFor the 2020 Ford Edge With Glass Vista Roof and Flush Mount Rails I recommend the Rhino Rack roof rack part # RRVA126B-2, and # RRSX024. The aerodynamic shape of the crossbars along with the Vortex strips in the C-channels significantly cut down on wind noise. The roof rack is compatible with the glass vista roof on the Edge but I do not recommend opening the sunroof while carrying cargo on the roof rack to avoid damage. Even when you are not carrying cargo and open the sun roof with...
view full answer...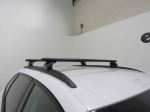
- Recommended Roof Racks for Mitsubishi RVR 2018We have roof racks that are a confirmed fit for your 2018 Mitsubishi RVR. If you have a naked roof you'd want the Rhino Rack kit part numbers # RRVA126B-2, # RRRLKVA and # DK289 which is a confirmed fit and would work well. If you have flush rails on your roof that you can't put your hand under you'd instead want the Rhino Rack roof rack part # RRVA126B-2 and # RRSX031. I also attached a link to a page that has all of the roof rack options we have for your vehicle as well.
view full answer... - Replacing the Factory Roof Rack on a 2014 Honda CR-VAll of the roof racks for your 2014 CRV will have the fixed mounting points you referenced that are 31-3/4 inch spread. To give you a better quality system than the factory system you referenced, I recommend the Rhino-Rack system. This kit consists of: Rhino-Rack Vortex Aero Crossbars - 49" Long - Qty 2 # RRVA126B-2 RCL Legs # RRRCL4 Custom RCP Fit Kit # RRRCP33-BK The biggest limitation of this system is its mounting location. The weight capacity is 165 pounds on the 2014 Honda CR-V,...
view full answer... - Roof Rack Recommendation for Installing Roof Mounted Cargo Basket on 2012 Honda CR-VIn order to use the Thule # TH859XT Roof Mounted Cargo Basket, you will indeed need a roof rack to provide an attachment point to the vehicle roof, as the basket can't attach directly. If your CR-V has the roof rails that run front to back along the sides of the roof, Rhino-Rack offers a roof rack that would work great for you. You'd assemble the rack using these parts: • 49 Inch Vortex Aero Crossbars # RRVA126B-2 • RCL Leg kit, part # RRRCL4 • Fit Kit for existing holes in the rails...
view full answer... - Roof Rack For 2019 Chevy Equinox w/ Fixed Mounting Point For Carrying 2 KayaksThanks for that info, and what your 2019 Chevy Equinox has are fixed mounting points, and there is a roof rack that will fit directly in those mounting points, from Rhino-Rack. The rack consists of the following parts: - Rhino-Rack Vortex Aero Crossbars # RRVA118B-2 - RCL Legs - Fixed Mounting Points # RRRCL4 - Custom RCP Fit Kit # RRRCP62-BK So this rack will fit your '19 Equinox and give you quiet, aerodynamic crossbars that will also allow you to carry a pair of kayaks. You can do...
view full answer... - Will the Thule Motion XT Cargo Box Fit on a 2021 Hyundai Santa Fe?Yes, the Thule Motion XT Rooftop Cargo Box # TH629706 will fit your 2021 Hyundai Sante Fe with a crossbar system. The Motion X will fit on top of your vehicle and allow you to access the rear hatch. If you need a roof rack, the parts you need depend on if you have factory flush rails or a naked roof on your vehicle. If you do not already have a roof rack, you will need to purchase one. If your vehicle has flush factory rails, I recommend the following parts: - Rhino-Rack Vortex Aero...
view full answer... - Aero Roof Racks for 2018 Honda CRV with Flush Roof Side RailsYes, we can help you select a black aero-style roof rack for your black 2018 Honda CR-V that has the factory flush-mounted roof rails. The available rack systems from Rhino-Rack, Thule and Yakima appear on the linked page and these include the Rhino-Rack Vortex system # RRRVP46 that you referenced. For a clean appearance and value for the dollar I really like this Rhino-Rack setup, but if you need longer bars for more cargo space there are additional options. For a black rack with longer...
view full answer... - Roof Rack Recommendation for 2019 Jeep Grand Cherokee with Roof Rails There are two different type of rails that run front to back on the roofs of the 2019 Jeep Grand Cherokee. There are rails that have chrome center sections and rails that are totally black. If you have the chrome center section I recommend the Rhino Rack part numbers # RRVA126B-2, # RRRCL4, and # RRRCP27-BK. And if instead you have solid black rails you'd want the Rhino Rack part numbers # RRVA137B-2, # RRRLKVA, and # DK234. The reason I recommend Rhino Rack is because Rhino Rack roof...
view full answer... - Correct Size Rhino-Rack Vortex Aero Crossbar for a 2018 Jeep Grand Cherokee TrailhawkThe correct size Rhino-Rack Vortex Aero Crossbar for a 2018 Jeep Grand Cherokee Trailhawk is 49", part # RRVA126B-2. This can then be used with the RCL Legs for Rhino-Rack part # RRRCL4 and Custom RCP Fit Kit for Rhino-Rack part # RRRCP27-BK. Please note, there are channels underneath the crossbars so you cannot just use any size as there is a limit for each vehicle. That said, I suppose you could go up to the next size without too much issue, part # RRVA137B-2 which is 54" long but that...
view full answer... - Recommended Roof Rack for a 2023 Chevy Traverse To add a set of crossbars to the raised rails on your 2023 Chevy Traverse, I recommend the roof rack by Rhino-Rack which includes the following parts: Rhino-Rack Vortex Aero Crossbars - Aluminum - Black - 46" Long - Qty 2 item # RRVA118B-2 RCL Legs for Rhino-Rack Crossbars - Fixed Mounting Points - Qty 4 item # RRRCL4 Custom RCP Fit Kit for 4 Rhino-Rack RC Roof Rack Legs - Fixed Mounting Points item # RR32SV This aero bar roof rack system has a 165 lbs capacity. The included locks...
view full answer... - Black Rhino-Rack Crossbars for 2015 Jeep Grand Cherokee With Black & Chrome Flush Mounted RailsThere are definitely black Rhino-Rack Vortex crossbars for your 2015 Jeep Grand Cherokee with the black and chrome flush mounted rails. The entire roof rack, including the 49 inch black crossbars for your Jeep is made up of: - Rhino-Rack Vortex Aero Crossbars # RRVA126B-2 - RCL Legs for Rhino-Rack Crossbars # RRRCL4 - Custom RCP Fit Kit # RRRCP27-BK
view full answer...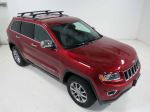
- Thule Roof Rack And Kayak Carrier For A 2020 Hyundai Santa FeFor your 2020 Hyundai Santa Fe, I recommend the Rhino-Rack Vortex Aero Crossbars # RRVA126B-2, the feet # RRRCL4, and the fit kit # RR66QJ. This roof rack will fit onto the flush mounted rails on your Hyundai Santa Fe, and can support up to 220-lbs, however the maximum capacity is ultimately determined by your vehicle. Since you mentioned you're wanting to transport a couple of Expression 11 Kayaks, I recommend using the Thule Compass Kayak and SUP Carrier w/ Tie-Downs # TH890000 has...
view full answer... - Roof Rack and Ski/Snowboard Carrier Recommendation for a 2014 Jeep Grand CherokeeYes, the Thule Ski and Snowboard Carrier # TH7326 that you referenced will fit Rhino Rack crossbars. For your 2014 Jeep Grand Cherokee with flush rails the Rhino Rack roof rack you would need would consist of part numbers # RRVA126B-2, # RRRCL4, and # RRRCP27-BK. The flus rails will need to have chrome trim on top of them.
view full answer... - Purpose of Fit Kit for Rhino-Rack Roof Rack on 2019 Honda CR-V with Flush-Mounted RailsThe fit kits are definitely the most confusing part to roof rack systems so you aren't alone in trying to understand exactly what they do. For your 2019 Honda CR-V with flush-mount rails the Rhino-Rack roof rack that fits will consist of: - Rhino-Rack Vortex Aero Crossbars # RRVA126B-2 - RCL Legs for Rhino-Rack Crossbars # RRRCL4 - Custom RCP Fit Kit # RRRCP60-BK These three parts work in conjunction, with the crossbars attaching to the legs and the legs attaching to the fit kit, which...
view full answer...
- Do Thule & Yakima Cargo Boxes Fit Rhino-Rack Roof Rack on 2017 Toyota Highlander w/ Flush RailsSince you asked about the 54 inch Rhino-Rack bars, your 2017 Toyota Highlander will have flush side rails, and the reason that's important is because of the crossbar spread, which is half of what determines a fit, along with the crossbar size. But the quick answer is yes, both rooftop cargo boxes you mentioned will fit the Rhino-Rack roof rack on your '17 Highlander with flush side rails: - Yakima SkyBox NX 16 Roof Cargo Box # Y95AV - Thule Pulse Large Rooftop Cargo Box # TH615 If you...
view full answer... - How To Use a Rhino-Rack Pioneer Platform Rack on a 2018 Chevrolet EquinoxThe best way to install a Rhino-Rack Pioneer Platform Rack on your 2018 Chevrolet Equinox would be to use a model that attaches to standard crossbars, the part # RR42114BF which is 48" long x 38" wide or the part # RR42115BF which is 58" long x 47" wide. These are actually the only two models of the Rhino-Rack Pioneer Platform Rack that can be installed on a standard crossbar. Then for a roof rack, you can use the Rhino-Rack Vortex Aero Crossbar System part # RRVA118B-2, part # RRRCL4,...
view full answer... - Surfboard Carrying Suggestions for 2014 Jeep Grand CherokeeThe roof racks that will fit your vehicle will depend on the roof of your Grand Cherokee. If your roof has the flush-mounted rails with chrome strips that run along the edges of the roof, I'd recommend a Vortex Aero Crossbar rack from Rhino Rack, which consists of the following parts: Vortex Aero Crossbar in Black, part # RRVA126B-2 or in Silver, part # RRVA126S-2 Leg Kit, part # RRRCL4 Fit Kit, part # RRRCP27-BK You could use the Rhino Rack Surfboard carrier, part # RRRWP03. If there...
view full answer... - Middle-of-the-Road Roof Rack Recommendation for Roof Box on a 2012 Honda CR-V EX-LYou are correct that there is a break-point in roof rack quality. A middle-of-the-road option that I recommend using for your 2012 Honda CR-V EX-L is the Rhino-Rack Vortex Aero Crossbar system which includes the following for your flush mount rails: Rhino-Rack Vortex Crossbars # RRVA126B-2 RCL Legs - # RRRCL4 RCP Fit Kit - # RRRCP33-BK The biggest differences between the Rhino-Rack setup vs a Thule setup for example is that the Thule pieces tend to fit together a little easier and the...
view full answer... - Rhino Rack Euro Bar Feet Compatibility On 2016 Honda CR-VThe Rhino-Rack Euro Bar square crossbars (discontinued) fit 2500 series feet part # RRRLKVA, so they are not compatible with the the RCL legs for fix mounting points part # RRRCL4. The RCL legs are only a fit for the Aero crossbars for Honda CR-V's with fixed mounting points. Along with the Euro Bar crossbars and the 2500 Series Legs, you will also need adapters part # RREB-FK1 and fit kit part # DK284 to complete the Rhino Rack roof rack system on your 2016 Honda CR-V. If your Honda...
view full answer... - What Crossbar Setup and Cargo Box do You Recommend for My Bare Roof 2020 Mazda CX-5?I believe you are referring to the following Rhino-Rack setup for your bare-roof 2020 Mazda CX-5 - Rhino-Rack Vortex Aero Crossbars - Aluminum - Black - 46" # RRVA118B-2 - RCL Legs for Rhino-Rack Crossbars and Pioneer Platforms - Fixed Mounting Points # RRRCL4 - Custom RCP Fit Kit for 4 Rhino-Rack RC and RV Series Roof Rack Legs - Fixed Mounting Points # RRRCP48-BK With this particular system, we unfortunately do not have the specific spread between the fixed mounting points on your 2020...
view full answer...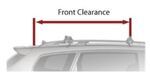
- Will Two Thule Hullavators Fit on Factory Crossbars of 2019 Honda CR-VYes two of the Thule Hullavators part # TH898 will fit on the factory crossbars of your 2019 Honda CR-V if the bars extended past the feet of the rack. Otherwise you'd have to go with an aftermarket roof rack like the Rhino Rack part numbers # RRVA126B-2, # RRRCL4, and # RRRCP60-BK.
view full answer... - Can I Use Longer Rhino-Rack Vortex Crossbars # RRVA137B-2 on My 2022 Jeep Grand Cherokee L?While we do have a longer crossbar option for your 2022 Jeep Grand Cherokee L with flush rails, Rhino-Rack cannot confirm whether the 54" Rhino-Rack Vortex Crossbars # RRVA137B-2 can fit onto your vehicle. This is because the # RRVA137B-2 has a finite bottom channel where it mates to the # RRRCL4. Since this is the case, the channel may not be long enough to accommodate that length on your roof to fit onto the supports. Also, since the 49" # RRVA126B-2 are the longest tested/confirmed fit...
view full answer... - Recommended Roof Rack for a 2017 Honda CRVI have a couple of options for a compatible roof rack depending on whether your 2017 Honda CR-V has the rails that run down the sides of the roof. I have listed them below along with installation videos. Flush Mounted Rails Rhino-Rack Vortex Aero Crossbars - Aluminum - Black - 49" Long - Qty 2 item # RRVA126B-2 RCL Legs for Rhino-Rack Crossbars and Pioneer Platforms - Fixed Mounting Points item # RRRCL4 Custom RCP Fit Kit for 4 Rhino-Rack RC and RV Series Roof Rack Legs item # RRRCP60-BK Naked...
view full answer...
- Recommended Roof Rack for a 2019 Chevy Equinox w/ Raised RailsSince your 2019 Chevy Equinox has raised rails you will want the roof rack by Rhino-Rack and it includes the following parts: Rhino-Rack Vortex Aero Crossbars - Aluminum - Black - 46" Long - Qty 2 item # RRVA118B-2 RCL Legs for Rhino-Rack Crossbars - Fixed Mounting Points - Qty 4 item # RRRCL4 Custom RCP Fit Kit for 4 Rhino-Rack RC and RV Series Roof Rack Legs item # RR32SV This aero bar roof rack system has a 165 lbs capacity. The included locks will prevent theft. The rubberized vortex...
view full answer...
- Recommendations for Hitch and Cargo Carrier on 2008 Toyota Corolla SStarting with a hitch for your 2008 Toyota Corolla S, I recommend the Curt Trailer Hitch Receiver # C11265. It features a bolt on installation and has a max tongue weight of 200 lbs for accessories. Since Class I is the only option available you are pretty limited on your carrier selection. You can choose from one of the following: -17x46 Curt Cargo Carrier for 1-1/4" and 2" Hitches - Steel - 500 lbs # C18145 (Weighs 29 lbs) -19x47 Curt Cargo Carrier for 1-1/4" and 2" Hitches - Steel...
view full answer... - Will the Thule Motion XT Cargo Box Fit on a 2021 Hyundai Santa Fe?Yes, the Thule Motion XT Rooftop Cargo Box # TH629706 will fit your 2021 Hyundai Sante Fe with a crossbar system. The Motion X will fit on top of your vehicle and allow you to access the rear hatch. If you need a roof rack, the parts you need depend on if you have factory flush rails or a naked roof on your vehicle. If you do not already have a roof rack, you will need to purchase one. If your vehicle has flush factory rails, I recommend the following parts: - Rhino-Rack Vortex Aero...
view full answer... - Thule Roof Rack And Kayak Carrier For A 2020 Hyundai Santa FeFor your 2020 Hyundai Santa Fe, I recommend the Rhino-Rack Vortex Aero Crossbars # RRVA126B-2, the feet # RRRCL4, and the fit kit # RR66QJ. This roof rack will fit onto the flush mounted rails on your Hyundai Santa Fe, and can support up to 220-lbs, however the maximum capacity is ultimately determined by your vehicle. Since you mentioned you're wanting to transport a couple of Expression 11 Kayaks, I recommend using the Thule Compass Kayak and SUP Carrier w/ Tie-Downs # TH890000 has...
view full answer... - 2010 Outback Roof Rack OptionsAdding feet to your 2010 Subaru Outback Wagon will not change the weight limit of the rack. The maximum weight limit will still be 165lbs. Adding the Rhino-Rack RT-Style Roof Rack Tracks - Rivet Mount - 51" Long - Qty 2, part # RRRTS551, does not change that. In fact, adding an extra feet/legs and crossbars to your roof rack will actually lower the weight you can carry on your roof. That is because your roof rack's weight actually counts toward the 165lb weight total. I would use my existing...
view full answer... - Recommend Roof Rack for Mounting Two Hullavators on a 2023 Hyundai Santa FeI have two options to mount a couple of Hullavators item # TH898 on your 2023 Hyundai Santa Fe. Which one you need completely depends on what is currently on your roof. There are two options one for a bare roof model and one with side rails. I have listed both options below: Naked Roof No Rails - Yakima JetStream Crossbars - Aluminum - Black - 60" Long - Qty 2 item # Y00426 BaseLine Towers for Yakima Crossbars - Naked Roofs - Qty 4 item # Y28TR BaseClip Fit Kit for Yakima BaseLine...
view full answer... - Roof Rack Recommendation for a 2019 Hyundai Santa FeYes! We definitely have a great roof rack available for your 2019 Hyundai Santa Fe. The parts you need depend on if your vehicle has flush factory rails or a naked roof. If you have flush factory rails, I recommend the following setup: - Rhino-Rack Vortex Aero Crossbars # RRVA126B-2 - RCL Legs # RRRCL4 - Custom RCP Fit Kit # RR66QJ If you have a bare roof, I recommend the following: - Yakima JetStream Crossbars # Y00425 - BaseLine Towers # Y28TR - BaseClip Fit Kit - Qty. 2 # Y06151 -...
view full answer... - What Roof Rack Will Work For My 2020 Hyundai Santa FeWhen it comes to your 2020 Hyundai Santa Fe I recommend The Rhino Rack Vortex Aero Bar System. This kit will work if you have flush mounted rails that run front to back. The kit comes with three parts that you will need. You need The Rhino-Rack Vortex Aero Crossbars # RRVA126B-2, you need The RCL Legs for the cross bars # RRRCL4, and finally need The RCP Fit Kit # RR66QJ. These parts will give you the complete roof rack setup. When it comes to the Rhino Rack Snowboard Carrier # RR576...
view full answer... - Do You Carry Something that will Carry Both Luggage and Bikes? In order to mount an accessory onto your 2019 Honda HR-V, you will need a roof rack. I did some research and discovered that your 2019 Honda HR-V has factory flush side rails. With the flush rails, you will need the following parts: - Rhino-Rack Vortex Aero Crossbars - Aluminum - Black - 46" # RRVA118B-2 - RCL Legs for Rhino-Rack Crossbars and Pioneer Platforms # RRRCL4 - Rear Wedges for Rhino-Rack Roof Rack Legs - 8.72 mm - Qty 2 # RRSUB0671 - Custom RCP Fit Kit for 4 Rhino-Rack RC and...
view full answer... - Low Profile Roof Rack For 2019 Hyundai Kona With Flush RailsThis Rhino-Rack Vortex Aero Crossbars # RRVA126B-2 is definitely going to be your best option. The RCL Legs # RRRCL4 mount to your fixed points on your 2019 Hyundai Kona. You'll want to get the Rear Wedges # RRSUB0671 and the Custom RCP Fit Kit # RR66QJ. These are only going to sit up a couple inches from your roof rails and will work great with your roof top tent # TH8001KSK04. I've included a video of an installation to help you with the install!
view full answer... - Recommended Crossbars for a 2023 Hyundai Santa Fe With Flush RailsFor your 2023 Hyundai Santa Fe, I recommend going with the Rhino-Rack Vortex Aero Crossbars # RRVA126B-2, with the RCL Legs for Rhino-Rack Crossbars and Pioneer Platforms # RRRCL4, and the Custom RCP Fit Kit for 4 Rhino-Rack RC and RV Series Roof Rack Legs # RR66QJ. These crossbars measure 49" long, has a dynamic weight capacity of 165 lbs, and has an integrated top channel for roof mounted accesories.
view full answer... - Height of Rhino-Rack Vortex Roof Rack for 2022 Hyundai Kona with Factory RailsThe Vortex Aero crossbar system is going to add about 3-1/2" - 4" to the height of your 2022 Hyundai Kona on tp of those factory rails. Here are the parts you'll need for this system: 49" Vortex Aero Crossbars - # RRVA126B-2 RCL Legs - # RRRCL4 Rear Wedges - # RRSUB0671 RCP Fit Kit - # RR66QJ If you let me know what you plan on using the roof rack for I'd be more than happy to make any other recommendations you might need!
view full answer... - Roof Rack System For A 2021 Hyundai Santa FeWe have the perfect Roof Rack For your 2021 Hyundai Santa Fe with moonroof! The Rhino-Rack Vortex Aero Crossbars # RRVA126B-2 RCL Legs # RRRCL4 Custom RCP Fit Kit for 4 Rhino-Rack RC and RV Series Roof Rack Legs # RR66QJ This kit per as customer stated that the top of the crossbar is about 4 inches above the roof glass and does not interfere with opening the moonroof, but Rhino Rack does not recommend it. The cross bars have a slim elliptical shape that helps to create an extremely...
view full answer... - Should Crossbars be Spread Out As Far As Possible for Carrying CanoeOn a roof rack like the Rhino Rack # RRVA126B-2, # RRRCL4, # RR66QJ you have on your 2023 Hyundai Santa Fe it is best to have the crossbars as spread out as possible to better distribute the weight of a longer item like a canoe so I would say you are on the right track.
view full answer...
- Rhino Rack Roof Rack that Fits 2020 Hyundai Santa FeThe 49 inch cross bar Rhino Rack roof rack part numbers # RRVA126B-2, # RRRCL4, and # RR66QJ is a confirmed fit for your 2020 Hyundai Santa Fe with flush rails. The feet of the rack install into the fixed mounting points that are on the flush rails you have. You will need to install them into the points you mentioned that require removing the plugs you mentioned.
view full answer... - Kayak Carrier, Tie-Downs and Load Assist For a 2023 Hyundai Santa Fe to Carry a 66lb. & 81lb. KayakThe biggest challenge you are going to face is the weight of your kayaks, mainly the 81 lb. kayak. For instance, the Malone DownLoader Kayak Roof Rack w/ Lift Assist and Tie-Downs # MPG114MD-351XL does a great job providing a kayak carrier, a way to help load the kayaks on the roof and the bow and stern tie downs for securing the kayaks. But it has a weight limit of 75 lbs. which is enough for your 66 lb. kayak, but not the 81 lb. kayak. Your best option may be the Rhino-Rack Kayak Roof...
view full answer... - What Roof Rack Utilizes the Fixed Mounting Points on My 2022 Honda HR-V with Flush Rails? I have a great roof rack solution for you. Unfortunately, through my research on your 2022 Honda HRV, I could not confirm the purpose for the 8 rubber plugs in the side of your flush rails. However, the slots on top are tabs that can be removed to access the fixed mounting points in the rails to attach roof rack systems. For the best roof rack system for your vehicle that attaches directly to the fixed mounting points, I recommend the following parts: - Rhino-Rack Vortex Aero Crossbars...
view full answer...
- Roof Rack Fit For 2020 Hyundai Santa Fe With Flush Mount RailsBoth roof racks that fit your 2020 Hyundai Santa Fe with flush mount rails install using a fit kit which mounts directly in the rails. I did link the directions below which should be useful to give you a better idea on the install (which is not difficult at all). Basically the flush rails have a couple points along them with lids that you pop up and the fit kit installs right at that point. As for the racks that fit, they are both from Rhino-Rack, and one has flush-mount bars that only...
view full answer... - Will Malone AriFlow2 Roof Rack Fit a 2021 Hyundai TucsonIt looks like the 2021 Hyundai Tucson has flush mounted rails while the Malone AirFlow2 Roof Rack # MPG216 is designed for raised rails which means we need to go with a different roof rack system like the Rhino-Rack Vortex roof rack which uses the following parts: 46" Vortex Crossbars # RRVA118B-2 RCH Legs - # RRRCH2 RCL Legs - # RRRCL2 Rear Wedges - # RRSUB0671 Fit Kit - # RR66QJ This uses aero-style crossbars like what you were looking at with the AirFlow2 system but it comes with...
view full answer... - What's Needed to Use Rhino-Rack Fishing Rod Carrier On 2020 Hyundai Santa FeIn order to use the Rhino-Rack Fishing Rod Carrier part # RR574F on a 2020 Hyundai Santa Fe you'll indeed need crossbars. The Rhino-Rack Vortex Aero Crossbar System part # RRVA126B-2,part # RRRCL4, part # RR66QJ is a great option for this and will provide the attachments needed to secure the Rhino-Rack Fishing Rod Carrier. We don't offer any options for fishing rod carriers without the crossbars so these will be needed no matter which option you decide. That said they do allow for much...
view full answer... - Best Roof Basket and Roof Rack for 2019 Hyundai Santa Fe With Flush Mounted RailsWe can get you set up with a top-quality roof basket that is quiet, durable and sleek looking for your 2019 Hyundai Santa Fe. First though you will need a roof rack, since you mentioned you had roof rails, as it sounds like you have the flush-mounted rails without a rack. There is one rack that fits your '19 Santa Fe with these rails, and it comes from Rhino-Rack, a manufacturer known for combining quality and price, making it the best value. The parts that fit your Santa Fe and make...
view full answer... - Recommended Roof Rack for a 2023 Hyundai Santa Fe With Factory Flush RailsWell there isn't any Thule rails that'll work with your 2023 Hyundai Santa Fe, however we do have the Rhino-Rack Vortex Aero Crossbars # RRVA126B-2 with the RCL Legs for Rhino-Rack Crossbars and Pioneer Platforms # RRRCL4 and the Custom RCP Fit Kit for 4 Rhino-Rack RC and RV Series Roof Rack Legs # RR66QJ. These crossbars will work just the same as any Thule bars providing up to 165 lbs of dynamic weight capacity, has integrated T-slot openings for channel mounted accessories, and measures...
view full answer... - Roof Rack and Assisted Paddleboard Carrier Recommendation 2019 Honda HR-V with Flush RailsThule did completely change their roof rack designs recently so there definitely isn't a way to adapt your old rack to fit your 2019 Honda HR-V with flush rails. The Rhino Rack RVP roof rack part # RR55QJ is a confirmed fit for your vehicle though and would be a great option unless you wanted an assisted board carrier like you mentioned. Assisted carriers need a rack that has bars that overhang past the feet of the rack like with the Rhino Rack roof rack part numbers # RRVA118S-2, # RRRCL4,...
view full answer...
Do you have a question about this Roof Rack?
Info for this part was:

Video Edited:
Dustin K

Edited by:
Daron K

Updated by:
Alex H

Written by:
Bethann B

Video by:
Samuel H

Test Fit:
Matthew B
At etrailer.com we provide the best information available about the products we sell. We take the quality of our information seriously so that you can get the right part the first time. Let us know if anything is missing or if you have any questions.
Product Experts Available Now!
Call 1-800-940-8924
Thank you! Your comment has been submitted successfully. You should be able to view your question/comment here within a few days.
Error submitting comment. Please try again momentarily.