
Custom Fit Roof Rack Kit With TH710501 | TH711520 | TH145105
Item # TH55KG
Our Price: $659.85
Will this fit?
To see if this custom-fit item will work for you please tell us what vehicle you'll use it with.
In Stock


- All Info
- Reviews (622)
- Q & A (0)
- Videos (7)
- Photos
Thule Roof Rack - TH55KG
- Aero Bars
- Crossbars
- 60 Inch Bar Space
- Thule
- Black
- Overhang
- 2 Bars
Premium, aerodynamic crossbars attach to Thule feet to create a quiet, stylish roof rack for your vehicle. Dual rubber strips in T-slots let you easily mount accessories - no trimming required. Simple to center and install with integrated scales.
Features:
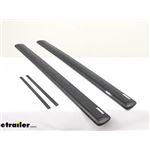
Thule WingBar Evo Crossbars 60" - Black - Aluminum - Qty 2:- Quiet, low-profile crossbars let you build an aftermarket roof rack for your vehicle
- Pair with a Thule foot pack and a fit kit to create a complete roof rack
- Works with Evo Clamp, Evo Flush Rail, Evo Raised Rail, Rapid Traverse, and Rapid Gutter foot packs
- Tapered TrailEdge shape creates an extremely aerodynamic roof rack system
- Dual rubber WindDiffuser strips help control air flow over bars to dramatically reduce wind noise and vibration
- Aero-style bars reduce drag to help maintain fuel efficiency
- Full-length crossbars maximize space for carriers and accessories
- Bars accommodate accessories that mount in the T-tracks or clamp around the bars
- Works with most universal-mount bike, water, snow, and cargo carriers
- QuickAccess T-tracks let you easily install channel-mounted accessories
- Simply pivot SwingBlade endcaps up and slide accessories into T-tracks
- Bottom T-tracks let you easily install bar on Thule feet
- SmartSlide slidable scale on bottoms of bars help center rack on your roof and double as under-bar aerodynamic cover
- Included rubber strips let you fill gap between outer edge of foot and end of bar
- Heavy-duty yet lightweight aluminum bars are durable and rustproof
- Black powder coat finish is corrosion resistant
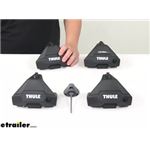
Evo Clamp Feet for Thule Crossbars - Naked - Qty4:
- 4 Heavy-duty feet mount Thule crossbars to your vehicle with a naked roof
- Combine with 2 Thule crossbars and a fit kit to create a complete roof rack
- Work with Thule WingBar Evo, SquareBar Evo, and ProBar crossbars
- Quick and easy installation with included torque tool
- Fit kit clips simply click into place inside feet
- Single attachment point lets you tighten crossbars to feet and feet to rails simultaneously
- Torque tool audibly clicks when system is secure - eliminates fear of over- or under-tightening
- One-Key System locks (sold separately) secure feet to your roof
- Powder coated steel, aluminum, and composite construction is durable and corrosion resistant
Fit Kit for Thule Evo and Edge Clamp Feet - Qty 4:
- Custom-fit clips and pads let you mount Evo Clamp or Edge Clamp feet on your vehicle with a naked roof
- Clips are quick and easy to install - simply click into place
- Steel clips provide secure grip on your door jambs
- Rubber coating protects door jambs from scratches and abrasions
- Powder coated for durability and rust resistance
- Molded rubber pads fit the contours of your roof
- Clip onto bottoms of feet
- Protect roof from scratches and abrasions
710501 Thule Evo Clamp Roof Rack Foot Pack for Bare Roofs - Qty 4
Replaces Thule TH480
711520 Thule Wing Bar Evo 150 Aluminum Cross Bars - Black - 60" Long - Qty 2
Replaces Thule THARB60
145105 Custom Base Clips and Pads for Thule Evo Clamp or Thule Edge Clamp Roof Rack Towers - Qty 4
Replaces Thule THKIT1745
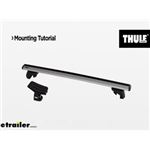
Video of Custom Fit Roof Rack Kit With TH710501 | TH711520 | TH145105


Videos are provided as a guide only. Refer to manufacturer installation instructions and specs for complete information.


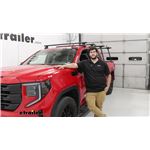
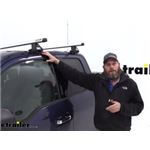
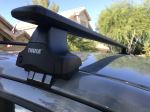
Video Transcript for Thule WingBar Evo Roof Rack Kit Installation - 2022 GMC Sierra 1500
Hi, I'm Matt with etrailer. And today we're talking about the Thule Roof Rack on top of our 2022 GMC Sierra 1500. Now this can be a great option for you for a couple of reasons. If you are trying to carry some of those longer items, whether that be a ladder, some lumber, anything that's not gonna fit in the bed of your truck, this is gonna be a great alternative, especially if you already have a ladder rack. Or if you wanna use this for more recreational uses, maybe if you wanna put a canoe up top, or maybe a larger box or basket and the back of your truck is full. So let's check it out.
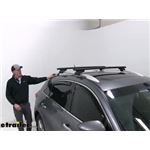
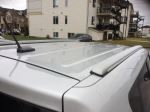
This is gonna be comprised out of three parts. Up top, we're gonna have our 60 inch crossbar. Beneath that we're gonna have the tower. And beneath that we're gonna have our fit kit. So with the tower we're gonna have this arrow shape designed to it.
So what that means, it's gonna be thicker in the front, thinner in the back, and that's gonna allow air to pass through this a little bit more smoothly to reduce that wind noise and resistance. What's also gonna help reduce wind noise is gonna be this weather strip up top, because this is for your T-channel. And if you didn't have this weather strip, wind would be coming down and entering that, creating that whistling effect. So we don't have to worry about that with this weather strip. It's also gonna keep out any debris and water from there.
And what I like about this T-channel is it's really easy to access. If I just turn this end cap over, I can just slide my gear right in place. And it's gonna work with most clamp on accessories. Beneath that, we're gonna have the tower, and this tower looks pretty all right on our roof. And if I remove this end cap, this is gonna have all the hardware that really cinches everything together and tightens everything up.
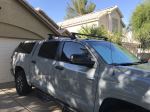
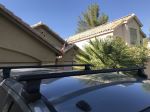
It's nice that we have this end cap just to give us more of a clean finish. And if you notice, we have this circle. This circle just has a spot where you can use a flathead screwdriver that put it into the locked position. You can actually get this traded out later on with a metal locking core for that additional security, so no one can come by and take off your roof rack. And beneath that, we're you're gonna have the fit kit. The fit kit is what grabs onto your roof and secures this whole system. And I really like the fit we're getting today. If you look at the contours here, it's really accommodating those contours. It looks very flush. And this is actually gonna grab into your gutter underneath your door. So this is gonna give us a really good fit overall. We're gonna get a few measurements to see how this is gonna fit on your roof. So the first one I'm gonna get is gonna be the distance underneath our crossbar. That's gonna be a little bit over three inches, which isn't too bad. Now if you do have a sunroof on your truck, definitely keep in mind because if that extends up and you have any clamp on accessories, they could make contact with each other. And talking about those clamp on accessories too, if you have some more large ones and you got to tighten them down and they're pretty low, this could be pretty tight. But that's why we have the T-channel up top if you do have any T-channel accessories to make things like that more smooth. And then for the overall height we're gonna get, that's gonna be a little bit over four inches. So that's not too high at all. Now what I recommend doing is taking the total height of your vehicle, plus your crossbar, and you if you have any gear on top of that, include that as well, so you know what areas you can make it under. And if you look over to the side, we actually have a ladder rack. And that actually sits up a little bit higher than our crossbars on our roof rack. So this is gonna be a little bit uneven for your level. Now if you are looking to make a platform out of sorts with your entire system, then I'd recommend checking out the Yakima OverHaul Ladder Rack, because you can actually accommodate that or change the height of that, to match the height of your roof rack. As for the weight capacity, this is gonna have a capacity of up to 165 pounds. It is important, however, to check what your roof is rated for, because if you overload that, that could damage your roof. So what I recommend doing is just finding what's gonna be the lowest rated component and then going from there. But in my opinion, I think this is a great system. I think it looks pretty clean on top of our roof. We're gonna get a really good fit out of the fit kit, and it'll be great if you want to carry any of those longer items that you can't fit inside your bed. Now if you have any really long items, even longer than what this can accommodate and you're trying to give them more support, then I do recommend investing in a ladder rack. We have plenty of other options on our website, whether if you wanna get a matching Thule Ladder Rack on the back, if you want to get a Yakima OverHaul Ladder Rack that has the ability to rise and lower, or something a little bit more affordable too, we'll have plenty of options to mix and match with this roof rack. Now as for the installation, that's one of the biggest selling points for this one for me. And that's one because of how easy it is, you don't have to deal with tightening a lot of different bolts. All you have to do is tighten one bolt per tower. But if you are curious to see what this looks like, just stay tuned and we'll walk you through the process. To begin the installation, I'm gonna lay everything out. So furthest away from me, we're gonna have the crossbar itself. Next to that we're gonna have the tower. And then we're gonna have the fit kit that goes along with it. You're gonna have an included tool. It's gonna be Allen key with a torque device on it. And I recommend grabbing some tape, something to measure it with, like a tape measure. I like to start off with the tower, so we're just gonna grab it. And I like to remove this end cap first. If it's in the locked position, just grab a flathead screwdriver and turn this over. And unlocked, and you just kind of pull it at an angle, it'll come right up. And with this out of the way, it's gonna make this process a fit easier because we're just gonna grab one of those bases. Make sure you grab the correct one. There's gonna be different ones for your front and back. For the front ones, we want to make sure we grab the base 643. And we're just gonna line it up with the contours and just press it into place. Once this is on there all the way, you repeat that same process with the other tower. Then we're gonna go over to our crossbar. Flip this over so the underside is facing up. I'm gonna remove this end cap just by pressing on this tab on the inside, and pulling on this cap. I'm gonna set this aside. As for the tower, the way we're gonna put this on is by squeezing this, because how this is operating is you have this bolt that is a plane crushing downwards. So when you squeeze that, it lifts up, allowing you to slide this area into that channel. Give it a squeeze and push, so it's locked into place. And we're just gonna roughly place it here for right now, and you just repeat that step on the other side. We wanna make sure these towers are in roughly the correct spot. And if you reference your instructions, for the front crossbar, it's gonna use the X to mark out how far apart those towers need to sit. And for us today, that's gonna be 60 inches, but it could be different for you so definitely check your instructions. So if you notice, I'm pushing this over, and this is giving me numbers. I see the 60 is right here. I'm just gonna push that in a little bit until it's lined up. I know this is out 60 inches now, so I can push this in and this is what we want. Just make sure we repeat this process on both sides. Just make sure you put these end caps back into place too. And you can put the clamps on now if you want. I did it on one side. It's definitely up to your choice. I like waiting till afterwards, and we also wanna make sure we get the right clamps too. For the front side, we're gonna grab the 421, and on the backside we'll have the other set. When you're ready to put this on your roof, we wanna make sure that this thicker side is facing forward and the thinner side is behind us. And if you're ready to put your clamps on, make sure your doors are already open. Now we're just gonna lift up, we're just gonna push this over and roughly place it down. And then I'll have to make some adjustments afterwards, and then we can start tightening things down. When you're adjusting this, you wanna look for this rubber pad and you wanna make sure that this is grabbing this edge of of your roof. If you're good, then you can start getting some measurements. And this first measurement is gonna be in your instructions, and it's gonna be the measurement from the top of your windshield to the front of your tower. So I'm just gonna go from here, all the way right here. And I have to make some adjustments to bring it in just a little bit so I can get everything lined up. With everything measured out, I can grab my clamp, if you haven't already put it on. And the way you do this is just by lifting up on this housing, and pushing this all the way through. Sometimes you might get a little bit of resistance. I like to hold mine at the top. You hear a click, letting you know everything's in place. And if this is giving you a lot of resistance or it's not moving a whole lot, you can loosen up this bolt that's in here and that will allow this to move more freely. And speaking of that bolt, when both clamps are on, you can tighten this down by using that bolt in there, because you gotta find it. And what we're looking for at this point is not to really get it tightened down all the way, we just want a little bit of resistance coming from this. Basically, you're just gonna make contact with your vehicle with your clamp. Once you've reached that stage, then you'll repeat that process on the other side, just so you don't overtighten anything and pull it too much from one side. After tightening it back and forth a bit, you've finally reach the point where it gets pretty tight. And you hear that click, and that'll let you know it's tightened down in all the way. And you can grab your end cap, and place it on and lock it into place. Finally, you can close the door. Give it a good shake test, make sure everything feels pretty secure. And if it does, then you can load it up with whatever gear you have and take it out for a ride. Well that was just a look at the Thule Roof Rack on top of our 2022 GMC Sierra 1500. Thanks for watching.
Customer Reviews
Custom Fit Roof Rack Kit With TH710501 | TH711520 | TH145105 - TH55KG
Average Customer Rating: 4.7 out of 5 stars (622 Customer Reviews)
Premium, aerodynamic crossbars attach to Thule feet to create a quiet, stylish roof rack for your vehicle. Dual rubber strips in T-slots let you easily mount accessories - no trimming required. Simple to center and install with integrated scales.by: Alexandra12/14/2023
I've had the roof rack for a year now and we only use it sporadically in the winter to put the ski box ontop of the car but it works great. Very easy to install and remove and very sturdy. Previously I had the kind that bolted into the roof of my SUV and had a terrible experience with that (we lost the rack and kayaks on the freeway and it tore holes in my roof). The clamp style is the only kind we'll get from now on because they are much sturdier and no risk of losing them. Definitely recommend them.
by: Ryan 05/13/2024
Quality product, fast shipping, install was a breeze. Glad to have shopped etrailer.
by: Ronald05/11/2024
Very sturdy. Works well. The attachment to the roof rails on my 2023 chevy suburban works well. The "C" clamp design mechanism holds it tightly and securely in place. No fear of anything coming loose and falling off like other racks I have tried to use.
by: Justin M.06/09/2016
Easy to fit into the feet that are sold separately. No clue why the rubber strip just can't come already attached but it only takes a minute or two to put them on. Make sure before tightening the feet, the bars are even.


by: Calvin02/29/2024
I just got my packages and had it installed within the hour very satisfied


by: Shelly05/16/2024
No problems installing. The rack is doing fine.
by: Daniel 10/25/2023
Product was right fit for my vehicle and installed perfectly. Etrailer was knowledgeable and got the goods to me quickly. Enjoyed working with them and will again.
by: Richard 04/05/2024
Favorite bar Thule makes. Super solid.
by: Mark 03/24/2024
Easy to install, fit and finish are top notch.
by: Michel03/12/2023
I've owned this roof rack for a year now, and it has served my purposes (carrying my kayak around on my truck) quite well. It was fairly easy to assemble, largely because the entire instruction guide was in pictures.
I have had to retighten the rack a couple of times since putting it on the roof, so I tie the kayak down to the front and back of the truck as well as to the roof rack. I suspect the ocean kayak puts a bit of lift on the roof rack resulting in the loosening.
by: Darwin 02/06/2024
GMC Sierra
Worked perfectly on my 2020 GMC Sierra. Looks and works great.
by: Jim 03/17/2024
Austin was exceptionally helpful.
by: Calvin02/29/2024
I got my packages today and had it installed within the hour looks great very satisfied
by: Ron04/25/2023
Ford F-150
I have almost always had roof rails on my vehicles. My F150 had no rails and I was nervous about clamp style rack holders given what I tend to carry on top. These have been great and I am positive I have overloaded them numerous times.
by: Glenn 01/27/2024
Perfect fit
by: Jeffrey 11/14/2023
Works as advertised. A little wind noise, but not much.
by: Marco Polo MTB03/14/2022
Great quality products! Easy installation with properly guided instructions. One of the best tracking information, from ordering to delivery. Would strongly recommend etrailer to anyone looking for roof or hitch bike racks.


by: Dany04/16/2020
I just installed these on my 2015 Odyssey's side rails.
Easy-peasy to install and appears to be quite solid.
Just not sure how tight I need to screw them.
It only took me 30 minutes to assemble and install the Crossroad feet with the 60" WingBar EVO. It will probably take me 10 minutes to move to another vehicle.
I chose the Crossroads for the ease of installation so I can switch them between our two Odysseys. When loosened for removal they also loosen the crossbar (60" WingBar EVO) which makes it so much easier to switch to a vehicle with a different width requirement.
Fits that requirement perfectly.
Will be loading the canoe on top this coming weekend. Looking forward to using these.


by: Allen07/19/2019
The whole experience was freakin awesome.
* Ordered on-line, delivered when promised, all packages were in excellent condition, and all parts were accounted for - no shortages, THANK YOU!
* The Thule roof rack design, quality of materials, comprehensive instructions were really impressive. Everything went together without a hitch and really looks good installed.
* We plan on carrying our 12 1/2' SUP's on the roof rack when we head out to the lakes.
* It saves us time as our SUP's are inflatable, however it takes a bit of time to pump them up once we get there. Now it's just loosen them up and we're ready to go.
Great job etrailer, I would definitely buy more products from your organization!!


by: Diane 02/20/2023
Easy to install with the anchors and crossbars, and still holding up great a year later.
by: Donald 11/28/2023
Excellent system
by: Dennis06/13/2018
Jeep Wrangler
The product quality seems great, and fit my Jeep Wrangler without having to do any drilling, or semi-permanent mounting of overly obtrusive cage type rack system. Tried mounting my Kayak on top and it seems like it's going to work for what I wanted it for. I especially like the fact that I can easily take the whole system off with ease as I would typically leave it on only in the summer.


by: Jorge05/16/2022
Great rack design. Fit my truck like a glove and holds two kayaks with no issues. I’m planning on installing a fish rod holder in between both kayaks.


by: Brian 01/28/2023
Ford Ranger
Great product from Thule. Fit my 2022 Ford Ranger perfectly and is very strong and secure when installed. Excellent customer service from trailer and extremely fast shipping.
by: James07/13/2022
Toyota Camry
I bought the Thule Evo Roof Rack to transport my kayak on my Lexus 300H. Thule will advise you on their website that his particular rack is not right for a Lexus 300H (i.e., they don't make a roof rack for a Lexus 300H); it is really for a Camry, but etrailer told me that is worked, I trusted them and they were correct. After all, a Lexus sedan is really a fancy Camry, but Thule will not acknowledge this point. It works great. Thule makes a solid product.
25
1318
Show More Reviews
See what our Experts say about this Thule Roof Rack
- Aero Bar Roof Rack for 2001 Ford F-250 Crew CabI suggest Thule's Rapid Traverse AeroBlade Roof Rack system made of parts # TH711520, # TH480R and # THKIT1508. This quiet roof rack provides 60-inch crossbars that will make much less noise than most. The rack offers a 165-lb total weight capacity when installed on your 2001 Ford F-250 Crew Cab.
view full answer... - Available Roof Rack Option for 2022 GMC YukonFor the 2022 GMC Yukon we have the Thule WingBar Evo Crossbars - Aluminum, # TH711520 in black or # TH711500 in silver, These are 60" in length and mount using the Evo Flush Rail Feet for Thule Crossbars, # TH710601 and the Fit Kit for Thule Evo Flush Roof Rack Feet, # TH95JW. I understand wanting to stay with same brand but depending on the component, most, are usable across different brands.
view full answer... - Is There a Light Bar Attachment for Top Channel of Thule Wing Bar CrossbarsWe have the LED light mounting bracket part # RR43174 which can be used in the top channel of a Thule Wing Bar like the part # TH711520 that you mentioned. We have the Rhino Rack Batwing part # RR33200 that can also fit the top channels of a ladder rack or crossbar that provides 270 degrees of coverage.
view full answer... - Thule Roof Rack for 2020 GMC Sierra 1500 Crew CabThule roof racks underwent a design change recently, with new bars, foot packs, and fit kits, so the older square crossbars won't work in the new foot packs. Which means if you have square crossbars that do NOT have a bottom channel (like in the accompanying photo) you will need to upgrade your bars as well. If you have the newest SquareBar Evo crossbars with the bottom channel you can utilize those on your truck. With that in mind, here are the parts that will give your 2020 GMC Sierra...
view full answer...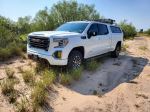

- Will 2019 Ram 1500 Ladder Rack Fit With Gator Folding Tonneau CoverFrom what I was seeing it looks like the Gator tonneau cover on your 2019 Ram 1500 mounts on top of your bed rails so if you're wanting a rack for cargo we'll either need to go with a roof rack or go with a different tonneau cover that is compatible with a ladder rack. For a roof rack I recommend the Thule WingBar Evo which uses the following: 60" WingBar Evo Crossbars - # TH711520 Evo Clamp Feet - # TH710501 Fit Kit - # TH145199 Lock Core Kit - # TH450400 For a new tonneau cover and...
view full answer... - Can XXL Thule Roof Cargo Box Fit on Roof of 2015 Dodge Durango R/TI checked with Thule and you can install the Thule Force XXL cargo box # TH6359B on the roof of your 2015 Dodge Durango with a naked roof currently once you install a roof rack. This is a longer box at 90-1/2 inches but due to the longer length of your roof it would not hang over the glass. For that I recommend the Thule Wingbar Evo part numbers # TH711520, # TH480R, and # THKIT1616 which gives you a great looking and aerodynamically shaped roof rack confirmed as a fit for your vehicle....
view full answer...
- Parts Needed to Add Thule or Yakima Roof Rack to Truck Cap with OEM TracksWe definitely have Thule and Yakima roof racks that fit the OEM tracks that came on your A.R.E. Overland truck cap. Some of it depends on what length of crossbar you need, but I'll add the fit kit and leg information and then we can figure out what crossbars you need from there. Thule System: Length of crossbar - measure from center of track to center of opposite track and choose similar length crossbar like the 60" WingBar Evo # TH711520 Rapid Podium Feet - # TH460R Fit Kit - # THKIT3101 Yakima...
view full answer... - Recommended Roof Rack for a 2012 Land Rover Range Rover SportThe roof rack I recommend for a 2012 Land Rover Range Rover Sport will be dependent on roof configuration. If you have a bare roof then I recommend the Thule WingBar Evo Crossbar System part # TH711520, part # TH710501, and part # TH145116. If you have factory installed tracks then I recommend the Yakima Jetsream Crossbar System part # Y00426, part # Y53TR, and part # Y00224. These are both excellent top-of-the-line options.
view full answer... - Roof Rack & 2-Kayak Mounting on 2019 Jeep WranglerThe Hull-A-Port System only holds one kayak, and only one Hull-A-Port can be mounted on your Jeep. If you are going to be hauling two kayaks in the next year or so, then it makes sense to go with a 2-kayak option now. For a Jeep I like the Exposed Rack # ER49FR. With these crossbars installed you can use the Thule # TH890000 Post Style 2-kayak carrier which will attach to the square bars of the rack.
view full answer... - Recommended Roof Rack For 2017 Jeep Grand CherokeeIt is a little confusing, but the difference is basicly that the E-Group has chrome flush mount rails and the Jeep without the chrome (all black) is without the E-group. The distinction is different things fit the chrome or non-chrome flush rails. For the E-group rails, I recommend the roof rack consisting of The AeroBlade Edge # TH7602-TH7602 and the Fit Kit # THKIT3142. Without the E-group (all black), I recommend the Thule rack consisting of: Thule AeroBlade Load Bars - Aluminum...
view full answer... - Roof Rack And Cargo Basket Compatible With 2016 Jeep Grand CherokeeThe Rhino-Rack RVP Roof Rack # RRRVP27 are compatible with your 2016 Jeep Grand Cherokee ONLY if you have the chrome on your top rails. This represents the E-group package on your vehicle. If you have the all black rails of the non e-group package, you will need a different roof rack. If that is the case, I recommend the Thule roof rack that includes: Thule WingBar Load Bars - Aluminum - Black - 60" - Qty 2 # TH711520 Thule Rapid Traverse Roof-Rack Foot Pack # TH480R Thule Roof Rack...
view full answer... - Best Roof Rack for 2006 Land Rover Range Rover SportIt's not likely since the Yakima Tracks # Y01135 are a universal fit usually used on campers but you can measure to find out. The 60 inch tracks have 11 mounting holes each spaced 6 inches apart. If the holes don't line up you can drill new holes into your roof but I wouldn't suggest it. Instead I would go with a roof rack designed to fit your 2006 Land Rover Range Rover Sport. The best rack we have that will fit is the Thule WingBar rack: 60 inch WingBars # TH711520 (black) or # TH711500...
view full answer... - Thule Roof Rack for a 2019 Toyota Highlander With and Without Factory RailsFor your 2019 Toyota Highlander, we have a variety of options for roof racks depending on what kind of roof you have. Thule makes great roof racks, so I'll use their WingBar Evo line as a comparison for you. If you have a factory rail system (rails that run front to back), then the WingBar Evo 53", part # TH711420, is a good crossbar system that connects to the rails using the Rapid Podium Feet, part # TH460R, and the Podium Fit Kit, part # THKIT3134. I've linked to a video installation...
view full answer... - Parts to Install Yakima 78 HD Crossbars and Watersport Carriers on a 2014 Jeep Wangler UnlimitedTo use your 78" Yakima HD Crossbars, part # Y01159, on your 2014 Jeep Wrangler Unlimited, you will need the Yakima 42" Tracks, Skyline Towers, HD Bar SL Adapters, and Landing Pad 1s. The Track Pads, part # Y01126, are designed for use on naked roofs (those without rails). They give a more flush look for the roof rack system. This will require some drilling into the hard top, but they allow you to slide the crossbars along the length of the Jeep. The Skyline Towers, part # Y53TR, are designed...
view full answer... - Can 60 Inch Thule WingBar Crossbars be Used on a 2007 Honda Fit SportYes, you can use the 60 inch Thule WingBar crossbars # TH711500 on your 2007 Honda Fit Sport. You will need a set of Rapid Traverse feet, # TH480R, and fit kit # THKIT1312 to complete the installation. The WingBars are also available in black using # TH711520. The recommended bar length for your Fit is 47 inches. The 60 inch bars will stick out about 6-1/2 inches more on each side of the vehicle so use caution.
view full answer... - Recommended Roof Rack and Cargo Basket for a 2015 Chevrolet Silverado 2500Yes, you will need to install a roof rack before you can affix a cargo basket to the roof of your 2015 Chevrolet Silverado 2500. For this, I recommend the Thule Aero Load Bar Roof Rack part # TH711520, part # TH710501, and part # TH145105. This system has aero shaped crossbars which produces one of the quietest roof racks on the market. I have attached a review video of this system for you as well. Then for a cargo basket, I recommend the Thule Canyon XT Roof Cargo Basket part # TH859XT...
view full answer... - Thule Roof Rack Availability for a 2019 Toyota Highlander LE Without Roof RailsYes, we do have the ability for you to add all of the parts for the Thule AeroBlade roof rack for your 2019 Toyota Highlander with one click of the button! I have added links to both the Black option and the Silver option with takes you directly to the product page. Simply click the "Add to Cart" button and it will add the 60" bars # TH711520 (Black) or # TH711500 (Silver) along with the Rapid Traverse Foot Pack # TH480R, and Fit Kit # THKIT1803 for a complete roof rack system! If you...
view full answer...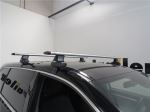
- Thule Foot Pack and Fit Kit for Roof Rack on 2006 Honda PilotThe Thule foot pack we have for your 2006 Honda Pilot is the Evo clamp feet, part # TH710501. It fits both the SquareBars # TH712500 and WingBars # TH711500 (silver) and # TH711520 (black). The feet use fit kit # TH145191.
view full answer... - Cargo Carrying Options For 2014 Honda Odyssey VanI spoke with my contact at Thule about your 2014 Honda Odyssey. With no side rails or crossbars on the roof they do have a few roof rack options that fit but you're requried to drill into the van. I've linked the selection for you. If you have the raised side rails, I recommend the Thule Evo Raised Rail Feet # TH710401, 60" WingBar Evo Crossbars # TH711520, as well as locks # TH450400. This kit mounts directly to the side rails and includes locks to secure the rack to your vehicle. ...
view full answer... - Can a 16 Foot Ladder Be Carried on the Roof of a 2014 Dodge Grand CaravanThe Thule WingBar Roof Rack part # TH711520, part # TH480R, and part # THKIT1043 is an excellent option for your 2014 Dodge Grand Caravan that will allow for you to carry bikes, kayaks, ladders, and much more. The 16' aluminum extension ladder will be fine as far as weight goes however, due to the shear length of the ladder I recommend adding additional support with a load extender like part # EM07600-07601. In order to use the above load extender you will need a 2" trailer hitch receiver...
view full answer... - Recommended Roof Rack For 2014 Kia Soul with Side RailsThere are 3 different roof options on a 2014 Kia Soul. There are the ones with no rails, there are others with factory side raised rails, and there are flush mounted rails. I know that you have one of the two rail options based on your description. If you have the rails that have space under them, I recommend the Thule WingBar Evo Load Bars - 47" - Qty 2 # TH711220 and the Evo Railing Foot Pack # TH710401. Then the locks # TH450400. If you have the flush rails, I recommend the Thule...
view full answer...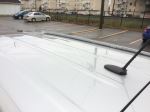
- Roof Rack Fit and Bike Carrier for 2013 Honda CivicFor your 2013 Honda Civic, we need to know if you have the Sedan or Coupe to get you the correct roof rack fit. For the Coupe: Thule WingBar Evo Crossbars # TH711520 Rapid Traverse Feet # TH480R Fit Kit # THKIT1557 For the Sedan: Thule WingBar Evo Crossbars # TH711420 Evo Clamp Feet # TH710501 Fit Kit # TH145180 With either option I recommend locks # TH450400 and then rooftop bike carrier # RKY1201. I've attached a video to assist.
view full answer... - What Parts Do I Need To Attach A Roof Rack To My Bed Cap That Has Thule TracksIt sounds like your bed cap will come with Thule tracks. In order to put a roof rack on this bed cap you will need the following: Thule WingBar Evo Crossbars - Aluminum - Black - 60" Long - Qty 2, part # TH711520 Rapid Podium Feet for Thule Crossbars - Fixed Point - Qty 4, part # TH460R Fit Kit for Thule Podium-Style Roof Rack Feet - 3101, part # THKIT3101 Thule One-Key System Lock Cylinders - Qty 4, part # TH450400. This is all you need to put a roof rack on your bed cap. The fit kit...
view full answer... - Creating a Roof Rack for 2015 Dodge Grand CaravanWe used to have roof rack kits from Yakima and Thule, but Yakima long phased out their compatible systems and it was just Thule for a while making roof racks for 2011 and newer Dodge Caravans/Grand Caravans. Thule used the Rapid Traverse Feet which is what you see in the videos. Since then though, Thule has phased out their Rapid Traverse Fit Kits and replaced it with their Wingbar Evo Towers. Since your vehicle has a naked roof, it requires custom-fit hooks or fit kits. Thule has not yet...
view full answer... - Why is There a Crossbar Spread Difference Between Rhino-Rack, Thule, and Yakima BrandsThe crossbar spread difference that you are seeing between different brands of roof rack systems has to do with the way that the racks are built. Each manufacturer tested their specific roof rack on a 2013 Toyota Prius and based the placement of the crossbars off of the data that they gathered. The specific spots are the best spots for weight capacity and performance. All manufacturers have great roof rack systems and I would have no hesitation recommending any of them. I do recommend...
view full answer... - Roof Rack Weight Capacities and Weight Capacity for Roof on 2019 Toyota CorollaA vehicle's roof weight capacity may not always appear in the owner's manual, although you certainly would expect to easily find this information there. Sometimes you will need to inquire at the local dealership to find this out. I checked the available online data on the Toyota website and could not find this information. Usually dealers can look up the car's VIN and confirm roof capacity. The roof racks made for any given car, such as the 2019 Corolla sedan, can have a different weight...
view full answer... - 2011 Nissan Juke Thule Crossbar LocationsThe correct Thule roof rack for your 2011 Nissan Juke includes the following parts: 47" WingBar Evo Crossbars - Black # TH711220 or Silver # TH711200 Evo Clamp Feet - # TH710501 Fit Kit - # TH145098 Lock Core Kit - # TH450400 (optional) According to the Fit Kit instructions the front of the front feet need to be 9-7/8" back from the front windshield and then from the front of the front crossbar to the front of the rear crossbar needs to measure 27-1/2" (see attached). According to my...
view full answer...
- Recommended Roof Rack To Use Thule Hullavator On a 2019 GMC CanyonIn order to use the Thule Hullavator Pro Kayak Carrier part # TH898 on a 2019 GMC Canyon you'll want the Thule WingBar Evo Crossbar System part # TH711420, part # TH710501, and part # TH145179. This will be the perfect system for the Hullavator. Please note, only one Hullavator can be used at a time per Thule so you'll need to use the etrailer J-Style Kayak Carrier part # e98878 for the other kayak. The Hullavator weighs too much and requires too much crossbar space to be able to use two.
view full answer... - Thule Roof Rack for 2020 GMC Sierra 1500 Crew CabThule roof racks underwent a design change recently, with new bars, foot packs, and fit kits, so the older square crossbars won't work in the new foot packs. Which means if you have square crossbars that do NOT have a bottom channel (like in the accompanying photo) you will need to upgrade your bars as well. If you have the newest SquareBar Evo crossbars with the bottom channel you can utilize those on your truck. With that in mind, here are the parts that will give your 2020 GMC Sierra...
view full answer... - Thule Roof Rack Components that Fit your 2014 Kia SoulWe have Thule roof racks that fit your 2014 Kia Soul but the part number you mentioned is not a component of a Thule rack that fits your vehicle. Instead the correct Thule part numbers for your vehicle are the # TH712400, # TH710501, and # TH145037.
view full answer... - Will 2019 Ram 1500 Ladder Rack Fit With Gator Folding Tonneau CoverFrom what I was seeing it looks like the Gator tonneau cover on your 2019 Ram 1500 mounts on top of your bed rails so if you're wanting a rack for cargo we'll either need to go with a roof rack or go with a different tonneau cover that is compatible with a ladder rack. For a roof rack I recommend the Thule WingBar Evo which uses the following: 60" WingBar Evo Crossbars - # TH711520 Evo Clamp Feet - # TH710501 Fit Kit - # TH145199 Lock Core Kit - # TH450400 For a new tonneau cover and...
view full answer... - Recommended Roof Rack and SUP Carrier for 2019 Toyota Tacoma Double Cab For your 2019 Tacoma Double Cab with the bare roof I highly recommend the Thule WingBar Roof Rack System that consists of # TH711420 for the 53" WingBar Evo Crossbars in Black or # TH711400 for Silver, # TH710501 for the Evo Clamp Feet, and # TH145107 for the Custom Fit Kit. This system is going to provide you with the quietest, nicest looking setup on the market. The WingBar Crossbars feature an extremely aerodynamic design combined with rubber WindDiffuser strips that dramatically reduce...
view full answer... - Recommended Roof Rack for a 2012 Land Rover Range Rover SportThe roof rack I recommend for a 2012 Land Rover Range Rover Sport will be dependent on roof configuration. If you have a bare roof then I recommend the Thule WingBar Evo Crossbar System part # TH711520, part # TH710501, and part # TH145116. If you have factory installed tracks then I recommend the Yakima Jetsream Crossbar System part # Y00426, part # Y53TR, and part # Y00224. These are both excellent top-of-the-line options.
view full answer... - Best Roof Rack for 2006 Land Rover Range Rover SportIt's not likely since the Yakima Tracks # Y01135 are a universal fit usually used on campers but you can measure to find out. The 60 inch tracks have 11 mounting holes each spaced 6 inches apart. If the holes don't line up you can drill new holes into your roof but I wouldn't suggest it. Instead I would go with a roof rack designed to fit your 2006 Land Rover Range Rover Sport. The best rack we have that will fit is the Thule WingBar rack: 60 inch WingBars # TH711520 (black) or # TH711500...
view full answer... - Fit Kit and Feet For a Thule Roof Rack on a 2011 Nissan Frontier Crew CabUnfortunately, there is not a fit kit for your 2011 Nissan Frontier Crew Cab that allows you to use the Rapid Traverse Feet for Thule Crossbars # TH480R. For your 2011 Nissan Frontier Crew Cab, you would need to use the Evo Clamp Feet for Thule Crossbars # TH710501 which will use the Fit Kit for Thule Evo Clamp Roof Rack Feet # TH145160. The Evo Clamp Feet will allow you to use the Thule WingBar Evo, SquareBar Evo, or ProBar crossbars. If the Aero bars you have are the AeroBlade crossbars,...
view full answer... - Lock Kit for Thule Square Bar Roof Rack that Fits 2020 Toyota CamryA lock kit would need to be ordered in addition to the Thule square bar roof rack part numbers # TH712400, # TH710501,and # TH145082 that you referenced as it is not included. For that you'd want the part # TH450400 which comes with 4 cores, a change key to install them, and two standard keys.
view full answer... - Recommended Roof Rack and Kayak Carrier to Transport 2 Kayaks on a 2017 Honda CR-VSince you are purchasing both a roof rack and kayak carrier at the same time for your 2017 Honda CR-V and 2 kayaks I recommend getting everything with the same brand because you know that the products were made for each other and that you can add locks to everything so that you use the same key for your entire roof rack setup. For your application I recommend going with a Thule setup. If you have a naked roof (with no rails or crossbars) on your CR-V then you will need the 53" WingBar...
view full answer... - Recommended Roof Rack for 2023 Kia Sportage with Bare RoofThe roof rack I recommend for a 2023 Kia Sportage with bare roof is the Thule WingBar Evo Crossbar System composed of part # TH711400, part # TH710501, part # TH145050. This system uses custom fit door clips which clamp onto the door sill for a tight, custom fit. The crossbars have an aero shape for the best wind resistance and they have integrated channels so you can use all of your favorite accessories.
view full answer... - Compatible Roof Rack for 2005 Toyota CamryThe old fitkit for the Thule Traverse Roof Rack on the 2005 Toyota Camry was # THKIT1261. This fit kit pairs with the Thule Rapid Traverse Feet # TH480R and Thule crossbars with slots underneath like Thule SquareBar Evo crossbars # TH712400. The fit kit product is now inactive since Thule phased out their Traverse foot packs and is using their new and improved Evo Clamp Feet # TH710501 instead. When you're ready to upgrade your Thule roof rack system, the best way to go is with Evo Clamp...
view full answer... - Recommended Roof Rack for 2016 BMW X6 with Naked RoofI have two roof rack systems that I can recommend for you: Thule and Yakima. The Thule Roof Rack system consists of Wingbar Evo Crossbars # TH711420, Evo Clamp Feet # TH710501 and Fit Kit # TH145145. I'm a fan of the 53" WingBar Evo crossbars in this system, especially how the T-tracks are designed. Most moderns bars have T-tracks, but Thule stepped it up in their latest edition where you just slide the endcaps off to mount accessories and the rubber in the channels adapt to your equipment....
view full answer... - Availability of Fit Kit for Thule Rapid Traverse Foot Pack for a 2015 Subaru WRXThe correct fit kit to mount the (discontinued) Thule Rapid Traverse foot pack TH480R to your 2015 Subaru WRX is the discontinued part THKIT1649. Thule has been doing a complete remake of their products and so basically all of their roof rack and bike racks have been changed to a newer style that better accommodates newer vehicles. I reached out to my contact at Thule to see if the newer fit kit will work with the Rapid Traverse foot pack but he said that none of those parts are interchangeable. Luckily...
view full answer... - How To Safely Carry 2 Large Kayaks On The Roof Of A 2019 Toyota TundraYou can certainly transport two 10-12' kayaks on a 60" crossbar. I recommend the Thule WingBar Evo Crossbars Aluminum 60" Long # TH711500. You will also need Feet # TH710501 and Fit Kit # TH145182 to install the crossbars onto your 2019 Toyota Tundra. The weight capacity is 165lbs; remember to never exceed the weight capacity of your vehicle's roof. In order to safely fit 2 kayaks, I would look into Rhino-Rack 2 Kayak Carrier w/ Tie-Downs - J-Style - Folding - Side Loading # S512-S512X....
view full answer... - Recommended Roof Rack for 2020 Toyota CamryI'll start off by saying that wind noise depends on a number of factors, but most roof racks are going to have a certain degree of noise associated with them regardless of a manufacturer. Additionally, comparing Yakima and Thule racks is a lot like comparing Nike and Adidas; they're both very high quality systems and I don't believe there's going to be any significant difference in the ease of installation or use since they're both going to have similar parts with different designs. With...
view full answer... - Recommended Roof Rack and Load-Assist Kayak Carrier for 2019 Mazda CX-5Lifting kayaks up onto the roof of a vehicle is definitely not something that anybody looks forward to, especially when your arms are burning and it's time to head home after leaving the water. My favorite lift-assist carrier to recommend is the Thule Hullavator Pro Kayak Carrier # TH898 because of its extremely sturdy design and efficient gas struts on the folding arms that do most of the work. To install this carrier on your 2019 Mazda CX-5 (if the roof is completely free of any side...
view full answer... - Recommended Roof Rack and Cargo Basket for a 2015 Chevrolet Silverado 2500Yes, you will need to install a roof rack before you can affix a cargo basket to the roof of your 2015 Chevrolet Silverado 2500. For this, I recommend the Thule Aero Load Bar Roof Rack part # TH711520, part # TH710501, and part # TH145105. This system has aero shaped crossbars which produces one of the quietest roof racks on the market. I have attached a review video of this system for you as well. Then for a cargo basket, I recommend the Thule Canyon XT Roof Cargo Basket part # TH859XT...
view full answer... - Is Thule Square Bar Roof Rack from 2007 Toyota Corolla Compatible on a 2018 Toyota CamryThank you for the picture! It looks like you have the square bar system from Thule that uses the Aero Foot Pack 400XT. I spoke with my contact at Thule who said that the 400XT foot back was discontinued back in 2011 so they won't have a fit kit (the clamps for your vehicle) that would be compatible with both the foot pack and your 2018 Toyota Camry. The current square bar system that fits a 2018 Camry includes an entirely new kit so you will need the 53" SquareBars # TH712400, the Evo...
view full answer...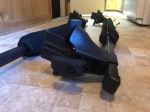
- 2017 Toyota Prius Prime Roof Rack and Kayak Carrier RecommendationWe have great roof rack and kayak carrier solutions for your 2017 Toyota Prius Prime. The Thule roof racks like the part numbers # TH711400, # TH710501, and # TH145029 for an aero bar roof rack would be a great option. Since you have a Prius and you are most likely interested in fuel mileage I'd recommend going with the aero bar option since it will give you better fuel mileage. The Thule Stacker part # TH830 is a great way to carry 2 kayaks on end with one carrier. Or we have the JayLow...
view full answer... - Thule Foot Pack and Fit Kit for Roof Rack on 2006 Honda PilotThe Thule foot pack we have for your 2006 Honda Pilot is the Evo clamp feet, part # TH710501. It fits both the SquareBars # TH712500 and WingBars # TH711500 (silver) and # TH711520 (black). The feet use fit kit # TH145191.
view full answer... - Recommended Roof Rack and Cargo Basket for a 2015 Chevrolet Silverado 2500Yes, you will need to install a roof rack before you can affix a cargo basket to the roof of your 2015 Chevrolet Silverado 2500. For this, I recommend the Thule Aero Load Bar Roof Rack part # TH711520, part # TH710501, and part # TH145105. This system has aero shaped crossbars which produces one of the quietest roof racks on the market. I have attached a review video of this system for you as well. Then for a cargo basket, I recommend the Thule Canyon XT Roof Cargo Basket part # TH859XT...
view full answer... - Roof Rack for 2017 Chevy Silverado 2500 Crew Cab for Hullavator Kayak CarrierFor your 2017 Chevy Silverado 2500 crew cab with a naked roof you could go with a Thule Wingbar Evo roof rack part numbers # TH711500, # TH710501, # TH145105 which is a more aerodynamic roof rack for your vehicle that would work great with the Thule Hullavator. The crossbars of this setup are 60 inches long. If you wanted the longer 69 inch ProBar Evo setup you'd want the part numbers # TH713600 with the same feet # TH710501 and fit kit part # TH145105 instead.
view full answer... - Roof Rack Recommendation For 2015 GMC 3500 Sierra DenaliFor your 2015 GMC Sierra 3500 Denali I recommend the Thule WingBar Evo rack part numbers # TH711520, # TH710501, and # TH145105 because this gives you an easy to install rack with aero shaped bars that will minimize wind noise. I attached an install video and picture of this rack on a similar Sierra as yours as well.
view full answer...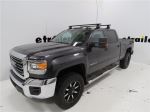
- Ladder Rack for 2019 GMC Sierra 2500 that Can Fit with BAK Tonneau and Carry Bike RackAdarac does offer a ladder rack that fits your 2019 GMC Sierra 2500 that has top channels you could mount a bike rack into with the Adarac Aluminum Series Ladder Rack # A4001232 that also will fit with your Bakflip tonneau as well. Then for a bike rack that can fit the top channels of the load bars the Thule UpRide Roof Bike Rack # TH599000 would be a great option that allows you to leave the front wheel of the bike installed as well.
view full answer... - Can Thule ProBar Evo Crossbars 69 Be Used On 2014 Chevy Silverado 1500?I confirmed with Thule that you can indeed use Thule ProBar Evo Crossbars 69" # TH713600 on your 2014 Chevy Silverado 1500 Crew Cab. You will also need Evo Clamp Feet # TH710501 and Fit Kit # TH145105 in order to install these bars. These ProBars have an integrated channel on top which allows for easy installation of t-slot accessories. I attached a couple demonstration videos to help you out with the installation process.
view full answer... - Rooftop Basket For 2015 GMC 3500 HD Crew Cab With Thule Wing Evo barsI do have a solution for your. While the Surco Safari Rack 5.0 Rooftop Cargo Basket for Factory Rails - 84" Long x 50" Wide # SPS5084-1101 will not fit the Thule Wingbar Evo bars it will work with Thule square bars like the Thule SquareBar Crossbars # TH712500 using # TH710501 and # TH145105 with the Surco adapter kit # SPT400. Using the 84" basket will require 4 sets of crossbars and would need to extend over a camper shell or other supports due ot length of this basket. The 50" version...
view full answer... - Thule Square Bar Roof Rack Recommendation for 2015 GMC Sierra 1500 for Thule Frontier Cargo BoxYes the Thule Square bar roof rack part numbers # TH712500, # TH710501, and # TH145105 that you referenced is a great fit for your 2015 GMC Sierra 1500 crew cab, is compatible with the sunroof, and is also a great rack to carry the Thule Frontier cargo box you have as well.
view full answer... - Roof Rack and Kayak Carrier Recommendation for 2018 Chevy Silverado 1500 Crew CabI attached a link that has all of the roof racks we offer that fit your 2018 Chevy Silverado 1500 crew cab which has several brands from Thule, Rola, Rhino Rack etc. but the rack I'd recommend is the Rhino Rack part numbers # RRVA150S-2, # RRRLKVA, and # DK377 as it gives you a higher quality roof rack at a better price than similar quality racks that fit your truck. Then for a kayak carrier the Hull-A-Port part # TH849000 would be a great option that's padded and can fold down when not...
view full answer... - Roof Rack and Kayak Carrier Recommendation for 2015 Chevy Silverado CrewFor a roof rack confirmed as a fit for your 2015 Chevy Silverado the Thule Aeroblade rack part numbers # TH711520, # TH710501, and # TH145105 would be a great fit. The shape of these bars makes them very quiet. The Thule Stacker part # TH830 would then do an excellent job of carrying both of your kayaks as well. Check out the review video I attached too.
view full answer... - High Capacity Roof Rack for 2015 Chevy Silverado 2500 for Kayak CarrierThe Thule Wingbar roof rack part numbers # TH711500, # TH710501, and # TH145105 has the highest weight capacity for your 2015 Chevy Silverado 2500 crew cab as it has a 165 lb weight capacity. This would work great with the etrailer kayak carrier you are looking at as well part # e98878.
view full answer... - Thule Roof Rack FIt For 2015 Chevy Silverado 2500 Crew CabThere is a Thule roof rack that fits your 2015 Chevy Silverado 2500 Crew Cab that will give you crossbars. The parts that fit your truck are the following: - Thule WingBar Evo Crossbars - Silver # TH711500 or Black # TH711520 - Evo Clamp Feet for Thule Crossbars # TH710501 - Fit Kit for Thule Evo Flush Roof Rack Feet # TH145105 - (Optional): Thule One-Key System Lock Cylinders # TH450400
view full answer...
Do you have a question about this Roof Rack?
Info for this part was:

Video Edited:
Chris R

Written by:
Matthew S

Edited by:
Daron K
At etrailer.com we provide the best information available about the products we sell. We take the quality of our information seriously so that you can get the right part the first time. Let us know if anything is missing or if you have any questions.
Product Experts Available Now!
Call 1-800-940-8924
Thank you! Your comment has been submitted successfully. You should be able to view your question/comment here within a few days.
Error submitting comment. Please try again momentarily.