
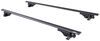
Curt T-Connector Vehicle Wiring Harness with 4-Pole Flat Trailer Connector
(296 reviews)
Price: $59.69
In Stock
Curt T-Connector Vehicle Wiring Harness with 4-Pole Flat Trailer Connector
Retail:$106.95
Our Price: $59.69
You Save: 44%
Will this fit?
To see if this custom-fit item will work for you please tell us what vehicle you'll use it with.
In Stock
Thank you! Your comment has been submitted successfully. You should be able to view your question/comment here within a few days.
Error submitting comment. Please try again momentarily.


- All Info
- Reviews (296)
- Q & A (0)
- Photos
CURT Custom Fit Vehicle Wiring
- Custom Fit
- Trailer Hitch Wiring
- 4 Flat
- Powered Converter
- CURT
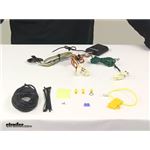
Quickly and easily install a 4-way trailer connector on your vehicle with this custom harness. T-connector plugs directly into existing wiring. Powered converter reduces strain on wiring system and is made using SMT to ensure superior performance.
Features:
- Provides a 4-way flat trailer connector at the back of your vehicle to power your trailer's signal lights
- Compatible with 5-pole, 6-pole and 7-pole adapters (sold separately)
- Connects quickly and easily
- Locate connection points in rear cargo area
- Plug in T-connector
- Run hot lead to car battery
- Includes a tail light converter to ensure that your vehicle's wiring matches that of your trailer
- Powered module connects directly to battery to avoid overloading vehicle's electrical system
- Constructed using surface-mount technology (SMT) for consistent, reliable performance
- Maximizes trailer light yield and intensity while producing minimal heat
- Ensures superior operation in rough road conditions
- Comes with dust cap for 4-way flat connector
Specs:
- Maximum amperage:
- Stop/turn lights: 3 amps per circuit
- Tail lights: 6 amps per circuit
- Limited 1-year warranty
Installation
This custom-fit T-connector plugs into your vehicle's wiring harness, which is located in your rear cargo area. You will have to remove the trunk floor covering and rear cargo area cover to access this harness. Once you've plugged in the T-connector, run the hot lead up to your car battery. Connect the lead to the included fuse holder, and then connect the fuse holder to the positive terminal on your battery.
Once installation is complete, the 4-way connector will be stowed in an out-of-the-way location within your cargo area.
It is recommended that you use a small amount of grease on all electrical connections - the plugs on your automobile and the 4-pole connector itself - to help prevent corrosion.
Powered Tail Light Converter with Surface-Mount Technology
A tail light converter is built into this T-connector. This converter is a circuit-protected, battery-powered unit that bypasses the electrical routes that are used by a basic wiring harness. As a result, there is virtually no draw on your tail light circuits.
Because most trailers run on a two-wire system - wherein the brake and turn signals are carried on one wire - the separate brake and turn signals from your vehicle's three-wire system need to be combined so they are compatible with the wiring system of the trailer. This converter combines the brake and turn signal functions of your automobile so that they run on one wire to properly activate your trailer's tail lights. Note: This will not affect how the tail lights on your vehicle operate.
Curt builds each tail light converter using surface-mount technology (SMT). This method of construction involves soldering electronic components directly to the surface of a printed circuit board. SMT eliminates the need for leads, which are used in older through-hole technology. The result is a circuit board that is smaller yet provides more routing area and that offers superior performance, reliability and durability.

Circuit boards constructed using SMT have been shown to perform better under rough conditions with excessive vibration than those made using the through-hole method. And where would vibration be more likely to occur than in towing applications? Curt converters also produce less heat, leading to increased durability and longer life. In addition, lower levels of resistance ensure better performance, especially for parts that operate at higher frequencies.
Each Curt circuit board is made using high-quality components that are pieced together in the most technologically savvy fashion, leading to greater predictability and reliability in functioning.
56350 CURT T-Connector - Surface Mount Technology - 4 Wire
Replaces 56166
Item # C56350
Installation Details

This Product Fits The Following Vehicles
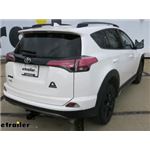
- 2013 - 2017 Toyota Avalon
- 2013 - 2017 Toyota Avalon
- 2018 - 2018 Toyota Avalon Hybrid
- 2023 - 2023 Lexus ES 300h
- 2013 - 2018 Toyota RAV4
- 2013 - 2018 Toyota RAV4
California residents: click here


Customer Satisfaction Score:
98% were satisfied with this product
2% of customers were not satisfied
- Wrong item was ordered
- Product did not meet expectations
- etrailer mistake
Customer Reviews
Curt T-Connector Vehicle Wiring Harness with 4-Pole Flat Trailer Connector - C56350
Average Customer Rating: 4.7 out of 5 stars (296 Customer Reviews)
Quickly and easily install a 4-way trailer connector on your vehicle with this custom harness. T-connector plugs directly into existing wiring. Powered converter reduces strain on wiring system and is made using SMT to ensure superior performance.by: Glenn 03/29/2024
Tedious to install as removal and replacement of the trunk floor and side pan and panels are required but necessary for a hidden appearance. All went well and works as advertised. Would buy it again.
by: Rolo02/11/2024
Right product, easy install, and work well with my trailer.
Would recommend getting clip and tab pry bars. It made the interior panel removal very easy with no damage.
by: Robert 01/24/2024
I bought and installed this kit last year. A full year in service and still working perfectly. All cables were long enough to get a professional looking install. I'll definitely purchase Curt again for my next vehicles.
by: Daniel 02/07/2024
Works great, the etrailer install video was excellwnt. No issues
by: Roberto02/21/2024
I no longer needed this item. The hitch I ordered came damaged and it looks like a used item too. I’m returning all my order!
by: NK04/10/2024
2018 Toyota RAV4
Super easy to install kit, everything fit perfectly with my existing connections.
Guide videos were very helpful and easy to follow as well.
Customer service is very responsive and resolved a product issue I had immediately and I had a new part in a week.
by: Rich Stro09/25/2013
2013 Toyota RAV4
The Trailer Hitch apparantly had been damaged in shipment because the spacing between the mounting holes was too close by 3/8". I had to use a Hydraulic bottle jack and 4x4 wood block to expand the mounting pads so they wold fit. I think they need to put some foam in the packaging.. so when shipper drop the box it doesn't cause the mounting plates to get closer.. Other than that no problem only took 15 minutes to install


by: Jeremy P07/21/2023
2017 Toyota RAV4
Generally like the product, but much prefer solder than "crimp-crap." And really, one end of the long black wire should have the fuse and connector already fitted so there really only needs to be one double-butt connector. Or better yet, suggest it be soldered. That would be an solid connection. I fear I'm going to have to redo this before long.
by: Paul 12/07/2021
2018 Toyota RAV4
This Curt T-connector installed pretty much per the instructions and per the available videos (my car is a 2018 Rav4). However, there are better places to route the trailer connector wire and power lead from the left pillar down to the hitch without routing it to the middle of the spare tire pan. There's a grommet (at least on my 2018) below the left pillar that puts the wiring right atop the left end of the hitch cross bar. Much better (and safer) location than the middle of the spare tire pan.
by: Will01/30/2023
The sticky backing for the "black box" was so old a degraded that is crumbled in my hand. That was disappointing. But otherwise, I LOVE these custom kits. They always work like a charm. My only setup qualm is that even though it is compatible with the hybrid system, there was no instructional video for it (I think). It's easier in the long run, but some of the paneling is different and so I had a hard time figuring it out.
Also, maybe don't take the wire out of the back drain port, it exposes too much of the wire underneath. And sell this with a section of black flexible tubing to protect the wiring. Also, nothing to hold the wire to the hitch receiver?

Jenny N.
2/2/2023
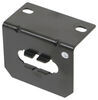
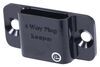
You have a few options available when it comes to where your harness ends up. You can just pull the harness out of the back door of the 2016 Rav4 whenever you want to use it. And store it back in the cargo area when done. It would be the best way to protect the harness from the elements. However, if you are so inclined, it can be moved to stored on the hitch. You can route the 4-Way through the vehicle and outside to attach it to the bracket rather than storing the harness in the vehicle when not in use. To do this you will need to get down to the metal floor of the cargo area by removing any plastic or carpeted panels that are in the way. Once down to the metal look for a grommet or other exit point through which you can route the wiring. If there is not one, then a hole will have to be drilled. If you have to drill, be careful of what is on the other side of where you are drilling! Once the 4-Way end has been routed through the grommet or hole be sure to seal up the hole using silicone such as part # 0160297 to keep out fumes and moisture. You can use the built in bracket on the Draw Tite hitch along with part # 18144 to hold the 4-way in place. Or you can use a magnetic 4-way holder like part # 306-X6019 that would give you more flexibility of where on the hitch to hold the 4-flat too.
by: Carolyn 04/05/2024
Exactly what I needed for my new install. Arrived in perfect shape
by: Karl K. 07/17/2019
Really easy to install if your half way handy. Reading the instructions really helps. They were clear and easy to understand. It took me about 45 minutes to install from start to finish.


by: Chad 06/25/2023
2018 Toyota RAV4
Great service, like usual, from etraile r.com.
by: Chuck K.06/07/2015
2015 Toyota RAV4
Installed this in my new 2015 RAV4. Took a bit longer than I expected due to a considerable amount of disassembly and partial disassembly of vehicle's plastic trim parts. The OEM connectors were actually behind the upper trim panel which also required partial disassembly (the instructions made no mention of this). There was a convenient tapped hole in the chassis that could be used for the ground point. Had to run to local hardware store to get an M6 metric pan head screw to accomplish the grounding.
I ran the power cable up the passenger side of my vehicle because I had previously run something else through the firewall boot on that side. The driver side also has a firewall boot, but it is hidden behind engine parts making it extremely difficult to get at. As a result of running my wire along the passenger side, the supplied wire was too short to reach the battery. I simply added more 12 ga. wire.
Accessing the OEM connectors behind the partially disassembled panels wasn't real fun. A bit tough to get both hands in there. When I was done with that part, there were some pretty good "indents" in my wrists where the plastic trim pushed against me.
With a run to the local hardware, and a lunch break, it took me about 4-1/2 hours to complete. Connector tested fine with a test light.

Chuck K.

7/21/2016
Everything is working fine. No problems, no issues. Happy with purchase.
by: Robert W.06/18/2017
2013 Toyota RAV4
Installation of this kit took longer than putting on the hitch itself, but connection to the vehicle wiring was simple and straight forward. No cutting of wires, and only one ground hole to drill. Running the +12V line to the front was the most difficult part, but certainly not an issue of the kit, rather is just the way it is with any newer vehicle that doesn't provide +12V at the back end. Don't run the wire under the vehicle. I ran it under the floor mats and found a spare port in a firewall boot. Relatively easy. I would recommend having an extra set of hands to hold the rear inner panel moldings out while you plug in the tail light connectors.
Laura E.
6/21/2017
Thanks for your business and your review, Robert. You should not use the power outlets to install a wiring harness.The reasons are that doing so will void the wiring harness warranty because it is not tested or designed for that type of installation. The circuit for a power outlet could be overloaded by the draw of a trailer wiring harness. And if attached to a power outlet you lose that level of circuit protection between the trailer and vehicle so if there is a severe short on the trailer it can end up damaging electrical components on the vehicle. I have included a link to a help article with tips on routing trailer wiring harness power wires. That link may be found at:
Helpful Links
by: vern06/23/2014
2014 Toyota RAV4
thanks to the guy suggested plastic trim tools from harbor freight they were helpful, drivers side T connector wires need to be longer as would not let me put convertor box in a good place so I extended them. ran battery wire in side vehicle tucked it under plastic door trim and put through firewall where wire bundle and hood latch went through used screwdriver to punch hole and small electricians fish tape to feed wire through. overall very pleased with kit and instructions. installed on 2014 Toyota rav4. if you are not used to working on cars/mechanics it may be a bit much to do.

Vern
6/24/2015
I M VERY HAPPY with the products and recomemd you site to everyone I can.
by: Ronald04/01/2013
2013 Toyota RAV4
The harness arrived in good condition and fairly quick, since it is a new item for the 2013 Rav 4. The install is not exactly easy. It took myself and a friend (an Aircraft A&P mechanic) 4 hours to complete. We were being careful not to break any interior plastic which added to the time.
My wife did not like the idea of hanging the connector out the hatch so we decided to run it our the bottom next to the spare tire through a rubber grommet ..then sealed the grommet with silicone and mounted the flat connector to the provided are on the hitch.
It might be helpful to test the connectors provided with the harness before trying to disconnect the connectors on the vehicle. The vehicle connectors are in a very tight spot and trying to unlock the tab is not easy. Pictures of how to unlock the tab connectors on the instructions would have been helpful.
I thought it would be a good idea to teat after the install with a volt/ohm meter. To my surprise, I had 12V at each leg without anything turned on. We then connected the trailer and all worked as expected. We still don't understand it but it works just fine. Some serious magic in that little black box LOL.
Ron

Patrick B.
4/4/2013
That is exactly why we work so hard to have videos of our products. Sometimes a different look can make all the difference in an install. As soon as we have a 2013 RAV 4 come through our shop, we will have wiring videos available on the site.

Mike
4/11/2013
Getting a 2013 rav next week. Any additionall light you can shed on removing plastic pcs. or where you ran hot wire would make me forever in your debt. I am a little bit of a detail frek also.Thanks.Mike

Ron
4/25/2013
Mike,One suggestion I have for removing the plastic interior panels is to purchase a set of nylon pry bars designed for this purpose. I used these from Harbor Freight tools:http:/www.harborfreight.com/4-piece-nylon-pry-bar-installer-kit-69668.htmlinexpensive and worth every cent!Along with the screws and bolts mentioned in the instructions, there are many plastic retainers that will be pulled straight out to remove. Be careful not to them since the do slide out of their mount brackets.I ran the hot wire to the battery through a rubber plug under the spare tire and under the Rav to the front. There are plenty places to tie wrap along the way forward and secure it. I did run it through a hole in the frame and made sure to use a grommet to assure that it did not chafe and short out.I also ran the 4 way plug through the same rubber plug under the spare and routed it to the tab on the hitch and secured it. All wires were then sealed with silicone on the rubber plug.I hope some of that is a help for you.Ron
by: Joe M. 06/05/2015
Product arrived in two days in great condition. 15 min hitch install and one hour for harness. I decided against running my power wires below the truck and instead ran it down the the left side under the the door sill plates. Everything works as promised and I'm looking forward to having another tow vehicle in the garage for light duty towing. E trailer was fantastic. I received three emails from George on my hitch. He was great.

Joe M.
6/9/2016
Great! No problems so far!
by: Don C.09/25/2014
2014 Toyota RAV4
The 2014 Rav4 hitch and wiring harness arrived in good shape within 3 business days of my order. Installing the hitch was simple and easy (30 to 45 min) with the use of a jack to hold one side while starting the bolts on the opposite side. I did not remove the exhaust as suggested but used a wood block to hold it aside while installing the bolts.
Installing the wiring harness is more of a challenge, especially if you have little or no experience. The instructions and few photos are not much help. After removing all the rear panels as instructed you also have to loosen the complete side panels enough to reach inside with your arms and the tools needed. I loosened the driver side rear panel to allow access to the floor of the rear passenger area. This will allow you to eventually feed the hot wire forward. Wear a long sleeve shirt to protect your arms from the sharp edges of the plastic side panels. After making all the connections, I fed the hot wire forward under the inside plastic floor guards for each door on the drivers side. Under the dash (above and to the left of the brake pedal and under the insulation) there is a large rubber grommet around the vehicle main electrical harness. I used a stiff wire to push through the grommet and feed the hot wire to the battery. There was more than enough wire supplied to route the wire this way. Even with my previous experience it took me just over 4 hours to complete the installation. I am very pleased with the product and would recommend "etrailer" to all who read this review.

Harry W.
10/6/2014
Good call on where to push power cable through fire wall. You saved us some time. Thanks!
by: Larry R.03/07/2015
2014 Toyota RAV4
This product was exactly as described in the product description and the installation was easy. I watched the video for the muffler hanger release to drop the muffler and a little CRC did the trick. I installed the trailer hitch on a 2014 RAV4 and the product value is exceptional, a very well constructed hitch with pleanty of towing capacity. I would recommend this hitch to everyone.
Larry R.
3/10/2016
It is still working perfectly fine with no issues. It is a great product.
by: Randy P.09/12/2014
2013 Toyota RAV4
Got the hitch & wiring harness kit in very short order. Put hitch on in half hour, wiring took about three hours. Keep in mind I'm 72 years young, so I'm very happy with E-Trailer products and instructions. Thank you E-Trailer !!
Randy P.
9/13/2015
The was only hard to install because of my age, 73. Although routing the wiring was a little difficult, directions where OK. Its a good product, thanksRandall
by: RICHARD04/23/2016
2016 Toyota RAV4
Great product! Quick delivery. The instructional videos were great. I watched them a couple of times and was able to install on my 2016 Toyota Rav4 Hybrid by myself in about 30 mins. The same with the wiring harness. Great instructions and video. Was able to do myself in about 1 hour. Most of the time was spent being careful removing the trim. Great product, great price and great support. Well done!
Richard
2/10/2018
Working very well thank you.
by: Mark10/11/2021
Unfortunately I did not realize the hitch review and this would be separate so I commented on the wiring and the hitch. The connector kit worked fine. There is not a lot of room to work behind the trim. Took a bit of work to get the wires loose from the frame. The two sided tape for the black box did not work very well. The wires should be longer so that a different location could be used. The video for running the wire to the front of the car looks much easier than it is. I was working on the floor and it was difficult. The good news is that all worked first time!

Heather A.
10/12/2021
Thank you for your review. It is easy to run out of length of the black power wire. I recommend to take a look at the article I linked that helps explain the best way to route the wire.
Helpful Links
by: Louis06/14/2022
2018 Toyota RAV4
I completed the install of two Curt Trailer Hitches; A 2017 RAV4 Hybrid and a 2018 RAV4 Hybrid. Couldn't be happier with the Curt T connector wiring harness C56350.
The Curt 13406 Hitch only has one issue that others may need to be aware of. After torquing the bolts that attach the hitch to the cars frame, the hatch would not open or close properly. There are two parts to the hatch system that allow the hatch to close and open, a "U" shaped clevis on the floorboard and the electric latch on the door. I believe the lateral bar of the hitch pushed up from below where the "U" shaped clevis hook is connected in the car. The mechanism on the hatch door would not join evenly to complete the close/latch process. My fix was to drive the "U" shaped clevis down less than 1/16th of an inch and then grease the two parts. Not my desire to beat up my car with a hammer, but it seems to have fixed the problem.
by: Jeff S.07/09/2016
2015 Toyota RAV4
I took time to research price and quality, I found both with etrailer. My order was shipped and received on time as said. The product worked exactly as promised. The directions and videos made install painless and easy. I highly recommend this company and would not hesitate to make another purchase.
Jeff S.
7/9/2017
Unit is still in great working shape. I installed according to the manufacturer instructions and have had no problems. I am very satisfied with the product.
25
296
Show More Reviews
See what our Experts say about this CURT Custom Fit Vehicle Wiring
- Does Curt Trailer Wiring Harness part # C56350 Fit 2017 Toyota Rav4 HybridI reached out the my contact in the tech department at Curt and he said that the Hybrid model uses the exact same wiring as the non-hybrid models. So he confirmed that the T-Connector part # C56350 will fit the Hybrid model like what you have. If you can maybe send me pictures of the connectors you found on your 2017 Rav4 Hybrid and compare them to the picture of where you should find the correct connectors I can forward them to Curt and see if they maybe overlooked something.
view full answer...
- Where Does Curt Trailer Wiring Harness Install on a 2014 Toyota RAV4The T-connectors are the ones on the harness # C56350 since they Tee into the vehicle wiring. Find the wiring to the tail lights on your 2014 Toyota RAV4. There will be a connector that you will unplug. Then plug the forward connector into the matching input on the harness, and the output from the harness back into the connector that leads to the tail light. We do not have a video for that particular harness but we do have one on another harness that fits your RAV4 which I have linked...
view full answer... - Tips on Routing Trailer Wiring Harness Power Wire on a 2014 Toyota RAV4Running the power wire to the battery when installing Curt trailer wiring harness # C56350 on your 2014 Toyota RAV4 is not all that difficult, it can just take some time depending on how you want to route the wire. How much time it takes varies. There are a few different methods to route the wire. I have included a link to our help article that covers tips on routing the power wire. It must be attached to the battery, no other power source will do. This is because the harness has only...
view full answer... - Could Install of Trailer Hitch Cause Rear Hatch Latch to Not ConnectIf they torqued the install hardware of the hitch without having the weight of the vehicle on the suspension of the vehicle it could have bound up the chassis a bit and cause the latch to stop aligning. You could loosen the hitch hardware and test this pretty easily.
view full answer... - Does Installing Trailer Wiring on 2017 Toyota RAV4 Require Disconnecting BatteryThe Curt trailer wiring harness part # C56350 that you bought for your 2017 Toyota RAV4 does require removing the negative battery terminal. This is a safety precaution that is recommended almost anytime you are working on something electrical for a vehicle. We don't have an install video for this harness though so I am not sure where you saw that it's not a required step.
view full answer... - Is The Power Wire Required When Installing The Curt T-Connector Vehicle Wiring Harness # C56350? The Curt T-Connector Vehicle Wiring Harness # C56350 for your 2014 Toyota RAV4 uses the battery connection to send power to the trailer lights directly off the battery. Older vehicles where the manufacturer put in larger wire than what the tail lights needed prevented the need for these powered modules like are required on todays vehicles with thin wires only providing enough power for the tail lights. This is where a lot of confusion rests as typically a power wire was only ran for a trailer...
view full answer... - Does Curt 4-Pole Wiring Harness C56350 Fit 2017 Toyota RAV4 HybridThe Curt 4-pole trailer wiring harness kit # C56350 is confirmed fit for all versions of the 2017 Toyota RAV4, including the hybrid. I confirmed compatibility with Curt. The linked video and article will help you complete your installation.
view full answer... - 2017 Toyota RAV4 SE Hybrid Compatibility With Curt T-Connector Wiring HarnessFor your 2017 Toyota RAV4, I reached out the my contact in the tech department at Curt and he said that it is a common misconception, but the Hybrid model uses the exact same wiring as the non-hybrid models. So he confirmed that the T-Connector part # C56350 will fit the Hybrid model and the installation will be the same. The C56166 you mentioned has been discontinued. I've attached an article to help with routing the power wire to your battery.
view full answer... - Troubleshooting Curt Wriing Throwing Codes on a 2017 Toyota RAV4The best way to start off troubleshooting the Curt T-Connector Vehicle Wiring Harness # C56350 on your 2017 Toyota RAV4 is to get in behind your tail light assemblies and remove the tee in connections so that the Curt wiring isn't a part of your RAV4 anymore. If the problem goes away then it sounds like something is wrong with the Curt wring and you'll want to get it replaced under warranty, but if the problem still exists then you'll need to take your vehicle to a shop as it would indicate...
view full answer... - Trailer Lights Always On With 2015 Toyota RAV4There are some vehicles that the running lights will stay on for a period of time after removing the key until after the doors are locked. It is a setting that can be changed on most vehicles. It's basically a courtesy light feature that when you unlock your doors with the remote the running lights will come on to help you see the vehicle and around it. The same happens when you remove the key and exit the vehicle to allow you to see around the vehicle. This usually will last 30 seconds...
view full answer... - Install Video for Installing Curt Hitch on 2017 Toyota RAV4 HybridThe install video for the Curt hitch part # C56350 can be used as a guide for the hybrid and non-hybrid models of the 2017 Toyota Rav4. We had customers with the hybrid model come back and tell us the video worked great to help them install it on their hybrid.
view full answer... - Video for Installing Trailer Wiring Harness on a 2013 Toyota RAV4I have included a link to a video that shows installation of trailer wiring harness # 118578. It installs the same way as Curt harness # C56350 on your 2013 Toyota RAV4. Both harnesses just plug in line with the vehicle tail light wiring. A direct connection to the battery is required for both as well. I have also included a link to our help article to the right with tips on routing the power wire.
view full answer... - 4-Pole Trailer Wiring Kit for 2018 Toyota RAV4The Toyota part you referenced, wiring kit PU322-42013-UW, appears to be a 4-pole trailer wiring harness kit that installs at the tail light assemblies, much like the aftermarket kits we offer for your 2018 Toyota RAV4. We have three such kits, from Tekonsha, Curt and Hopkins, that are shown on the linked page. Our experience with these wiring kits tends to make the Tekonsha kit # 118578 our best recommendation for reliability. I linked an installation video to show how this kit installs....
view full answer... - Routing 4-Way Out of Vehicle for 7-Way Adapter that is Stored in Trunk AreaWhen installing a 7-way adapter like the # 37185 on a vehicle that has a 4-way that is stored in the rear trunk area when not in use you will have to find a way to route the 4-way out of the vehicle through the trunk floor. Since this isn't a super common situation for us we don't have a video on it for your vehicle. What you will want to do is take apart the trunk area getting to the bottom of the trunk floor pan and look for any grommets or holes that you could pass the 4-way through....
view full answer... - Recommended Trailer Wiring Harness for 2014 Toyota Rav 4Although the Curt # C56350 and the Tow Ready # 118578 perform the same function and would install in the same manner, the Tekonsha model has a slightly higher amperage rating and is a bit less expensive. The higher rating wouldn't really matter unless your trailer has many lamps on it, but there's no good reason not to go with the lesser priced Tow Ready unit. If you click the provided links, you can see the installation details and an install video.
view full answer... - Trailer Hitch Recommendation for a 2016 Toyota RAV4 HybridAll of our trailer hitches for the 2016 Toyota RAV4 fit the Hybrid models as well. We have confirmed this with our trailer hitch manufacturers. I recommend looking at the Curt Class III Trailer Hitch, # C13149. This hitch has more than enough towing and tongue weight capacity for your RAV4. Also, the 2 inch receiver is compatible with a wide variety of accessories such as bike racks and cargo carriers. If you plan on doing any towing, Curt offers a plug-in style trailer wiring harness,...
view full answer... - Can a Seperate Battery Be Used to Power a Trailer Wiring Harness For starters, if you have a 2014 Toyota RAV4 then the correct trailer wiring harness for you is the Curt T-Connector Vehicle Wiring Harness part # C56350, not the Curt T-Connector Vehicle Wiring Harness part # C56033 which is a fit for Nissan and Infiniti models. Regardless, the converter box really needs to be powered by the vehicle's battery but if you really wanted to install a separate battery in the truck area you can do so as long as it is rated for at least 10 amps. Please keep...
view full answer... - Recommended 2 Inch Trailer Hitch for 2017 Toyota RAV4 HybridThere are a few trailer hitch options for the 2017 Toyota Rav4. All the available systems are confirmed to fit the Hybrid models as well. I recommend the Curt Class III Round Tube Receiver Hitch # C13149 because installation of this hitch does not require trimming or removal of your vehicle's underbody panel. This is a 2 inch receiver opening with a 525 lb tongue weight capacity that is custom fit for your RAV4 Hybrid, eliminating the need for drilling. Always check the tongue weight capacity...
view full answer... - Will Mounting Bracket 18144 Work With Curt 4-Pole Flat Trailer Connector?Mounting Bracket # 18144 will work just fine with the Curt 4-Flat Connector # C56350 that fits your 2017 Toyota RAV4. You may want to add No-Drill Mount Bracket # 18140 as well so you do not have to drill; this bracket clamps to your hitch and you can then attach Mounting Bracket # 18144 directly to it.
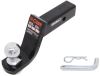
view full answer... - Does Curt Hitch # C13149 Fit 2017 Toyota RAV4 SEYes, the Curt Hitch part # C13149 is a confirmed fit for your 2017 Toyota RAV4 SE and would be a great option. I attached an install video for this for you to check out as well. If you wanted to do some towing you might be interested in etrailer ball mount kit # 989900. It comes with 2 ball mounts; one with a 3/4 inch rise or 2 inch drop and one with a 2-3/4 inch rise or 4 inch drop. It also includes a 1-7/8 inch ball, 2 inch ball, hitch pin with clip, and a storage bag. If the ball mount...
view full answer... - Will Curt Hitch C13149 Fit a 2016 Toyota RAV4Yes, we checked with Curt and the trailer hitch part # C13149 is a confirmed fit for the Hybrid versions of your 2016 Toyota RAV4 like yours so it would fit and work well. For trailer wiring you would want the part # C56350 which also fits the Hybrids. I attached install videos for both this and the hitch. If you wanted to do some towing you might be interested in etrailer ball mount kit # 989900. It comes with 2 ball mounts; one with a 3/4 inch rise or 2 inch drop and one with a 2-3/4...
view full answer... - 2 inch Trailer Hitch Availability for a 2016 Toyota RAV4 HybridThe Curt hitch part # C13149 that you referenced is a 2 inch trailer hitch that has been confirmed as a fit for your 2016 Toyota Rav4 Hybrid. This would be a great option for you. I attached an install video for you to check out as well. If you wanted to do some towing you might be interested in etrailer ball mount kit # 989900. It comes with 2 ball mounts; one with a 3/4 inch rise or 2 inch drop and one with a 2-3/4 inch rise or 4 inch drop. It also includes a 1-7/8 inch ball, 2 inch...
view full answer... - Is Hitch and Wiring From 2009 Toyota RAV4 to 2015 RAV4 the SameThe hitch fits for a 2009 Toyota Rav4 and a 2015 like the Curt part # C13149 are the same but the wiring is different. You'd have to swap to new wiring like with the part # C56350 and you'd be set. Since hitch hardware is considered one time use you'll need to order new hardware too with part # RHK.
view full answer... - Trailer Hitch Recommendation for 2017 Toyota RAV4 HybridThere are a few trailer hitch options for the 2017 Toyota Rav4. All the available systems are confirmed to fit the Hybrid models as well. I recommend the Curt Class III Round Tube Receiver Hitch # C13149. This is a 2 inch receiver opening with a 525 lb tongue weight capacity that is custom fit for your RAV4 Hybrid. If you are looking to tow with your trailer hitch, I also recommend the Curt T-Connector Vehicle Wiring Harness # C56350. This harness is custom fit for your vehicle and will...
view full answer...
Do you have a question about this Custom Fit Vehicle Wiring?
Info for this part was:

Expert Research:
Mike L

Expert Research:
Jameson C

Expert Research:
Adam R

Edited by:
Lindsey S

Video Edited:
Joshua S

Video Edited:
Jacob T

Video Edited:
Chris R

Installed by:
Cole B

Updated by:
Wilson B

Updated by:
Kristina F

Updated by:
Isabelle B

Written by:
Amanda M

Video by:
Jonathan Y

Test Fit:
Robert C
At etrailer.com we provide the best information available about the products we sell. We take the quality of our information seriously so that you can get the right part the first time. Let us know if anything is missing or if you have any questions.
Product Experts Available Now!
Call 1-800-940-8924
Paul
12/8/2022
No problems with the wiring harness for the past year.