Roadmaster Crossbar-Style Base Plate Kit - Removable Arms

Will this fit?
To see if this custom-fit item will work for you please tell us what vehicle you'll use it with.
- All Info
- Reviews (879)
- Q & A (0)
- Videos (1)
- Photos
Roadmaster Base Plates - RM22RR
- Removable Drawbars
- Roadmaster
- Twist Lock Attachment
Roadmaster's crossbar-style brackets are virtually invisible, easy to mount and simple to remove. Brackets install on your vehicle's frame to provide attachment points for your tow bar.
Features:
- Hidden bracket design provides improved aesthetics compared with standard brackets
- Crossbar-style brackets sit far back for a supremely clean look
- Drawbars attach and remove quickly and easily
- Arms click to lock in place in brackets
- Built-in pull rings let you unlock arms so you can twist and remove them
- Computer-cut, all-steel construction provides exceptional strength
- Black powder coat finish is durable and corrosion resistant
- Simple installation - no welding required
- Custom base plates ensure a perfect fit for your vehicle
- Integrated mounting points let you easily attach an electrical connector plug or bracket (sold separately)
- Compatible with Roadmaster tow bars with use of quick-disconnect crossbar (910021-00 - sold separately)
- Instructions and mounting hardware included
- Made in the USA
- Limited Lifetime Warranty
The drawbars, or front arms, on the crossbar-style series base plate kit are supremely easy to mount and remove. Just insert them into the brackets and twist to lock them in place. To remove, simply twist the arms back and pull them out. Once the drawbars have been removed, the remaining brackets are virtually invisible. On most automobiles, the brackets are mounted within the grille, where they remain not only unseen, but protected from scrapes and scuffs, as well.
521886-4 Road Master EZ4 Base Plate Kit
Installation DetailsThis Product Fits The Following Vehicles
- 2022 - 2024 Mini Cooper Manual transmission - S models
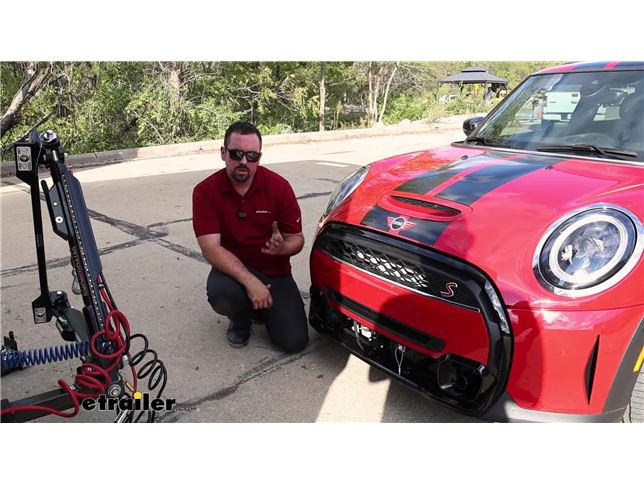

Videos are provided as a guide only. Refer to manufacturer installation instructions and specs for complete information.
Video Transcript for Roadmaster Crossbar-Style Base Plate Kit Installation - 2022 Mini Cooper
Hello neighbors, it's Brad here at etrailer, and today, we're taking a look at installing the Roadmaster base plate on our 2022 Mini Cooper S. Now there's five main components required for flat towing your Mini Cooper, and the first one is gonna be the base plate. That attaches to the structural point of the car, generally the frame or a bumper support. And that way you can have connection points to your tow bar, as well as some of your other components. And your tow bar is going to be the connection point between the hitch on the RV and the base plate on the vehicle. So that's what's really gonna be doing the heavy lifting to tow it down the road.
Now just as you would a trailer, you're gonna have safety chain loops just in case of a accidental disconnect. These are gonna keep everything attached. That's also part of the base plate. You're also gonna have a braking system, which is gonna be a legal requirement, which slows and stops the vehicle as you apply the brakes on the RV. You're also gonna have this breakaway switch.
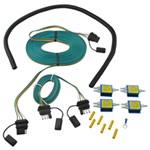
So just in case everything was to fail and you have a catastrophic disconnect, it's gonna pull this, applying the brakes on your towed vehicle so it's not rolling down the highway. We also have a diode wiring, and that's gonna be wires that tie into the factory lights of your towed vehicle, and then go up to the front of the six pole, which your umbilical will connect to the seven pole. And that way you can get your light signals to the towed vehicle, including your running lights, your turn signals, as well as brake lights. Now this is what your base light is gonna look like when it's installed on your Mini Cooper as you're driving around town. And overall it does a really good job of utilizing the space of this front grill.
You can see where we had originally air ducts, we now have our attachment for our arms. We have our safety chain loops that extend nice to be able to hook up, and we're also having a mounting point for our diode wiring. Now as far as mounting up your braking system components, we did have to get a little crafty with that. Now once you are ready to hook up and flat tow your vehicle, you're gonna have these arms, and we have the cross member style on this today. So we have this extra bracket, and that's because they're gonna be putting a rock guardian on the front to protect this from any rocks from chipping the front.
So once this is in place, we'll go ahead and get our other one in place. Super easy, you just kind of put this in at a straight angle here. You'll push this pin in just by putting pressure. And then once you twist in, that's gonna lock it in place. So you'll hear that click and it's going to be ready to go. And to remove them, just as easy. You're gonna pull this pin, twist it, and then it's easily removable. Then we'll just take our crossbar and have this attached to the tow bar. And you can actually put this in first and then do your tow bar. Either way works well, and then we'll just pin this up. The rest of your components will be super easy. We have our safety chains. Again, super easy to attach this here. We'll get our diode wiring in place. Get our breakaway switch set up as well. And we'll just get our other side in. Now this does come with new pins, which is really nice. Normally you only get the Roadmaster pins with the Roadmaster tow bars, but this goes directly in here. You can align the hole with the pin, snap that in place, and then you're ready to go. You just need to get your vehicle in flat tow mode, and then you can hit the road. Now as far as installation goes, this one isn't too terribly hard to do. Honestly, the biggest problems I had, you're gonna have to remove a washer fluid bottle. That gets a little bit tricky. But other than that, none of it was too terrible, and there's really not a whole lot of trimming required. So I'm gonna walk you through all the steps to make sure you get your base plate installed. So let's take a look. Beginner installation, we're gonna grab a T30 Torx bit, and we're gonna start at these five screws on the front right by the grill. Now throughout this whole process, there's gonna be quite a bit of hardware coming off, so I really recommend having a nice organized spot to keep everything, 'cause chances are, if you're doing your base plate, you're gonna wanna do the rest of your flat tow components at the same time. So as the parts are kind of hanging off for a little bit, having these organized is gonna make it that much easier to get everything back up. So the five are just right along this edge here. (tool whirs) Now on each of the wheel wells, there's gonna be two eight millimeter screws that we're gonna remove. So there's one here and one here. If it's hard to get to with the socket and a ratchet, what you can do is start the vehicle and turn the wheel one side or the other. That's gonna open it up for you to be able to get access. I have a right angle electric impact here, (tool whirs) so makes it pretty easy, but go ahead and get those removed on both sides. Now based on the instruction pictures, and what I see on ours, it's slightly different, but I think what we're gonna be doing is we have these eight millimeter screws. There's three on each side and then one in the center. So we'll go ahead and get those removed. (tool whirs) On here, we have some underglow here, so ours is a little bit hidden. So I'm gonna remove this and then get the rest of these removed. Now we're gonna head to each of the wheel wells, and this plastic trim, we're gonna need to peel back, because there's a bolt, a T30 that's holding the fascia on. So to get this popped out, just kind of put your fingers behind here. And once you kinda get a gap, you can probably do all of this by hand, so you don't wanna pry up too much. You want to just make sure that you're putting pressure directly where those clips are, because if you crease this, it's very possible that that's gonna be a permanent crease. So once you kind of find where those clips are, just kind of work your fingers here. And then once you get up here, there's these plastic clips, but there's some metal clips here. So you'll kind of just put your fingers behind here, and pull up top. And once you get to this point, that's gonna be enough for us to get this T30 taken out. Now do be careful, because our proximity sensors, as well as our side markers here, do have plugs. So don't pull on it too hard. And what I'm gonna do just for a little protection is just take some painters tape and run this along these clips, and just kind of tape those up. And then I'm also gonna do this edge here. The main thing is, is when we're taking the fascia off or putting it back on, it's possible it's gonna rub against it, and we don't want our clear coat to get any scratches. So now we can go ahead and get that T30 taken out. So again, just be careful, don't pull it past those wires. (tool whirs) And once you get that bolt removed, go ahead and repeat the same process on the other side. Now at this point, you're gonna want an extra set of hands to get the face you're taking off, and also have a safe place to put it. As I mentioned, we're gonna be putting the rest of the flat tow components on, so somewhere safe where it's not gonna fall. Just kind of grab on the corners, and work on these outside edges first, making your way towards the center. Now don't pull off too far, because there is a connection here that we're gonna wanna separate here on the passenger side. So it looks like we actually may have two of them. I don't know if there's a harness that I can separate. So we're gonna want to get this unplugged here. So there's this tab, just pull that back, press that in, and then it looks like this carries on to our sensors. So we got a few of these that we'll need to unplug. There's also gonna be some plastic Christmas trees, as they call them, that go into the plastic that just kind of hold this in place. So you're gonna wanna pry that off. And once they're all separated, you'll just set your fascia aside. So now we need to remove our washer bottle. So for this, where the reservoir is to fill, this just pops out, this just a little clip here, and that's flexible, but there's gonna be two T30 Torx bits, screws that we're gonna remove that are right here. And I also recommend having a set of vice grips or something along those lines, because once we separate the line, you can have fluid leaking out, and this is a good way to pinch that off. So let's get this removed first. (tool whirs) Now to get this out, it's gonna take a little contorting. It does sit on this bottom bracket here. So I'm gonna try to get this lifted up and out of the way. I'm gonna move this bracket down a little bit, so I can slide it out. Pretty tight fit here. Now I'm trying to get this out, it's pretty tight, but there is some sensors that go in here, I would assume to say that your fluid is low. So we'll separate this electrical plug. So just kinda reach back here. And there should be a tab here that we can get removed. So this one's kind of tricky. There's this electrical plug that we've removed. There's also a clip that goes onto a plastic portion. And I think what we're gonna do is separate this. Be careful here when you're pulling up on the electrical. This may come out, it just kind of presses in there. But to separate our lines, you'll see that there's these black clips. You just kind of pry that back a little bit. Make sure you don't lose those clips. And then once you have that up, that's where we're gonna start to see it flowing. So you might wanna have something ready to cap that, rubber plug if you have one, or anything to just, maybe even though honestly duct tape, to just kind of put that around it, keep that from flowing out. But I think once we have this reservoir unhooked like this and taken out, we'll be able to set it in a spot that it doesn't continuously leak. I'm gonna be honest here, there's a lot going on to get this removed, which seems kind of wild, but this plastic portion, one of the plugs is gonna be pressed in there. You're gonna need to pry that out. We also had the clip that goes onto here. We had an electrical connection here, electrical connection here. The cap line, I just use a four-pole plugin to just kind of slide that over. So if you have anything that's a rubber, I don't know, something for like an antenna, or whatever you may have to kind of put that over, that's gonna be a good option. Otherwise, once you kinda get this out, you can set it to a part where hopefully it's not gonna flow through it. Ours is obviously pretty full. So with all that out of the way, just know that it is gonna be a little bit tricky to get this all. So take your time, make sure you're not cracking any of the plastic, obviously. But we'll go ahead and set this aside. So now we need to remove our vents, and basically, it's gonna live in this area. So these are not gonna be going back in place, but you might wanna retain them if you ever go back to OEM. Now to get these popped off, you're gonna want to reach in the engine bay, and you'll see the plastic push pins that kind of hold these in. There's one at the top, one at the bottom. I'm just using my fingernails real quick, and I'll take one out, and then I'll show you how it looks. Just something like this. So you'll pull that center portion out. The rest of it should come with it. I'll get this bottom one here. And if you need to, you can use a trim panel tool or a flathead screwdriver to get that loosened up if it's fighting you a little. With those taken out, we're also gonna get our ambient air temperature sensor on the driver's side. So this just pulls out of the housing. It should come out like this. There's also gonna be a T25 bolt here that we'll remove, (tool whirs) and then this should just slide out. There is this little tab here. So just slide back up, and get this out of the way, and go ahead and remove the other one on the other side. Now there's probably not gonna be an ambient air temperature sensor there, but the rest of it will be the same. Now if you're following along with the instructions along with the video, they have us cutting out this portion here that kind of goes by the intercooler, and we will be trimming that out. But ours is a little bit different based on the drawing. So I'm gonna wait until we get a little bit closer with putting some of our parts up, and that way, we can trim exactly what we need. But at this point, we're gonna grab an 18 millimeter socket, and there's gonna be two bolts that go into the frame that attach our bumper beam. So just kind of follow your bumper beam back, you'll see the two of them here. We're gonna go ahead and get those removed, and then do the same on the other side. (tool whirs) So now we're gonna take our driver's side brace, and it's gonna look like this. You'll see it's double walled. It should kind of bend in towards the middle here. And we're gonna take our longer bolts that came with the hardware, we'll put a split washer, and then we also have these pipe spacers. So make sure you have those in place. Now we are eventually gonna torque these down. We're gonna kind of keep them somewhat loose, because we're gonna line everything. But since we're in the process of getting this all put on, I'm gonna just go ahead and get our thread lock in place. That way we don't have to go back and put it on. And that's something with all the hardware, you're gonna want to use a little bit of thread lock. That way, long term, you know it's not gonna get loose. So I'll just kind of raise this in place. And looks like we need to take this bottom portion here. This needs to slide in between that brace, and then these will go up into the frame rail. So might take a little bit of a finagling here. Just make sure your pipe spacer's stayed in place, and you're gonna want to kind of align this up as square as possible. So just I'm using the painted portion of the frame rail here, and lining it with the frame that we just put on our bracket, and making it as level as possible. Okay, so a three-quarter inch socket will help kind of start them. Again, you want it to have a little bit of movement here, because when we get the center brace in, we're gonna wanna align it with the other side. So for now, I'm just gonna get it to where we have some threads in there holding it, but it's still movable. So now we'll just repeat the same process on our passenger side. So now take your main receiver brace, and this is gonna go in between the two brackets that we just put. And this is where we're gonna get that perfect trimming of that little shroud air dam there by the inner cooler. So just kind of holding this in place if you need to, you can loosely put hardware here, but just an eyeball. I'm gonna just kind of go here, and knowing that we have to trim this portion out, we'll go ahead and get this marked, and then trim it. And with this kind of roughly marked out, I'm just gonna cut a little bit above and below this just to kind of make sure it's nice and clean. And I'm gonna take some painters tape and get a clean line. Now as far as cutting this, it's rubberized here, and then kind of a plastic here. So you can use a pair of snips if you have some shears or something along those lines. And we're just gonna go back until this ends here. So we'll get this notched out and do that on both sides. (tool whirs) With that trimmed out, I'll just mock this up, and it looks pretty good. That works out really well. So I think that's gonna be the best way to do that. So go ahead and get those both trimmed out. Once you cut that, you're gonna also wanna just make sure any of those burs are knocked down, so if you have a file, just run it over those edges, kind of make it look a little bit cleaner. Now we're gonna bolt up our main receiver brace. So take this bolt with a flat washer, and I'm just gonna get one started on each side. So pass it through both of them, and then we'll finish it up with a split washer, and then a nut. So once we get one started on each side, it'll make it easier to get the other remaining two in place. We're not gonna tighten this down yet, just hand tighten should be plenty good for now. We are gonna get ready to tighten this in place, but we want this main receiver brace as level as possible. And we wanna start on these back bolts. Now we do have a little bit of play here. I think our best bet, as I mentioned earlier, is you can see this painted portion. I'm gonna try to get those as level as possible. So have your three-quarter inch socket ready. So get that rear brace squared up right there. And then I'm gonna just tighten these down. You don't have to get crazy here, 'cause we're gonna torque them down later, (tool whirs) but just snug enough to where it's not gonna move. And we'll get the other rear brace in as well. And then we're gonna come back and make sure that this is nice and level, and get these tightened down. Now if you don't have someone there to kind of stabilize this to make sure it's nice and level, I just grabbed a large zip tie. You can grab a bunch of them, and then put this through the safety chain loop around the bumper beam, and that way you can really adjust exactly where you want. So main thing is is it's nice and level, and I'm gonna go up just a hair here, and I'm pretty happy with that. So to get these side braces both tightened down, it's gonna be pretty easy here. Normally I like to tighten on the nut side, it's gonna be pretty hard to do. So three-quarter inch wrench and socket is gonna be the way to get this tightened. So this at this point, since we are gonna be snugging it down, if you wanna grab that Loctite and just put it on the threads here, now is a good time to do that. (tool whirs) So at this point, we have everything snug down. We need to go back with the torque wrench and tighten them down to the torque settings found in the instruction manual. Now that's based off of the hardware, so check back to the table of all of the hardware, and you you're gonna find that has torque settings. So these ones in the back, we're gonna do first. These are gonna be a higher torque setting than these. You may need an extension here, and something else that the instructions pointed out, if your horn, which is right here, is making contact with anything, feel free to move it. Ours doesn't, so we should be fine there. So we'll get these torqued down. And if you need a torque wrench, you can get one here at etrailer. You can generally go to an auto parts store and rent one for free. But this is gonna make sure that long term, the hardware's gonna be tight enough for the lifespan of the base plate, but also not too tight, causing any stress on any of the components or the weld nuts. Now when getting these front bolts tightened down, you are gonna need to use your wrench. And normally, when I torque things down, I'd like to tighten it on the nut side. We don't really have access to get to it that way. So this is gonna work here. We'll just go through, get these all torqued down properly. Now we need to get our foam that's on our impact bar off, and this just kind of clips around it. It's pretty firm for foam, so you may have to just kind of work at it. There we go. Got that popped off. Now this is not gonna get reinstalled, so you can do whatever you want with it. Now we have a support plate that's gonna bolt up to this tab on the cross member that's gonna eventually drill through and bolt up kind of back here. So in order to get our measurements for where we're gonna drill, from the top of the cross member, we're gonna measure out five and a half inches. So kinda hold this in place, have something to mark it, and the holes are slotted. So as long as you're roughly within that kind of five and a half, should be good. So just kind of using this, we're right at two and a half from the bottom of our beam. So I'll just mark this, and then what we'll do is take our brace, and slightly align it with those holes. And that should put it to be right about where we need to drill. So we kind of have these in line here. So we'll mark this out, and then we'll grab our drill bit. So now we're gonna drill directly through our bumper beam. Now the bolts we're gonna be using are these ones here. So I recommend having them handy. That way you can test to make sure that they fit through. But you're gonna drill all the way through, trying to keep it as squared up as possible. If you need to, you can use something to create a dimple here just to kind of center it up. But take your time here, (tool whirs) and then we'll get this drilled out. Now we'll just test fit to make sure that this passes through, and we're good there. And obviously be careful. If you have a long bit, don't puncture your condenser. So just kind of take your time passing this through. So we'll get our other one drilled out, and then get our plate mocked up. Now we'll get our plate put in place, and we're gonna start by putting the top bolts in. So take a flat washer that's included in your kit, and then we will pass this through. So make sure that this is on the backside, and then you can go ahead and finish that up with a split washer, and then a nut. And then we'll get our other side in as well. So with those loosely in place, everything should align on the bottom side. So now we can take these bolts that we have here. I'm gonna put some thread lock on them, we'll pass these through, and finish them up with a split washer and a nut. Now we'll go ahead, we'll snug these down, and then come back with our torque wrench, and torque them down properly. (tool whirs) And now we need to block off where we had those air vents that go into the fender well, and these plates are included also with the hardware. So we'll just make sure that these line up. Now they're all offset, so if you need to, you can flip it one side or the other to make sure it's blocked. So what we'll do is we'll take our, we'll run our bolt through, and then on the backside, since it's plastic there, I'm gonna use the flat washer, and then a nylon lock nut to get these in place. So you may have to go into the fender well to get this tightened down. But you can see that blocks it off. We got the holes lined up. So we'll go ahead and get those installed on both sides. To get these snug down, it's gonna be a 7/16 socket, as well as the wrench on the backside. (tool whirs) Now since we've removed those vents and blocked them off, our ambient air temperature sensor does need to go back in a home. So we'll just put this here on our aluminum cross member. There's two holes here that I'm just gonna zip tie it into place. So at this point, we have our base plate officially installed. And as I mentioned earlier, we're gonna wanna get all of our components in place right now before we get the fascia put back on. So I'm gonna get everything set up, and then we'll come back, and I'll show you how it all goes back together. Now at this point, I've gone ahead and got the rest of our flat tow components set up and mounted. So we have our diode wiring, we have a breakaway switch here, and then since we're doing an Air Force One, we have an air fitting. Now it is tempting to just self tap into the cross member, but for structural support, you really don't wanna do that. It can cause integrity issues and void warranties mainly. So what we did is we took some brackets that I kind of just cut up, and use a hose clamp here to kind of get that on the base plate. It's nice and solid on all of these. So with setting those up, mocking up the fascia, the grill, it goes directly over here, and the slats, pretty much as long as you center up your components, you're gonna have plenty of space there. So that's kind of what you're gonna wanna look for. And if you have an air fitting already on your RV like we do today, try to get it on the same side so you don't have to cross cables over. So at this point, we're ready to start putting our fascia back in. So we're gonna start by getting our washer fluid bottle put back in, plugged in, make sure all those connections are made, and then we'll continue on. We'll mock up our fascia and make sure that it slides on. Now I've got my washer fluid in, and I'm just mocking up our fascia, so you can kind of see where everything lives in here. So if you need to move it around as necessary, this is a good visual to kind of see where it all lands. Now they do recommend trimming out this portion here where we originally had our air ducts if you have clearance issues. But as I mock this up, everything's pretty well lining up to where I don't think we're gonna have to do anything there. So at this point, you're just gonna make sure that you get everything put back in place, following the reverse order that you took it off. Just make sure that you get all your electrical connections plugged back in. So as I was kind of buttoning up the fascia, it is a little bit tight here, and I see where they want us to trim. On this outside edge here, I am seeing that it is rubbing against it, so you might wanna just take off, I would say maybe an eighth of an inch should be plenty. So just kind of notch this area here if you need to. That way it cinches up a little bit cleaner. So with everything back in place, we officially have our base plate installed, but we are doing our crossbar on here. And I think the main reason they're doing that is for the guardian that's gonna go in the front and protect the vehicle from any road debris. So in order to get our crossbar set up, our arms will just simply slide in, and then once you get to a point, you're just gonna rotate it, and that should lock in place. So these pins go in there, holding our arms in. So this point we'll take these brackets here, and it'll say driver side of car and up. So it's pretty hard to mess up here. And we'll take the bolts and this plate, just slide it through here, slide it through our removable arms. We'll finish it up with a flat washer, a split washer, and then finally a nut. Now we're gonna leave these loose for now. We need to take our crossbar, and make sure that it gets lined up properly. So just make sure that this top hole is sliding there, and then our bottom is also sliding in. So this is a good chance to really align it up to where this will be nice and easy to drop in place. And we also wanna make sure it's centered up. That way, as we're towing the vehicle, it's not gonna be crooked where it attaches to the tow bar. I think the best way to probably do that is just measure from the end of our crossbar to the end of our removable arm. Make sure that that's even, and once we're happy with it being centered up, I'm gonna go ahead and just snug down the outside bolts here so it stays in place. Now these are gonna be a three-quarter inch socket and wrench to accomplish this. So we don't have to get crazy here, because we are gonna be torquing it down. But this is a good way to make sure that it's gonna hold in place as we torque everything down. It's not gonna shift on us. Now you may have to play with this a little bit. Just imagine that your tow bar is attached to this. So it is gonna wanna be able to set up to where you can just drop this in. So you kind of put the bottom tab in first, and then walk this up, and it should drop in to where you can get your linchpins in place. If it's not, if it's binding, if it's, you know, causing issue, and you really have to smack it to get it loose, then you're gonna wanna adjust this. Now some of the tolerances may be a little bit off, and in fact, what we found on ours was this side was great, 'cause it was perfectly vertical. This one was sitting far back, so we just couldn't get that right angle. So I ended up putting a shim on this backside, and I think that's gonna keep it nice and level. So once you have it kind of snug down, we're gonna come back with a torque wrench, and torque these down. Torque settings are gonna be found in the instruction manual, and you're gonna need a three-quarter inch wrench and socket just as you probably found out while tightening it down. So go through and torque these all down, and once you have them all properly torqued, double check to make sure that drops on nice and easy still. We've got this to drop on, so now we'll just take our pins, and make sure they go into place properly. That metal should make metal contact here. Then all that's left to do is get your tow bar hooked up, and the rest of your components before hitting the road. And that was a look and installation of the Roadmaster base plate for a 2022 Mini Cooper S.
Customer Reviews
Roadmaster Crossbar-Style Base Plate Kit - Removable Arms - RM22RR
Average Customer Rating: 4.8 out of 5 stars (878 Customer Reviews)
Roadmaster's crossbar-style brackets are virtually invisible, easy to mount and simple to remove. Brackets install on your vehicle's frame to provide attachment points for your tow bar.This was a straightforward install. The instructions were easy to understand and follow. All the necessary parts and hardware were included. It is pretty well hidden once installed. I highly recommend this base plate and etrailer.
great fit. a slight cut needed to be made in the bumper bracket to facilitate the round tube to fit through the bracket. but, other than that, it was an easy install took about 2 hours if you include the coffee brakes. this part is highly recommended. Fast shipping. the beast human service. thank you.
Had Base Plate installed today, shop gave me 2.5 hr labor time. I returned just under 2hrs and they were backing my car out the shop. They parked it facing me. I told the Mechanic "That was quick" He said that's because it wouldn't fit. I was disappointed and asked what do I owe you for your labor> He laughed out loud and said it on there, but hard to see. I was so surprised and pleased you have to just about get down on your knees and bend down to see it. took me about 8 min to install everything and connect it to the Tow vehicle. I'm very pleased with it.

Working great on my Fiat 500l with the automatic euro transmission. Towed over 10000 miles and was easily installed using etrailer video instructions. Yes you can tow a Fiat 500 with the automatic euro transmission. The firmware was flashed on a recall and revised in the manual. Most dealers don’t even bother checking for the latest version.

So far has performed very well. Was easy to install and hookup is pretty quick and easy. You install instructions were very thorough. Practically invisible when not in use. Tried to attach two pics, but would only take one.
Ordered Product on Saturday afternoon, delivered on Wednesday, Installed on Friday. My 23 Wrangler Sahara 4Xe did take the spacer and washer on each side of the frame and was no problem getting them to fit. The lower passenger outside nut that holds on the bumper will not tighten down all the way, the flange of the factory nut gets caught in a slot in the base plate on that side. Will look into a standard nut to see if that will work - it is tight against the slot and holding.

Super-cool. It's been a year. I installed it myself and it was way less of a task than I expected. The fitment of this was incredibly spot on (no "tweaking" or drilling). Performance wise . . . it does what you expect. You insert the removable "arms", clip in onto your tow bar, and when you get to your destination the vehicle is still attached to your tow bar. Quality product.

I’m always extremely satisfied with Roadmaster products. I had just bought a new truck and planned on towing it so I needed everything to get it ready to tow. This review also applies to to the other items I purchased.

Good fit, works well. Very happy with the base plate after 1st year of use.
etrailer staff was very helpful with my questions, making certain I got the base plate that was right and advice with minor problems I had with installation.
I installed this kit on my 2015 Honda Fit. The instructions are very good, however, there are a couple of "snags" to watch out for. You might have to enlarge the holes on the blind hole part of the bumper installation in order to get all of the mounting bolts to align. The other recommendation I have is NOT to use the Loctite "red" thread compound on the blind hole bolts where you cannot get a wrench on the inside. The Loctite will dry too fast and cause issues tightening the bolts on those areas. They have lock washers anyways and you can use the Loctite on the bolts you can get a wrench on the backing nut mounts. I have been towing for months now and I am very happy with it, especially the crossbar style. You will have to purchase the crossbar separately. It's more weight and a little clunky compared to the direct attachment but it allows you to disconnect in some tough situations by pulling the crossbar off while one arm of the tow hitch is still attached. I use an Falcon All Terrain tow bar so I can release the tow arms in uneven conditions. And I have encountered all types of uneven ground, it really makes disconnect of the TOAD very easy.
The whole etrailer family has been great to deal with.

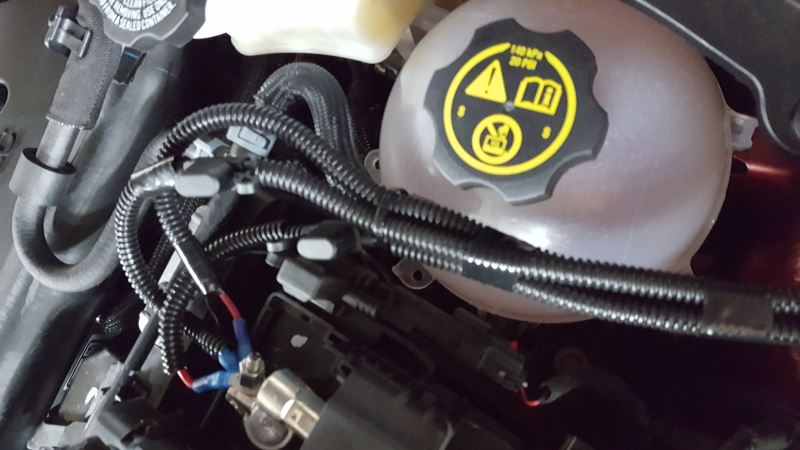
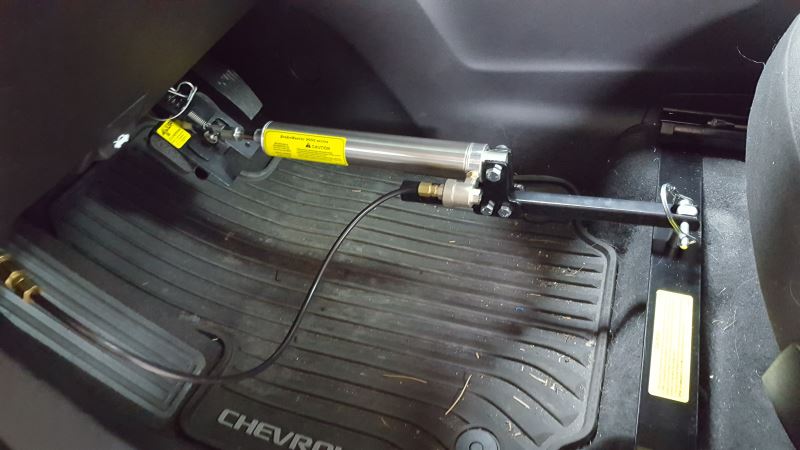
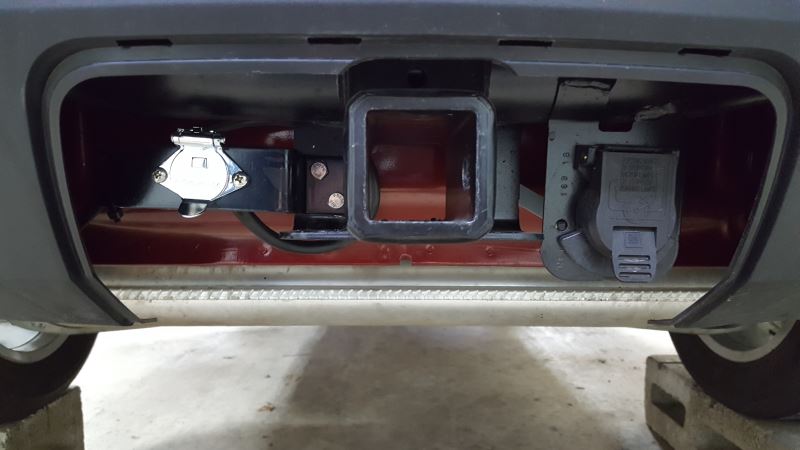
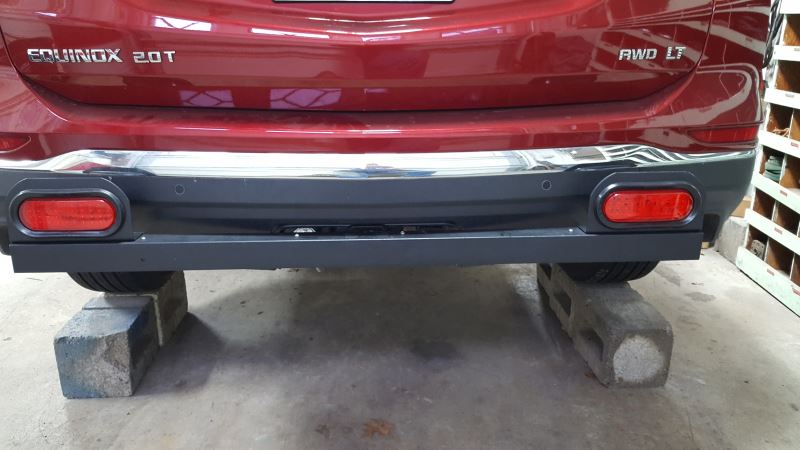
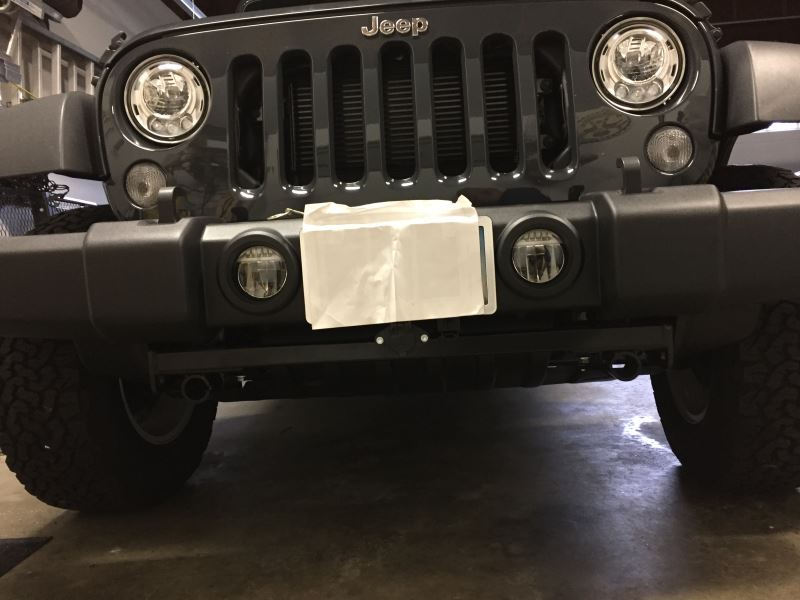
The Jeep project went very well everything fit great and worked well. I really love Roadmaster products and quality and your company is the best place to purchase them. I sold the Jeep and replaced it with a new 2019 Chevy Equinox 2.0 L AWD and just purchased and installed the following items from you and installed them, RM-156-25 & RM-156-75 Battery Charge Line Kit, RM-146-7 Flex Coil Kit, RM-523193-4 EZ4 Plate Kit, RM-88333 Custom Seat Adapter, RM-751489 Stop Light Switch Kit and a RM-98160 Second Vehicle Brake Kit w/brakeaway. All these parts were in stock and arrived quickly and normal with you people, I really enjoy the o-line vidios as I do all my own installs. Thank you so much for your great service.
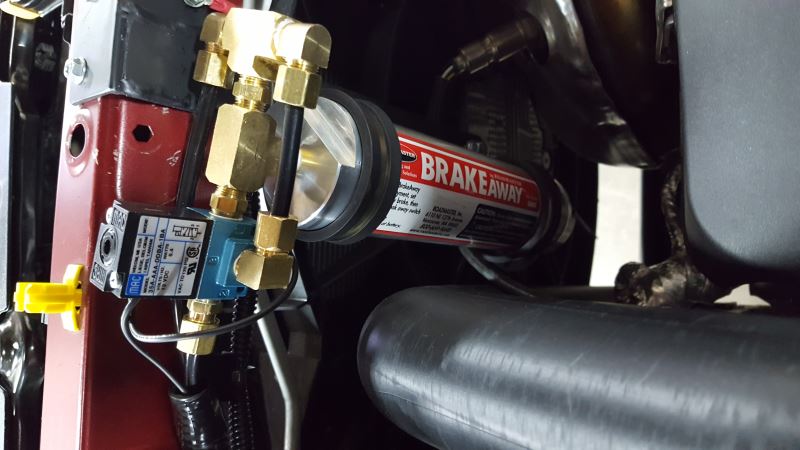
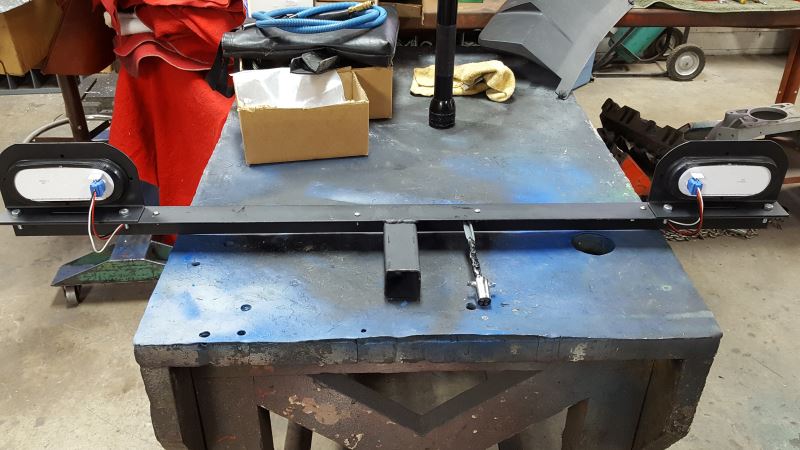
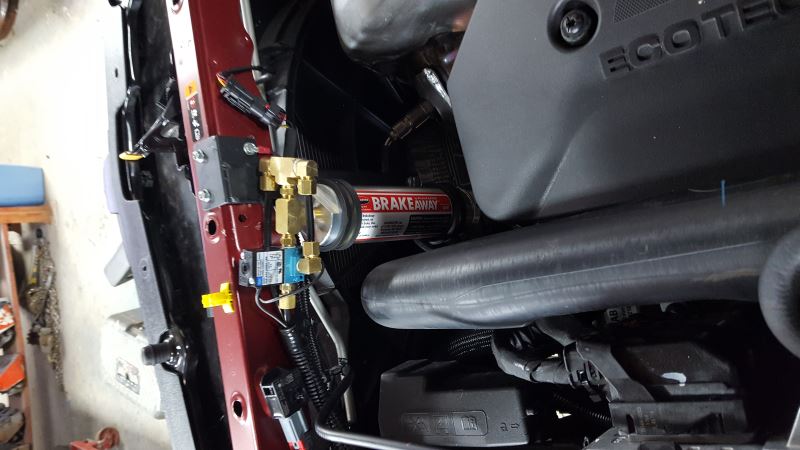
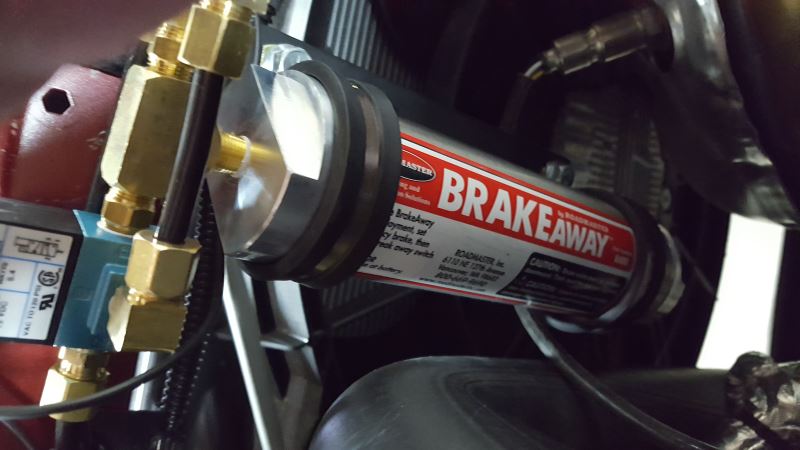
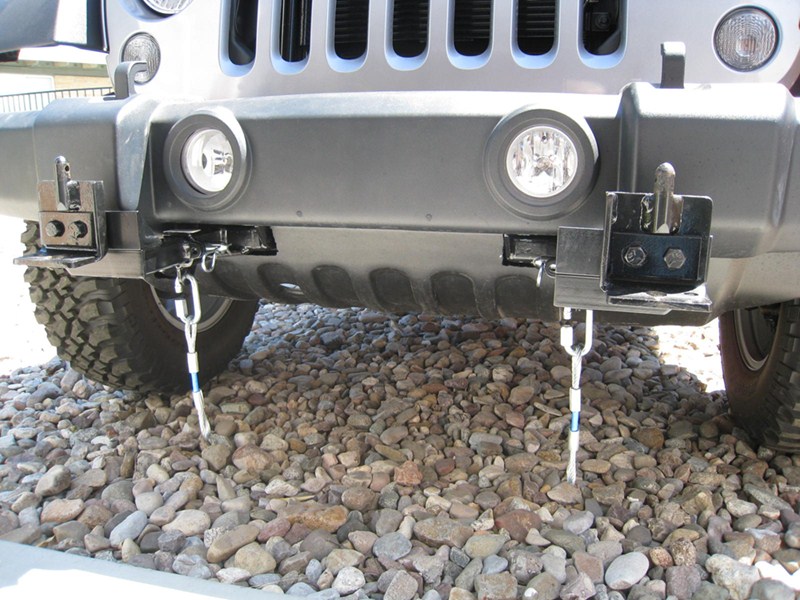
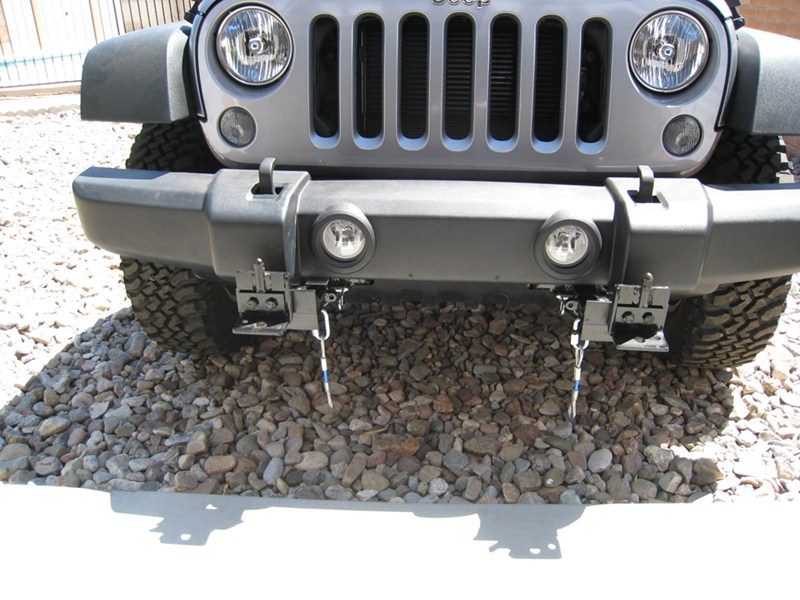
I will attach pictures of my install, you will see how I was able to fab a bracket and attach it to the existing mount on the base plate to mount the brakeaway switch and the air connection for the brake system.
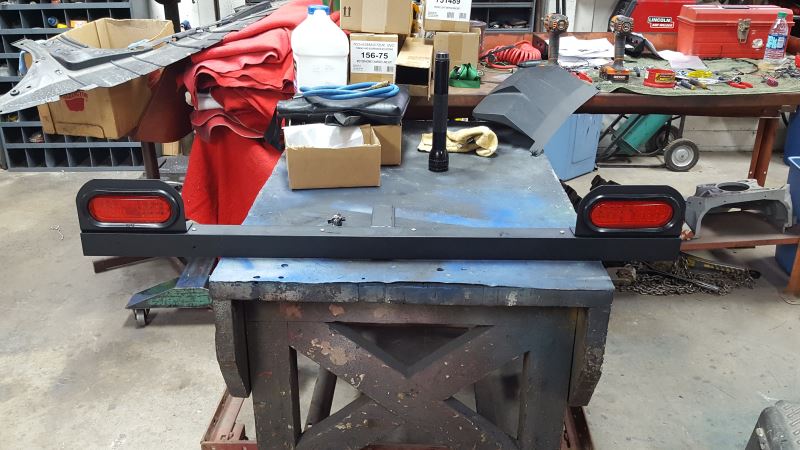
I also fabricated a tail light bar as I didn't want to use mag-lights or splice into the factory lights and bulbs installed into the lights would not work as the factory brake lights will come on when the brake system is applyed and the turn siginals would not be visable.
Thanks for all you do, I would and do recommend you people to everyone who needs your products. Rob
Great product for my 2014 Wrangler. Good materials, solid attachment to vehicle, and looks good. The e trailer installation video was great for assisting installation. Made the install much quicker and easier. The most difficult procedure for me was disconnecting the wiring harness on the back of the bumper. An old tack puller (or tool of similar design) would have been great for leveraging the pins out of their holes. Cutting the air dam was a slow process to ensure I didn't cut too much. A paper template to mark where to cut the air dam would make this process much simpler. Again, I can't emphasize enough how great the installation video was for making the steps easier.
Solid product well make easy install

Installed myself with help of one friend. Assistance with install using the videows was invaluable. The installation on a brand new vehicle brought praise and comments on how clean the install looked. Great job etrailer.
So far so good. It arrived sooner than expected. Very pleased. Installing it tomorrow. I’ll try to update later.
etrailer service was great. Received my Roadmaster base plate in 3 days. The directions from Roadmaster were fair, but etrailer's video was excellent. I had trouble mounting my base plate as the space between the two baseplate ends were too tight. I needed to use a floor jack and bottle jack to get it on. Once it was in position everything went together fine. I trimmed the Jeep' air dam differently keeping the ends that Roadmaster wants you to cut off. I think it looks better. I also had to modify the center cut in the air dam to accommodate the breakaway switch I have.
Unfortunately first set was defective from Roadmaster. Etrailer sent another set and return label which installed correctly, eTrailer was great to work with.
Fast delivery, correct parts, excellent installation instructions, and everyting fit! I would buy from this seller again.
2019 Ford Fusion Energi. A lot more trimming required on the facia than noted in the instructions, but I'll chalk that up to running changes I suppose. I used a combination of a Sawzall with a fine blade and a Dremel tool, both worked well. In the end, it took me about 8 hours (over two days) to install, and had it's challenges. I had to do some pulling and tweaking to get holes to line up, and the already mentioned extensive trimming of the facia. Overall well designed product, and of course etrailer was excellent in shipping.
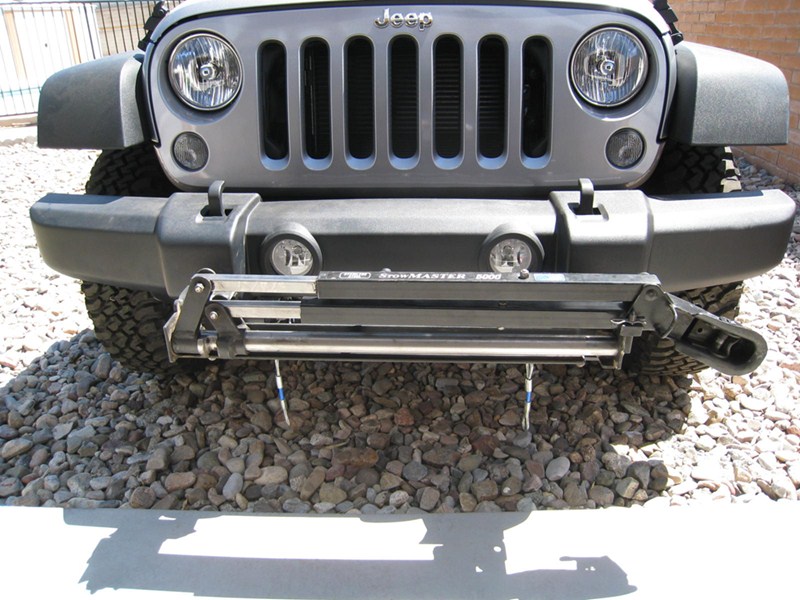
Side note, adaptive cruise control is not affected when the drawbars are removed. With the bars in and the towbar mounted (it's a Stowmaster car mounted bar) the cruise control works just fine as an old fashioned CC, the adaptive part just doesn't work (it won't slow down for you when a slow car is in front, because it can't see around the tow bar). Basically perfect and what I was hoping would happen.
Baseplate did not fit vehicle. Apparently it was manufactured icorrectly. All other baseplates for this vehicle were also manufactured improperly so engineering had to come up with new install procedures. Took a week to make that happen. Also, received new Easy Connect modules that are identical to one I already had.
Followed directions and completed job in a little over 4 hours. had trouble reinserting some pins in difficult locations.
Later in the month I installed the wiring tow package. Goofed up and crossed a wire and it took me two days to get back under the truck and rewire. all is working great according to directions...…….
I will use etrailer again, good service, great service representatives...……..jt
Perfect fit no trimming to grill
5 hours into install. Not the kits problem as I am using a ratchet, don't have an impact wrench. Biggest problem I had was nuts that went up into the frame. Very frustrating. Not sure why couldn't use a long bolt and go straight through to the hole on the other side. Instructions for the cut on the plastic skid plate are a little vague as is the video. All in all, pretty smooth install.
great kit to add a baseplate to my 2019 jeep wrangler. It takes several hours for one person to install, but if you follow the instructions and watch the video it's straight forward and easy to install.
See what our Experts say about this Roadmaster Base Plates
Info for this part was:


At etrailer.com we provide the best information available about the products we sell. We take the quality of our information seriously so that you can get the right part the first time. Let us know if anything is missing or if you have any questions.





















Thank you! Your comment has been submitted successfully. You should be able to view your question/comment here within a few days.
Error submitting comment. Please try again momentarily.