Brake Bleeding Procedure For Hydrastar Disc Brake Kits & Hydrastar Electric over Hydraulic Actuator
Question:
I bought HYD54FR disc brake kit. Im getting ready to bleed the lines. I would like to know the recommended procedure to do this. Should I use the actuator or pump brake kit.? Do I need to bleed reservoir? If actuator is used to bleed with which is best the breakaway or brake controller? If lines stop bleeding what should be the procedure, assuming reservoir is full. Thanks
asked by: Craig S
Expert Reply:
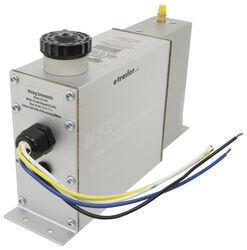
Here are the brake bleeding instructions directly from the manual for the Hydrastar Actuator # HBA16. This process needs to be followed to ensure you do not damage the actuator.
BLEEDING AND ADJUSTING THE BRAKES
1. It typically is much easier to bleed the brakes with two people working together or use of a power ECN 04007 Manual 440-1008 Rev D Page 6 of 10 bleeding device.
2. Special care must be taken to insure that the Hydrastar™ unit does not run out of brake fluid. Check the fluid level frequently during the bleeding process.
3. Block the wheels on the trailer and towing vehicle.
4. If the trailer is equipped with drum brakes, check that the brake running clearances are properly adjusted consistent with the trailer manufacturer’s recommendations. Even the slightest amount of brake drag will generate heat and will damage the trailer brake system voiding the manufacturer’s warranty.
! CAUTION – Failure to properly adjust the brakes on trailers equipped with drum brakes can result in sluggish operation of the Hydrastar™ unit. Eye protection should be worn at all times while bleeding the Hydrastar™ unit and trailer brake system.
5. Remove the dust cap from the bleed screw on the Hydrastar™ unit and install plastic tubing onto the bleeder
6. Immerse the free end of the plastic tubing in a clean container partially filled with brake fluid.
7. With eye protection on, open the bleeder screw one half turn on the Hydrastar™ unit. Take care to protect yourself and the trailer from brake fluid expelled from the bleeder.
8. Activate the Hydrastar™ unit by turning on the ignition switch and pressing on the brake pedal or the manual control on the in-cab controller.
9. Watch the free end of the bleeder hose for air bubbles escaping into the container.
10. Continue to bleed until the fluid becomes clear and free of bubbles.
11. Tighten the bleeder screw, turn off the Hydrastar™ unit, and remove the plastic tubing from the bleeder screw. Bleeding of the Hydrastar™ unit is now complete.
12. Install plastic tubing onto the bleeder screw of the wheel cylinder/caliper.
13. Immerse the free end of the plastic tube in a clean container partially filled with brake fluid.
14. With eye protection on, open the bleeder screw one half turn on the wheel cylinder/caliper farthest from the Hydrastar™ unit. (If towed vehicle has multiple axles, always start with the rear axle first.)
15. Activate the Hydrastar™ unit. (Turn the ignition switch on and press on the brake pedal.)
16. Watch the free end of the bleeder hose for air bubbles escaping into the clear container. Continue to bleed the wheel cylinder / caliper until the fluid becomes clear and free of bubbles.
! CAUTION – Do not run the Hydrastar™ unit without adequate brake fluid in the reservoir as it will damage the unit and void the manufacturer’s warranty. Check all bleeder screws to ensure that they are securely closed and do not leak.
17. Tighten the bleeder screw, turn off the Hydrastar™ unit, and remove plastic tubing from the bleeder screw. Bleeding of the wheel cylinder/caliper is now complete.
18. Refill the Hydrastar™ unit with brake fluid.
19. Continue the above process (steps 12 through 18) on the next farthest brake away from the Hydrastar™ unit. Repeat these steps until all the brakes have been bled.

Products Referenced in This Question
Hydrastar Electric Over Hydraulic Actuator for Disc Brakes - 1,600 psi
- Brake Actuator
- Electric-Hydraulic Brake Actuator
- 1600 psi
- Disc Brakes
- Hydrastar
more information >
Product Page this Question was Asked From
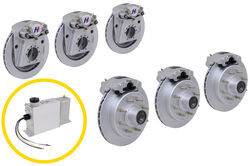
Hydrastar Disc Brake Kit w/ Actuator for Triple Axle Trailers - 9/16" Studs - 8 on 6-1/2 - 7K
- Trailer Brakes
- Disc Brakes
- Marine Grade
- 8 on 6-1/2 Inch
- Hub and Rotor
- 9/16 Inch Studs
- 7000 lbs Axle
- Hydrastar
more information >

Continue Researching
- Shop: Kodiak Ceramic Brake Pads - Stainless Steel Back - 7,000 lbs to 8,000 lbs
- Video: Kodiak Ceramic Brake Pads Installation
- Q&A: What is the Best Way to Jack Up a Boat Trailer with Torsion Axles
- Search Results: tire change
- Q&A: Recommended Replacement Brake Pads For Hydrastar Disc Brake Kit # HYD54FR
- Search Results: kodiak 250 brake pads
- Search Results: disc brake pads
- Search Results: brake pads
- Shop: Andersen Rapid Jack
- Shop: Blaylock EZ Jack and Wheel Chock for Tandem-Axle Trailers - Aluminum - 20,000 lbs
- Shop: etrailer Enclosed Trailer Transition Plate - Universal - 1,000 lbs
- Shop: Kodiak Disc Brake Caliper Rebuild Kit for 7,000 lb to 8,000-lb Trailer Brakes
- Shop: Aluminum Liger Trailer Wheel - 16" x 6" Rim - 8 on 6-1/2 - Glossy Black
- Shop: Hydrastar Disc Brake Kit w/ Actuator for Tandem Axle Trailers - 13" Hub/Rotor - 8 on 6-1/2 - 7K
- Q&A: Can Hydrastar Disc Brake Kit for Triple Axles HYD54FR Use Oil Instead of Grease
- Q&A: Disc Brake Conversion for a 2014 Kaufman Mini 5 Car Trailer
- Search Results: grease
- Video: HydraStar Electric Over Hydraulic Actuator Kit Review
- Video: Kodiak Brake Pads Review and Installation
- Video: Electric Over Hydraulic Disc Brake Installation HBA16
- Video: Review of Hydrastar Trailer Brakes - Triple Axle Disc Brake Kit - HSE7K-TR1SO
- Video: Review of Kodiak Trailer Brakes - Raw/E-Coat 13" Hub/Rotor Disc Brakes - KOD96FR
- Article: Trailer Wiring Diagrams
- Video: Review of B and W Fifth Wheel Installation Kit - Custom - BWRVK2402
- Shop: Trailer Hitch
- Search Results: safety chains
- Q&A: What Is An OEM Prep Package And How Do I Know If I Have It
- Article: Most Popular Wheel Bearings
- Shop: Trailer Wiring
- Q&A: Does Truck with 6-1/2 ft bed Have to Use Slider Hitch for Turning Clearance with Fifth Wheel Hitch


