Installation Instructions for the Ventline Powered Vanair Trailer Roof Vent # VP-543SP
Question:
Ventline Powered Vanair Trailer Roof Vent # VP-543SP Does this vent come with installation instructions? Im a girl that needs a little guidance to install this.
asked by: Gina
Expert Reply:
The installation instructions for the Ventline Vanair Trailer Roof Vent # VP-543SP that you referenced are included in the box and are as follows:
1.Cut a 6-1/4" diameter rough opening through roof. (You can use the smaller diameter of the ceiling garnish as a template.)
2.Remove the two screws from the roof cap and then take off the cap for access to the mounting holes.
3.Apply sealant to bottom of flange. Be sure to surround each screw hole.
4.Make electrical connections.
5.Insert vent into the rough opening and align it correctly with the trailer. The flange is stamped "FRONT" on the part that should be oriented toward the front of the trailer or RV.
6.Mount to roof with #8 screws.
7.Insert ceiling garnish into opening and attach with #8 screws.
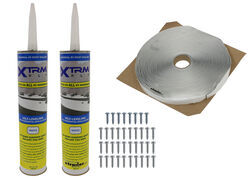
You will need the Installation Kit # 344270KITW for the sealant and #8 screws.
Please note that it should not be used above tubs, showers, or range cooking surfaces.
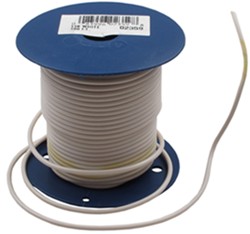
You may also need 16 Gauge Wire # DW02359-1, a Ring Terminal # DW05702-1 for the Ground, and Butt Connectors # 05731-5 to complete the installation if you don't already have them.
I have attached a review video for you to check out as well.

Products Referenced in This Question
16-14 Gauge Butt Connector - 5 Pack
- Wiring
- Wire Connectors
- Butt Connectors
- 16-14 Gauge
- Deka
more information >
Roof Vent Installation Kit - Sealant, Butyl Tape, Screws - White
- Accessories and Parts
- RV Vents and Fans
- Vent Install Kit
- LaSalle Bristol
more information >
Ring Terminal -16-14 Gauge - 1/4" Ring ID - Qty. 1
- Wiring
- Wire Connectors
- Ring Terminals
- 1/4 Inch Diameter
- 16-14 Gauge
- Deka
more information >
Product Page this Question was Asked From
Ventline Vanair Trailer Roof Vent w/ 12V Fan - 6-1/4" Diameter - Smoke
- RV Vents and Fans
- Vent
- Roof Vent
- Manual Lift
- 2-3/8 Inch
- 12V Fan
- Plastic
- Tinted
- Ventline
more information >
Featured Help Information
Miscellaneous Media

Continue Researching
- Shop: Ventline Vanair Trailer Roof Vent w/ 12V Fan - 6-1/4" Diameter - Smoke
- Search Results: lasalle bristol
- Shop: Roof Vent Installation Kit - Sealant, Butyl Tape, Screws - White
- Shop: Replacement Fan Blade for Ventline Vanair Trailer Roof Vent
- Shop: Vehicle Engine Heaters
- Video: Review of MAXXAIR RV Vents and Fans - MaxxFan Mini Roof Vent - MA00-04401M
- Video: Review of Ventline RV Roof Vent - Low-Profile Round Fan - VP-543SP
- Shop: MaxxFan Dome Roof Vent w/ 12V Fan - 6" Diameter - Manual Lift - Black
- Shop: Opti-Brite LED Interior Strip Light - Weatherproof - 171 Lumens - Clear Lens - 9" Long
- Shop: MaxxFan Dome Plus Roof Vent w/ 12V Fan - LED Light - 6" Diameter - Manual Lift - White
- Shop: Replacement Plastic Dome Assembly for Ventline Vanair Trailer Roof Vent
- Search Results: toggle switch
- Search Results: 12 volt switch
- Search Results: winch switch
- Search Results: thermostat
- Search Results: rocker switch
- Search Results: switch
- Video: Review of Ventline Replacement Fan Blade Vanair RV Roof Vent - BVD0217-00
- Q&A: What Is Amperage Draw For Fan-Tastic Vent Roof Vent w/ 12V Fan
- Shop: Trailer Wiring
- Shop: Grille Guard
- Q&A: Replacement Switch and Fan Blade for the Replacement 12-Volt DC Fan Motor
- Video: Ventline RV Vents and Fans VC0359-00 Review
- Q&A: Installation Instructions for Ventline Ventadome Trailer Roof Vent with 12V Fan # V2094SP-30
- Video: Ventline RV Vents and Fans - Roof Vent - BVA0502-03 Review
- Video: Review of Maxxair RV Vents and Fans - Roof Vent - MA00-03810W
- Q&A: Can a Variable Speed Motor be Added to the Ventline Vanair Trailer Roof Vent
- Shop: Brake Controller
- Q&A: How Far Below the Roof Will MaxxFan Dome Plus Roof Vent Set
- Q&A: Replacement Foam Ring for Ventline Vanair Trailer Roof Vent Part # VP-543SP


