
To see if this custom-fit item will work for you please tell us what vehicle you'll use it with.


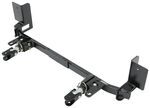
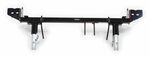
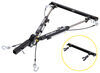
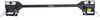
This custom-fit base plate kit lets you hook up your tow bar to your vehicle. Tabless design provides a clean, unobtrusive look for your towed car even when not hooked up. Simple bolt-on installation.
Features:
Specs:
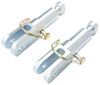
Setting up these tabless base plates for use with your Demco tow bar is fast and easy. Just remove the attachment lugs from the ends of your tow bar arms and replace them with these tabs. Then you can just insert the tow bar arms into the base plate receivers to hook up. There's no need to remove the tabs from your tow bar, so you won't run the risk of misplacing tabs. And because the tabs remain on your tow bar at all times instead of protruding from your vehicle, your car maintains a clean look when it's not being towed.
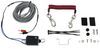
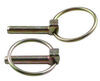
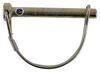
Using the Demco Tabless base plates to attach and remove your tow bar couldn't be easier. With the base plate tabs attached to your tow bar arms, simply insert the tabs into the receivers on your vehicle and twist to lock them in place. Insert the included pull pins to add an extra layer of security, ensuring the tabs stay put. To remove each arm, simply tug the pull pin to disengage the lock, twist the tow bar arm, and pull the tab out of the bracket.
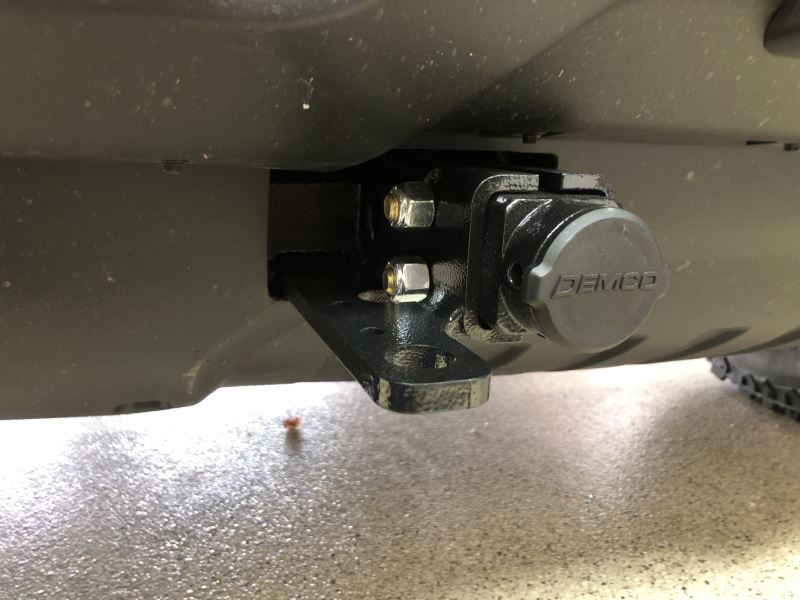
Keep dirt and debris out of the base plate receivers with the included covers. These high-density polyethylene covers easily snap into place over each pull point when your tow bar is not attached. Limiting internal corrosion makes it easier to slide the tabs in and out and helps to prevent seizing so that the tabs don't get stuck.
If you have a Demco Kwik-Tow tow bar or a tow bar from a different manufacturer, an adapter may be available. Demco makes adapters for use with other tow bars so that you don't have to go through the added hassle and expense of replacing your tow bar when outfitting your new towed car with base plates.
| Type of Tow Bar | Adapter |
|---|---|
| Roadmaster Sterling All-Terrain, and Blackhawk 2 All-Terrain | e98983 |
| Roadmaster Falcon All-Terrain | DM9523036 |
| Roadmaster Nighthawk All-Terrain | DM9523062 |
| Roadmaster Falcon 2 and Tracker | Use both DM9523128 and DM9523036 |
| Blue Ox (excludes Embassador) | DM9523127 |
| Demco Kwik-Tow | DM9523128 |

Videos are provided as a guide only. Refer to manufacturer installation instructions and specs for complete information.
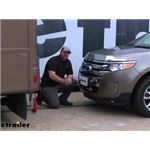
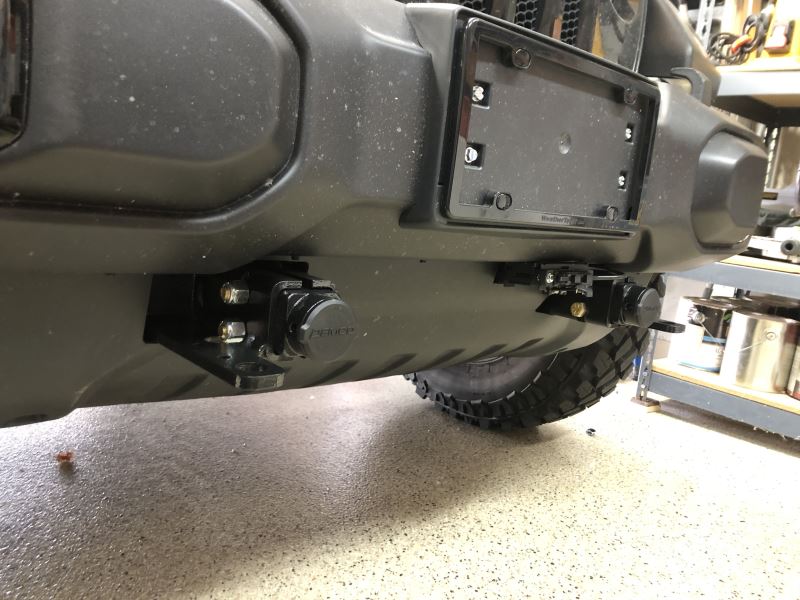
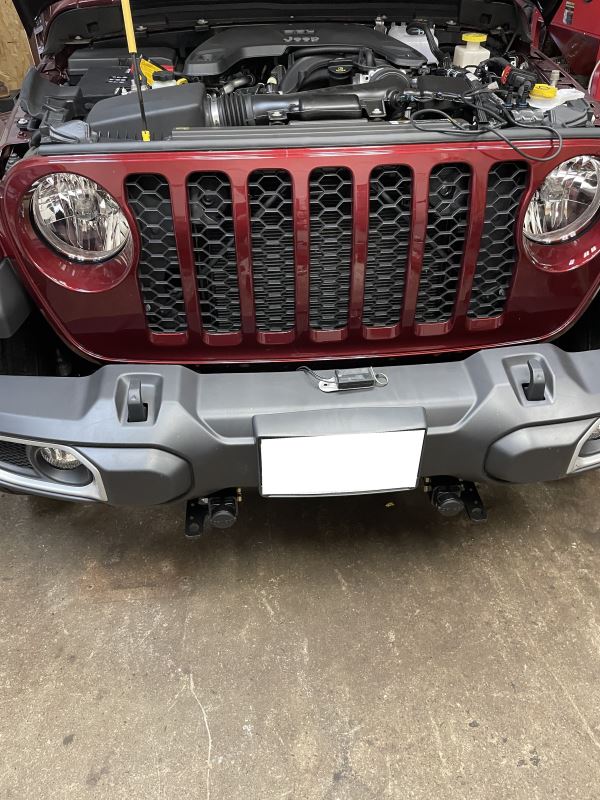
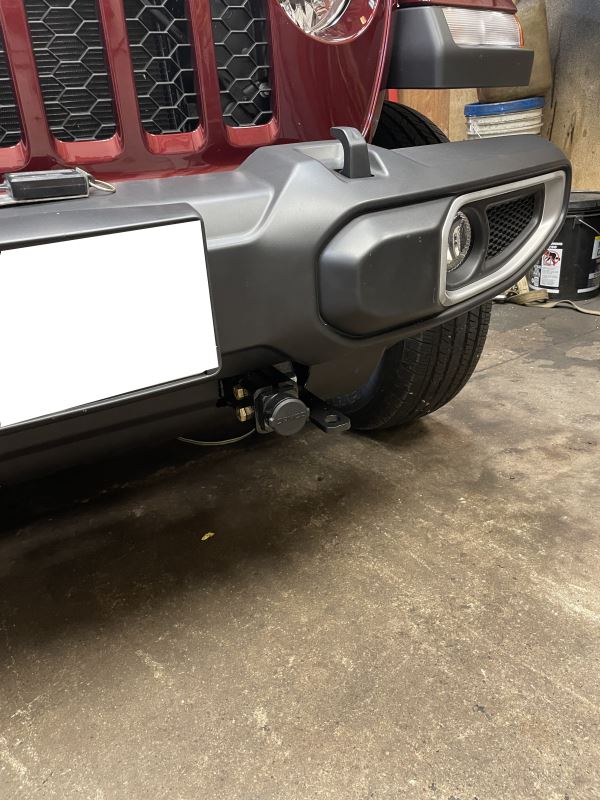
Shane: Hi, I'm Shane with etrailer.com. Today we're gonna be taking a look at, and I'm gonna show you how to install, Demco's Tabless and Base Plate Kit on our 2014 Ford Edge.There are five main components to a flat tow setup: your base plate, your wiring, your tow bar, your safety cables, and your braking system.What our base plate is gonna do for us is it's gonna be a solid connection point between our tow bar and our towed vehicle. You can see with our fascia removed, our base plate is going to attach directly to the chasse of the vehicle to give us that solid anchor point for our tow bar.You can see when not in use it maintains a nice, clean look on the front of the vehicle. We're gonna have our safety chain looped here, which they're not gonna stick out too far. Again, maintains that nice, clean look. We don't have a lot of protruding items or anything like that sticking out of the front of the vehicle.
Putting this base plate on is gonna require a little bit of fascia trimming, and it will require you to remove the fascia.It is gonna have a nice, black powder coat finish. It's kind of a dimpled finish, kinda keeps a rugged look but it does look like a very durable finish on it. And this is gonna be a tabless design, and what that means is these tabs on a lot of base plates, this tab will actually slide in like this, and it'll turn. But the other types of tabs will actually, you'll disconnect your tow bar. Then you'll have to find somewhere to store these when you're not using them.With this, these will actually bolt on to your tow bar.
When you're ready to use it, you put it in, you twist them just like that, then you put a pin in it. When not using them, they stay on your tow bar. You don't have to worry about storing them, you don't have to worry about misplacement.Another really nice feature that I like about this base plate is when not in use, we're gonna have caps that will cover our holes to keep any dirt and debris from collecting in there. And they just snap right into place.Now that we've gone over some of the features, let's show you how to get installed. We need to start by removing our fascia.
We're gonna have four classic fasteners and two 10 millimeter head bolts we need to remove. Our plastic pin fasteners are run right across this front plastic piece, and then our two bolts are right here. And these are just plastic, so you don't have to put any pressure on them. Just wanna make sure you get this bottom part out too. Once you have the center out like this, it's easy if you just pull up like this, and it'll come out just like that.In each wheel well, we're gonna have three 5.5 millimeter head bolts we need to remove.
Now your instructions are gonna tell you three pushpin fasteners you're gonna have to remove from underneath the vehicle, which are gonna be these three here. But actually, you're gonna have one on each side for your mudflap where your front fascia actually hooks into your mudflap. You're gonna have to remove one of those on each side too, so technically you're gonna have five. So technically you're gonna have five.So remove three of these. You just do it with a flathead screwdriver. You can get the center pried out there, take a trim panel tool. Pull out the base just like that, and this one here on the very lower front part of your fender liner, or in front of your tire. Again, you'll have one of these on each side.And we're gonna have a couple of 5.5 millimeter head bolts on each side we need to remove. First, we're gonna remove this one, and this one, just like that. And you're gonna remove those same two on the other side of the vehicle. We need to unhook our fog lights. If you clipped this black plug here, we're just gonna push in on this backside right there. It's gonna push in and pull out. You're gonna do that same thing on the other side.With an extra set of hands we're gonna remove our fascia, and we're gonna start on the very outside of our fender where our fender meets our front fascia, and we're gonna start to pull out, work our way to the center. And remember when pulling this off, don't just pull it off, because if there's any additional wiring or anything in there that needs to be unplugged, you don't wanna mess up the plugs. Once you get it off, you're just gonna set it aside in a safe place for now.And we're gonna remove our bumper core. We're gonna have one bolt here, 10 millimeter bolt, or 10 millimeter head bolt. You're gonna have two 13 millimeter head bolts here, and you're gonna have a 13 millimeter head nut down here on the bottom. We're gonna have that same hardware on each side. Then we're gonna have a 10 millimeter head nut right down here on the bottom. Then we'll remove our bumper core and we'll set it aside.Driver side, you're gonna have a bracket in your kit that looks like this, it's gonna say driver side on it. You're gonna need two inch and a half by 7/16 bolts, lock washer and flat washer. You're gonna get some blue Loctite in your kit, it's a little tube, gonna look like this, and make sure you use this on all of your hardware that you're installing.We're gonna take this bracket, and you see how it's kinda notched out there It's gonna be facing down like this, and you're gonna have a small nut plate, and a long one for each side. We're actually gonna do the backside first. We're gonna go through this hole.On our passenger side, we're gonna have two nuts. We're gonna have one here, and we're gonna have one on our backside of our washer reservoir, washer valve reservoir that we need to remove so we can get our bracket in against our frame rail. 10 millimeter socket will remove those.Now, if you remember on our driver side, we had a hole back here that we needed to get to. I'm not able to get my washer bottle out of the way enough just by loosening these two nuts or taking them off, so up here on top we're gonna have an eight millimeter head bolt that threads through this container into our washer reservoir. I went ahead and removed that. Now I'm gonna take . and I should have a little bit more play with my washer reservoir to give me enough room that I can get back there and get that bolt put in.Then we'll take a 5/8 socket, we're gonna tighten and then torque our bolts for our side brackets or frame brackets on the sides. We're gonna do that on both sides.In your kit, you're gonna have six washers. We're gonna use them as spacers to space out the backside of our washer bottle so it doesn't rub on the bolts. Three on each post, actually its still touching the bolt so I'm gonna add an extra one on each post. It's completely up to you. I just wanna make sure that the bolt doesn't rub a hole in the backside of the reservoir.Next, take your base plate and we're gonna set it up against our frame rail. You're gonna clamp it into place like this on each side. Good idea to have an extra set of hands to do this, 'cause our base plate's kinda heavy. We're gonna be drilling out this hole, and putting a self-tapping bolt in it.Because it's heavy, what I suggest doing is the bolt that we took out on the bottom from our bumper beam, I went ahead and reinstalled that just for now to get my base plate to pull up against the bottom of my frame rail as much as possible. Once I got it tightened up to the bottom of my frame rail, then I clamped it back into place so we're tight this way and this way. Now we can drill this hole out.Using a 5/16 drill bit, we're gonna drill a hole right through our frame rail. Make it a little bit easier for yourself, you take drill bit that'll just fit inside of this hole, and use it to make a mark because your drill bit, your 5/16, is actually smaller than that hole. Use a drill bit just the right size and actually make a little dimple there and that'll keep your drill bit from bouncing around inside that hole.We're gonna take our 3/8 self-tapping screw, you'll know it's a self-tapping screw, it's gonna have a little notch in it like that. 9/16 socket. Tighten that into place. Again, make sure you're using Loctite on all your hardware. Then you're gonna repeat that process on the other side, and then you can remove your clamps.Before reinstalling our bumper core, our lower tab, which is gonna be this single one, we're gonna . you can either bend it up or you can cut it off. I'm just gonna cut mine off so that I know that it's flush with this edge. That means you're gonna use a cutting wheel, and you're gonna do that same thing on the other side.Once you get your lower tabs cut off your bumper beam, then you can reinstall it. We're gonna use the same two bolts that we took out on the top on each side. One thing to keep in mind: the bolt here, and the bolt down below it, are not gonna line up. What you wanna make sure of is this plate up here with these two bolts is sitting flat on top of the frame rail. If it's not sitting flat, where you cut the tab off on the bottom, you're gonna have to cut that down some more. Because what it's doing is it's sitting on the base plate, and that base plate is pushing it up. You wanna make sure that this is sitting flat when you reinstall the bolts.Once you get those installed, go ahead and tighten them down. If this for some reason is not lining up, this whole section radiator you can lift it, and you can put that bolt back in.Now we've reinstalled our bumper beam. We need to drill through our bumper beam, through our base plate, to this bracket that we mounted on the side of our frame rail. If you remember there's two holes in it. We need to be able to run a bolt through here to hold all this together. We're gonna have to drill from here all the way through.Per our instructions, we need to measure down an inch, in a half inch. From there, down two and 5/8, then again in a half inch. Now, what I suggest doing is looking at your holes on your bracket right here, and see if you can't . make sure they're gonna line up, and make any adjustment necessary, whether up a sixteenth of an inch or down, 'cause what you don't wanna do is when you start going in, you don't want this hole, when you start hitting here, to go down or up. 'Cause then you're gonna have to wall out this hole, and your heavier bolt is actually gonna sit in here and not out there. So, try and get that as straight as possible.Some of these bumpers can be hardened steel. It might take a little bit to get through them. If you don't lubricate it, what happens is your drill bit overheats, and you can end up breaking it or it really strips it off bad where it's not any good anymore. So, just try to keep that lubricated as much as possible. Even if you have to have somebody stand here and spray it every once in awhile, it might be good.So now what I'm gonna do is I'm gonna open this outside hole just a little bit, 'cause it looks like I might be just a little bit high on this inside hole. I'm gonna open this up, so that I can get my drill bit and kinda go down a little bit more. If I try to go down now, what's gonna happen is my drill bit's gonna bend, and you can take a chance of breaking it.So, again, this outside hole here we're not gonna be using, we're just using it to get our hole drilled in here. The reason why we don't just cut it out is because inside our bumper there's a flange that's welded right here, and if we cut that out, then you're losing support on the bumper. So alls we need to do is a hole.Now we'll take our 3/8 hex bolt, 3/8 lock washer, and 3/8 nut. I'd suggest cleaning it out, just so you don't get any on your threads. Again, make sure you're using the blue Loctite that comes in the kit. We're gonna go from here through, put on our lock washer, and then our nut, and then we're gonna tighten and torque that to the specifications in the instructions, and then we can drill our next hole.Once you're done putting your two bolts in on each side of our bumper beam, we're gonna have two more on the bottom. Again, it's gonna be a 3/8 hole; I'm gonna start with a pilot hole, and try and get it as centered as possible on there. It will make it go a little bit quicker rather than going straight to the big drill bit. If you use a small one, do a pilot hole first.We're gonna take our 3/8 bolt, we're gonna go up. We're gonna put on a lock washer, and then a nut. And then again, we're gonna tighten and then torque that to the specifications in the instructions. Again, don't forget to use your blue Loctite. Then you're gonna repeat that same thing for this hole here.Then you need to put on your safety cables. With this vehicle it's a little bit difficult to find somewhere to go around. On our driver side we we're able to go around our support beam that runs across right behind our radiator. You can see I went around the faceplate, and went through, and then wrapped around my support beam, and then used my two rings here.Passenger side is gonna be a little bit different. Passenger side, we can't go around our support beam because we have a pulley that sits right there. So what we did is around my base plate, I went through and wrapped around my body mount here. I took one ring, wrapped around both cables, passed the one through it, and tied it to the next one. This ring is tied to loop on the one that comes around this way, and I just zip tied them in place so they don't rattle.Now our last step to installing our base plate is to trim and reinstall our fascia, but before doing that it's a good idea if you're adding any wiring or braking system to do that before installing your fascia. It's gonna make it much easier to run all your wires down to the front of the vehicle.That'll do it for a look at and installation on the Demco Tabless Base Plate Kit on our 2014 Ford Edge.
Average Customer Rating: 4.9 out of 5 stars (197 Customer Reviews)
This custom-fit base plate kit lets you hook up your tow bar to your vehicle. Tabless design provides a clean, unobtrusive look for your towed car even when not hooked up. Simple bolt-on installation.Great product! Mostly easy installation.

The baseplate and wire kit that I purchased from etrailer was everything that I expected. It was an easy install, thanks to the easy to understand and read instructions and video.
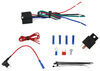
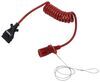
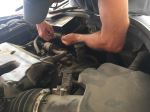
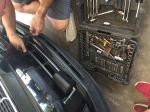
Relatively easy to install, works great, less obtrusive than other brands. Instructions are clear, quality is good. Shown with knuckles removed. As you can see, I had to improvise to mount the coiled cord socket and breakaway switch.
Love it,my bumper wasn't rated for towing so I had to go this route. Pleased it fit fine with the aftermarket bumper.
This base plate is of exceptional value and construction. It was fairly easy to install on my 2008 Jeep Wrangler by myself but would have been quicker if I had an extra set of hands. Overall I am extremely happy with how the base plate looks and the customer service was above and beyond expectations. I would recommend the base plate and you don't have to look anywhere else than etrailers for what you need.
I purchased this as part of a package which included; Hitch and wiring for my 2022 Equinox, Base plate, Tow Bar, brake System and connecting air hose, break away cables, LED tow lights with wiring harness, and a trickle charger to keep the Equinox battery from going dead while I was towing it behind my class A RV.
I had etrailer do the install of all the components on my car and RV. All the workmanship was excellent and done in the amount of time they said it would take. Also because they did not have a video of this equipment being put on this year and model vehicle, I gave them permission to make a video(which added a extra day and a half to the install)and the installation was free. Everything has worked perfectly and I couldn't be happier. Etrailer is my go to for anything towing and also RV parts.
I recently completed a DIY installation of the Demco Tabless Base Plate on my 2021 Jeep Wrangler. Installation is fairly straightforward following the etrailer.com videos. A couple gotchas on the videos.
First, one of the videos suggests removing a sheet metal plate to provide easier access. While it does make for easier access during removal of the bumper, you should reinstall it BEFORE installing the base plate. If you install the baseplate first, there is insufficient clearance for the bolts that hold the sheet metal plate.
Second, the videos show reinstalling the plastic air dam after reinstalling the bumper. At least on my 2021 Wrangler there is NO way you could do that without seriously bending, and possibly breaking the plastic dam. Reattach the dam to the bumper BEFORE reattaching the bumper. Clearances for rebolting the bumper are sufficient. I did it without a lift (thank goodness for the Wrangler’s high ground clearance).
Bottom line is it’s a bit of a project but looks great.
Eady Order, Very Fast delivery. Will update after base plate installation
I can’t say enough good about how great etrailer customer service is! Our trip was nearly a complete disaster after having a tow plate added to my jeep. We had planned to tow the Jeep and drive back to Maryland from Texas. After hours on a Friday night we found that the connectors were missing but we had to get on the road anyway, so my son drove the RV with my granddaughter and I followed, driving the Jeep. We kept trying to reach the installer but it was the weekend so we rented a U-Haul. Once we were able to ride together, we called etrailer. The parts we needed were expedited to my son’s home and now we can proceed to my grandson’s soccer tournament without having to use the U-Haul! THANK YOU ETRAILER FOR YOUR QUICK RESPONSE and saving the family trip.
I have not installed my base plate yet, but the 5-Stars is for the service I have received from etrailer I was sent the wrong base plate which fit the factory plastic bumper mine is a steel bumper, but etrailer was great about the easy return and repurchase. Hard to find companies with such great customer service.
Will update this review after installation..
I received the parts from etrailer much sooner than expected. They ship very fast.
Unfortunately some of the hardware was missing. The box arrived a little beat up. The bag the hardware came in was torn open. It seems that a few nuts and bolts were lost in transit. Since my shipment arrived on a Saturday, I did not wait until Monday to call for replacements. I went down to local HW store and bought what I needed. Fitment was excellent and installation went very smooth. I will continue to shop etrailer for all my towing needs.
The video that etrailer had for the installation of this towbar was awesome. The only hitch was the brackets were mislabled (passenger and driver side were switched), but the video helped show how everything worked and how it should look. Goes very smooth with a helper!
Installation went well! The pictures in instructions are a bit hard to decipher! Using it in a few days. It is a replacement my last CR V 2003 was totalled in an accident had a Blue Ox before seems comparable!
So far so good. Packages came intact. Everything unpacked and looks ready to go. I’ll keep you up to date on the installation. Thanks Jessica and team for keeping me up to date on the delivery.
I've used this setup for a year towing a 2023 Jeep Wrangler . I 100% recommend it for anyone else. Under normal conditions it is very easy. Under stressful conditions (bad weather, uneven terrain, need to connect/disconnect quickly) it is a life saver.
I am 63 and I can connect/disconnect this in 5 minutes.
Very good baseplate and easy to install. You do have to trim the front bumper a bit (1/2” wide by 3/4” deep) on the bottom to put it back on. The only issue I had were the outside factory screws on the skid plate that comes with this base plate. The factory screws are too short and I had to go buy 2 replacement screws to fit.
Took about 2 hours to install. That included gathering needed tools and putting them up.
Have not towed with it yet, but that will happen soon!!
Superb Customer Service and Communication!!!! Fast shipping...item delivered sooner than estimated. The baseplate seems very well constructed (as expected of Demco products).
entailer demonstrated its excellent reputation with this order.
Thank you!
Unfortunately these base plates did not fit up to the front grill near as well as past ones I have purchased from you. A lot more cutting on my vehicle was required that should not have been needed. Also having to convert my towbar to less desirable Demco attachment was disappointing. I purchased Blue Ox for a reason and would have been much happier if Ox style pins were supplied to fit Demco sockets.
Works well if you can get your bumper bolts out ;-).
Otherwise, was easy to install and tows perfectly.
As with all Demco products that I've purchased, this baseplate kit is extremely well engineered, expertly manufactured and work exactly as advertised. The installation instructions are easy to follow and understand. This is one worry free produce that will make our travels much more enjoyable.
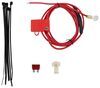
The reinstall kit for the SMI stay and play duo braking system was exactly what I needed we removed it out of a 2012 Cadillac SRX and a RV shop will be installing it in a 2020 Jeep Wrangler I will send pics of the final installation later on this month ! Great product was delivered with all parts needed in three days and as usual great customer service !
I was very pleased with the service I received from Karl. The equipment was very well made. It seems the Demco baseplate and wiring kit are superior to the Blue Ox I’ve used in the past. Thanks for your service and products.
It was easy to install, works great on the vehicle, and the hitching is very easy with this bass player.
The baseplate installed easily. It looks great on the Jeep Wrangler. You have to know it has been installed in order to see it. see the photo

Do you have a question about this Base Plate?
Info for this part was:
At etrailer.com we provide the best information available about the products we sell. We take the quality of our information seriously so that you can get the right part the first time. Let us know if anything is missing or if you have any questions.


Thank you! Your comment has been submitted successfully. You should be able to view your question/comment here within a few days.
Error submitting comment. Please try again momentarily.