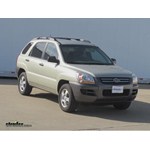
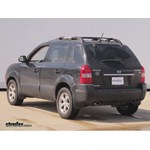
Curt Trailer Hitch Receiver w/ Euro Drawbar - 1-7/8" Ball - Custom Fit - Class II - 1-1/4"

- All Info
- Q & A (0)
- Videos (2)
- Photos
CURT Trailer Hitch - C121261
- Class II
- 1-1/4 Inch Hitch
- 3500 lbs GTW
- Concealed Cross Tube
- CURT
- 300 lbs TW
- Custom Fit Hitch
Perfect for light-duty towing, this custom, vehicle trailer hitch receiver features fully welded, gloss powder coated steel construction. Euro-style drawbar with 1-7/8" hitch ball included.
Features:
- Custom fit is designed specifically for your vehicle
- Precision, robotic welding maximizes strength and improves fit
- Bolt-on installation - no welding required
- Complete hardware kit and installation instructions included
- Lifetime technical support from the experts at etrailer.com
- Gloss black powder coat finish over protective base coat offers superior rust resistance
- Sturdy, square-tube design
- European-style drawbar with integrated hitch ball included
- Pin and clip sold separately
- Made in the USA
Specs:
- Receiver opening: 1-1/4" x 1-1/4"
- Rating: Class II
- Maximum gross trailer weight: 3,500 lbs
- Maximum tongue weight: 300 lbs
- Hitch ball size: 1-7/8"
- Limited lifetime warranty
Note: All non-trailer loads - bike racks, cargo carriers and so forth - should be supported with stabilizing straps. Failure to properly support these loads will void your hitch warranty from Curt.
etrailer.com Technical Support
At etrailer.com we're committed to the products we sell, and to our customers. Our experienced and knowledgeable staff are available via both phone and email to address your questions and concerns for the lifetime of your hitch. The technicians at etrailer perform hitch installations on a daily basis, making them a valuable resource for do-it-yourselfers. The one-on-one, personal service you'll receive comes straight from an expert in the towing and automotive field. We've installed it, we've wired it and we've towed with it, so whatever your question, we can answer it.
12126 Curt Class 2 Trailer Hitch Receiver
45551 Curt Euro Mount Ball Mount with 1-7/8" Ball
Installation Details

Videos are provided as a guide only. Refer to manufacturer installation instructions and specs for complete information.
Video Transcript for Trailer Hitch Installation - 2008 Kia Sportage - Curt
Today on our 2008 Kia Sportage, we'll be installing the Curt Hitch, part number C12126. This is what our hitch will look like once it's installed. Next, we'll go ahead and give you a couple of measurements to assist you with selecting accessories for your new hitch, such as a ball mount, bike rack, or cargo carrier. From the center of the hitch pin hole, to the outermost edge of the bumper is six inches. From the top of the receiver tube opening to the ground is 12 and three-quarter inches. Let's go ahead with installation.
First, we'll need to lower the exhaust before we can install the hitch. To lower the exhaust, there are a total of three rubber isolators we'll remove from the metal hangers on the muffler. To start, we'll spray each rubber isolator with some spray lubricant. Then, using a pair of pliers, pry bar, or in this case, we're using an exhaust hanger removal tool, we'll go ahead and remove the rubber isolator from the metal hanger. With the rubber isolators removed, we'll go ahead and allow the exhaust to come down and sit on the rear axle, giving us a few more inches of working room.
We'll shift it over to the driver's side, and start to remove the tow hook here on the passenger's side. There are a total of five fasteners that secure the tow hook into position, four in the bottom of the frame rail, and one in the side. We'll go ahead and remove these fasteners, setting both the tow hook and fasteners aside, as they will not be reinstalled. Next, on the driver's side, we'll need to clean out the weld nut, which will be our forwardmost attachment point on the driver's side. To clean it out, we'll use some spray lubricant and a half-inch nylon tube brush, part number 814092.
Thoroughly clean out the threads, because over time they build up with rust, dust, dirt, and debris. Quick tech tip: in extreme cases, it may be necessary to run a thread tap to clean out the excess of rust or dirt buildup. Once we have it thoroughly cleaned out, I recommend to take one of the new fasteners and go ahead and put it into the weld nut and make sure it'll go nice and easily. With that done, we'll need to remove an additional fastener here in the bottom of the frame rail on the passenger's side. This will be a weld nut in the frame that we will utilize once we install the hitch.
We'll move over to the driver's side. This application does not have a tow hook; however, we'll need to remove the two fasteners in the bottom of the frame. With those removed, we can see all six attachment points for the hitch. Starting from the rear of the vehicle, it'll be the first three weld nuts in the frame. We're ready to go ahead and install the hitch. We'll be using the new ten millimeter bolt, three-eighths conical tooth washer, the teeth of the washer facing the hitch. We'll go ahead and take our hitch, feed it up over the exhaust on the passenger's side, and then bring it up into position on the driver's side. We'll go ahead and install each one of the fasteners finger tight until we have them all in place. With the fasteners holding the hitch, we'll go ahead and tighten it down. Next, we'll torque to specifications, as indicated in the instructions. With our hitch secured and torqued to specifications, we'll go ahead and reinstall the exhaust. With that done, this'll complete the install of our Curt Hitch, part number C12126 on our 2008 Kia Sportage.
See what our Experts say about this CURT Trailer Hitch
Info for this part was:


At etrailer.com we provide the best information available about the products we sell. We take the quality of our information seriously so that you can get the right part the first time. Let us know if anything is missing or if you have any questions.


Thank you! Your comment has been submitted successfully. You should be able to view your question/comment here within a few days.
Error submitting comment. Please try again momentarily.