Curt Trailer Hitch Receiver with Standard Drawbar - Custom Fit - Class I - 1-1/4"

- All Info
- Q & A (0)
- Videos (1)
- Photos
CURT Trailer Hitch - C114083
- 1-1/4 Inch Hitch
- Class I
- 2000 lbs GTW
- Visible Cross Tube
- CURT
- 200 lbs TW
- Custom Fit Hitch
Perfect for light-duty towing, this custom, vehicle trailer hitch receiver features fully welded, gloss powder coated steel construction. Standard drawbar included.
Features:
- Custom fit is designed specifically for your vehicle
- Precision, robotic welding maximizes strength and improves fit
- Bolt-on installation - no welding required
- Complete hardware kit and installation instructions included
- Lifetime technical support from the experts at etrailer.com
- Gloss black powder coat finish over protective base coat offers superior rust resistance
- Sturdy, square-tube design
- Standard drawbar included
- Pin and clip sold separately
- Assembled in the USA
Specs:
- Receiver opening: 1-1/4" x 1-1/4"
- Rating: Class I
- Maximum gross trailer weight: 2,000 lbs
- Maximum tongue weight: 200 lbs
- Limited lifetime warranty
etrailer.com Technical Support
At etrailer.com we're committed to the products we sell, and to our customers. Our experienced and knowledgeable staff are available via both phone and email to address your questions and concerns for the lifetime of your hitch. The technicians at etrailer perform hitch installations on a daily basis, making them a valuable resource for do-it-yourselfers. The one-on-one, personal service you'll receive comes straight from an expert in the towing and automotive field. We've installed it, we've wired it and we've towed with it, so whatever your question, we can answer it.
11408 Curt Class 1 Trailer Hitch Receiver
45521 Curt Standard Ball Mount - 7-1/4" Long
Replaces 112843
Installation Details

Videos are provided as a guide only. Refer to manufacturer installation instructions and specs for complete information.
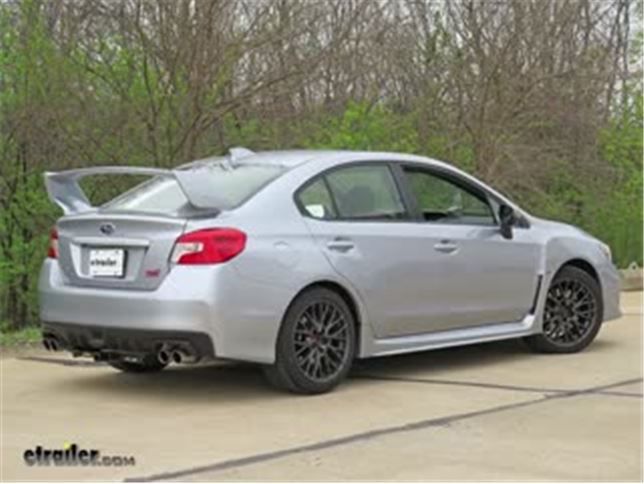
Video Transcript for Trailer Hitch Installation - 2017 Subaru WRX
Today on our 2017 Subaru WRX, we'll be having a look at and installing the Curt Class 1 Trailer Hitch Receiver, part number C11408. All right, here's what our hitch looks like installed. As you can see, it's tucked up nice and tight, up against our rear fascia here. It doesn't sacrifice much ground clearance so we won't have to worry too much about backing in and out of driveways or going up inclines pulling into a garage. We have this nice welded on collar at the end of our receiver opening here to give it a nice finished appearance, and also give it a little bit more strength. Welded on on the bottom of the frame and our receiver here we have this angular plate which is where our safety chain loops are for our trailer.
These have a fairly decent size opening. We shouldn't have much problems hooking up safety chains for a small trailer to this vehicle. On the side of our receiver here is our industry standard 1/2 inch diameter hitch pin hole to secure any of our hitch mounted accessories that we may have. This hitch features a nice high gloss, black powder coat finish, which blends in nicely with our vehicle. Now we found most people like purchasing this hitch for using it for bike racks and I can see why because the amount of clearance we have around our fascia here, and the distance from our pin hole to the rear most part of the back bumper is very minor, so it pushes it further back here giving us ideal clearance for most bike racks on the market. This hitch features a 200 pound max gross tongue weight rating, which is the amount forcing down, and a 2,000 pound max gross trailer weight rating, which is the amount it's rated to pull.
You'll want to consult with the owner's manual of your WRX before you attempt to tow any trailers. If we are using this hitch for a non-trailer application, such as a bike rack or a cargo carrier, Curt does require the use of a stabilization strap to help support the load. We have those available on our website for purchase. What I really like about this hitch compared to others on the market is that we have plenty of clearance around our fascia, around the receiver opening and it doesn't stick out passed our fascia here. We don't have to worry about running our ankles or our shin into it when loading cargo into our trunk. Now for a few measurements to better assist you in choosing any hitch mounted accessories you may need such as a bike rack or cargo carrier, you're looking at about 10 inches from the ground to the top of the 1 1/4 receiver opening and about 3 inches from the center of the hitch pin hole to the rear most part of the back bumper. Now that we've gone over some features, we'll show you how to get it installed. In order to install our hitch, we need to lower our exhaust but in our case, our exhaust here, we can remove just the rear section by undoing 2 nuts that hold the mufflers in place.
This will be the easiest way of doing this. It's less hangers we have to remove and we'll have a great access here with this out of the way. Okay these are 14 millimeter nuts. We'll use a wrench on the backside to hold the bolt in place, also a 14. We'll do the same on the other side.
Our vehicle has 2 exhaust hangers per muffler, one on the outside edge here towards the front of the car, and one on the inside edge towards the back. We'll lubricate these a little bit with some spray to help them slide off easier. We use a pry bar to pry them off. Now we'll take it down and set it aside. Once we have our muffler out of the way, we'll repeat the same process on the other side. All right with our mufflers removed, we have access to our heat shields. They are both held in place with 4, 10 millimeter bolts. Remove those. Now keep in mind everything we're doing on one side of the vehicle, we're repeating on the other side. On the back side of our heat shield we have an L for left and an R for right. There's this dimple right here. We'll use this dimple as a guide to drill a hole. Okay with that hole drilled, we can either use a pair of tin snips and cut out a 1 inch diameter hole or we can use a step bit. I'm going to use a step bit. Now that we have a nice round hole, it's nice a clean, be perfect for our hardware to go through. On each frame rail we have several plastic plugs. We need to remove the rear most 3. To do that just take a flathead screwdriver or a trim panel tool, come up underneath it, pop it on out. Our front most plug, we need to remove this one as well because this is our access hole that we're using. Now we need to enlarge our access hole here a little bit so our hardware will fit through it. You can use a file. I'm going to use a carbide grinding wheel here on our drill to enlarge it. To prevent any rust from occurring, we'll take some spray paint and spray paint around the hole that we enlarged. Now we'll take our pull wire, stick it in the back hole, feed it in until it comes out our access hole that we enlarged. Take our spacer block, stick it on the wire, stick it in the hole, screw on one of our carriage bolts, stick the bolt in and pull it on down through the hole. Now we'll go to our front hole here and repeat the same process. Now we can reinstall our middle plug here. We took it out just so we could see our hardware going through, making sure it wasn't getting snagged up anywhere. Our front one may be able to go back in, and it does so we'll put that one in too. Now we can reinstall our heat shield. It originally had 4 bolts but now it's only going to have 3 because we will not be using the one that goes in between the hardware for our hitch. Now, with an extra set of hands, we'll raise out hitch up into place and secure it with our flange nuts. Now we use a 3/4 inch socket and snug down our hardware. Now we'll torque all of our hardware to the amount specified in the instructions. Now we can reinstall our mufflers. That completes our look at and installation of the Curt Class 1 Trailer Hitch Receiver, part number C11408 on our 2017 Subaru WRX.
See what our Experts say about this CURT Trailer Hitch
Info for this part was:


At etrailer.com we provide the best information available about the products we sell. We take the quality of our information seriously so that you can get the right part the first time. Let us know if anything is missing or if you have any questions.


Thank you! Your comment has been submitted successfully. You should be able to view your question/comment here within a few days.
Error submitting comment. Please try again momentarily.