
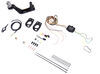
Perfect for light-duty towing, this custom, vehicle trailer hitch receiver features fully welded, gloss powder coated steel construction. Standard drawbar included.
Features:
Specs:
At etrailer.com we're committed to the products we sell, and to our customers. Our experienced and knowledgeable staff are available via both phone and email to address your questions and concerns for the lifetime of your hitch. The technicians at etrailer perform hitch installations on a daily basis, making them a valuable resource for do-it-yourselfers. The one-on-one, personal service you'll receive comes straight from an expert in the towing and automotive field. We've installed it, we've wired it and we've towed with it, so whatever your question, we can answer it.

Videos are provided as a guide only. Refer to manufacturer installation instructions and specs for complete information.
Speaker 1: Today on our 2014 BMW 4 Series, we're going to be taking a look at and showing you how to install the Class 1 Curt Trailer Hitch Receiver, part number C11367. This is what our hitch looks like when it's installed. As you can see, the cross tube is completely hidden behind the bumper. It gives it a nice, sleek style. It's going to be a class 1. It's going to be 1-1/4" by 1-1/4".
It's going to have a 1/2" hitch pinhole. It had a nice ring style safety loop, which gives you plenty of room for different sized safety chains. It's nice and well hidden back under your bumper. You don't have to worry about hitting your legs on it. It's got a reinforced collar for extra stability.
It's going to give you great clearance for multiple bike racks. However, Curt does require the use of stabilization straps for all non-trailer loads.And it's going to have a 200 pound max tongue weight, which is the downward pressure on the inside of the receiver tube. It's going to have a 2,000 pound max trailer weight, which is the trailer plus the load included. Now I do recommend checking your owner's manual to make sure your vehicle can withstand that amount of weight. And you're going to want to pick the lowest between the hitch and the vehicle.
Now we're going to give you a couple of measurements to help you in deciding on any hitch products accessories you may need, such as a bike rack or cargo carrier. From the center of the hitch pinhole to the outer most part of the bumper will be about 3". From the ground to the top innermost part of the receiver tube will be about 11".Now it's a good idea to get a raised shank for better ground clearance. Now I'll show you how to get this installed. First thing we need to do to begin our installation is we need to remove our tail lights.
So we'll come inside the trunk here, take a flathead screwdriver and we'll just unscrew this plastic clip here to gain access to those two bolts. We're going to be using 10 millimeter socket. Next, what we're going to do is we're just going to pull straight back on the tail light. if you look down here on this wire, it's clipped around that plastic clip. Go ahead and pull that out. We're going to push down to release the wire. And we're going to repeat that on the other side of the vehicle.Next, we're going to remove our splash guards. We're going to be using a 10 millimeter socket here on this bolt. We're going to use an eight millimeter socket for these three and then two inside the wheel well. Now here on the driver's side, you're going to have a wire, so we're just going to pop this out and we're just going to twist them to pry the clips out. And you're going to repeat that same process on the other side. You're just not going to have the wire. Next, we're going to remove these three bolts here that are under our back of the bumper fascia. We'll be using 10 millimeter socket. Next thing we're going to do is right here on the inside of the wheel well, we're going to have two eight millimeter bolts.Right up here at the top of the wheel well, we're going to have a third eight millimeter bolt. We're going to repeat that on the other side. Next we're going to take out our wheel well liner, we're just going to kind of fold it back, put it behind our tire to get it out of the way. And we're going to take a T20 Torx bit and we're going to remove this bolt right here. Next, we're going to remove this bolt right here. We're going to be using a 10 millimeter socket. With an extra set of hands, go ahead and remove the bumper fascia. We're just going to pull out on it. Now you don't want to pull out too far. You're going to have sensor wires in here so you're going to have to unplug those.We're just going to push down on this little tab here and pull out. We're going to have four of these across the back of the bumper. Next, we're going to remove our bumper beam. We're going to have a bolt on top and a bolt on bottom. It's going to be on both sides of the vehicle. Before removing this, you want to make sure you don't have any wires connected to it. We're going to be using an 18 millimeter socket and then we're going to repeat that on the other side. Go ahead and set our bumper beam aside. Next, we'll go ahead and set our hitch into place. And then reinstall our bumper beam. And then reinstall the same hardware we just took off. Next, we'll go ahead and tighten everything down.Next, we're going to torque our nuts down to the specifications in the instructions. Now with an extra set of hands, we'll reinstall our bumper fascia. We need to make sure we plug our sensor wires back in. Now that we have our bumper fascia back on, we can reinstall all of our hardware in reverse order from the way we took it off. And that'll do it for the Class 1 Curt Trailer Hitch Receiver, part number C11367 on 2014 BMW 4 Series.
Info for this part was:
At etrailer.com we provide the best information available about the products we sell. We take the quality of our information seriously so that you can get the right part the first time. Let us know if anything is missing or if you have any questions.


Thank you! Your comment has been submitted successfully. You should be able to view your question/comment here within a few days.
Error submitting comment. Please try again momentarily.