
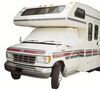
To see if this custom-fit item will work for you please tell us what vehicle you'll use it with.


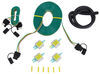
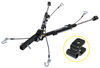
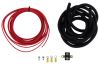
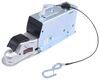
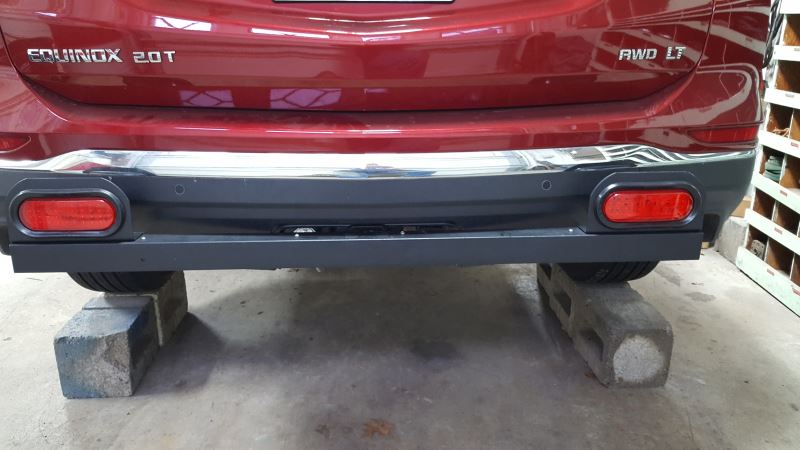
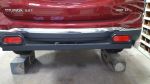
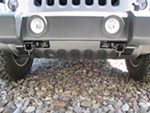
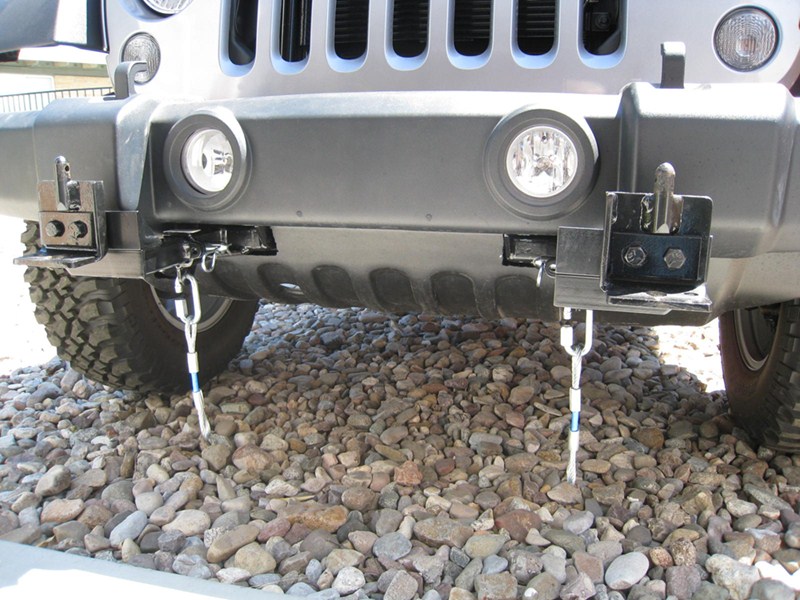
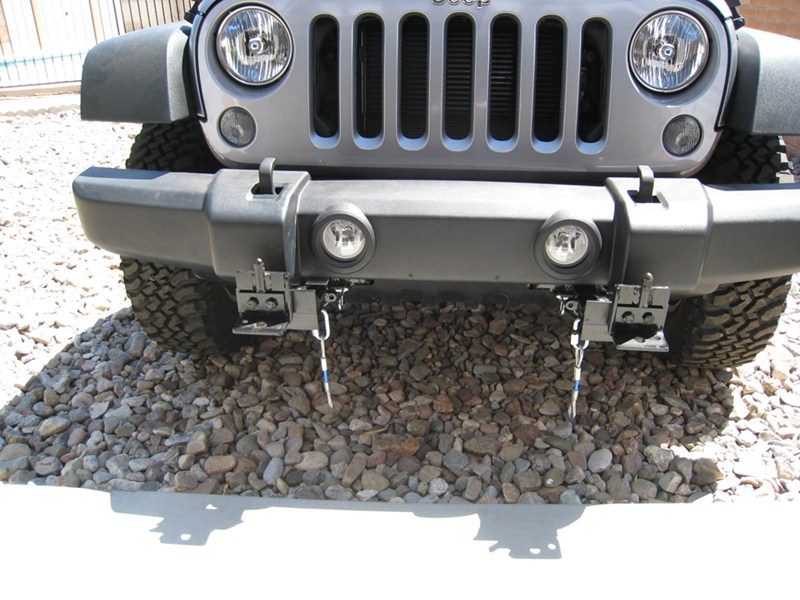
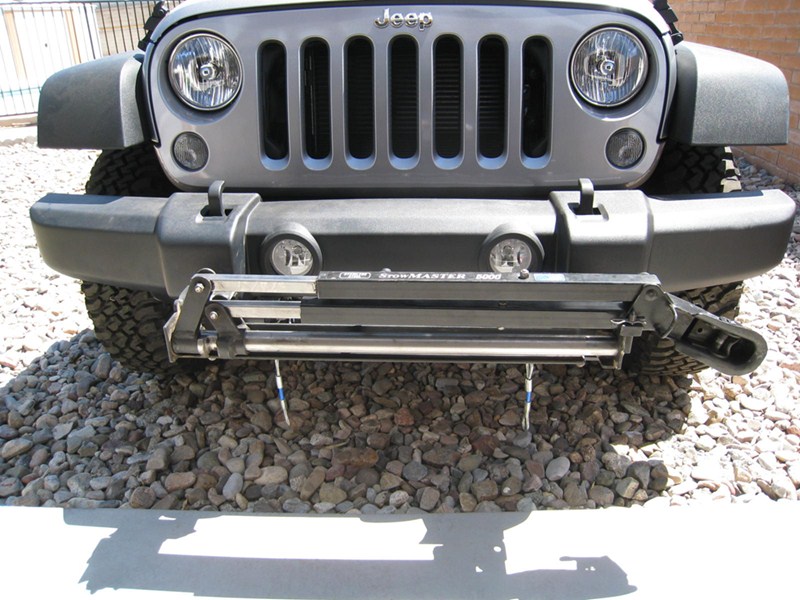
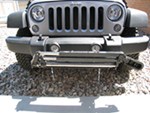
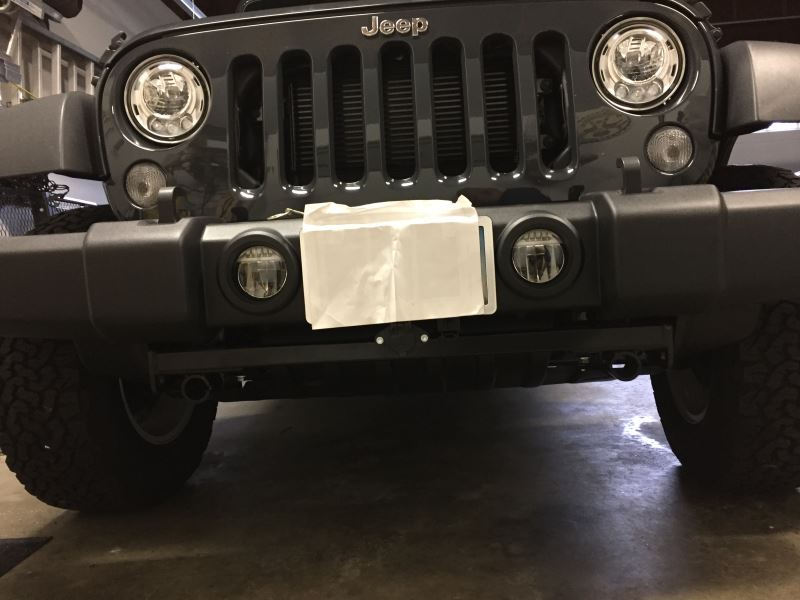
Roadmaster's crossbar-style brackets are virtually invisible, easy to mount and simple to remove. Brackets install on your vehicle's frame to provide attachment points for your tow bar.
Features:
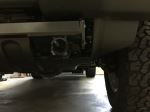
The drawbars, or front arms, on the crossbar-style series base plate kit are supremely easy to mount and remove. Just insert them into the brackets and twist to lock them in place. To remove, simply twist the arms back and pull them out. Once the drawbars have been removed, the remaining brackets are virtually invisible. On most automobiles, the brackets are mounted within the grille, where they remain not only unseen, but protected from scrapes and scuffs, as well.

Videos are provided as a guide only. Refer to manufacturer installation instructions and specs for complete information.
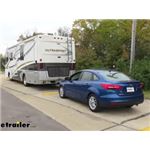
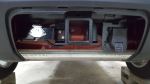
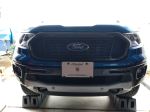
Today on our 2018 Ford Focus we're gonna be taking a look at, I'm gonna show you how to install the Roadmaster EZ4 Base Plate Kit with removable arms, part number RM-524443-4.This is what our base plate looks like when it's installed. It's gonna be one of five main components in a flat tow setup. The other four are gonna be your safety cables, your tow bar, your wiring, and your braking system.Your base plate's gonna give you a solid connection point between your RV and your Ford to safely flat tow your vehicle.Our base plate's gonna be compatible with quick disconnects and all Roadmaster tow bars.It is gonna come with removable arms. Simply pull the spring loaded pin, twist, and remove. When not in use, maintains a nice clean look on the front of the vehicle. When you're ready to use it, the pin is gonna go on the notched side, so you know which side you have the correct way.
You're gonna push it against the base plate, twist it so it locks into place.Base plate does come with a quick disconnect bar. Simply drops into place. And it's gonna come with two snap rings to hold it in place. Simply slide the arm to the inside of the bracket, line up the holes, slide your pin through, snap the ring over.These are gonna be our safety cable hook-ups. Make for easy connection.It's also gonna have two rods to attach our six-volt plug for our diode wiring.As far as the instillation goes, it is time consuming.
Front fascia does have to come off. And there's quite a few parts that have to be installed. Other than that, it's pretty straightforward. You will have to drill a few holes, but there is no welding required. It will come with all the necessarily parts.First thing we need to do to start our installation is we're gonna be removing our fascia.
To start that, we're gonna remove a couple of push-pin fasteners and some T-30 torques head screws up here on the top side under the hood. For a push-in, you can use a flat head screwdriver. I'm gonna use a trim panel tool. We'll pull out the center. If it separates, no big deal.
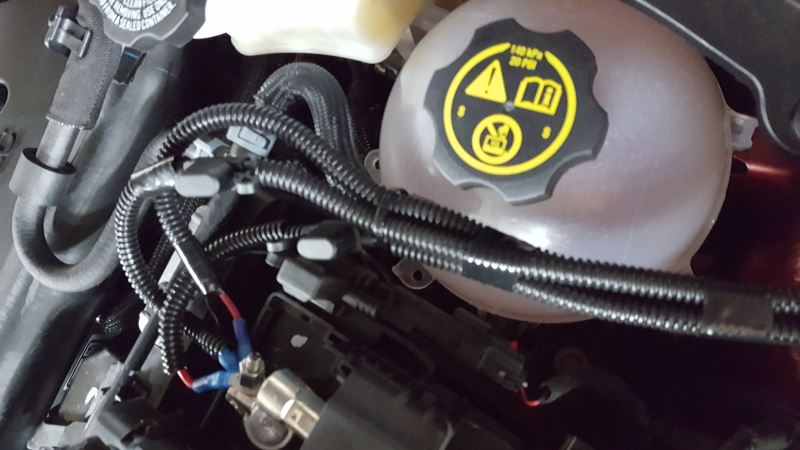
Just make sure you pull out the base with it. You can always put the two back together. We're gonna have a second one on this side.Take a T-30 torques bit, we're gonna have one bolt here. We're actually gonna have one on driver's side and passenger's side. Going to remove those. We're gonna have a black one here in the center.We're gonna have a torques head bolt on each side, right next to our stop here.Next thing we're gonna do, is we need to remove the headlights. We're gonna have two T-30 torques bits, or torques head screws. One on the lower side of the light, and one on the upper side of the light. Go ahead and remove those. We'll disconnect the lights, and we'll set our lights aside.You're gonna have a little tab here. What you're gonna do is you're gonna pull up on it, like this, and slide it off. And we'll set the light aside.Now we're gonna repeat this same process on the other light.Next we're gonna take T-27 torques bit, we're gonna have a torques head bolt here, torques head bolt here, and we'll take our trim panel tool or screwdriver, and we're gonna have a plastic fastener we need to remove here. We're gonna do that on both sides of the vehicle.Underneath the vehicle, or underneath our front fascia, we're gonna have some plastic push-pin fasteners. We're gonna have three on our driver's side and three on our passenger's side. We'll just remove those the same way we did the ones from the top.Next we wanna pry our hook latch cable out of the holder. Like that. And we're gonna remove the cable.Now with an extra set of hands, we're gonna pull our fascia off. We're gonna start from the outside and work our way in. There's gonna be a little tab here down underneath where your headlight was. Make sure you pull up on that as you start pulling it off. And we'll set our fascia aside somewhere safe.We'll take our T-30 torques bit. We're gonna have two screws holding this underliner here to our splash guard. Go ahead and remove those, and you're gonna have two on the passenger side of the vehicle also.Next, we have two options here. This lower inaudible 00:05:27 air dam here, you can either cut out the big notch here, or big opening here, and then cut these out. Or there's two T-30 torques bit, or screws. There's one here, and there's one here. We can just remove the whole thing, which is what I'm gonna do.If you decide to cut it, just follow directions on what lines to cut it on.All you're gonna do is you're gonna slide this little tab to the center, and you're just gonna push down on the backside to release it.And we'll take our T-30 torques bit. We're gonna have torques head bolt on this bottom liner, right here towards the lower side of the engine compartment. We'll have one on each side. Then we'll remove our liner, and set it aside.Next, on our passenger side, we're gonna remove our washer bottle. 10 millimeter socket, we're gonna have a bolt here, we're gonna have a bolt on the backside. You may need to use a swivel to get this one, because our fender liner does not go in far enough. We're gonna go ahead and unplug our wiring, because we are gonna be removing this all the way. One on here. That one right back here.Once you take the bolts out of your washer bottle, then the directions are gonna tell you, "Take it off, dump it out, and refill it later," to move it away from the frame. What I did is the filler neck will actually come off right here. I dropped the bottle down, left it connected, and just raised it up, you can see how I have it here, and just ran a zip tie to just hold it in place.Next, we're gonna take a 10 millimeter socket on our passenger side, we're gonna remove the horn. Some vehicle models may have a horn on the driver's side, it also needs to be removed.Take the bolt out. We'll slide the horn off.On the passenger side only, this tab here that we had our washer bottle mounted to, we need to take that and we need to fold it down flat. I'm just gonna use some channel locks.They actually tell you to cut out a circle here with a hole saw bit. These frames are pretty strong, so use a Dremel tool with a cutting blade, is what I'm gonna use. And I'm actually just gonna cut a square. What we're trying to do is open a hole to the center of our frame rail, because we're gonna have to put in some handle nuts to get to our bolts. So again, you see how I have marked out here. We're gonna go ahead and cut that out.Once you have them cut out, we're gonna take some Rustoleum paint, cover up that bare metal to resist any rust or corrosion later on down the road.On our driver's side, we need to disconnect the fastener holding on a wire loom to the side of our frame rail. We'll just use our trim panel tool, and we'll pop it out.Next we're gonna take our brace here, on the driver's side. How you know you have the right one, these three holes are gonna be on the outside of the frame rail, and this angle is gonna face towards the back. So it's actually gonna . and it should line up with the three holes.We're gonna take our 3/8 by 1 1/4 bolts, and we're gonna temporarily slide them in the outermost holes, then we're gonna take a third one and we'll put Red Loctite, we wanna make sure we're using Red Loctite on all of our hardware. We're gonna put on a lock washer, we're gonna slide this into the center hole. And we're gonna take the nut plate, we're gonna go through the hole in the frame that we cut. We're gonna line it up with that center bolt. And we'll thread on that backing plate. Then we'll go ahead and remove these two that we had temporarily, make sure you have a lock washer on. Go ahead and put your Loctite on. And you're just gonna repeat the same thing with the next two bolts.Next we're gonna take this plate, this nut plate, you can see how it's offset, and we're gonna slide it into the hole. And there's a hole right down inside in the bottom of our brace. And it's right over on this side. We're gonna line up the hole. We're gonna take a half inch bolt and bolt up through that brace. Take your half inch bolt, lock washer, make sure you put Loctite on it. We're gonna go up through the hole.Next on each side, what we're gonna do is we're gonna trim, you can see where I have the line. We're gonna trim the bottom part of this shock absorber off. We'll just use a Dremel tool with a cutting blade.Take an 8 millimeter socket. We're gonna remove our computer box. We're gonna have three bolts: one here, you're gonna have one on the backside, straight back here, and the other one's gonna be up here on top. There is a T-30 torques bit holding the liner in right here. You may have to remove that to get to the bolt, which is back up in here.And we're just gonna take it, and we're gonna set it down just like this. Make sure it's out of the way so it doesn't get damaged.Next we'll remove our wiring harness from the top of our frame rail. Right here. We'll take this bracket here. You'll know you have the right one, this side here is gonna be on the outside of the frame rail. And we're gonna set it in place just like this.The hole that we just pulled our wiring out, we're gonna take a half inch drill bit and we're gonna enlarge that.We'll take a 1/2 inch by 1 1/2 inch bolt, black washer, we're gonna go down through the hole like that. Then we'll put our half inch backing plate on.Now we'll take our half inch drill bit and drill out this back hole here. I'm gonna use a half inch to start it, just to give me the indention, then I'm gonna use a smaller drill bit to drill a pilot hole. It'll make this big one go in a lot quicker.Once you have your hole drilled, you're gonna take your half inch by two inch bolt. You're gonna have a pipe space, you're actually gonna have three pipe spacers. You're gonna have two of them that are the same size, one that's a little bit smaller. We're gonna use one of the two larger ones. Pipe spacer's gonna go in between this bracket and the hole. Bolt's gonna go down through like that.Then we'll take our handle nut through the hole that we cut in the front. And line it up with the bolt. And we'll thread the nut plate or the bolt into the nut plate.Once you're done with one side, you're gonna repeat the process on the other side, with the exception of removing the computer box. That is only gonna be on the driver's side.Next we'll take a half inch bolt, lock washer, we're gonna raise our main receiver brace up behind our side brackets. We're gonna run our bolt through our top hole. And we'll put a nut on the back.On our passenger side, our washer bottle bolted here, this hole in front of it, we're gonna enlarge it to a half inch. Then we'll take the lower brace, gonna make sure that this is facing in, this part is going up towards the bottom of the frame rail. How you'll know you'll have the right, correct side. We'll take our half inch by two inch bolt, black washer, we're gonna go through our side brace, through our lower bracket, and through our main receiver brace. Gonna put a nut on the back.This clip right here in the back, we're gonna remove that.Next, we're gonna line our hole up. Hold this firmly against the pinch weld. And we're gonna drill a half inch hole in our front hole here. We'll use that as our guide, and we're gonna do the same thing here. Start out with a half inch, that'll mark my spot, and then I'll go to a smaller drill bit to use it as a pilot hole.Next we're gonna take this backing plate. You see how the holes are offset They're gonna match the holes on this lower bracket. It's gonna go up behind that pinch weld. We're gonna have a long bolt like this. We're gonna put a flat washer on it. Come in from the inside of our pinch weld, then we're gonna go through this very most rear hole. Put a flat washer on front, follow that with a nut.The forward hole. Half inch by 1 1/2 inch. We're gonna go through from the outside in. Make sure you have your lock washer on it. Make sure you also go through that plate, and then we're gonna put a nut on it.The only difference between our driver's side and our passenger's side is that our passenger's side, this rear most hole, we're gonna put the smaller pipe spacer followed with a flat washer, and then a nut.Next we're gonna go around and tighten all of our hardware.Once you have all your hardware tightened, you're gonna go back through and torque everything to the specifications in the instructions.Then your handles here, you're gonna need to cut them off, bend them out of the way. I'm gonna take my Dremel tool and I'm actually gonna cut them off flush with the frame.Next, our 8 millimeter bolt, we're gonna reinstall our computer box. We're gonna take this nut off, slide our computer box back up, and we're actually gonna go through . run our bolt through it. Once you get your back nut on, just replace the other two 10 millimeter bolts.And then on our passenger side we're gonna mount our horn. It's gonna mount right here in this hole. Just like that. What we might have to do, is this tab actually folds up. This is too thick, this bottom bracket is too thick, so you might have to fold that down to get the holes to line up. You're gonna have a bolt, nut and the washer in your kit. And then washer on, and then inaudible 00:18:28. Take an 11 millimeter socket and wrench, and tighten into place.Next we're gonna remount our washer bottle. First, this nut here on the back side, we're gonna take it off. We're gonna take out this fender washer and leave the pipe spacer installed. Turn this back down here. We'll reinstall our fender washer, and then reinstall the nut.Before reinstalling your fascia, it's a good idea if you're putting a braking system in or wiring the wiring it, it's a good idea to go ahead an do that now because it's a lot easier to run your wires up here to the front of the vehicle with the fascia off.You're gonna have some trimming that's gonna be required here on the front, on the fascia. It's a good idea to do all that at one time.Once you get that done, then you're gonna reinstall the fascia in reverse order from the way you took it off.Now you can see here, I've already cut the fascia out. How you're gonna do that is, how I did it is I just slid it into place. I put one bolt right in the top, and I took some side cutters, this plastic's pretty easy to cut. Just took some side cutters and just started cutting around it. That way I can keep everything as close as possible, and it looks as neat as possible.That'll do it for a look at installation on the Roadmaster EZ4 Base Plate Kit with removable arms, part number RM-524443-4 on our 2018 Ford Focus.
Average Customer Rating: 4.8 out of 5 stars (886 Customer Reviews)
Roadmaster's crossbar-style brackets are virtually invisible, easy to mount and simple to remove. Brackets install on your vehicle's frame to provide attachment points for your tow bar.
Installed it myself on a 2017 Ford Focus. Watched a few videos on how to pull front bumper and install mount. The hardest part was making the holes in the steel front bumper. I like the fact I can remove the outside mounts that the hitch mounts to. I’ve pulled the car about 5,000 miles behind the rv with no problems.
THE PRODUCT WAS AS ADVERISED. THE FIT WAS GOOD AND THE INSTRUCTIONS WERE FIRLY THOUROUGH. I INSTALLED THE BASEPLATE MYSELF, ALTHOUGH I AM A BODY SHOP OWNER OF NEARLY 40 YERARS AND HAD EVERYTHING NEEDE TO DO THE INSTALL IT WAS STRIGHT FORWARD.
The base plate came with all the required parts to due the installation. It took me 3 days to complete the installation, but is only because I was working outside and didn't have a lift to get the car up in the air to make it easier to work on. Net thing for me to hook it up to the house and going on the road.
Great job by Greg and team getting me the right equipment in a timely manner. Thank you Etrailer!!
Works as advertised!
rec. in good condition. have installed by dealer in sept
This was a straightforward install. The instructions were easy to understand and follow. All the necessary parts and hardware were included. It is pretty well hidden once installed. I highly recommend this base plate and etrailer.
great fit. a slight cut needed to be made in the bumper bracket to facilitate the round tube to fit through the bracket. but, other than that, it was an easy install took about 2 hours if you include the coffee brakes. this part is highly recommended. Fast shipping. the beast human service. thank you.
Had Base Plate installed today, shop gave me 2.5 hr labor time. I returned just under 2hrs and they were backing my car out the shop. They parked it facing me. I told the Mechanic "That was quick" He said that's because it wouldn't fit. I was disappointed and asked what do I owe you for your labor> He laughed out loud and said it on there, but hard to see. I was so surprised and pleased you have to just about get down on your knees and bend down to see it. took me about 8 min to install everything and connect it to the Tow vehicle. I'm very pleased with it.
Working great on my Fiat 500l with the automatic euro transmission. Towed over 10000 miles and was easily installed using etrailer video instructions. Yes you can tow a Fiat 500 with the automatic euro transmission. The firmware was flashed on a recall and revised in the manual. Most dealers don’t even bother checking for the latest version.
5 hours into install. Not the kits problem as I am using a ratchet, don't have an impact wrench. Biggest problem I had was nuts that went up into the frame. Very frustrating. Not sure why couldn't use a long bolt and go straight through to the hole on the other side. Instructions for the cut on the plastic skid plate are a little vague as is the video. All in all, pretty smooth install.
Ordered Product on Saturday afternoon, delivered on Wednesday, Installed on Friday. My 23 Wrangler Sahara 4Xe did take the spacer and washer on each side of the frame and was no problem getting them to fit. The lower passenger outside nut that holds on the bumper will not tighten down all the way, the flange of the factory nut gets caught in a slot in the base plate on that side. Will look into a standard nut to see if that will work - it is tight against the slot and holding.
Works perfect and very hidden. Cannot even tell it is on my Honda HRV. Installation was time consuming since this was my first on a Honda. Your video did make things go smooth. I would buy this item again.
So far has performed very well. Was easy to install and hookup is pretty quick and easy. You install instructions were very thorough. Practically invisible when not in use. Tried to attach two pics, but would only take one.
As always roadmaster went above and beyond on construction. Super solid installation. I mean the only thing I wish roadmaster would make custom steal brushgaurds that you can adapt there amazing towbar too.
Super-cool. It's been a year. I installed it myself and it was way less of a task than I expected. The fitment of this was incredibly spot on (no "tweaking" or drilling). Performance wise . . . it does what you expect. You insert the removable "arms", clip in onto your tow bar, and when you get to your destination the vehicle is still attached to your tow bar. Quality product.
I’m always extremely satisfied with Roadmaster products. I had just bought a new truck and planned on towing it so I needed everything to get it ready to tow. This review also applies to to the other items I purchased.
The Jeep project went very well everything fit great and worked well. I really love Roadmaster products and quality and your company is the best place to purchase them. I sold the Jeep and replaced it with a new 2019 Chevy Equinox 2.0 L AWD and just purchased and installed the following items from you and installed them, RM-156-25 & RM-156-75 Battery Charge Line Kit, RM-146-7 Flex Coil Kit, RM-523193-4 EZ4 Plate Kit, RM-88333 Custom Seat Adapter, RM-751489 Stop Light Switch Kit and a RM-98160 Second Vehicle Brake Kit w/brakeaway. All these parts were in stock and arrived quickly and normal with you people, I really enjoy the o-line vidios as I do all my own installs. Thank you so much for your great service.
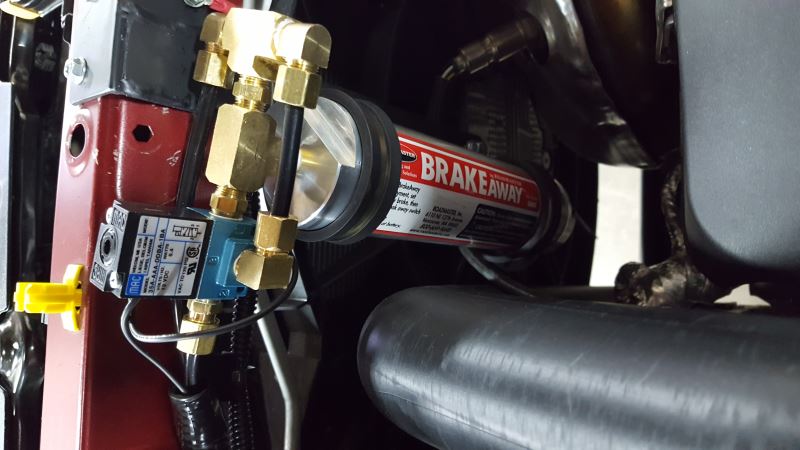
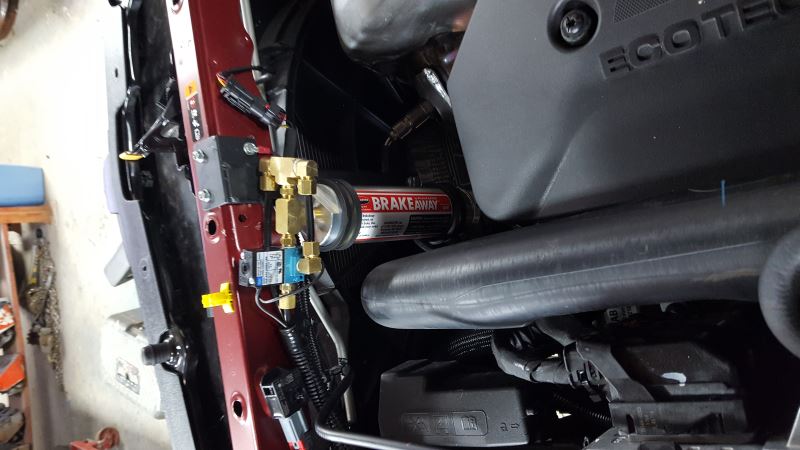
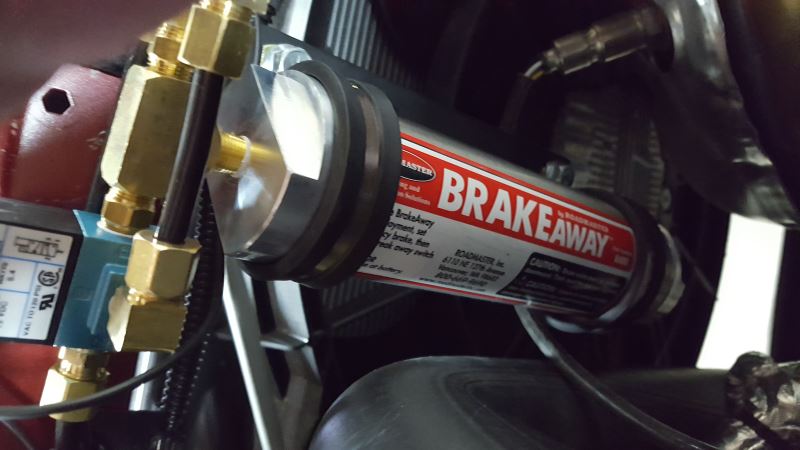
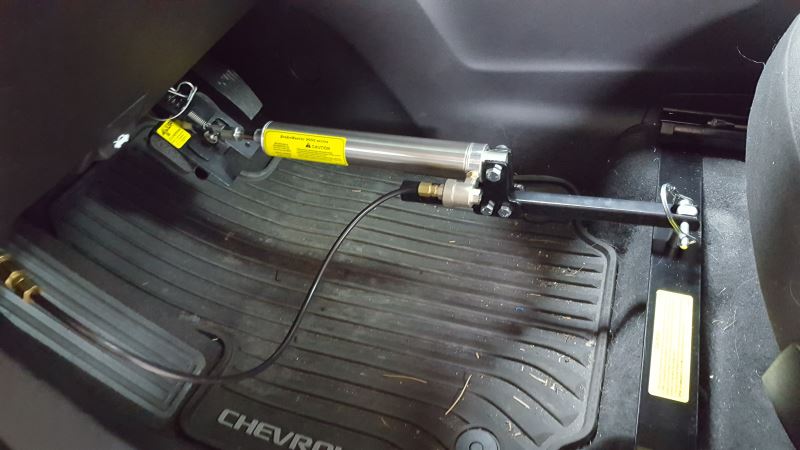
I will attach pictures of my install, you will see how I was able to fab a bracket and attach it to the existing mount on the base plate to mount the brakeaway switch and the air connection for the brake system.
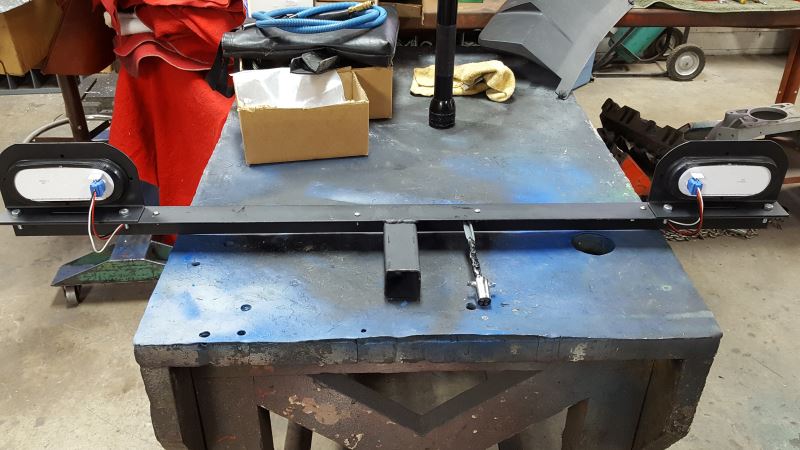
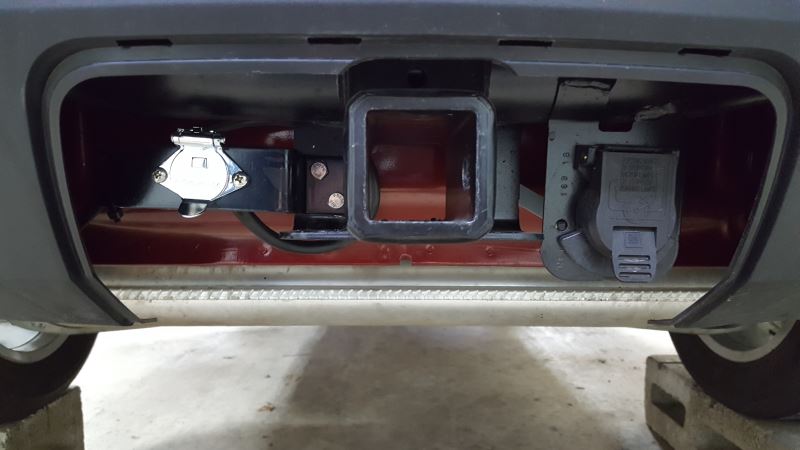
I also fabricated a tail light bar as I didn't want to use mag-lights or splice into the factory lights and bulbs installed into the lights would not work as the factory brake lights will come on when the brake system is applyed and the turn siginals would not be visable.
Thanks for all you do, I would and do recommend you people to everyone who needs your products. Rob
I installed this kit on my 2015 Honda Fit. The instructions are very good, however, there are a couple of "snags" to watch out for. You might have to enlarge the holes on the blind hole part of the bumper installation in order to get all of the mounting bolts to align. The other recommendation I have is NOT to use the Loctite "red" thread compound on the blind hole bolts where you cannot get a wrench on the inside. The Loctite will dry too fast and cause issues tightening the bolts on those areas. They have lock washers anyways and you can use the Loctite on the bolts you can get a wrench on the backing nut mounts. I have been towing for months now and I am very happy with it, especially the crossbar style. You will have to purchase the crossbar separately. It's more weight and a little clunky compared to the direct attachment but it allows you to disconnect in some tough situations by pulling the crossbar off while one arm of the tow hitch is still attached. I use an Falcon All Terrain tow bar so I can release the tow arms in uneven conditions. And I have encountered all types of uneven ground, it really makes disconnect of the TOAD very easy.
Good fit, works well. Very happy with the base plate after 1st year of use.
etrailer staff was very helpful with my questions, making certain I got the base plate that was right and advice with minor problems I had with installation.
Great product for my 2014 Wrangler. Good materials, solid attachment to vehicle, and looks good. The e trailer installation video was great for assisting installation. Made the install much quicker and easier. The most difficult procedure for me was disconnecting the wiring harness on the back of the bumper. An old tack puller (or tool of similar design) would have been great for leveraging the pins out of their holes. Cutting the air dam was a slow process to ensure I didn't cut too much. A paper template to mark where to cut the air dam would make this process much simpler. Again, I can't emphasize enough how great the installation video was for making the steps easier.
etrailer service was great. Received my Roadmaster base plate in 3 days. The directions from Roadmaster were fair, but etrailer's video was excellent. I had trouble mounting my base plate as the space between the two baseplate ends were too tight. I needed to use a floor jack and bottle jack to get it on. Once it was in position everything went together fine. I trimmed the Jeep' air dam differently keeping the ends that Roadmaster wants you to cut off. I think it looks better. I also had to modify the center cut in the air dam to accommodate the breakaway switch I have.
Followed directions and completed job in a little over 4 hours. had trouble reinserting some pins in difficult locations.
Later in the month I installed the wiring tow package. Goofed up and crossed a wire and it took me two days to get back under the truck and rewire. all is working great according to directions...…….
I will use etrailer again, good service, great service representatives...……..jt
2019 Ford Fusion Energi. A lot more trimming required on the facia than noted in the instructions, but I'll chalk that up to running changes I suppose. I used a combination of a Sawzall with a fine blade and a Dremel tool, both worked well. In the end, it took me about 8 hours (over two days) to install, and had it's challenges. I had to do some pulling and tweaking to get holes to line up, and the already mentioned extensive trimming of the facia. Overall well designed product, and of course etrailer was excellent in shipping.
Side note, adaptive cruise control is not affected when the drawbars are removed. With the bars in and the towbar mounted (it's a Stowmaster car mounted bar) the cruise control works just fine as an old fashioned CC, the adaptive part just doesn't work (it won't slow down for you when a slow car is in front, because it can't see around the tow bar). Basically perfect and what I was hoping would happen.
Do you have a question about this Tow Bar Base Plate?
Info for this part was:
At etrailer.com we provide the best information available about the products we sell. We take the quality of our information seriously so that you can get the right part the first time. Let us know if anything is missing or if you have any questions.


Thank you! Your comment has been submitted successfully. You should be able to view your question/comment here within a few days.
Error submitting comment. Please try again momentarily.