
Short Strap Fit Kit with Locks for Rhino-Rack Vortex StealthBar - 8" Long - Qty 4
(2 reviews)
Price: $69.63
In Stock
Short Strap Fit Kit with Locks for Rhino-Rack Vortex StealthBar - 8" Long - Qty 4
Item # RRRSK01
Retail:$84.20
Our Price: $69.63
You Save: 17%
In Stock


Need help with installation?
Locate installers near me- All Info
- Reviews (2)
- Q & A (0)
- Videos (1)
- Photos
Rhino Rack Roof Rack - RRRSK01
- Fit Kits
- Rhino Rack
- 4 Pack
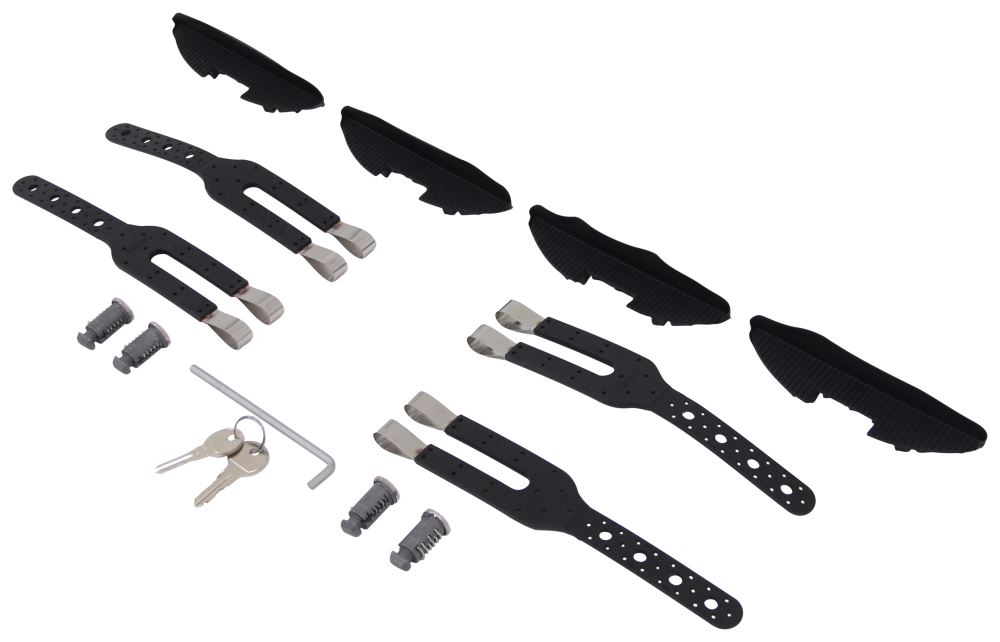
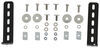
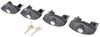
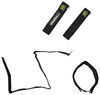
This kit includes everything you need to mount and secure your Rhino-Rack StealthBar roof rack to your vehicle. 4 Long, rubber-coated stainless steel straps mount crossbars to your raised, factory side rails. 4 Locks secure crossbars to your roof.
Features:
- Fit kit lets you mount a Rhino-Rack Vortex StealthBar roof rack to your vehicle's raised, factory side rails
- 4 Rubber-coated stainless steel straps wrap completely around raised roof rails
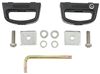
- Allen keys secure straps to StealthBar legs
- 4 Keyed-alike lock cores secure crossbars to your vehicle's roof and channel-mounted carriers to crossbars
- 2 Keys included
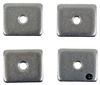
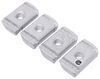
- 4 Gaskets attach to Stealthbar legs and protect your side rails from scratches and abrasions
Specs:
- Strap length: 7-11/16"
- 5-Year limited warranty
RSK01 Rhino-Rack Vortex StealthBar Hardware Kit - 8" Long - Qty 4
Installation Details Alternate Instructions


Video of Short Strap Fit Kit with Locks for Rhino-Rack Vortex StealthBar - 8" Long - Qty 4


Videos are provided as a guide only. Refer to manufacturer installation instructions and specs for complete information.

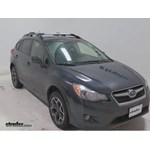
Video Transcript for Rhino-Rack Vortex StealthBar Roof Rack Review JA7954
Today we're going to be reviewing the Rhino-Rack Silver Vortex StealthBar Roof Rack, part number JA7954. This is also available in black, as part number JA7973. The Rhino-Rock StealthBar Roof Rack System is a great addition to your vehicle. It grips on to the raised side rails of your vehicle, and it gives a nice sleek look, and actually looks like part of the car. The StealthBar sheath actually sit in between the two rails, giving it more that factory look, as opposed to sitting on top of them. The aerodynamic shape of the bar, plus the vortex strip, which actually extends out to the foot here, will give you that reduced wind noise and drag. The StealthBar Roof Rack uses these rubber coated steel straps to hook onto your car. This ensures that your car won't get scratched or dented, or anything like that, while you're installing it. This roof rack comes with all the tools necessary to install it, and you can even take the allen tool and store it inside the roof rack itself, while you travel.
It also has a locking system here, to insure that, if you have anything set in your T track, you can secure it to your vehicle, as well as the roof rack itself is secured to your vehicle. With the feet themselves, there's actually almost four inches of play on either side, so if you have to move the crossbars further in, to make them narrow or longer to accommodate different accessories. This roof rack has an 176 pound weight capacity, although you should check your owner's manual to make sure that your car can handle that. It also has a limited lifetime warranty. Now that we've gone over some of the features of this roof rack, let's go ahead and show you how it goes together. The first step is, we're going to take this gasket here, and place it onto the end of our foot. It fits in like so, and just pops into place. This pad is actually going to be what rests on our raised factory roof rails. Our next step is we're actually going to flip the arms, or the crossbars, excuse me, right over, and just loosen this dome bolt here.
Don't take it out all the way, because it's kind of a pain to get back in. This will allow us to actually move the foot out, and adjust it when we put it onto our vehicle. With that done, we'll go ahead and flip the crossbars back over, get our T bolt out of the way, and remove this dome bolt all the way, so we can install our strap. We'll use our included allen key here, or allen tool, excuse me, remove our bolts, collect our washer. You'll see a gap right here, and that's where we're going to insert our strap. With each notch, there's a number to either side of it, and with the crossbar that we've already had installed on the front, we found that the fit we're looking for is three, or the third notch up. We'll go ahead and reinstall our washer and our bolt, and tighten it down.
Now we're ready to install our bar onto our vehicle. We'll set it on gently for now, getting everything in place, and get our placement of our feet where we need them to be, and then we'll tighten the feet down. When sliding the straps underneath, you want to be a little bit careful, because the steel tips here can possibly scratch your car. It's not so much a concern here, because the factory side rails are a little bit higher than normal, but if you want to avoid that you can put a paper towel, or maybe a washcloth down, or something, to kind of soften the metal here, and not make contact with your car. Sometimes the T bolt here can get in the way of making any adjustments. With our feet generally in place, we're actually going to go ahead and do our crossbar spread next, and then we'll tighten our feet down. That's going to be about 70 centimeters, from center to center. Now we can tighten those arms down, or those feet down, excuse me.
With our feet tightened down, now we'll go ahead and take the steel loops here, and put them around our T bolt. Now we can start tightening it down. We're going to go ahead and do this evenly on both sides, kind of get it snug first and then tighten it down. Use the included allen key, or allen tool, start in the middle of our T bolt, and start tightening it down. Our final step before we put the feet covers back onto the feet, we're actually going to install our lock core. To do that we take the key and our lock core. We insert the key and we place it into the core, and now we're ready to go. We'll go ahead and set these in place, and lock them down. It doesn't matter which way you put the locks. I'm actually going to put them facing towards the back, so no road dirt or grime is going to get into them while we're driving. Slide them in, make sure they're nice and secure, and then we'll go ahead and lock them into place, and our foot's secure. We'll repeat this for the other side. There you have it for the Rhino-Rack Vortex StealthBar Roof Rack, part number JA7954.
Customer Satisfaction Score:
73% were satisfied with this product
27% of customers were not satisfied
- Wrong item was ordered
Customer Reviews
Short Strap Fit Kit with Locks for Rhino-Rack Vortex StealthBar - 8" Long - Qty 4 - RRRSK01
Average Customer Rating: 5.0 out of 5 stars (2 Customer Reviews)
This kit includes everything you need to mount and secure your Rhino-Rack StealthBar roof rack to your vehicle. 4 Long, rubber-coated stainless steel straps mount crossbars to your raised, factory side rails. 4 Locks secure crossbars to your roof.by: Christy 10/09/2022
by: Vladislav10/07/2022
2
2
See what our Experts say about this Rhino Rack Roof Rack
- Roof Rack Options for Mounting the Thule Canyon XT on a 2018 Nissan ArmadaEven though we haven't test fit the Thule Canyon XT # TH7503-TH7503 on a 2018 Nissan Armada I am confident that it will fit just fine and I'm pretty sure you could even get away with using the extension piece! The answer to your next question is yes, the Lock Cylinders # TH450400 will work with the Canyon XT. This is demonstrated in the attached review video. I do have a solution for a roof rack but unfortunately Thule doesn't have a roof rack fit (like part # TH7503-TH7503 you mentioned)...
view full answer...
Info for this part was:

Edited by:
Tyler C

Video Edited:
Jacob T

Updated by:
Wilson B

Updated by:
Alex H

Written by:
Daron K
At etrailer.com we provide the best information available about the products we sell. We take the quality of our information seriously so that you can get the right part the first time. Let us know if anything is missing or if you have any questions.
Product Experts Available Now!
Call 1-800-940-8924
Thank you! Your comment has been submitted successfully. You should be able to view your question/comment here within a few days.
Error submitting comment. Please try again momentarily.