
To see if this custom-fit item will work for you please tell us what vehicle you'll use it with.
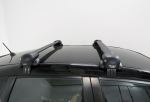
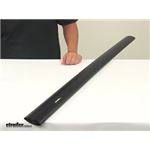
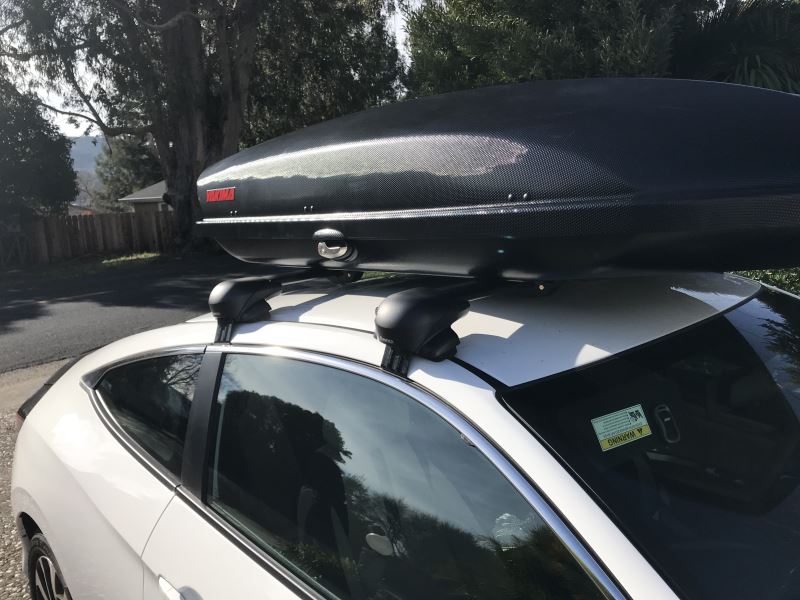
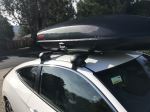
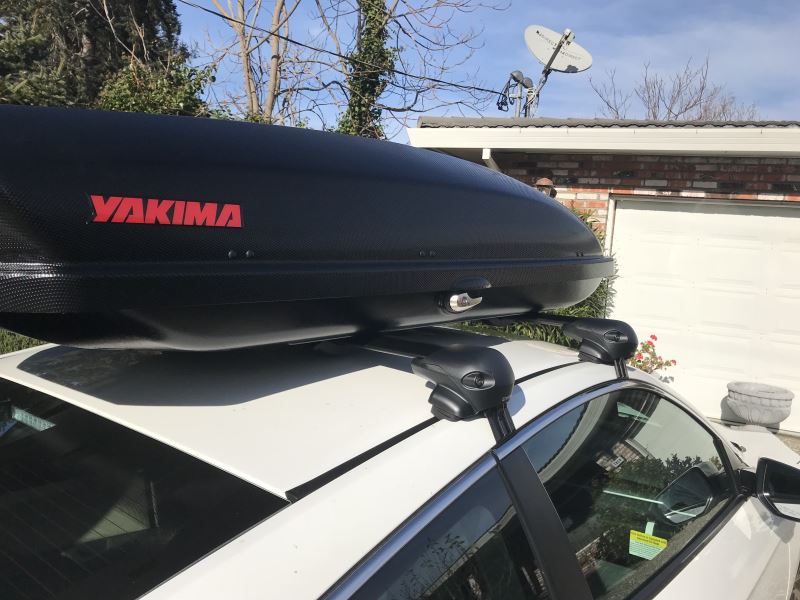
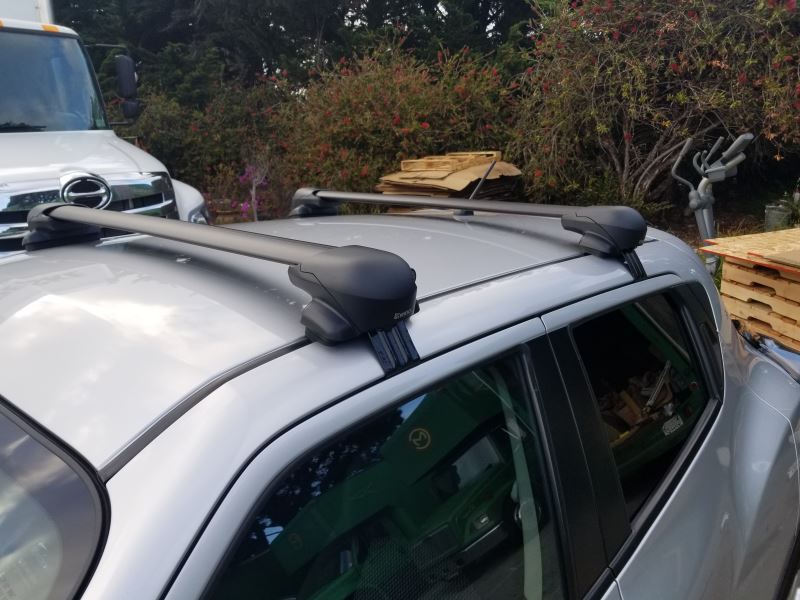
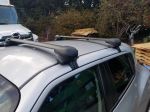
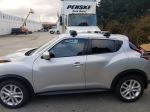
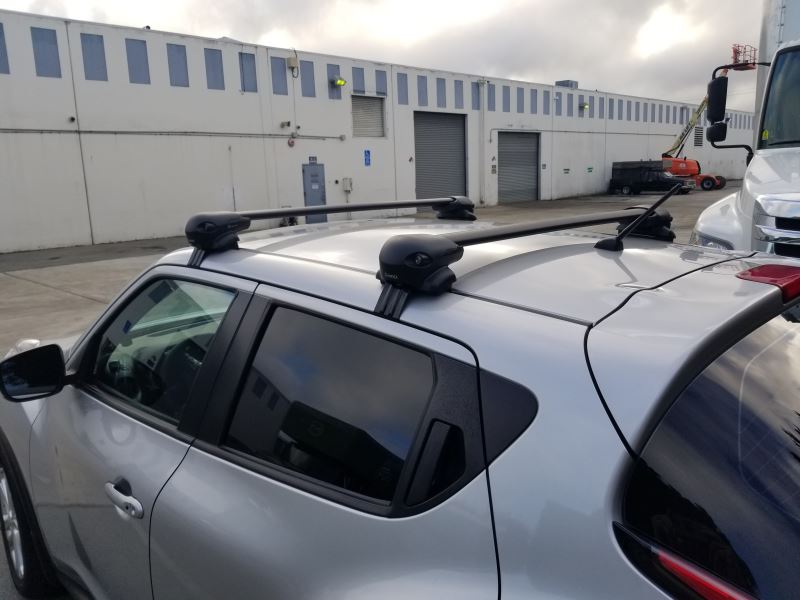
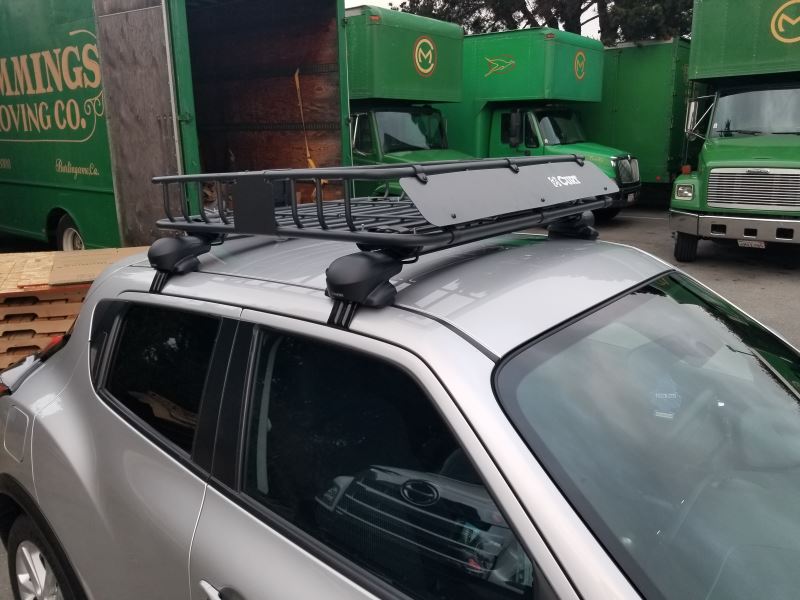
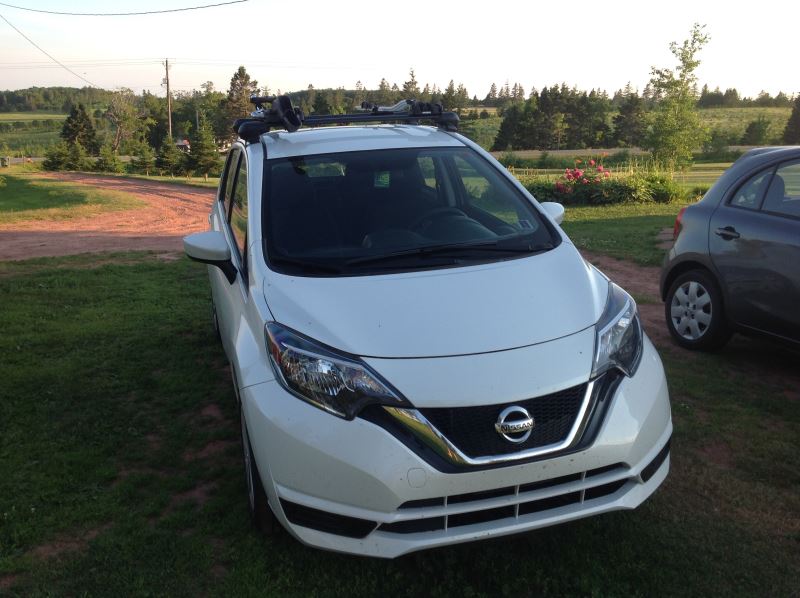
Low-profile, aerodynamic crossbars create an aftermarket roof rack for your vehicle. Aluminum bars have T-slots that let you mount channel-mounted carriers and accessories. Flexible rubber strips in T-slots keep out dirt and won't need trimming.
Features:
Inno Aero Aluminum Load Bars - 42" Long - Black - Qty 2:Videos are provided as a guide only. Refer to manufacturer installation instructions and specs for complete information.
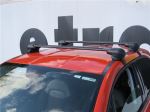
Speaker 1: Today on our 2015 Honda Accord, we're going to be test fitting the Inno Aero Roof Rack System, consisting of part numbers INXB115-2, these are the Inno Aero Crossbars, 45 inches long. We'll also be using the Inno Flush Feet System to hold those bars in place. That's going to be part number INXS200, and finally we have the Inno Fit Kit to attach it to our actual Accord here. That's going to be part number INK592.This is a great roof rack system that can carry a wide variety of accessories ranging from bike racks to cargo baskets, to cargo boxes. The shape of the bars themselves is aerodynamically shaped, so that's going to cut down the wind noise and drag while you drive, eliminate the need for any fairings that you might need for say square bars. Moving onto our end caps, they do come with a lock already installed, so once you have everything on your roof, it's going to be secured to it, and removing our end cap here, you can see that we have this rubber strip up at the top here.
That's actually, excuse me, that means you can utilize T track accessories with this. Instead of having to remove the strip, you can actually push down that center portion, so you can just push the T track accessories in place and not have to make any cuts at all.Everything is labeled as to which side it's supposed to go on, so that will avoid confusion. You can see how it attaches underneath the door frame here. Any place that makes contact with the vehicle, whether it be the clamp here, or the rubber pad on the bottom, it is going to help the vehicle from any scratches or abrasions once you're installing it.How we got our front bar into the position it's in now, we set it in place and measured from the center of the door jam to the center of the front bar on both sides, to make sure that it was even. Let's go ahead and show you how the rear bar goes into place.We already have it put together on our handy little table here.
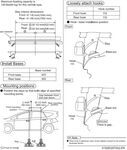
We have all the parts in front of you here that's going to come with the kit once you have it. First things first, we're going to flip the bar upside down, like you see here. It's going to make it a little bit easier to show you how to do this. We'll start getting things prepped.First, we'll take our bracket piece here, and we'll install it on the end of our bar. You can see that there's a little notch here.
Make sure that it fits in on the proper space up at the front, so then we'll push that in to this point here. Then we're going to take our flush foot, and this tab at the top here, will fit into this portion, and again, make sure it's on the right side, and it's going on the right portion. We'll push that out until it rests, and then we'll take our included Allen took here and go to the center, and we'll just loosely tighten that down, because you want to be able to move this back and forth, because we're going to have to measure the space in between our flush feet here in a second.We'll take our measuring tape, measure from one side to the other. We'll measure it out as prescribed in the instructions to where it needs to be, and then we'll tighten it down the rest of the way with our Allen tool. Next we'll take our fit kit and start installing it as well.
You can see how it fits in to the bottom here, and it just pushes into place like so. Then we'll take our clamp, this goes to the outside We'll loosen up our bolt here all the way. Loosely tighten that up, and now we can move on to our vehicle, and we'll set it in place.We'll start by opening up our two rear doors, and then we'll set the bars down. Now at first it doesn't matter where you set them because you're going to be measuring this out anyway, but when you do set these down, we're going to try to be a little careful here because we still don't want the bar coming down on the vehicle. Okay, so to measure the distance for the bar at the rear, we'll again measure from the center of the door jam to the center of the rear bar. You'll find this measurement in your instructions, which I wasn't too far off. How's that for a coincidence All right now to make sure that it's eve non both sides, it looks like we can come towards the passenger side just a little bit.All right, now we can start tightening things down. It does come with a tightening tool, and we'll just loosely, we'll just get it snug, say it that way, against the door frame here first, and then we'll tighten back and forth until we can hear two or three audible clicks from our tool. That lets us know that it's tightened down to it's specification, so we're not going to over-tighten it and possible damage the vehicle that way, or under-tighten it and have it not be safe when we install our accessories. Now when you do hear these clicks, a word to the wise, it sounds like you're breaking it, but I swear you're not.Some other accessories that you can put on these is anything from ski carriers, to ski and snow board carriers, and maybe kayak carriers if you're roof can take the weight that's on the top. Inno offers all of these and you can find them on etrailer.com. There we go.Next, we'll install our end caps. These just push into place, as you see. Now I'm also going to give you a couple of quick measurements, to give you an idea of how high this sits off the roof. As you can see, it does have a pretty low profile to it because that's the style that these go after. From the center of the roof to the bottom of the bar it's going to be about 1 and 3/8 inches, and from the center to the top it's going to be about 2 1/2 inches, so that's more than enough space for those accessories that wrap around the bars as opposed to using the T track accessories, and with our sunroof here, you should not have any problem using that.One thing to note though, these do have a carrying capacity of 165 pounds, but you always want to double check with your vehicle's manual to make sure your roof can take those weights, and go by the manufacturer's recommendations. There you have it for the Inno Aero Roof Rack System on our 2015 Honda Accord.
Average Customer Rating: 4.8 out of 5 stars (84 Customer Reviews)
Low-profile, aerodynamic crossbars create an aftermarket roof rack for your vehicle. Aluminum bars have T-slots that let you mount channel-mounted carriers and accessories. Flexible rubber strips in T-slots keep out dirt and won't need trimming.Prefect fit and looks great on my 2008 Evo X. The install videos made it super easy to put together and install.
This inno rack fits well with my car. I installed a cargo box with it. The roof rack is well built and sturdy.
Shipping and packaging was very good and delivered on time!
Glad I went with the Aero cross bars for the less wind noise!
Perfect fit on our vehicle and they feel strong and sturdy. Install wasn’t bad either. Very happy with the kit at this point and will test them out this weekend.
Great profile. Looks good on truck.
Locking and unlocking very easy.

I bought these last summer to affix my kayaks to the roof of my corola. my husband, who is decidedly not a handy person, installed them in an hour and they've been great. no issues– slight whistling at times on the interstate, but that's to be expected. highly recommend!
2016 Golf R MK7
Love it so far
By far the best service I have received in a very long time. I recieved my inno flush feet areo crossbars, sooner than expected and the assembly was just as specified. I especially liked having the video with the tutorial.
I like the look of the low profile and the quality is outstanding. I have used this for my kayak and the low profile helps with the loading and unloading.
I would highly recommend this product and Company.
Thank you etrailer my car looks great I spent 4 hours to ensemble this cross bar and the bask rack but finally I made it now I have more cargo space in my car I really recommend etrailer good quality items and good service thanks again
I like that the bars don't extend too much beyond the width of the vehicle (2012 Toyota Prius V). No noticeable wind noise or fuel economy change. They held two bikes just fine.
I bought this for my 2016 Fiat 500X which has two glass sunroofs, and it fits perfectly! Follow the directions, put the bars where it says to, and your glass will be safe. You can't open the sunroof while this is in place, but hey, at least you can haul gear on your roof without breaking the glass.
The roof rack arrived days before it was scheduled to. Everything ordered arrived intact. Assembly and installation were pretty easy per the directions included and the video on the etrailer site. The rack looks fine on my Maxda CX5 and the additional noise from the rack is not too bad. Haven't had my cargo box on the rack yet but anticipate no problems with it. My experience with etrailer has been first rate.
Josh is the greatest! Thanks for all the help!
Nice aerodynamic bars.
Everything about this kit met my expectations.
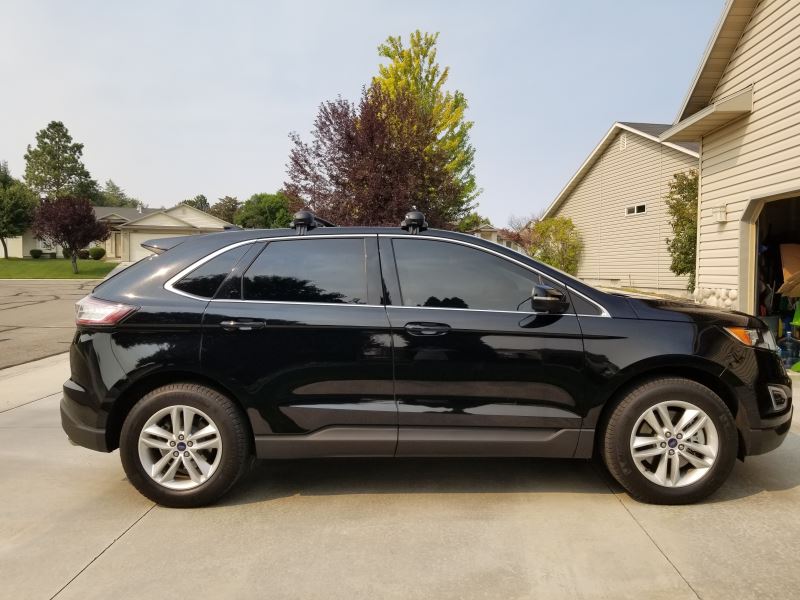
- Perfect fit for my Ford Edge, as advertised.
- Lowest bar height that was still high enough for the Edge Vista roof to clear. The glass does clear when nothing is attached to the bars.
- Aero bar shape. I haven't done a lot of miles yet with only the bars and no other attachments.
I attached an Inno roof box (which still fits through my garage door!) and did a 2000 mile road trip at insterstate speeds. Except the box noise (expected), and a bit of a mileage hit, I had no issues. Secure fit the whole way.
I bought the whole kit for 2008 honda fit for a cross-country trip, and it performed great. Made it with two surfboards on top with no problems. Instructions for installation are atrocious, but youtube videos can fill in the gaps. Shipping was quick. I didn't use any of the customer service options, but it seems like they would be useful if needed.
I like that the feet don't extend too much beyond the width of the vehicle (2012 Toyota Prius V). No noticeable wind noise or fuel economy change. They held two bikes just fine. The tightening process feels very secure, but took me a while to do. I wasn't in a hurry so it was fine.
Great customer service, thank you for all your help!
The Inno racks have handled an assortment of different loads without problems. They are quiet at highway speeds. The lack of tie down points are the only drawback with these racks.
fast shipping, great customer service, and easy to install
Good racks, one year of frequent use and no problems. The instructions could have been clearer, but once I figured it out it was easy to install.
Easy and worked well with the total kit for our vehicle. Feel sturdy and strong. We’re happy with them.
Shipping and packaging was very good and delivered on time!
Love the flush bar look!
Great product and figment, the service was great as well, the only suggestion I have is if there is a product that cannot be shipped to Canada it should be told when you try to order it, however the follow up call was appreciated .
Easy install, build quality is really nice as is fit and finish. Almost no wind noise at highway speed.
Do you have a question about this Roof Rack?
Info for this part was:
At etrailer.com we provide the best information available about the products we sell. We take the quality of our information seriously so that you can get the right part the first time. Let us know if anything is missing or if you have any questions.


Thank you! Your comment has been submitted successfully. You should be able to view your question/comment here within a few days.
Error submitting comment. Please try again momentarily.