
Summer Starts Here - Save up to 70%
To see if this custom-fit item will work for you please tell us what vehicle you'll use it with.
These 3" round tube steps make it easier to climb in and out of your truck. Their molded plastic step pads are non-skid for secure footing. Black powder coat finish on the steel resists rust and corrosion. Custom installation kit included.
Features:
Specs:

California residents: click here
Videos are provided as a guide only. Refer to manufacturer installation instructions and specs for complete information.
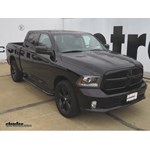
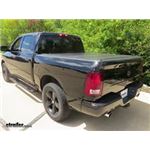
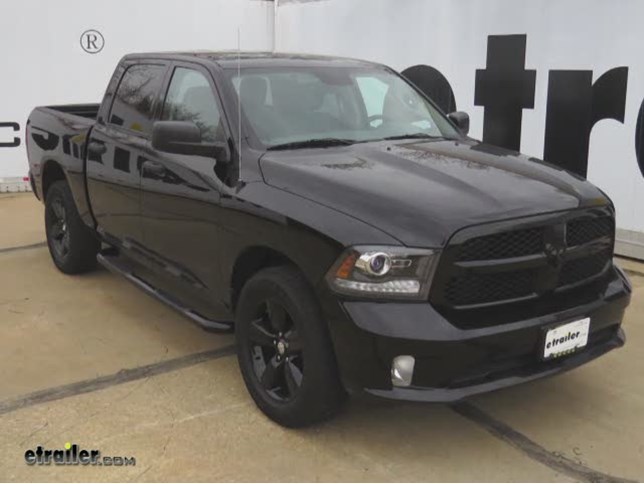
Today on our 2015 Ram 1500 we're going to do a review and install of the Dee Zee tube step running board, part number DZ372251. Getting in and out of your truck is nice and easy with the Sure-Grip step. Here's what our tube step will look like once installed. This is our 3"-wide round tube step. It also has the black plastic molded tread here for both the front and rear door. This will make it easier getting in and out of your pickup. Not only is it custom for your vehicle, but it's got a nice black powder-coated finish to match the vehicle's trim. Now to begin our install we need to find our forward attachment point.
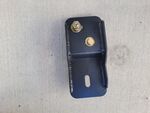
It's going to be on the inside of the rocker panel and we're going to reuse the manufacturer's hole. Now these holes are covered up with some tape so we'll go ahead and remove the tape, exposing our forward bracket attachment points. We'll have a total of three attachment points using two of the manufacturer's oblong holes. Starting with our 12mm nut plate, so it has a bolt built into a plate, we're going to feed that into the rocker panel as an attachment point for our forward bracket. Now to help hold the nut plate in position we've got a clear plastic washer that we can thread onto the bolt before we feed it in place.
Once we feed it into the rocker panel we'll then take the plastic washer and go ahead and thread it all the way down. It will help hold that bolt plate in position. Our second and third attachment point will be the oval hole and the smaller round hole. This is going to get a nut and bolt plate. On one side there's a nut; on the other side there's a bolt. We'll also have the plastic washer to help hold them in place.
Go ahead and thread that on and then feed it into the rocker panel. Once I have it in, again we'll thread down that washer to help hold it in place. Now once we get our bracket in position we'll line up the pre-drilled holes in the bracket with our bolts and the pre-drilled hole with the weld nut on our bolt plate. Let's go ahead and put our forward bracket in place. You can also identify the forward bracket by the inscribed letters PF for passenger front. Now once we have it identified let's go ahead and put it in place.
We'll start with our forward attachment hardware, which will be our flat washer, split lock washer, and then a nut. Now for our weld nut on our bolt plate we're going to use a 10mm bolt, split lock washer, and flat washer. We can use the bolt plate to help line up the weld nut with the bracket and pre-drilled hole, and then install our 10mm bolt and hardware. Now we'll go ahead and install the hardware here for the bolt plate. It's the same hardware as our forward attachment point: a flat washer, split lock washer, and then a nut. Now we just install each fastener finger tight until we have them all in place. It gives us the ability to move it around if necessary so we can help line up the forward bracket with our support bracket that will attach to the body mount and the forward bracket. Next we'll go ahead and remove the body mount bolt. We're going to take the bolt out, line our bracket up. We have the pre-drilled holes in the bracket that line up with both the body mount and the forward bracket. Reinstall the manufacturer's bolt. Now I'm not going to tighten it down all the way but we do want to tighten it down enough that we take up some of the slack. Now with the forward bracket and brace in place we're going to move to the rear bracket. Now just like our forward bracket, the first step in installing the rear tube step bracket is identifying the manufacturer's pre-drilled holes as our attachment points. Again, we have an oval hole underneath our tape so we'll go ahead and remove the tape, exposing our two attachment points. Just like the rear hardware on our forward bracket we're going to have a bolt plate with a weld nut. We'll install our plastic washer and then feed it into the rocker panel. Now we can bring in the rear bracket, feed it over to the bolt, and start installing our hardware. We'll be using the same 10mm bolt, split lock washer, and flat washer for the weld nut as we did for our forward bracket. Same hardware for the bolt plate, which was our flat washer, split lock washer, and nut. Again, we're just going finger tight. Next we're ready to install the hardware to secure the tube step to our brackets. Here at the forward bracket we'll be lining up with our brace and the forward bracket with our 1/2" bolt, split lock washer, and flat washer, going through the brace in the bracket, into the weld nut built into the end of the tube step. We're now ready to go ahead and put our tube step in place. It's a good idea to get an extra set of hands to help you hold the tube step as you install your fasteners. Just like our previous hardware, we're going to install it finger tight until we have it all in place. Now with our tube step in place we're ready to start tightening down the hardware. Note, before you tighten it down completely, you want to make sure you make any necessary adjustments so that you have a nice level tube step. Now once you have all your hardware tightened down, we'll go ahead and torque to specifications as indicated in the instructions. Now with everything tightened down, we're ready to hit the road. That will do it for our review and install of the Dee Zee tube step running boards, part number DZ372251, on our 2015 Ram 1500. .
Average Customer Rating: 4.0 out of 5 stars (1 Customer Reviews)
These 3" round tube steps make it easier to climb in and out of your truck. Their molded plastic step pads are non-skid for secure footing. Black powder coat finish on the steel resists rust and corrosion. Custom installation kit included.Tips to save you an hour: Have a table or work bench available to organize the hardware and brackets, have somebody to hand you stuff. You need an 18mm socket, an 18mm deep socket, and a 16mm socket. You need a long extension, a long handled ratchet and a standard ratchet with a normal length extension. You only need to tighten one bolt fully before putting rail on. It is the front most bolt in the front bracket. Make sure bracket is in forward most position, and tighten it up. You won't be able to reach it after installing the cross brace that connects to the main body bolt (large bolt with huge washer that is part of the truck, not supplied hardware.)
After everything else is finger tight install the tube step and torque fully, then torque front bracket, rear bracket and you're done. Do it in any other order and you'll spend way too much time being frustrated.
Fitment is perfect, brackets work just as they should, look exactly like the instructions. Product seems more robust than similar tubestep my mechanic installed on previous truck for more than double this price.
Do you have a question about this Nerf Bars - Running Board?
Info for this part was:
At etrailer.com we provide the best information available about the products we sell. We take the quality of our information seriously so that you can get the right part the first time. Let us know if anything is missing or if you have any questions.


Thank you! Your comment has been submitted successfully. You should be able to view your question/comment here within a few days.
Error submitting comment. Please try again momentarily.