
To see if this custom-fit item will work for you please tell us what vehicle you'll use it with.


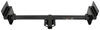
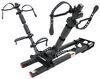
Easily attach a variety of accessories to the front of your vehicle with this fully welded, corrosion-resistant trailer hitch receiver. Perfect for winches, spare tire carriers and more.
Features:
Specs:
At etrailer.com we're committed to the products we sell, and to our customers. Our experienced and knowledgeable staff are available via both phone and email to address your questions and concerns for the lifetime of your hitch. The technicians at etrailer perform hitch installations on a daily basis, making them a valuable resource for do-it-yourselfers. The one-on-one, personal service you'll receive comes straight from an expert in the towing and automotive field. We've installed it, we've wired it and we've towed with it, so whatever your question, we can answer it.

Videos are provided as a guide only. Refer to manufacturer installation instructions and specs for complete information.
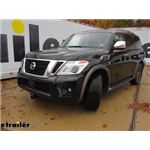
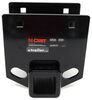
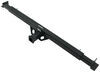
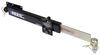
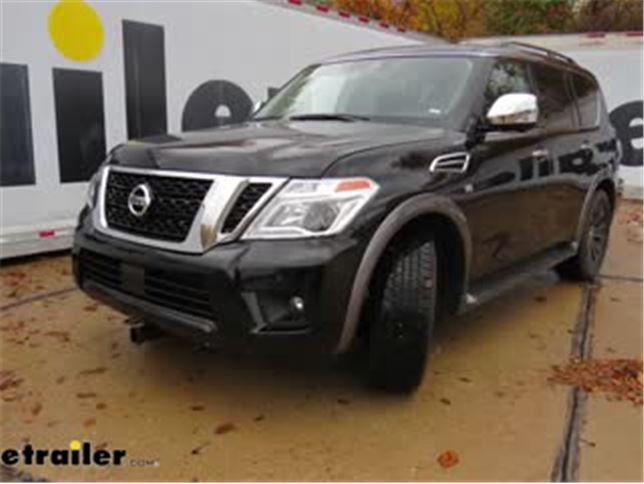
Today on this 2018 Nissan Armada, we're gonna review and install a Curt Front Mount Trailer Hitch Receiver, part number C31081.This is what the hitch looks like when it's installed in the front of our Armada. As you can see, it is as close to the bumper as possible. You can still stick your hand in there, to give you an idea of how close it is, so it won't rub on your bumper, or anything like that.It's got our standard two inch receiver opening right here, and it uses a 5/8 diameter hitch pin, or a locking hitch pin.It goes back through here, reaches across, and reaches up to the frame on both sides of a frame. Actually, on the side, and on the bottom of the frame. So we've got three attachment points on each side. So, it gets a good grip on the frame of the truck.This is a great addition to your Armada because if you use your vehicle off-road, or get in situations where you have to use a winch, a lot of the times this is a perfect match.Another use for this, is that people will use this to put their boats into the water.
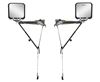
It's probably dependent on how big your boat trailer is, and how steep your ramp is, because you're getting close to putting the motor into the water. But it can be done.Another great option for this hitch, where I see a lot of people using, is actually for your home snow plows. They just plug right in here, the simple ones that you manually adjust, go up and down, and use. And, also, some more of a lighter-duty ones that are remote controlled as well.No matter what accessory you put into your receiver hitch, you're gonna be limited to 500 pounds of weight that's pushing down on the hitch. Now, our hitch is gonna be rated for 9,000 pounds of straight-line pull, and recovery operations.All right, next we'll give you a few measurements to help you out in selecting some accessories.
These measurements will help you determine if your accessory can fit up against the hitch, and not interfere with the bumper of the vehicle.From the center of the hitch pin hole to the outside edge of the bumper is gonna be about 3-3/4". From top of the receiver opening down to the ground is gonna be about 13". That'll be helpful in determining a ball mount for your trailer if you need it. Also, for clearance issues, you might want to consider the bottom of the receiver down to the ground. Which will come out to about 10".To begin our install, there's a few components that have to be removed first.
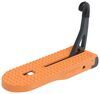
The skid shield, here, and this plastic component here, needs to come down. Also, this tow hook, right here, has to be removed.We'll start with our shield first. We'll need a 13 millimeter socket to remove the fasteners. Now, there's some hidden at the front edge of the bumper, right here. With two in the front removed, let's go to the back and remove these two.
You can bring your whole assembly down at the back, and pull it towards the rear of the vehicle, and out of our way.Using an 18 millimeter socket, we have to remove these two bolts on the bottom here, for a tow hook.We're looking at the driver's side frame rail here. We're gonna take the included bolt leader, run it through this hole here, towards the back of the vehicle, where you can find a very large opening. It's an oval right behind our front wheel. We'll route our wire up and through there.We'll take the included block slide it onto the wire, push into the frame, let that sit. Then we'll take our bolt and thread it onto the coil part, push that into the frame and pull it through. We'll repeat the same process for this hole here as well.Now, this hole on the side of the frame, right here, between these two outriggers, we're gonna run a bolt through there as well. So, I'll run my bolt leader through, out the same access hole, and I'll pull it through to make sure everything fits okay.Okay. Push inaudible 00:03:48 into the frame. Pull it out. Make sure you can pull it in and out easily. Then we'll leave it back into the frame.For this hole here, we're gonna repeat the same process over on the passenger side. Passenger side is a little bit different. Instead of just holes here, we have threaded holes where the tow hook was. So, double check your hitch hardware, make sure it threads in okay.Also, one note, this washer right here, when you put it together with the hitch, make sure your teeth on the washer, always stays towards the hitch.We'll take our wires on our driver's side, run them through these two holes on the hitch, and then also our wire from the side here, will go through the upright here.After we have all our wires put into place, we'll push the hitch up, pull the bolts with the wires on the top first.We'll pull the hitch down, trap the bolt, and then we'll take our flange nut, and thread it into place. We'll do this on both sides of the hitch.Now, with the two bolts on the side of the frame holding our hitch into place, we'll shove it up, and on the passenger side, here, we'll take our metric bolt with counter-tooth washer, and we'll thread these guys in. There are two that go in this place here. On our driver's side, we'll install two more locking flange nuts. Okay.At this point, all our hardware's installed. Make sure the hitch is pushed up fully into place. We'll tighten down our bolts, and then torque the bolts down as specified in the instructions.Now, I've tightened down all our hardware on our hitch. We'll need a 3/8 quarter inch socket, or a 19 millimeter socket.We'll use a torque wrench to tighten down our bolts as specified in the instructions. Now, our tow hook will not be reinstalled, but we can reinstall our shield here. So, we'll push it up over the hitch, back into it's original position, and reinstall the hardware.Now finished up with the Curt Front Mount Trailer Hitch Receiver, part number C31081 on this 2018 Nissan Armada.
Average Customer Rating: 5.0 out of 5 stars (4 Customer Reviews)
Easily attach a variety of accessories to the front of your vehicle with this fully welded, corrosion-resistant trailer hitch receiver. Perfect for winches, spare tire carriers and more.Shipped fast and injury free. Installed pretty quickly. Only needed to remove the skid plate which you also have to remove for an oil change. You need to be careful when installing the bolts that fit in the side. You'll have to hold them with needle nose pliers when removing the fish wire to insure they don't fall in the frame. That would be bad. The hitch will fit just in front of the air deflector which is attached to the skid plate. The skid plate will go back on just as easily as before.
This is such a good option for people that tow RVs/Boats/trailers and would like to have some additional options for either a cargo carrier/bicycle racks. The hitch is very well made as expected and the install should have been easier. However, I made some errors by fishing through the wrong screws into the frame (Recommend identifying the screws before fishing it through) and also dropped the screws inside of the frame. If I paid attention, the install could have been done in less than 30 minutes but because of my error, it took more than 3 hours. Had to get a magnet to retrieve the flange and the screw.
Do you have a question about this Front Receiver Hitch?
Info for this part was:
At etrailer.com we provide the best information available about the products we sell. We take the quality of our information seriously so that you can get the right part the first time. Let us know if anything is missing or if you have any questions.


Thank you! Your comment has been submitted successfully. You should be able to view your question/comment here within a few days.
Error submitting comment. Please try again momentarily.