
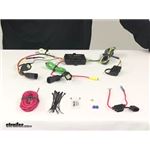
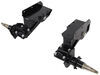
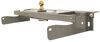
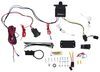
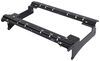
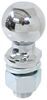
Hopkins Plug-In Simple Vehicle Wiring Harness with 4-Pole Flat Trailer Connector
(12 reviews)
Price: $85.01
In Stock
Hopkins Plug-In Simple Vehicle Wiring Harness with 4-Pole Flat Trailer Connector
Item # HM11140695
Retail:$126.89
Our Price: $85.01
You Save: 33%
Will this fit?
To see if this custom-fit item will work for you please tell us what vehicle you'll use it with.
In Stock


- All Info
- Reviews (12)
- Q & A (0)
- Videos (2)
- Photos
Hopkins Custom Fit Vehicle Wiring - HM11140695
- Custom Fit
- Trailer Hitch Wiring
- 4 Flat
- Powered Converter
- Hopkins
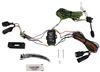
Quickly and easily install a 4-way trailer connector on your vehicle with this custom harness. T-connector plugs directly into existing wiring. Powered converter reduces strain on wiring system.
Features:
- Provides a 4-way flat trailer connector at the back of your vehicle to power your trailer's signal lights
- Compatible with 5-pole, 6-pole and 7-pole adapters (sold separately)
- Connects quickly and easily
- Locate connection points behind tail lights
- Plug in connector
- Run hot lead to car battery
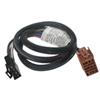
- Includes a tail light converter to ensure that your vehicle's wiring matches that of your trailer
- Powered module connects directly to battery to avoid overloading vehicle's electrical system
- Protective connection terminals resist corrosion
- Comes with dust cap for 4-way flat connector, cable ties, and terminal grease packet for electrical connections
- 90-Day limited warranty
Installation
This custom-fit T-connector plugs into your vehicle's wiring harness, which is located behind the driver's-side and passenger's-side tail lights. You will have to remove the cargo nets, floor hatch, and tail light assemblies to access this harness. Once you've plugged in the connector, run the red hot lead up to your car battery. Connect the included fuse holder, and then connect the fuse holder to the positive terminal on your battery.

Once installation is complete, the 4-way flat connector will be stowed in your rear cargo area.
It is recommended that you use a small amount of grease on all electrical connections - the plugs on your automobile and the 4-pole connector itself - to help prevent corrosion.
Powered Tail Light Converter
A tail light converter is built into this T-connector. This converter is a battery-powered unit that bypasses the electrical routes that are used by a basic wiring harness. As a result, there is virtually no draw on your tail light circuits.
Because most trailers run on a two-wire system - wherein the brake and turn signals are carried on one wire - the separate brake and turn signals from your vehicle's three-wire system need to be combined so they are compatible with the wiring system of the trailer. This converter combines the brake and turn signal functions of your automobile so that they run on one wire to properly activate your trailer's tail lights. Note: This will not affect how the tail lights on your vehicle operate.
11140695 Plug-in Simple Hopkins T-Connector with 4-Pole Trailer Connector
Installation Details
This Product Fits The Following Vehicles
- 2011 - 2014 Ford Edge
California residents: click here


Video of Hopkins Plug-In Simple Vehicle Wiring Harness with 4-Pole Flat Trailer Connector

Videos are provided as a guide only. Refer to manufacturer installation instructions and specs for complete information.


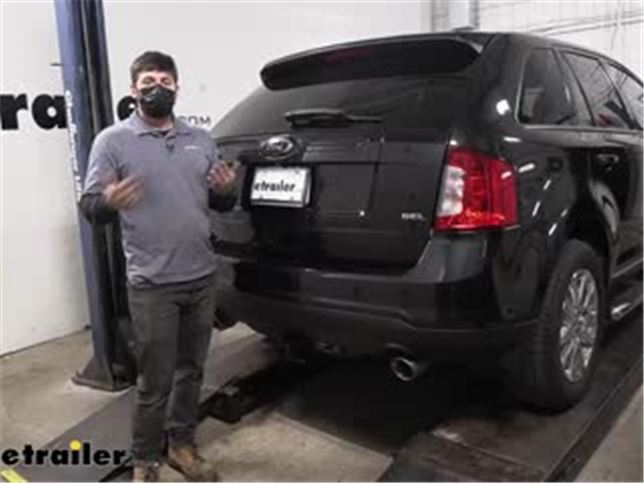
Video Transcript for Hopkins Plug-In Simple Vehicle Wiring Harness Installation - 2014 Ford Edge
Hey everybody, how's it going Today, we're gonna be going over and showing you how to install the Hopkins plug-in simple trailer wiring harness here on our 2014 Ford Edge. So, a trailer wiring harness is gonna be one of the few things you're gonna need to successfully tow a trailer here with your Edge. So, in addition to the trailer wiring harness, we're gonna need a trailer hitch, as well as a ball mount/ hitch ball. The trailer wiring harness portion of it is what's gonna allow the vehicle to transmit the taillight signals to the trailer. Now, this is not only your legal requirement, in almost all states, it's also gonna be necessary to let other motorists out in the road know the signals we're gonna be making. A lot of times, our trailer is actually gonna block the taillight signals on our vehicle.
Therefore, we need an effective way to communicate with other motorists, the signals that we're gonna be making, so we can arrive to our destination safe and sound. So, for this particular kit here, the trailer connector actually gets stored inside of the vehicle. And that's really ideal for vehicles like this, because chances are, we're not gonna be towing every day. And although it is sort of inconvenient to drape the trailer connector out the bumper and close the hatch, there's not gonna be any issues with doing that. You're not gonna damage the wiring.
And when we're not using it, it's gonna be nice, safe and sound inside of the vehicle here, so we don't have to worry about any water getting in the plug there, causing any lighting issues, which would be a headache to deal with down the road. So, we mentioned how we need to position the trailer connector in order hook up to our trailer. So, just to give you guys a better visual and show you how easy that is, we'll go ahead, open up the trunk here. We're going to take our trailer connector. We'll reach in here and we're just gonna be draping it out the bumper here, just like so.
This weather stripping here, both on the bumper and the tailgate, they're gonna compress, making sure we don't pinch or damage our wires. We're gonna have a nice, convenient, easy-to-access trailer connector to use when we back up to our trailer. As you can see here, just hangs out like so, easiest to connect, plenty of room and plenty of movement as well. So, this trailer connector here is what's known as either a four-pole or a four-way flat, those are both referring to the same thing. Now, this is gonna be the most common type of trailer connector, especially for this vehicle, so most trailers we're gonna be potentially towing are gonna have this connector.
It has four pins, as you can see here. One's for the ground, one's for the running lights, one's for the left turn signal circuit, and one's for the right turn signal circuit and the stop and turn signals are obviously integrated with most trailers. So, we have a powered ModuLite here powering this harness. And what that means is we're gonna have a dedicated power wire running from the converter to the battery. Now, this allows us to not pull power from the trailer lights and from the vehicle's taillights. And it's also gonna separate the two if there's any issues with our trailer, therefore, we don't have to worry about that affecting the functionality of our vehicle's taillights. So, in regards to installation, this one is actually very simple. It's definitely something I think you guys can do at home by yourselves with really just a set of common hand tools. We have to remove the vehicle's taillights, but I know that may seem daunting, it's actually pretty easy. And then the bulk of the installation is just running a wire from the rear to the front of the vehicle, so it's definitely doable for you guys at home. You shouldn't have to pay a shop to do this. In regards to the timeframe, that's sorta gonna vary based on your experience level. But I would say comfortably, you guys should be able to get this done in about two to three hours, depending on how hard you're working at it. Nothing is particularly challenging, it's just gonna take you some time. Let's go ahead and walk you through that entire installation step by step now. So now, the first step of our installation, we're gonna be opening up the hatch on our vehicle here. We're gonna be taking an eight-millimeter socket. And inside here, we have two screws that we're gonna remove, so we can pull the taillight assembly away from the vehicle. So, there's one on top there. We have that same one on the bottom as well. Now, we should be able to pry the taillight housing away. Some of them may pop just out. Some of them are gonna take a little bit more wiggling. Just be careful that we don't break any of the alignment tabs. But now that we have it pried away, we can go ahead and unhook our taillight assembly. So, here's our main wiring harness. These connectors have a little tab on the backside. If you press that, you should be able to pull out. Just like that. Now, we need to get the other side off the same way as well. Now, once we have the taillights out, we're going to come in here to the storage area and we're gonna lift open the floor covering. We're gonna hold that back there, and then we're gonna remove our little storage trays here underneath the panel. We have one on either side here, we're just simply going to pull out. Next, we're gonna come back to our taillight pocket here. We're going to pry the grommet out away from the vehicle. So, just like that. And next, we're gonna take our harness. We're gonna come through the inside and we're gonna feed one of our connectors through that hole. Now, we're gonna take our wiring harness here. We're gonna be taking the connector with the yellow wire in it. We're gonna be coming inside the vehicle here. Underneath the side panels, we're gonna be lifting up and then out through the hole here with our grommet. So there, once we have the connectors here, in the driver's side taillight housing, I'm gonna go ahead and make our connections. It should only go one way. So, this one goes to the factory plug. Now, this one is gonna go to our taillight. But before we connect that, I'm gonna go ahead and cut a slit in our grommet here, so our wires can pass through and we can reseat the grommet. And now, with the grommet secure, we'll go ahead and reattach our taillight. So now, coming from the converter here, we're gonna have a single green wire that leads to the two connectors that look like the same ones we just installed earlier. So, we're gonna route this over to the passenger's side of the vehicle and attach that to the passenger's side taillight assembly using pretty much the same few steps that we showed you over here. So, the next thing we're gonna do is we're gonna take the white wire coming from the converter box. We're going to place our self-tapping screw over the ring terminal. And now, we're just gonna find a spot in the floor here where we can ground that. So, just preferably out of the way. We don't want it interfering with our storage trays or anything. So, there we go, that should be good. Now, next, we're gonna be taking our bundle of red wire. This is our power wire. We're gonna be stripping some jacket off of that, so we can attach it to the power wire lead coming from the converter box. So, if we reach down in there, we should see a wire lead coming off the converter box with a butt connector already attached to it. So, let's take our wire crimper there, feed in our wire, and close down to lock it in place. And make sure that's nice and secure. And now that we have that power wire connection made, we need to find a grommet in the floor to pass that wire through. And if we look directly behind this panel here, there's gonna be a nice little grommet there. So, I'm gonna take a trim panel tool, I'm just gonna pry that up. There may be some sealant around there. So, we can remove that, like so. And the next thing I'm gonna do is I'm actually gonna drill a hole in this grommet. That way, I can feed that power wire through there and we can still reuse our grommet. So now, we'll just take our red power wire here, feed it through the hole in the grommet. Now, you don't actually need a drill. You can just take a sharp side of the scissors there, just poke a hole through there, that's really all we need to do. And now, we're just gonna begin feeding this grommet all the way through our bundle of wires. So, I've got our grommet fed all the way up on our wire here. We're gonna take the other end of the wire. We're gonna pass it down through that hole there. I'm gonna feed about a foot through of show, and then I'm gonna come underneath, I'm gonna grab that wire and pull the rest through. So, once I pull it all the way through, I should be able to reseat our grommet once it's lined up, just like that. So, now to finish up everything inside the vehicle here, we're gonna have our four-pole connector. I'm just going to take this, but actually, I'm just gonna tuck it behind this little rod here just to keep it out of our way. We'll get to that a little bit later. But now, we're gonna take our green wire that we ran earlier. Now, I'm just gonna secure this to the backside of this panel here. I'll probably just actually use clear tape. You can actually just tuck it back there and store it under the panel. The panel should do a good job of holding it down. But, yeah, we're just gonna use some clear tape here, just sort of an extra measure of security. So, as you can see here, I've got some tape on our wire, just sorta securing it to the panels here, just making it look a little bit nicer, keeping the wire nice and tucked away. But now, we're pretty much done inside of the vehicle here, so I'm gonna go ahead and reinstall all of our panels. And then we can jump underneath and show you the rest of the wiring. So, now we're underneath the vehicle here. I'm gonna take our power wire. We're gonna route this up to the front of the vehicle, into the engine bay, so we can attach it to our battery. So, we're gonna go ahead and do that. Now, we wanna be careful that we avoid any of the exhaust or moving suspension components. So, once we get that done, we'll show you the path that we took. So, we can see our wire here underneath the vehicle, just directly underneath that grommet. And now, what we're gonna do is we're gonna come up and over the filler neck here. I believe that's the filler neck for the gas tube. And then we're gonna come up and over the subframe. And if we look up in here, we should be able to see, we have a couple of zip ties securing it to that metal tube. And then we're gonna come up and over the subframe again. So, now we have another zip tie there, just holding it, making sure it doesn't fall down and get tangled up. And now, we're gonna come over here. We have it zip tied to an existing wiring harness there. And now, it's gonna come over here, along the frame rail, another zip tie there. Work your way this way. If we get to this point here, we got another zip tie. Now, we're gonna go up this panel here. You don't have to remove that panel, just go over it. It's gonna come all the way under here. There's gonna be a little opening, we have another zip tie. And then you can see where it comes out over here. And again, we have another zip tie attaching it to the brake line. Now, in order to get the power wire up into the engine bay, we're gonna come up top, take a piece of airline tubing or any sort of flexible line that you have. We're gonna be sticking it through the engine bay from the top there, and it should come out in this area here. We're just gonna simply tape our wire to that airline tubing. Then we'll go back up top, pull the airline tubing through, bring your whole wiring along with it. And now that we have our wire pulled all the way through, I'm gonna take one zip tie here, just secure it to another wire. That way, we don't ever have to worry about the wire falling down, back into the engine bay, getting tangled up on our exhaust or the steering. We're gonna go ahead and unveil the positive battery terminal by just removing that rubber cover, just like so. And we're going to, next, cut some of our red wire, 'cause we have a lot of extra slack here. And then to strip off some of the jacket. And then we're gonna be attaching this to the fuse holder that comes in your kit. So, the fuse holder is already preassembled there with the correct butt connector on the end, so we just need to connect this other side here. And now, we're gonna take a 10-millimeter socket. And we're gonna remove that nut there on the positive battery terminal. Make sure you don't lose the nut. And we'll attach our ring terminal. And then resecure our nut. So, check that we have our fuse installed. We do. So now, we're ready to test everything out. So, now that we have our tester plugged in here, we'll go ahead and run through our signals. We have the brake, left turn, right turn, and running lights. And that's gonna do it today for our look and installation of the Hopkins simple plug-in trailer wiring harness here on our 2014 Ford Edge..
Customer Satisfaction Score:
94% were satisfied with this product
6% of customers were not satisfied
- Wrong item was ordered
- etrailer mistake
Customer Reviews
Hopkins Plug-In Simple Vehicle Wiring Harness with 4-Pole Flat Trailer Connector - HM11140695
Average Customer Rating: 5.0 out of 5 stars (12 Customer Reviews)
Quickly and easily install a 4-way trailer connector on your vehicle with this custom harness. T-connector plugs directly into existing wiring. Powered converter reduces strain on wiring system.by: Donnie03/10/2021
Super simple to install. I have a cigarette lighter plug in back that is always hot so I just tapped into that instead of running wires to front. Took maybe 30 minutes. Nice product


by: Randy03/02/2022
Good product, worst part is fishing the wires thru the existing grommets. Easy to connect looks professional once installed and tucked into place.
Very satisfied with my purchase.
by: Johnny05/23/2022
2014 Ford Edge
Perfect install instructions (although you may want to suggest people add silicone to the perforations of the grommets for water tight-ness of the vehicle).
by: Stephen08/07/2018
2011 Ford Edge
The harness installed easily and works well. It could use a bit more wire for the driver's side connection as the control module is completely hidden away inside the body cavity and was hard to secure, but it went just fine.
by: Oran06/23/2022
Plug and play. Working as it should. Plenty of material to complete the job
by: Laura08/31/2019
No problems with it. My mechanic put it on with ease for me.
by: Mark 12/15/2021
It worked as expected.
by: Mark 09/20/2022
by: Gary 08/23/2022
2013 Ford Edge
by: Anthony 07/09/2022
by: James 07/07/2022
by: Larry03/18/2022
12
12
See what our Experts say about this Hopkins Custom Fit Vehicle Wiring
- Recommended Class III Trailer Hitch Receiver for 2014 Ford EdgeYes, I recommend the Class III Draw-Tite Max-Frame Trailer Hitch Receiver, # 75992 for your 2014 Ford Edge. This fully welded trailer hitch receiver bolts onto your Ford Edge's frame, no welding required. This has a maximum gross trailer weight of 4,000 lbs. and a max tongue weight: 400 lbs. and it can be used with a used with weight distribution system. You will want a trailer brake controller installed in your 2014 Ford Edge for towing the R-pod 178. If you do not already have a flat...
view full answer...
Info for this part was:

Edited by:
Lindsey S

Video Edited:
Jacob T

Installed by:
Cole B

Written by:
Alexander C

Video by:
Jonathan Y

Test Fit:
Conner L
At etrailer.com we provide the best information available about the products we sell. We take the quality of our information seriously so that you can get the right part the first time. Let us know if anything is missing or if you have any questions.
Product Experts Available Now!
Call 1-800-940-8924
Thank you! Your comment has been submitted successfully. You should be able to view your question/comment here within a few days.
Error submitting comment. Please try again momentarily.