
To see if this custom-fit item will work for you please tell us what vehicle you'll use it with.


Give your Toyota Tundra's cloth or vinyl seats an upgrade with these seat covers that look and feel like factory leather. The perforated leather covers with memory foam centers keep you cool and comfortable as you drive. Simple, slip-on installation.
Features:
Upgrade your vehicle's cloth or vinyl seats with these luxurious leather seat covers that look and feel just like factory original equipment. The custom-fit covers protect your seats from wear and tear, and they install easily over your existing seat material.
Each set includes covers for your vehicle's front and rear seats, as well as covers for the headrests, armrests, and center consoles (where applicable). The covers accommodate all of your vehicle's seat belts and controls without impeding access, so you won't lose functionality. Every seat adjuster, every console function, and every cup holder has been accounted for.
The covers are constructed of perforated leather. This ventilated, breathable material doesn't conduct body heat so you'll stay cool on long road trips. The perforations prevent moisture build-up between the covers and seats so mold and mildew won't develop. Each cover has anti-bacterial and anti-odor coatings to help preserve their new and clean scent, and they are flame resistant.
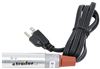
The breathable leather also makes this the ideal seat cover to use with a Clazzio seat heater (SH-1 - sold separately).
All Clazzio covers are custom cut and hand sewn by professional machinists to ensure that they fit your vehicle's seats without flaw. The thread used for stitching the seams won't loosen, fray, or tear over time. It is, however, specially designed to break away in the event that the seat airbags deploy. And you can replace an individual cover so one set of Clazzio seat covers will last for the lifetime of your vehicle.
Each cover has a 1/2" memory foam pad in the center. This memory foam layer softens in reaction to your body heat to perfectly fit the contour of your hips and legs. This gives you an additional level of comfort that you didn't have with your original seats.
Both the driver's- and passenger's-side front seat covers have a rear map pocket for convenient storage.
Clazzio covers install over your seats with no need to remove any factory material. Simply slip the covers over the seats. Once the cover seams are properly aligned, tuck all excess material into your seats' plastic trim so they look tight and wrinkle-free. Then secure the covers with the built-in straps, hook-and-loop fasteners, and S-hooks. Detailed instructions with color pictures are included with each seat cover to ensure easy installation.
Videos are provided as a guide only. Refer to manufacturer installation instructions and specs for complete information.
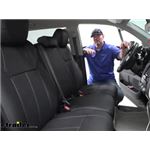
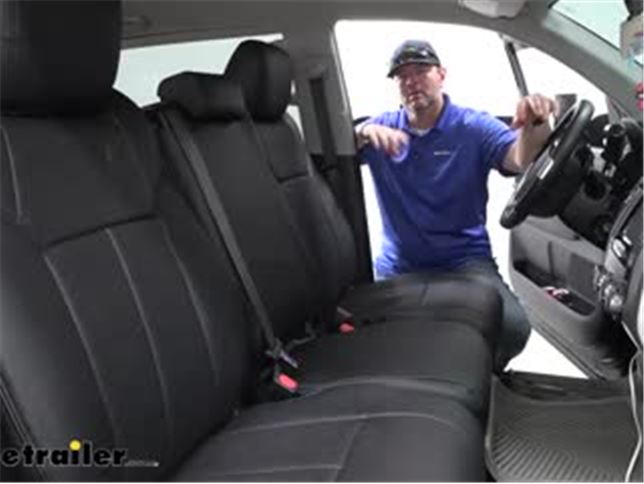
Hey everyone. Shane here with etrailer.com. Today I have a 2014 Toyota Tundra, and I want to walk through how to install the Clazzio custom fit leather seat covers. Now when we talk about or think about leather seats, we think about going to a shop and getting custom leather seats put on. Well, they can be rather expensive. But why do we need to do that when Clazzio has come up with seat covers that are genuine leather and they're custom fit to go right over top of either your vinyl or your fabric seatsAs you can see, this is what they look like when they're in.
They look very nice. Once they're in they look like they are real leather seats. I mean, a lot of people who have seen these in cars think that they're actually leather seats and they're not seat covers. They are amazed when they realize that they're seat covers. So this is going to give you a nice touch, a nice upgrade to your worn out, your damaged, your stained factory seats.So these being custom fit covers, they're not only going to come with the seat and the back rest, they're also going to come with headrest and center console covers.
So if you have a vehicle like this with a 40, 20, 40, backseat is a 40/60 split, it's going to give you all of your covers to cover everything so everything matches.Now you may be asking yourself when you put this leather over the top of your factory seats, what about moisture or anything building up underneath Because it can create mold. Well, the way they designed these, these are designed as a breathable fabric. So it's not going to allow mold or mildew or anything on the underside of the seat if it happens to get a little bit of moisture in there. You'll notice here in the center, it's perforated to keep it cool and to keep it dry.Underneath this center section everywhere where it's perforated here, there's a half inch thick foam or memory foam pad. So it's not only a nice cover, but it's also nice and comfortable to sit on.
We come down here where all of our seams are showing. These are double stitch hand-sewn seams. So they're going to be very durable. We don't have to worry about those coming apart like some of your other covers out there.Talking about other covers, let's compare them to some of the other covers you might buy at a local store. You can find some that slip on.
Sometimes they're not going to fit tight. They may be loose, they may be tight here and here, but then your center is stretched across here and they just don't look the best. And they may work for awhile but eventually they wear out with. With these you can see they fit very tight. They look like factory leather seats. These covers are going to have an antibacterial and anti-odor coating on it. And that's just to help preserve it, to maintain that nice clean smell.And as far as the cleaning process, don't have to remove them to clean them like you may have to with other ones. You just soap and water, wipe them down and you'll get them clean. You also, if your vehicle is not equipped with heated seats, you can buy seat heaters that you will install before you put the seat covers on. They're also by Clazzio. You can find those here at etrailer.com. You have a pad that sticks to the back and a pad that sticks here to the seat and you just put your seat covers right over the top of them.Each of your front seats on the backside, it's going to have a map pocket. And what's different about this map pocket from others is there's a metal band that runs in here. Actually it's a plastic band, but you'll notice how it kind of has an angle to it so that if you pull it out, it snaps right back into place. It's not sitting out, stretched out like this, like on a regular seat would. As far as our backseats go, you can see we've got full coverage back here as well. Here in the center, all of our headrests, our armrests. Kit's going to come with a little tool like this for areas like this around plastic, around buckles, stuff like that. You can use this to tuck that leather up inside of there so it looks factory. Which brings me to the point of installation.Installation. It's not easy, but I wouldn't say it's extremely difficult. The seats covers are going to be tight when you're putting them on. So keep that in mind. And it's going to be time consuming, but once you get it done, put on the effort, once you get them on and they look like factory seat covers, you're going to be very happy with them. Now we've gone over some of the features, let's walk through with you how to get them installed.Starter installation, you're going to have a driver's side, passenger side. It really doesn't matter if you start at the front or the back. I'm going to start with the driver's side front seat. We need to look for is this split here and this split here. This goes around the seatbelt. There's a wire that runs in the back of the seat in between your top and bottom if you have the heated seat option. And that is for that wire. The back of it is going to be open like this. You want to make sure that these straps are undone off the buckles. Then take them like this. All you're going to do is push them around the seats. We're going to take these flaps and we're going to tuck them in between the seats and get them to the backside. One thing I will say is when tucking these in, watch it if you have fingernails, because if it grabs a nail, it is going to hurt. Back in there like that.So we're going to take our straps and you'll notice all the wiring and brackets up here. We want to make sure we go up above all that. So we're going to take these and feed them to the back here. This one, we're not going to have much of a problem with you want to make sure you're going over top of your slide bar here. Over the top there. And we'll get those fed to the back. The carpeted part of your seat and you reach under there's little straps. You need to undo them. You should only have two. Pull these through. This is the wire I was talking about here. These are your buckles. Now we're going to take those straps, feed them through our buckles. Then we can cinch them down.Then we can go up again. We'll tighten these up a little bit more once we get the rest of the seat cover in place, but essentially that's what we're going to do.You're going to have a foam bead right here. This plastic piece is going to tuck right down in between that plastic and your seat. Like that. Then we'll come to our strings. The strings, you'll have one on this corner and you'll have one on that corner. What we're going to do is we're going to go underneath. They have loops in them. We're going to take one, feed it through, pull it tight, feed it through the other one. And then we're going to actually tie the two strings together underneath the seat. And that's going to cinch up around this bottom edge.What you want to make sure when you're doing this, how your seats slide on that rail, make sure that string is not in that rail so that when you slide it, it's not going to cut that string in half. So we'll take our loop in our string. Again, I went over top of the bracket. I'm not going underneath where the wiring is. We're going to feed the string through the one. Pull it tight like that. There's no real certain way you have to do this. This is just cinching up the bottom edge of your seat. There we go.For the back rest. We're going to remove our headrest. Again we're going to have a driver and passenger side. Same split there. This one is full. So we're going to slide it over the top. Before we get too far, let's make sure if you have a back pocket here, make sure there's nothing in it. And this flap, you need to take it, fold it up like this and get the seat cover over it. Right up here at the top, where your head rests sides in, it's going to have two holes in it. We're going to take that and we're going to push it around the little plastic pieces. Just feed it around like that. And then we'll just start pulling the rest of it down, getting it good and tight. We're going to take these two flaps and we're going to slide them through just like we did on the seat part itself.Now what we need to do is we need to get the hook and loop fastener up to get to that. So we're going to pull down on the back, back on this flap and get those two pieces together. This could take a little bit of stretching. That's good because I mean, we want the seat covers to be tight. The way that I found that works is if you can get one part of it done, or at least caught to where it hold it up, we can come back and fix it and get it exact after. Makes it a bit easier. Come here, put this little one on there.Just like that. And this piece will get put underneath. You're going to have some little keepers that look like this. Going to slide that onto that rubber band on each one of them. And we're just going to take these and we're going to hook them anywhere underneath the seat that they're not going to get damaged, they're not going to be in the way of any wiring or the seat moving, or anything like that.Once you've got your seat on the backrest on, you want to move to the headrest. Go ahead and insert your headrest back in. And it may be easier to do it from the back seat rather than standing here, trying to do it from the side. So I think that's what I'm going to do. I'm going to rotate this back just a little bit. We'll get our headrest cover. We're going to take it and we're going to slide the two pieces apart. We want to make sure we're installing it the correct way. You notice the stitching. It follows the seat. So I'm going to take this and these can be kind of a little trying, because they're so tight.What we need to do is we need to get that in there. We're going to have to squeeze this headrest together a little bit. Now we've got it partially on there, we're going to go ahead and remove the headrest. I'm going to take it out to a table and then we can kind of squish that down and get it in there a little bit easier. We're just going to work our way around a little bit at a time till we get it pulled on there.And we'll get it straightened out. We need to take this flap, tuck it inside of there. Once we get a headrest done, slide it back into place and repeat the process for the passenger side. Next what we're going to do is we're going to do the backseat, the seat itself. On your driver's side and passenger side obviously with if you have a 60/40 split, they're going to be different. Your driver's side is going to be longer. What we're going to do is this is a full one. We need to take it and we're going to slide it right over the front of the seat. You're going to have a hole here on the side and that's for your handle.Maybe easier to start it with the seat folded up like this. And then we're going to do the same thing, kind of how we did our headrest. And I kind of have to squeeze it in there.(silence)Then we're just going to work the cover down over the seat. And we're going to take it's flap. It's going to tuck right down in the seat like this. When you reach down in there, there's a bar that runs across. You want to make sure you're going down underneath it because the backrest actually has two hooks come down and hook around the bar. So you're not going to be able to get it over the top. And all we're going to do is we're going to take this side, pull it up, this side pull it down and fasten them together. And down nice and tight. And again, just like we did on the front seats, if you find that it's a little tight you can start on one side and get it kind of loosely fastened and then come back and tighten it all up.Now to do the backrests. On the '14 Tundra, the backrest does not fold forward. So, and when it slides on it, it only has a flap that goes over the top. However, it has a flap around the side that has hook and loop fastener. One tucks under here and one wraps around the side and they need to be fastened together. We have a little bit of space here that we might be able to do it, but there's not a whole lot. So to make it easier, what I'm going to do is take a 17 millimeter socket. We're going to take the seat out. We have a bolt here, bolt here, bolt here, both here, and then we can pop the seat out. We can do it right here in the floor if we want. I'm actually going to take it out and put it on a table. Make it a little bit easier, a little bit more room. Go ahead and remove these.Then you can just lift the seat up and slide it out. This is our back rest for our backseat. Those are the fasteners of the flaps I was talking about we have to get the attached in the back. Take it and slide it right over the top like this. We have the car seat tie-down there. They have open squares for our headrest brackets. The kit is going to come with a little tool like this. It make it a little bit easier. If you find that you can't get that in there, you can take this and then push it down underneath of that. I've been able to get them down with my hands.From there we're going to take this flap and we're going to tuck it in. And it might be a little easier if we fold this up a little bit. It makes that gap a little bit bigger to get that tucked down in there. And we're just going to work it. Get those fastened on there.Once you get your backrest on, reinstall your seat and then you're going to repeat the process for installing the headrest cover like you did on the front seats. Once we get our headrest done, we're going to repeat the process for any remaining seat. Now that we've got these done, let's go ahead and work on the center console in between the two front seats.As far as the seat part in the center, pretty self-explanatory. The whole back of it's open. It's going to have two strings, two tensioners that run along the edge. I just want to make sure those are below the seat. Then your strap is going through the center here and we're just going to tie these two together.(silence).Now that we've got this part of our seat done, we can work on the backrest and armrest. So for the backrest or the center armrest, you're going to have hook and loop strap, and you're also going to have a zipper. You need to make sure those are both undone. Take it and just feed it over the top like this. Go ahead and get these in first. We're just going to work our way around getting everything into place. And make sure you go under your zipper here or under your seatbelt, I should say.We'll take this flap, we're going to tuck it underneath. And we're going to take our hook and loop fastener on the top and bottom and we'll get those put together. Like that.So last thing to do other than the headrest for center console, is a hook and loop strap that runs right here. Strap them together, and that'll hold it in place. We'll raise this up. We'll grab our head rest and we'll put on our cover the same way we did the other ones. Once you get your center, armrests, headrest cover installed, you're ready to go. That's going to do it for a look at and installation on the Clazzio custom leather seat covers on a 2014 Toyota Tundra.
Average Customer Rating: 5.0 out of 5 stars (10 Customer Reviews)
Give your vehicle's cloth or vinyl seats an upgrade with these seat covers that look and feel like factory leather. The perforated leather covers with memory foam centers keep you cool and comfortable as you drive. Simple, slip-on installation.
Best seat covers made in my opinion, everyone thinks I have factory leather seats in my tacoma. The fact the you get a cover for center console an the headrest is amazing. They are not cheap ! But if you want cheap go to Pep boys .
I have examined the covers and am pleased with the construction but Alas, I have been so busy that I have not had time to rebuild the existing foam on the seats prior to installing the covers. Hopefully I will have time this winter to install them.
Now a year since install..all fitting(s) pieces remain snug and secure. Very comfortable, and easy to clean. As of this review, NO suggestion of wear, tear, or loose corners. All in all, VERY pleased.
Love it, has stood up beautifully to kids eating in there all the time!
After 1 year they still smell and feel like new.
Info for this part was:
At etrailer.com we provide the best information available about the products we sell. We take the quality of our information seriously so that you can get the right part the first time. Let us know if anything is missing or if you have any questions.


Thank you! Your comment has been submitted successfully. You should be able to view your question/comment here within a few days.
Error submitting comment. Please try again momentarily.