
To see if this custom-fit item will work for you please tell us what vehicle you'll use it with.


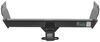
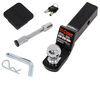
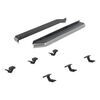
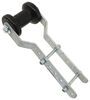
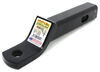
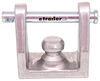
Use your Stealth Hitches rack receiver to tow a small trailer with this all-inclusive towing kit. Remove the receiver attachment from your hitch and insert the included ball mount. 7-Way connector, hitch ball and safety chain loops included.
Features:
Specs:
Videos are provided as a guide only. Refer to manufacturer installation instructions and specs for complete information.
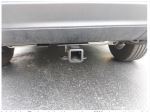
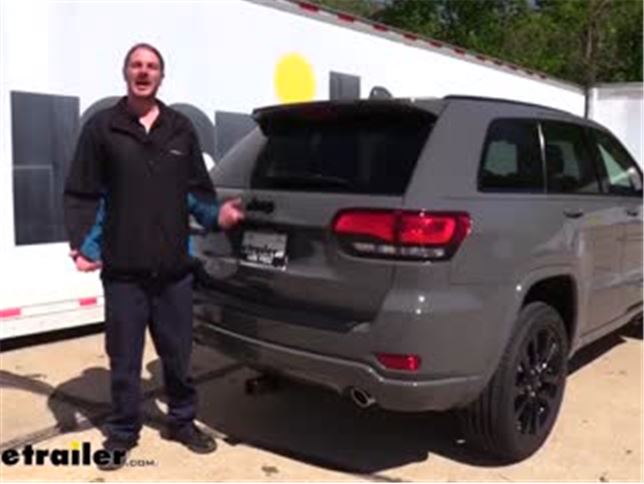
Hi there Jeep owners. Today in our 2020 Jeep grand Cherokee, we're going to be taking a look at and showing you how to install Stealth Hitches' hidden rack receiver. Invisible, isn't it That's because it has a removable end, we'll go ahead and remove the cover from it. This keeps any dirt and debris from getting inside of the receiving end for the removable accessories that can be placed in it. We're going to go ahead and pop it in. There's a handle located on one side that you just twist the knob, and on the other side, we have a lock mechanism.Our receiver is right here, and it will just slide into place up into our stealth hitch.
So we'll just line up the end here with the hole, give our nob a little twist, and then we can press the lock in place on the opposite side. And now we've got a two inch by two inch receiver for any of our accessories. So here we can see our new hitch that's installed. And the lever that is on here does come in the kind of locked position. So when you go to put it up here, it's not going to go in, but if we twist it all the way back, it'll actually lock into place.
You'll see the little tab here move, and then our receiver can just push straight up. You don't want to forget on the opposite side here to press in the lock, that'll ensure that our receiver end can not come out. Got to put the dust cap on it to keep any dirt and debris from getting inside of our lock and messing it up.You're now ready to load up your favorite accessories, whether it be bike racks or cargo carriers, and you're ready to hit the road. Now you do want to keep in mind that this receiver here is not designed for towing, it is just for your accessories, but there is a tow package available here at etrailer.com that comes with everything you'll need to snap right in to your stealth hitch, so you can do some towing as well.Our receiver is a two inch by two inch, so it's great for many different types of accessories. You don't have any limitations like you might have with a one and a quarter inch, and it uses a five eighths inch hitch pin and clip.
Now, one doesn't come included with this hitch, but we've got plenty available here at etrailer.com. It offers a 600 pound tongue weight, which is the force going down on top of our receiver.And that's going to be more than enough for our cargo carriers, fully loaded up to the max, as well as a four bike platform rack loaded up with four bikes. Now I've got some measurements for you to help you when deciding on accessories. From the center of the hitch pin hole to the edge of our rear bumper here, it looks like we're measuring about three inches. And this is important when determining if any of your folding accessories can be placed in the upright storage position without contacting the bumper.
And from the ground to the top inside edge of the receiver tube, it looks like we're at about 16 inches. And that's important when determining if you need a raised shank on any of your accessories. This one sits up pretty high here on our Jeep. I still recommend a raised shank just because you get that extra clearance, but it's not necessary, so you don't have to specifically pick those out.Now that we've gone over some of the features, let's go ahead and go over the installation together. One of the things that I do recommend is that you pick up a 21 millimeter crow's foot because while it is deceptively easy looking, there are a couple of bolts that are very difficult to tighten and torque down. That crow's foot is definitely going to come in handy getting this installed.We'll begin our installation underneath the vehicle by removing some factory hardware to reveal some weld nuts that we're going to be raising our hitch up to install into. Right on the driver's side of the frame, and we need to remove the two inside bolts that we see here. We're going to use a 21 millimeter socket to remove those. We'll then remove the bolts in the same location on the other side of the vehicle. Now that we've got the bolts out of the way, we have some sealant that runs here and this may or may not interfere with you raising your hitch up, but looking at how thick it is right here, this is likely going to interfere with us, so we're just going to take a razor knife scraper or something like that, and we're just going to trim this off right up in here. So that way our hitch can easily be raised up and we're not fighting it.And we're just trying to clean it up a little bit just, and then we're going to check the other side of the vehicle and then do the same thing over there. We can now take our hardware that we had removed, we're going to place a lock washer on it, followed by a flat washer. We're going to do the same thing for the three remaining bolts. We can now take our hitch and lift it into position, the angled end here at the center should be at the top, we want the flat part at the bottom. You may or may not want an extra set of hands. It's not very heavy, but it can be a bit awkward to hold it up there. And we're just going to hold it up.Put a bolt in on one side to hold that side up. We can come over to the other side here, slap one in over here and now our hitch will hold itself up, making it much easier to put the last two bolts in. Now we've got all of our hardware started, we can tighten the bolts down. I recommend tightening down these ones first, because if you tighten the ones here that are easy to get to, it could potentially put these in a bind and make them hard to tighten down. Because they're already extremely difficult to tighten down due to the gussets being in the way.You are likely going to have to go purchase a 21 millimeter crow's foot in order to tighten this down, because you're not going to be able to get a socket on it, and if you try to get a wrench on it, it's going to hit here, you're really not going to have much throw to be able to tighten it. So this is about your only option to do so. And just take your time threading it down, and it's going to be a little time consuming because you can't turn it that far.Just keep on working at it. Now that you've finally got those tightened down, you can go back and snug these ones towards the front of the vehicle up just using your socket. We can then go back and torque our hardware to the specifications found in our instructions. For your rear mount bolt, the ones difficult to get to, you're going to need to use your crow's foot again, to get up in there to torque it down. Now, if you're having trouble using a crow's foot on there, I've got a trick for you that's not really the recommended way because we aren't going to be using the correct size socket, but it is a way that you could potentially use a socket. I do say you're going to be doing this at your own risk, but if you take a larger socket like a seven eights, that's going to give you some slop and allow you to get a socket kind of on there. We're also using a three eight drive with an extension and we are on there kind of at a cricket angle. Again, this is not recommended. You may strip the bolt out.We can now take our center section, lift it up between our hitch and then take the long bolts that come included with it. We can then raise our center section up through the hitch and then take our bolts and we're going to run them through on the handle side. And this is going to help ensure that you have clearance to get up in there to reach the handle. If you go through it the other way, the bolts are going to stick out further with nuts on them. And you may or may not scrape your knuckles when you're trying to use this, so I recommend you go this direction.And you do want to make sure your handle's on the passenger side and your lock mechanism on the driver's side. On the other side, we're going to use the nylon locking nuts that come included with it to secure it. And then we can go back and tighten these down using a 19 millimeter socket and wrench.And then we can go back and torque, these bolts to the specifications found in our instructions. Now at this point, your hitch is fully installed, you can either leave it this way if you're not planning on towing, or if you are planning on towing, we can go ahead and install our receiver. You'll find your keys located below the rubber seal that keeps all the dirt and debris out when you're not using it.Go ahead and pull off the cap, so you could see the lock there. We can then raise our section into position and then lock it into place. Now, once you've removed the section, we can take the dust cover off of our lock. We're going to lift our receiver end up, twist our handle, push it all the way up, release the handle, verify that it's in position. And then you want to make sure that you push the lock in so that way it can't come out. That completes our installation of Stealth Hitches' hidden rack receiver on our 2020 Jeep Grand Cherokee.
Average Customer Rating: 4.8 out of 5 stars (28 Customer Reviews)
Use your Stealth Hitches rack receiver to tow a small trailer with this all-inclusive towing kit. Remove the receiver attachment from your hitch and insert the included ball mount. 7-Way connector, hitch ball and safety chain loops included.
2023 Volvo XC60. I bought this and the hitch separately. If you're not used to doing these, like me, the install was actually a fun and easy project, if you take your time to understand how things come apart/go together. I won't know if I did it all right, though, until I have the dealer program the vehicle to accept the new accessory. One pic shows white,braided wire to grounding nut. Another shows where I affixed the module. And another shows the black plug that is to be removed for where the wires will exit the vehicle.

You should have seen the macho Marina crowd as they watched me back my BMW 640 down the launch ramp with a 16 foot boat trailer hanging off the back. Guys were down on their knees looking under the rear of the car. But the best part was when I dropped the hitch and put it in the trunk! Lot' of OOOs and Ahaaas.
Worked fine but wiring came with no instructions (got from stealth website) and the thickness of the wires was not compatible with the connectors without a lot of effort to force the splice. Wires much thicker than car wires. Hitch part works great.
The Stealth Hitch is a great option if you want to keep your rear end looking clean. This kit allows you to add towing ability to an already installed Stealth Hitch Rack Receiver. I added this to a 2020 Volvo XC90. You do need to remove the bumper fascia which, with the excellent videos on this site, was not very difficult. I was able to complete the project in a couple of hours.
***Note*** Stealth changed the size of the bolts holding the hitch block to the bar (from 1/2” to 5/8”) in 2021. Since I had installed my receiver rack in 2020, the included, longer bolts that you need to use to install the chain hooks did not fit. I contacted Stealth and they sent me a new kit with the smaller bolts, chain hooks, and (nicer) bracket to mount the connector to the hitch - no charge. It took about a week to get them so plan accordingly so you’re not stuck with your bumper fascia lying on the ground, not able to complete the job. I ran to the hardware store to grab some temporary bolts so I could get everything back together until the correct bolts came. I’m hoping I can change out the correct bolts without having to remove the bumper fascia again.
Excellent hitch, instructions and videos were easy to follow no issues. Cant wait to install my bike rack and tow something
I am generally very happy with the design and function of this hitch. Unfortunately the paint started peeling off and rusting within weeks of installation. I keep my cars a long time so I will need to put extra effort into maintaining over time.
the longer bolts weren't included. used original bolts even though a tad short. contacted etrailer and no response couple days later.
Product was exactly as advertised - works perfect & was also recommended by my local BMW Dealership. Customer service form Alex (x72965) was exceptional!
I was looking for a hitch that I could tow my motorcycle trailer behind my E92 3 Series 335i. This stealth hitch has the removable quick mount receiver and ball adapter, so that it wouldn’t be an eye sore when I wasn’t towing my bikes to the track.
It works great! I was thinking it would be a loose fit, but the hitch is rock solid! I’ve never pulled more than 1K since the car is so light, but I’m sure it wouldn’t be the hitch that would go out.
It is pricey, but you certainly get what you pay for! Minimal cutting required to the bottom side of the bumper, and it goes in place of the bumper plate. You can only see about 1/8” of the machined receiver under the bumper.
Great product if you need to tow something light with your 3 series!
the rubber grommet and key fell out and were lost
Fast shipping. Great instructions. Lots of good videos. No problem installing the hitch. Love it.
Product works great. Only challenge was determining the correct turn signal and marker light wires without owning a multimeter. However, a couple paper clips, lead wires, and 12v bulb helped confirm the correct wires to splice into.
Note: The wire to pin 1 is for left/right directional. The wire to passenger side pin 4 is for the marker lights.
For connecting the wiring to power, remove the spare tire bracket to access the additional positive battery connections. Attach the black power line here instead of the battery post. For the ground wire, there is a collection of brown ground wires fastened with a crown nut towards the rear wheel well in the rear passenger side fuse compartment area. Attach the ground wire here instead of directly to the negative battery post.
I tested the wiring multiple times through the installation process to ensure all was good before closing it all back up again.
The installation instructions were not very clear. The reinstallation of the bumper trim was very hard and to have another person help. That should be included on the instructions to understand the process and have another person available. Bumper trim was very hard to place back on correctly and I still have an edge that is not flush.
Great look, no ugly hitch to look at. HIGHEST quality products!
Hitch worked perfectly and wiring did also. Great fitment.
A great Kit. Good instructions. Totally hidden when not in use.
Etrailer is great, knowledgeable, parts in stock and fast shipping.
Easy installation and all is well after one yer of use.
Awesome shopping experience! Lori B was thorough, professional and extremely
knowledgeable. I am especially grateful for her product knowledge and how courteous she was in the process. Best service I have received in years!
This is Amazing for the model 3. Love towing with it!!
Received my hitch fast. Quality. Highly recommended.
Do you have a question about this Accessories and Part?
Info for this part was:
At etrailer.com we provide the best information available about the products we sell. We take the quality of our information seriously so that you can get the right part the first time. Let us know if anything is missing or if you have any questions.


Thank you! Your comment has been submitted successfully. You should be able to view your question/comment here within a few days.
Error submitting comment. Please try again momentarily.