Connecting My New P3 Brake Controller to a Factory 4-Way Flat On a 2010 Ford Ranger.
Question:
Help! I bought the P3 Break Controller, and the 4 flat/7 pin plug with the long gray cable, the three circuit breakers, etc. I bought it before Xmas and then becam ill and couldnt install the product. Your videos seem to have changed and now I really need your help. I have a 2010 Ford Ranger Sport V6 withe the tow package i.e., 4 flat and type III hitch. Is there a video that shows the installation on this particular model? Is there a specific installation sheet that could walk me through this? Could you send one of the nice guys that make the videos????? HELP. How about the name of an installation company in Orange County, California that could help. I pretty sure I could install it myself, if I had the right video. I was very angry with Ford when they sold me the tow package and it didnt come break ready. Ive bought a small fiberglass trael trailer and need to pick it up in the next few weeks. Again, Im pretty good with my hands, but the videos I first saw seem to have been changed. Also, a video that SPECIFICALLY addresses this particular make, model, and year would really help. Please!
asked by: John L
Expert Reply:
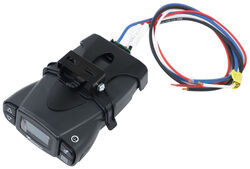
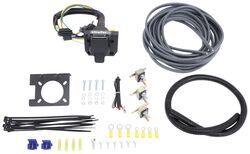
I think we can get you set up to install the P3 Brake Controller, item # 90195, and the Brake Controller 7 & 4 Way Installation Kit, item # ETBC7, yourself if you would like to go that route. We have a 2 part video, see links, that will walk you through the installation on a 2006 Ford Ranger, and we have detailed instructions, see link, that will help when installing the brake controller and related parts on your Ranger. The installation on the 2006 Ranger will be the same on your 2010 model.
If you take your time and carefully run the wiring you will have a professional looking setup in no time. Here is how the installation should go.
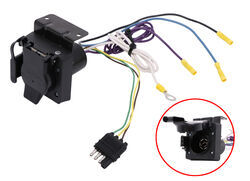
Start with installation of the # 37185 adapter included in the # ETBC7 kit. To install the adapter, you would first plug it into your 4-Way connector, and then connect the additional wires.
The additional wires would be installed as follows:
White: Ground, attached to a suitable location on the vehicle frame.
Black: 12v power lead wire, run to the vehicle positive battery terminal, with the 40amp circuit breaker included in the # ETBC7 kit. Use black wire in double bonded gray wire included in the brake controller install kit.
Blue: Electric brake wire, connected to the blue electric brake wire coming from the brake controller in the vehicle cab. Use the white wire in double bonded gray wire included in the brake controller install kit.
Purple: This is an auxiliary wire, and can be used as a 12v power source, or to power a reverse light or reverse lockout function if needed. If not, this wire can be tied up.
Now, install the brake controller. The white wire needs to be grounded to the vehicle battery and the black wire needs to be connected to the AUX side of the 20 or 30 amp circuit breaker that is included in the brake controller installation kit. The 20 amp circuit breaker is used for trailers with less that 6 brakes and the 30 amp circuit breaker is used on trailers with 6 or more brake assemblies. Use a length of the double bonded wire to run these wires. Then use a length of the black wire in the cable to connect the BAT side of the circuit breaker to the positive post of the vehicle battery.
The blue wire is attached to the white wire that was ran forward from the blue wire on the 7-Way connector at the rear of the vehicle. Then, the last connection is the red brake signal wire. This wire is connected to the wire coming off of the vehicle brake pedal that has 12 volt power only when the brake pedal is pressed. Use a circuit tester to locate this wire, and be sure that the wire does not have any voltage when the brake pedal in not pressed.
There is quite a bit going on here, but the installation is pretty straight forward, and you will be able to install it easily, deciding to get started may be the hardest part. If you decide to have the installation done, any local automotive service station should be able to perform this for you. I would say about 3 hours would be the normal installation time for a qualified mechanic.

Products Referenced in This Question
Tekonsha Prodigy P3 Trailer Brake Controller - 1 to 4 Axles - Proportional
- Trailer Brake Controller
- Proportional Controller
- Electric
- Electric over Hydraulic
- Automatic Leveling
- Under-Dash Box
- Dash Mount
- Up to 4 Axles
- LCD Display
- Up to 360 Degrees
- Tekonsha
more information >
Universal Installation Kit for Trailer Brake Controller - 7-Way RV and 4-Way Flat - 10 Gauge Wires
- Accessories and Parts
- Trailer Brake Controller
- Installation Kits
- etrailer
more information >
Product Page this Question was Asked From
Adapter 4-Pole to 7-Pole and 4-Pole
- Trailer Wiring
- Wiring Adapters
- Multi-Function Adapter
- 4 Flat
- Plug and Lead
- 4 Flat
- 7 Round - Blade
- Hopkins
more information >
Featured Help Information
Instructions
Miscellaneous Media

Continue Researching
- Article: Brake Controller 7- and 4-Way Installation Kit (ETBC7)
- Article: Trailer Wiring Diagrams
- Article: Brake Controller Installation: Starting from Scratch
- Article: Brake Controller Installation on a Ford Full-Size Van
- Article: How to Choose the Right Trailer Hitch Class
- Q&A: What is the Difference Between a 4-Way and 7-Way Trailer Connector
- Article: How to Measure for Trailer Hitch Drop
- Q&A: How To Connect 4-Way Flat Vehicle Connector To 7-Way on Trailer
- Article: Wiring Trailer Lights with a 7-Way Plug (It's Easier Than You Think)
- Q&A: My Vehicle has a 4-Pin Trailer Plug, but Trailer has 7-Pin Trailer Plug
- Q&A: Parts Needed to Install 7-Way Trailer Connector on 2021 Honda Odyssey
- Q&A: What is the Difference Between a Class II and a Class III Hitch?
- Q&A: Trailer Hitch for a Lance Travel Trailer
- Q&A: Can I Use a 4 Way Vehicle Connector with 7 Way Adapter and the Curt Echo Brake Controller?


