
Breakaway Kit Installation for Single and Dual Brake Axle Trailers
Breakaway kit - includes a breakaway switch and a battery contained in a mounting box Breakaway kit components: Breakaway switch - mounted to the trailer frame and has a cable that connects to the vehicle's frame If the trailer disconnects, the cable pulls a pin out of the switch, activating the trailer brakes.
Breakaway battery box - houses a 12 volt battery and, in some models, a battery charger
Electric Trailer Brakes Connection to the auxiliary power wire from the tow vehicle needed only if the breakaway kit has a charger
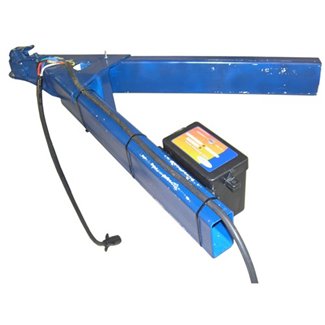
Locate a secure surface on the trailer to mount the breakaway kit battery box. A typical position is on the inside of one of the trailer frames in the front of the trailer. Self-tapping screws or U-bolts are usually included for mounting the battery box.
Mount the breakaway switch close to the trailer coupler so the cable can be attached to the vehicle. Also, mount the breakaway switch close enough to the battery box so their wires can connect. A typical position is on the outside of the trailer frame between the trailer connector and the battery box. NOTE: The switch is held in place with only one screw. It needs to be tight but not so tight that it cannot rotate to allow the pin to be pulled out.
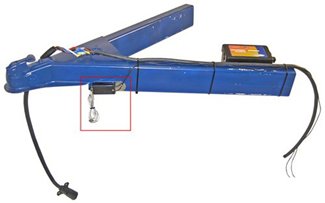
Breakaway kits without battery chargers require three connections. Remember to periodically remove the battery from the box to charge it, or replace it accordingly.
Splice one of the two wires coming out of the breakaway switch into the trailer brake wire running from the trailer connector to the brakes. Connect the second wire coming out of the switch to the brake wire (blue) coming out of the battery box. This connection will send power to the breakaway switch. NOTE: Both wires on the breakaway switch are interchangeable.
Splice the white wire coming out of the battery box into the existing ground wire (usually white) running from the trailer connector to the trailer, or screw the white wire directly to the trailer frame.
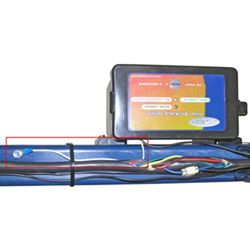
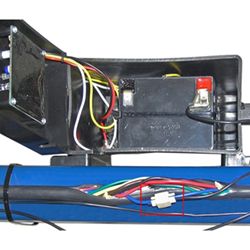
Hopkins breakaway kits with built-in chargers require four connections. One connection has already been made inside the battery box.
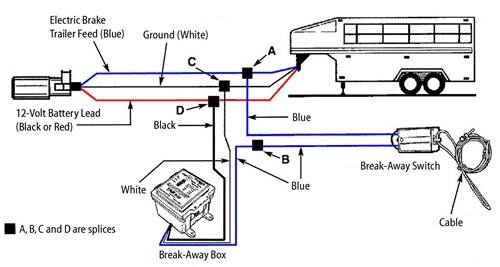
This diagram shows a typical wiring configuration for a Hopkins breakaway kit with a battery charger. Some other manufacturers have similar configurations, but not all wire colors are the same. Consult your breakaway kit directions before installation to verify the wiring configuration.
Splice one of the two wires coming out of the breakaway switch into the trailer brake wire running from the trailer connector to the brakes See point A on the wiring diagram
Connect the second wire coming out of the switch to the brake wire (blue) coming out of the battery box. See point B on the wiring diagram This connection will send power to the breakaway switch. NOTE: Both wires on the breakaway switch are interchangeable.
Splice the white wire coming out of the battery box into the existing ground wire (usually white) running from the trailer connector to the trailer, or screw the white wire directly to the trailer frame See Point C on the wiring diagram
Splice or run the 12 volt hot lead (black) coming out of the battery box into the 12 volt hot lead running from the trailer connector to the trailer See Point D on the wiring diagram This connection will charge the battery when the vehicle is in use.
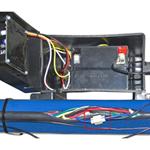
This connection will send power to the breakaway switch. NOTE: Both wires on the breakaway switch are interchangeable.
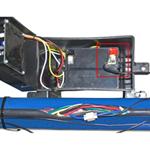
This connection charges the battery. There should now be two wires connected to the positive post: the second switch wire and the red charger wire. Connect the black wire on the charger to the negative post (black) on the battery.
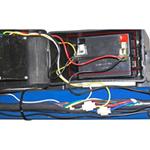
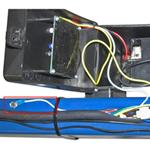
This connection will charge the battery when the vehicle is in use.
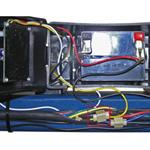
The cable should come straight out from the switch to attach to the vehicle Any angular attachment may cause breakaway switch failure Secure the cable on the same side of the trailer frame as you mount the breakaway switch Do not loop the cable over the hitch ball; the cable may bounce off while the vehicle is moving Before towing, test the breakaway kit by pulling the pin out of the switch to activate the brakes
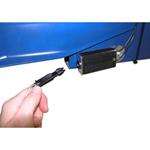
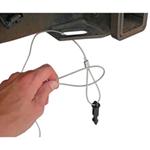
Departments
Towing
- Trailer Hitch
- Fifth Wheel
- Gooseneck
- Towing a Vehicle
- Front Hitch
- RV Hitch
- ATV Hitch
- HD Truck Hitch
- Vehicle Wiring
- Brake Controller
- Ball Mounts
- Weight Distribution
Sports and Recreation
Trailer Parts
- Utility Trailer
- Boat Trailer
- Landscape Trailer
- Enclosed Trailer
- 5th/Camper Trailer
- Car Hauler
- Horse Trailer
Vehicle
Contact & Help

Popular Vehicles
- Subaru Forester
- Ford F-350 Super Duty
- Ford F-250 Super Duty
- Chevrolet Silverado 1500
- Jeep Wrangler Unlimited
- Jeep Wrangler
- Ram 3500
- Toyota Highlander
- Ram 2500
- Chevrolet Silverado 2500
- Subaru Outback Wagon
- Chevrolet Silverado
- Dodge Ram Pickup
- GMC Sierra 2500
- Ram 1500
- Ford F-250 and F-350 Super Duty
- Jeep Grand Cherokee
- Toyota Tacoma
- GMC Sierra 3500
- Toyota Tundra
- Ford Escape
- More >>


