bing tracking image

header

DO NOT TRY TO FLAT TOW WITHOUT THIS EQUIPMENT!

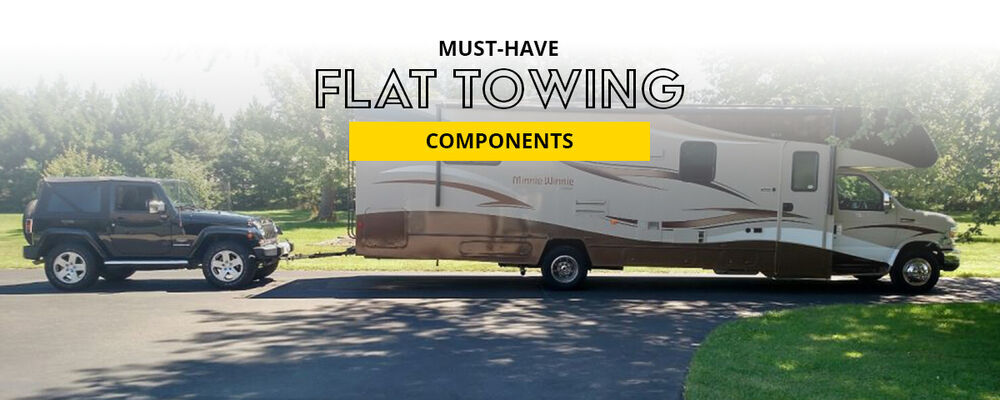
Flat towing a vehicle (also called a toad or dinghy) behind an RV is one of the most ingenious innovations since someone decided to throw wheels under a tiny home. The most common reason for flat towing is basic convenience. Who wants to maneuver a large, unwieldy motorhome through small towns, parking lots, or back roads? With flat towing, I can just hook up my car to my RV’s trailer hitch, and when I get to the campsite, disconnect it to go exploring.But to safely flat tow, your setup must have:
In the following sections, I break down what each of these parts are, what they’re used for, key options when researching the parts, and generally how to use them. Let's get into it!
Watch Now: What You Need to Flat Tow a Vehicle

1. Base Plate Kits

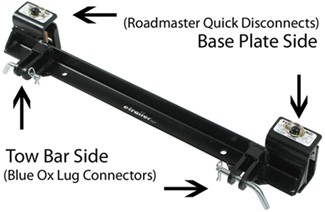
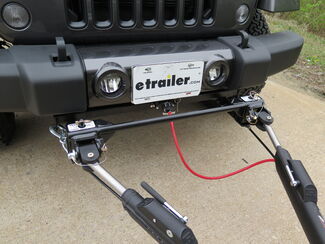
A base plate kit is a set of steel components installed on the front frame of your toad. A base plate has connection points where a tow bar will attach. The other end of the tow bar attaches to your RV's hitch, either by inserting the tow bar's shank into the hitch receiver or a coupler.Base plates install on your toad's frame using as many existing bores as possible without sacrificing the strength or safety of your toad’s frame. Base plate kits are a vehicle-specific flat towing component, and most toads require custom-fitted base plates to specifically fit their frames.
base plate
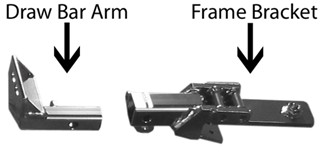
How do I find the right base plate kit?First narrow your search to only base plate kits that fit your vehicle. Check out our fit guide for base plate kits here. Just enter in your vehicle’s year, make, and model, and our unique-in-the-industry system will display only base plate kits that fit your specific vehicle. When multiple base plate kits are available for a vehicle, the modifications needed to your toad will be nearly the same for each kit. The main differences between kits lie in the drawbar type and the number of frame bracket pieces. Typically, base plates consist of two main parts:
  • Frame bracket(s): Mount directly to the toad's frame
  • Draw bar arms: Provide attachment points for the tow bar
    • Removable arms attach to frame brackets using a pin/clip or twist-lock feature. They create a cleaner look with no visible parts when the arms are removed.
    • Fixed arms are welded to the frame bracket and are visible at all times. They are typically the more economical option.
Different brands offer different base plate styles. Roadmaster offers two styles of base plates, which you can read more about here. Demco offers two different styles, which you can learn more about here. Blue Ox offers a lug-style base plate system, which you can read about here. Finally, etrailer offers a variety of base plate kit options as well. In these articles, you will learn about the differences between styles and why you may want to choose one style over another.
What is a base plate adapter, and do I need one? While most base plate manufacturers construct products to fit as many applications as possible, it is common to find that your tow bar's manufacturer does not have base plates that can fit your vehicle. Each tow bar manufacturer has a unique type of connection used to secure the tow bar to the base plate arms. Because of this, you may need to purchase an adapter. The key here is making sure your base plate kit and tow bar are compatible with one another. Generally, if you purchase a tow bar and base plate kit from the same manufacturer, they will be compatible with each other, but that is not always the case.
base plate adapter 1
base plate adapter 2

2. Tow Bars

The tow bar is the most recognizable part of a flat towing system. It is the part that links your toad to your RV. The function of the tow bar is the same regardless of model or manufacturer. The differences between tow bars lie in the type of mount (how it’s installed), towing capacity (how much weight it can tow), and basic design (functionality). Beyond those aspects, there are a wide variety of features associated with the various models.
Check out our video on how to use your tow bar safely!
What are my tow bar options?The first qualifier for choosing a tow bar is finding one that is compatible or can be adapted for use with your base plate kit. Generally speaking, a tow bar and base plate kit from the same manufacturer will be compatible. When comparing tow bars, there are many options to choose from, so while the basic function of the tow bar remains the same, you may find you prefer certain features or materials over others. Steel: Traditionally, tow bars were made from steel; this means that we have years of experience making them this way, and that can be reassuring for many. They also tend to be a bit less expensive than their aluminum counterparts, weighing around, and often exceeding 50 lbs. Which may not seem like much when you are towing an entire vehicle, but they can make loading, unloading, and transporting your tow bars more difficult than it has to be. Aluminum: Aluminum bars are generally considered the “premium” option for tow bars. Like many other premium options however, this is a double edged sword. You have premium convenience and features, but also a premium price tag. Aluminum bars way much less than steel bars, which makes the process of using them extremely easy. One of my favorite aluminum tow bars, the Demco Dominator, weighs only 30 lbs. That’s one lightweight tow bar! Fixed Arms: Some economical, vehicle-mounted tow bars are made with rigid arms that don’t adjust in length. Being the more budget-friendly option is always a plus, as is the confidence inspired by your tow bars being a single piece with little room for mechanical failure. But the more rigid design means that you will have a more difficult time connecting your vehicle. You will have to be extremely precise when you pull your vehicle up to your flat tow hookup in order to make the bars connect cleanly. Telescoping Arms: Tow bars with telescoping arms allow you to slide the arms to the length you need while hooking it up to the base plates. You don't have to drive your toad into a precise position to connect your towing system like with fixed arms. Again, these are seen as a more “premium” option, so they come with a slightly more intimidating price tag, but for those who hook and unhook their toad frequently, the time and hassle saved can be well worth the investment.
tow bar 3
Crossbar-Style Tow Bar
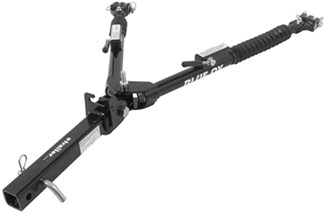
How does a tow bar install? The primary difference between tow bars is how they attach to both your RV and toad. RV-Mounted Tow Bars: This type of tow bar inserts into your motorhome's hitch receiver, secured with a hitch pin and clip. That’s it. As you’ll understand when you read about vehicle-mounted tow bars, there is significantly less work that you must do to set up an RV-mounted tow bar. Using a locking hitch pin can secure the tow bar to your receiver, so you don’t have to worry about someone running off with your expensive tow bar. The benefits of an RV-mounted tow bar include:
  • Sturdy, stable connection - Because you don’t have a coupler on this style of tow bar, there’s one less point of potential uncoupling from your RV.
  • Safe, secure storage - Once you’ve installed your RV-mounted tow bar in your RV’s hitch receiver, it can be folded up to remain on the rear of your RV for storage. And it’s easy to keep safe by using a locking hitch pin.
  • Less hassle - Because your tow bar stays on the back of your RV, this also equates to less hassle. You won’t have to strain yourself, lugging your tow bar out of storage every time you want to flat tow.
  • Easy to adjust - As I’ll discuss later, your tow bar needs to be practically parallel to the ground. With a hitch receiver high-low adapter, you can easily get your tow bar level.
tow bar 2
Extra Tow Bar Features You May Want:
Non-Binding Release Latches What is it? These are easy-to-grab latches that let you release the tension in the tow bar's arms after flat towing. Why do I want it? Tension in the tow bar arms when parked at an angle or on an incline can make it nearly impossible to disconnect the arms from your toad. A release lever relieves that tension so that you can safely disconnect the tow bar.
release latch
Self-Supporting Arms What is it? These tow bars have a tension mechanism at the base of the arms that holds the arms wherever you place them.Why do I want it? Tow bar arms can be heavy and unwieldy, so self-supporting arms make it easier to keep everything in place while you're hooking up to your base plate.
self supporting arms
Self-Aligning ArmsWhat is it? Once you're hooked up, the arms telescope to lock in the safe and centered towing position as your slowly drive your RV forward.Why do I want it? Self-aligning arms save you the hassle of having to align your toad perfectly with your RV's rear to connect the arms in the fully extended, locked position.
self aligning arms
LED-Lit Arms What is it?The Roadmaster Nighthawk tow bar has LED strip lights along both arms.Why do I want it? The LED lights illuminate the flat towing components, back of your RV, and front of your toad to signal to other drivers to not merge into your rig. They also provide more visibility to disconnect at night. No ramming your shins into the arms or losing parts on the ground.
led lit arms
Pivot JointsWhat is it? Pivot joints allow the tow bar's arms to individually swivel, allowing for easier hookup on uneven ground.Why do I want it? If you camp at mom-and-pop campsites or in the backcountry, the ground likely won't be level, which makes connecting a tow bar difficult. Pivot joints allow the tow bar to be connected on uneven and inclined terrain.
pivot joints
Safety Cable Management What is it? Tow bars with a cable management system have either clips or channels along the arms to secure the safety cables and/or electrical cord.Why do I want it? Loose safety cables can hang low to the ground, creating a safety concern, especially if you're taking your RV off paved roads. Keeping your cables away from the ground also protects them from wearing quickly and needing to be replaced often.
safety cable management
When your toad is connected to your motorhome, the tow bar should be within 3", up or down, of being level to the ground. If it is not within this acceptable range, also called “the safe zone,” you will need to use a high/low hitch adapter to safely connect your tow bar to your base plate. Click here to learn more about high/low adapters. Why does this matter? Improper leverage can cause stress and wear on the tow bar and base plates. When braking, stress is applied to your towing system and to the frames of your RV and dinghy because of the downward braking force placed on both vehicles. This can cause flexing at the base plate installation points and adversely affect both the frame and suspension of your towed vehicle.
How do you know if you need a high-low hitch adapter? Here’s a quick tutorial on measuring your hitch receiver and base plate.
  • A: Measure the height from the center of your hitch pin hole on the RV to the ground.
  • B: Measure the distance from the center of your dinghy's draw bar arms (when installed in frame brackets) to the ground.
  • A - B = C: Subtract the difference (A - B). If there is more than a 3-inch difference, a hitch adapter is needed.
high low adapter

3. Safety Cables

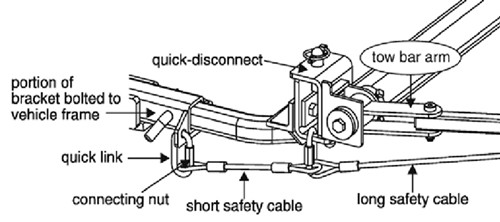
What are safety cables? Safety cables are steel cables connecting your RV to your toad. The cables' purpose is to ensure that your toad does not fully detach from your RV if your tow bar somehow fails. These cables are crucial for any tow bar setup and are required by law in most states. How do I use safety cables? If your safety cables aren't integrated into your tow bar, the proper way to connect your safety cables is to crisscross them underneath the tow bar. One cable will attach to the left side of your RV and to the right side of your toad. The second cable will attach vice versa. Crossing cables create a basket under the tow bar in case it becomes uncoupled. This basket keeps your tow bar from dragging on the ground.
In most towing setups, safety cables link two or three components together. The long cable connects the RV hitch to the base plate brackets on the toad. If your base plate has removable draw bar arms, you may also need to add a small cable that connects the base plate arms to the frame-mounted brackets on the toad.What are my safety cable options?Long, straight cables: Designed for tow bars with integrated cable channelsNote: Cables should not be wrapped around Blue Ox tow bars with protective rubber boots. This will interfere with the rubber boots’ functionality and cause them to prematurely wear. Long, coiled cables: Won't drag during towing, great if your tow bar doesn't have an integrated cable management system Short safety cables: May be required when using the Roadmaster EZ or XL base plates
safety cables
Safety Cable Tip
Use quick links. Your safety cables clip on to your RV's hitch and base plate brackets, but the proper clipping location can be hard to reach. Placing quick links makes clipping on safety cables quicker and easier. No awkward hookups—just a clip that your cable hook can easily attach to.

4. Tow Bar Wiring

You are required by law to have a lighting system on your toad that functions in sync with your RV's tail lights. More specifically, when you brake, use a turn signal, or turn on your hazard lights on your RV, your toad’s lights should do the same thing. You have several light wiring options available to you. These systems all meet the legal requirements for synching your RV and toad's lights. The main difference is how they’re installed. Some solutions are temporary (needing to be installed and uninstalled anytime you’re flat towing), and others are permanent (installed once and remain on your toad). Additionally, some wiring systems are universal and can be used with any toad, while other systems are custom to your vehicle.
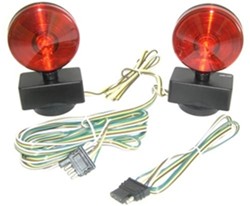
What are my wiring options? Removable Exterior Light Kits: Magnetic towing lights and hitch-mounted light bars. These are typically the most economical wiring solutions, but you will have to set up the system every time you flat tow. However, the setup is quite easy. Just plug the harness into your RV (which may require an adapter if you don't have a 4-way plug), and then pop them into place at the rear of your toad.
exterior lights
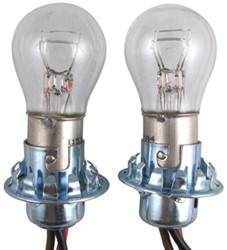
Bulb and Socket Kit: Mount inside vehicle's tail light housings and bypass dinghy lighting system. This is another economical solution, but it means you have more bulbs to maintain over time. Moreover, many new vehicles don't have space for an extra set of bulbs, meaning you'll have to drill into your housings to make room. This leaves your housings susceptible to water intrusion.
bulb and socket kit
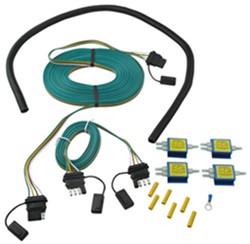
Diode Kit: Wires in-line with toad's existing tail lights. This is the most common method for syncing your lights. The best benefit of this system is that once it’s installed, you don’t have to worry about removing anything. Also, it uses your toad’s bulbs instead of you needing to add an extra set of bulbs. You can also install a diode kit on your own, but it will take a bit of time. When you find a diode kit on our site, you can view our installation videos to guide you through the process.
Diode Kit
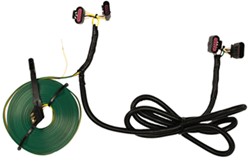
Custom-fit, Plug-In Wiring Harness: This is the most recent technology for towing wiring, and more and more people are choosing this method. This system consists of a harness that plugs directly into your toad’s existing tail light wiring harness. This is a solution you can install at home with the same benefits and functionality as a diode kit.
wiring harness
Extra Wiring Accessories You May Need
If you are unsure about wiring systems that will work for your toad, we have a custom fit guide to help you choose the best solution for you. When you enter in your vehicle’s year, make, and model, you may be shown a few extra parts that are needed for your specific setup. Two common wiring extras are wiring extensions and charge line kits. If these parts are required for your vehicle, the recommended wiring kits will contain these parts for you. Wiring Extensions: Connect towed vehicle wiring to motorhome wiring. Most installations require a wiring extension. Charge Line Kits: Connects to 6-way or 7-way plug and allows RV to charge vehicle's battery while you're towing. This will prevent the vehicle's battery from being drained if it's used to power a braking system. A power line must be present on the RV. If there is no power at the 6-way/7-way plug, a charge line kit must be installed. Here are some testers you can use to see if you’re getting power.

5. Supplemental Braking Systems

Required in most states and Canadian provinces, a supplemental braking system synchronizes your toad’s brakes with your RV’s brakes. While you may think this is an optional component for your flat towing rig, most likely you will RV in a state that requires this system. You might as well plan for this component beforehand. Additionally, while you're flat towing, your RV is pulling thousands of pounds behind it. A supplemental braking system helps make sure everything safely stops when it needs to. This braking system has benefits too. A supplemental braking system can decrease braking distance up to 30% on some towing setups. It also minimizes wear on both vehicles and smooths braking. Plus, many RV manufacturers will only honor your warranty if a braking system is in place when towing. What are my braking system options? When looking at supplemental braking systems, you have two general categories to choose from: fixed systems and portable systems.
Fixed Braking Systems: A fixed braking system is installed once, and you don't have to remove it when you're done flat towing. Some fixed systems work by tapping into your RV’s and toad’s braking systems and may require a professional to complete this installation.
fixed braking
Portable Braking Systems: A portable braking system is a simple braking solution for people who don’t want to bother with advanced mechanical work; however, this system has to be removed and set up again every time you flat tow.
portable braking system
Updated on: 6/16/23


Departments

Towing

Sports and Recreation

Trailer Parts

Vehicle

What our customers are saying:

"Very helpful/friendly Customer Service. Competitive Pricing. Shipping was Fast."

John
Mankato, MN

Popular Vehicles