bing tracking image

Camping Tips for First-Time RVers

Camping Tips for First-Time RVers

A Walkthrough of Your First Year of RV Ownership

If you're reading this, you probably just bought your first RV, or are about to. So firstly, congrats! If anyone understands the excitement and lure of a shiny new (or new-to-you) RV, it's us here at etrailer.If you're like most new RVers, you probably received a brief rundown of your camper when you bought it. As in, "here are the slide controls. Here's the water heater. Here are some hoses for your tanks." It's a start, but what about after you leave the lot? What do you need to know before your first trip? What kind of maintenance does your RV require? What should be on your mind as you take your camper through its first season (or at least, your first season with it)? You don't know what you don't know, so that's where we come in. Here are a few other tips from veteran RVers who have been there, made the mistakes, and learned from them.
In this article:

Tips for Before Your First RV Camping Trip
Your first camping trip might be days or weeks after you bring your camper home, but it never hurts to be prepared ahead of time. Below, we've laid out a few things you should think about or familiarize yourself with ahead of time.
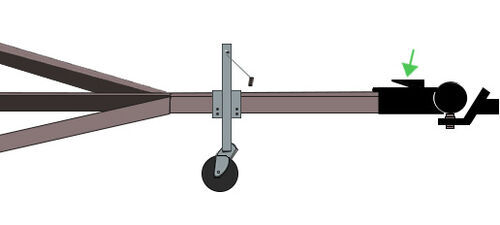
Trailer Coupler on Ball Mount

1. Learn How to Hook Up Your Camper

In theory, it's pretty straightforward: back your car up to your camper, lock it in place, and hook all the cords and chains where they need to go. In practice, you'll probably have to pull forward and back a few times to get the hitch lined up. You'll run into issues where the coupler wants to be difficult instead of latching, or your spotter forgets to call "stop" in time. Your arm will get tired from cranking the jack. (Can confirm: all of these happened to me my first trip out.)It helps to make yourself a checklist to ensure you don't miss any crucial steps when hitching up. If you'd like, feel free to print or copy/paste ours to your phone for later use.
For a travel trailer:
  • Jack up trailer so coupler is higher than hitch ball
  • Back vehicle up to coupler
  • Lower trailer onto coupler
  • Latch coupler and insert safety pin
  • Retract jack completely
  • Add safety chains and plug in wiring
  • Hook up breakaway cable
  • Test: Pull forward to make sure trailer stays coupled; test brake lights/blinkers to make sure brake controller works
For a 5th wheel:
  • Open 5th-wheel hitch jaws
  • Back truck toward king pin (lower tailgate if necessary)
  • Latch 5th-wheel hitch jaws (even if jaws latch automatically, check to make sure they closed properly)
  • Drive forward to ensure coupler is properly latched
  • Plug in wiring
  • Test: Pull forward to make sure 5th wheel stays coupled; test brake lights/blinkers to make sure brake controller works
You'd be surprised how many new campers don't latch their travel trailer coupler properly or don't fully back into their fifth-wheel hitch. It's crucial to make sure you're hooked up properly so you don't damage your tow vehicle, trailer, or anyone on the road.A few other tips:
  • For the easiest time, make sure you're parked on as level a surface as possible when hitching up.
  • Ensure your jack is completely retracted before you drive off—more than one camper has ruined a jack by leaving it down and bottoming out.
  • Make sure to have a spotter, or grab some alignment tools to make the job easier.
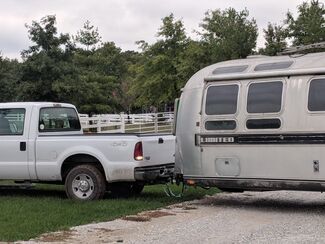
For more tips, check out our article on hitching up a trailer.
Backing Up Airstream Trailer

2. Learn How to Drive, Park, and Back Up Your Camper

You don't have to be a pro, but it's helpful to practice driving, parking, and backing up your rig in an empty lot before you actually go camping. Even if you're used to driving a huge one-ton truck or monster SUV, an RV is a different beast. You'll need to drive slower, you'll require more turn clearance, and backing up a camper is uniquely counterintuitive. (Usually, if you want your vehicle wheels to go right, you turn the wheel to the right, but it's the opposite with a camper.) I can't overstate how helpful a spotter is when backing up your camper into its space, because, hey, you can't really see where the camper is going. You can use your mirrors and your backup camera (and I recommend doing this), but at a certain point it's just really hard to tell where the camper is and where it needs to go. A few tips:
  • Remember that trailers turn the opposite way of the wheel. If you want the trailer to go left, turn the wheel right.
  • Don't jackknife—aka turn so sharply that the rear of your tow vehicle collides with the front of your trailer. Another reason to have a spotter to tell you when you're getting into danger territory.
  • Don't get frustrated (easier said than done, but at the very least try not to yell at your spotter)
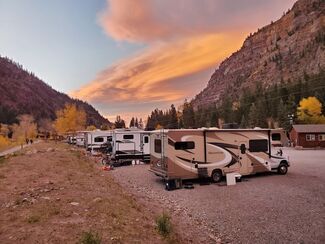
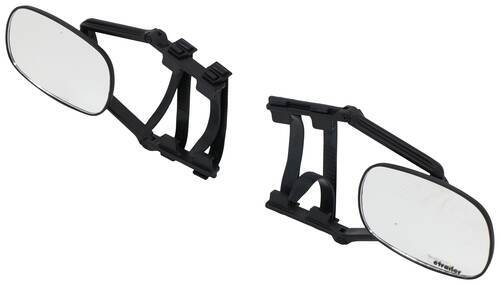
Check out our article here for some additional tips and to watch my first attempt at backing up a 30' 5th wheel. PS — towing mirrors are a must-have, even if your camper is short! Personally, I'll never tow a trailer without them; it feels too much like driving blind.
Parked Campers Mountains

3. Learn About Your Campsite (As Much as Possible)
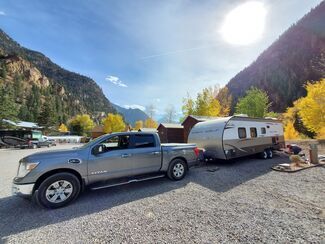
RV campgrounds vary widely in what they offer, from full hookups and shower facilities to a bare bones camping experience. Try to plan as much as possible. Know whether your campsite has electrical and water hookups, or if you'll be living off your RV's battery bank and water tank. Check whether laundry facilities or showering facilities are available. It also helps to know what is/isn't allowed at your campsite. For instance, are dogs allowed off leash? Is alcohol allowed? If you plan on swimming or kayaking, are there designated areas for this? (I can tell you from experience that it's no fun loading up all your kayaks, driving to the water, and unloading only to then see the sign that says "no kayaking.") You can usually find a brief rundown of the rules on a campsite's website, or you can check when you call to make the reservation. Speaking of reservations, you'll want to make one. You don't want to spend an unexpected night in a Walmart parking lot because the site filled up unexpectedly. Campgrounds can fill up fast and may limit "walk in" arrivals to certain times. Also familiarize yourself with your campground's check-in procedure, if there is one—do you have to register when you get there? Are there certain hours for check in? What happens if you arrive later? It may seem like a lot of prep, but asking all these questions upfront can limit the kind of surprises that put a damper on your trip. Even if you're not normally a planner, it's worth planning out at least this first RV trip as much as possible. Trust me, it's easier dealing with these things from the comfort of home than when you're hungry and tired on the road.
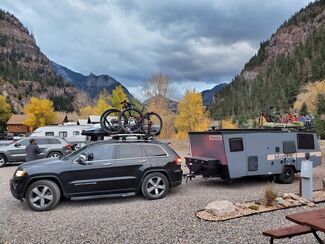
Parked Camper Mountains

4. Make Several RV Packing Checklists

There's a lot to remember when taking your RV out, so we suggest making a couple of lists to start with. Make one for your daily household items like a toothbrush, electronics, and medications. Make another for RV-specific essentials, like your dump hose and wheel chocks. When packing clothes, bring items you can easily layer for different weather. It'll also help to plan your meals and grocery shop ahead of time. Many RVers start off bringing everything but the kitchen sink on their travels. After a few trips, they get a feel for what they really need and pare down the must-have list substantially. You probably don't need as much as you think, but making a list of essentials goes a long way in ensuring you have what you need when you need it. For a comprehensive RV packing checklist, out our RV Camping Checklist for Your First Year RVing, or download the printable version here.

Tips for Your First RV Camping Trip

Here you are with your rig at the campsite for the first time — you made it! So now what? What's the first thing you should do when you arrive? How do you go about those necessary RV tasks like dumping your waste tanks? Below, we'll go over some need-to-know info for your first campground stay.
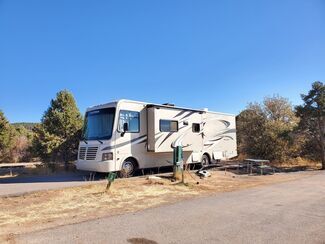
Parked Camper Mountains

1. What to Do When You Reach the Campsite

Get to the campground before dark whenever possible. Navigating around, trying to find your camping spot, and parking/setting up your camper is considerably harder to do in the dark. Here's a rough breakdown of how to set up and settle down when you reach the campsite:
  • Check in with the campground staff and find your campsite
  • Try to park on the most level part of your designated spot. You're going to want a level to indicate how you should place your leveling blocks. (I recommend the kind that stick on the side of your rig.)
  • Level your camper
    • Level your camper left to right by driving onto leveling blocks
    • Chock your wheels
    • Unhitch
    • Level your camper front to back by unwinding the jack until the rig is level. (You'll want a tongue jack stand or block of wood to place beneath it to create a sturdy platform.)
    • Put down your stabilizers. Make sure to put down all 4 (or more if you have them), or your rig will be super wobbly the whole trip.
    For more detailed help, check out our 3-step guide for leveling your camper.
  • Open your slides/pop-ups
  • Connect to the power pedestal (if available) (read more about RV power service here)
  • Connect water (make sure to use a water pressure regulator)
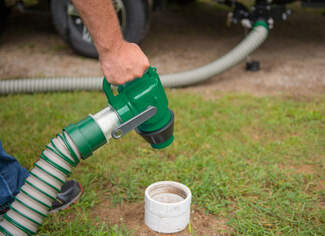
  • Connect sewer (leave valves closed)
  • Turn on propane tank valve
  • Turn on appliances (AC, water heater, etc.)
  • Set up your camping chair, open a beer, and relax
This may seem like a lot, but trust me, after about 5 or 6 trips, you'll get this down to an exact science.
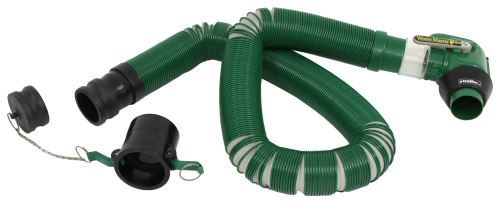
RV Dump Hose

2. How to Dump Your RV Tanks for the First Time

It's everyone's least favorite part of RVing, but a necessary one all the same. A few words of advice when it comes to dumping your tanks:
  • Wear gloves.
  • Never use your potable water hose for your sewer duties.
  • Try to only dump your tanks when they're at least 2/3 full (keep an eye on your sensor so you know how full it is). This helps prevent solids from sticking to the sides of the tank.
  • You'll find that many campers leave their gray tank valves open to let the sink/shower waste water drain. This is typically okay as long as it's not making a muddy mess, but you should always keep your black tank valve closed until you're ready to dump. Otherwise the liquid will drain from the black tank, and you'll be left with muck stuck in the tank. This is a common cause of what's known among RVers as the dreaded "poop pyramid," which happens when waste builds up, layer after layer, until the tank is completely blocked. It's the stuff of RV nightmares.
  • If you do leave your gray valve open most of the time, it's best to close it for a while to let the water build up prior to dumping the black tank. You can then use this gray waste water to wash out the hose after dumping your black tank. Or, of course, you can leave both valves closed the entire time until you need to dump.
  • Tank sensors can lie to you, especially black tank sensors, and especially when your tank needs a good rinse. Gunk (I won't specify what) sometimes sticks to the tank walls and tricks the sensors into thinking the tank is full when it's not. Use a flush valve or other tank rinser to give your tanks and sensors a good cleaning after each dump.
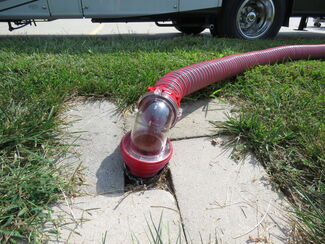
RV Dump Hose
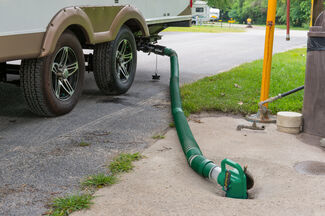
Below are the steps you should follow when you're ready to dump: It's everyone's least favorite part of RVing, but a necessary one all the same.
  • Attach the hose to the dump station hole. Use an elbow to make the connection and hold the hose in place. If you don't have an elbow, insert the hose at least 8" into the hole so it doesn't come unattached while you're dumping.
  • Make sure the valve is closed (you don't want poop shoes), then remove the cap.
  • Open the black tank valve first and let it drain. Then, use a black tank rinser (if you have one) to rinse out any leftovers inside the tank until it runs clear.
  • Open the gray tank valve (the gray tank water will help flush the black tank gunk from the hose).
  • Once the drain runs dry, close the valve.
  • Double check that both your black water and gray water valves are closed. Then disconnect your sewer hose.
  • Use the dump station hose (if available) to rinse the inside and outside of your sewer hose, then around the dump station hole.
  • Add any holding tank treatments now
Learn more about cleaning and maintaining your black and gray water tanks here.
Camper Parked with Power Pedestal

3. How to Practice Good Campground Etiquette

Use common sense and be a good campground neighbor, just as you would at home. This includes:
  • Respecting quiet hours. Many campgrounds have noise restrictions during certain times (note that this includes not running your generator during these hours). If you arrive to the site late, don't yell back and forth, shine bright lights everywhere, or let your dog bark freely.
  • Cleaning up after yourself, kids, and pets. No doggy waste, beer bottles, or trash left behind.
  • Practicing good dump station habits, such as using the hose to wash down spills and being ready to dump so you don't hold up the line when you get there.
  • Staying on your own site and not spilling over onto others' space.
  • Supervising kids and pets. Yes, it's a vacation your little one (or fluffy one) will also love, but just make sure they're having fun while also being respectful of others. Make sure your kids aren't shouting and your dogs aren't barking (or, you know, vice versa).
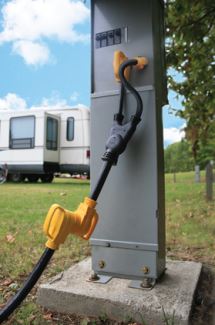
RV Power Pedestal

4. How to Use Electricity in Your RV

AT A CAMPSITE WITH AN ELECTRICAL HOOKUPAt a campground with an electrical hookup, using electricity is pretty straightforward. Just plug your power cord into the power pedestal at the campsite.The main thing to be aware of here is that your RV will run on either 30- or 50- amp power, but some campgrounds only supply one or the other. If the connection isn't compatible with your RV, you'll need an adapter. We highly recommend taking one of these along to every campground to make sure you can always hook up to power. (Read more about 30-amp and 50-amp RV plugs here.)WHEN BOONDOCKINGIf you're boondocking (camping without hookups), using electricity requires a bit more forethought. You have three main options for using power:
  • Rely on your RV's battery bank
  • Use solar power
  • Use a generator
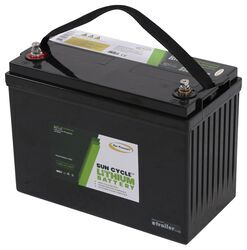
RV Battery Bank
1. Relying on your RV's battery bankYour RV comes with a 12V DC battery to run your electrical appliances (you can add additional batteries to your bank as well). However, because RVs use 12V DC batteries (like a car), you're limited to using 12V DC appliances in your RV if you rely on the battery alone. DC-run appliances include most of your basics such as your lights, fans, water pump, and slide outs. To use AC appliances (which typically include larger "household" items like the microwave, refrigerator, and air conditioner), you'll need an inverter if your RV didn't come with one. The inverter will change your battery's DC power into AC power to be used by your AC appliances. Of course, there's only so much power in your battery; eventually, it will drain (and you never want to drain it below 50%; letting the charge drop this low will shorten your battery's lifespan considerably). You'll either need to cut your camping trip short when your battery runs low, use a generator, or replenish the power in your batteries using solar panels.
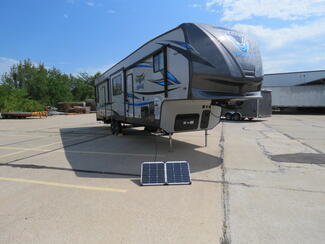
RV Solar Panels
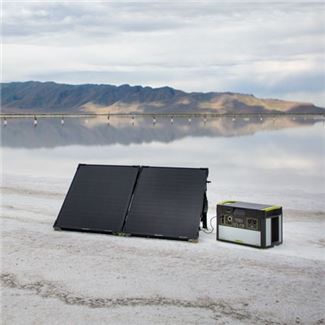
2. Using Solar PanelsMany boondockers enjoy the freedom provided by solar panels. On a basic level, solar panels work by converting sunlight into DC energy, which is stored in your RV's batteries. Your batteries then power your RV appliances. Because you're still relying on your 12V DC battery for power, you'll need an inverter in order to use AC appliances.Curious about whether solar power is right for you? Learn more about it here.
etrailer RV Generators
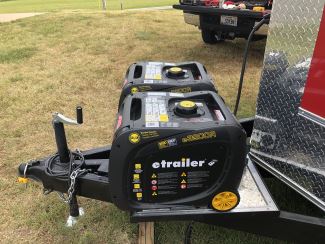
3. Using a GeneratorGenerators are usually the simplest and most powerful method of supplying power to your RV when boondocking. You can plug your RV power cord into the generator and run the AC appliances in your RV. Alternatively, you can use an inverter generator to use both your AC and DC electrical appliances.Even if you use solar power, we recommend purchasing a generator at least for part-time use. Chances are, solar panels aren't going to be enough 100% of the time, so you'll want a generator for backup. Learn more about choosing the right RV generator here.
There's a ton to know about RV electrical systems, more than we could possibly cover here, so we'll point you toward a few additional resources:
  • Read up on your electrical system here.
  • For a rundown on how to charge your RV batteries, click here.
  • Read up on solar here.
Mantis Camper on Road

5. What to Do When Leaving the Campsite

  • Bring in all camper chairs, outdoor rugs, leveling blocks, etc.
  • Pick up any trash or animal waste
  • Disconnect from all hookups
  • Close all vents
  • Make sure your awning is retracted and any antennas you have are down
  • Close/latch your cabinets, refrigerator door, and shower door
  • Make sure your steps are retracted
  • Always do a final walk-around your camper to make sure you're not forgetting anything. Don't forget to look up to check your awning and any other accessories.
  • Don't rush. When you're in a hurry, that's when you'll forget to latch, lock, or close something important.
RV Camping

6. Other RV Camping Tips

  • Keep an outdoor rug outside your camper to limit amount of dirt you track into your camper. You probably also want to pick up a 12V vacuum cleaner and a small mop. You'll be amazed how much dirt and mud you track in.
  • Bring an old-school paper map, in case you end up somewhere without cell service.
  • Always make sure you have enough gas — your RV is nowhere near as fuel-efficient as your daily driver, and in remote areas, gas stations may be few and far between.
  • Take your time. This one might be easy to overlook once you're on the go, hurrying to your next destination or setting up camp after a long day on the road, but it's a lesson many veteran RVers insist is worth remembering: slow down. You make more mistakes when you're in a hurry. And besides, this is supposed to be relaxing.

Tips for Maintaining/Servicing Your RV

Many RVers are surprised to find out just how much maintenance is involved in owning an RV. In many ways, it's like combining vehicle and household maintenance — you have wheels and brakes and suspension, but you also have plumbing and appliances. Below is a breakdown of the major points of maintenance you'll want to take care of during your first year RVing (and every year after). Take the time to do preventative maintenance, and if something pops up along the way that's not on this list, address it sooner rather than later so it doesn't cause additional problems. Perform Every Trip
1. Check tire pressure & tread wear
2. Check breakaway switch's battery charge level
3. Pull breakaway switch pin and test for proper function
4. Check camper lighting functions
5. Test braking function and performance
Perform 4x a Year, or Every 3,000 Miles
1. Tighten lug nuts
2. Clean/replace AC filter
Perform Every Year
Tires and Wheels1. Repack bearings and check for damage/wear2. Inspect hub and drum assemblies for scoring/wear3. Inspect tires and wheels for cracks/dents4. Inspect your spare tire if you have one
Brakes and Suspension1. Check brake assembly internal parts for wear, leaks, or damage2. Check brake magnets for wear; replace if surface is grooved or copper windings are exposed3. Check brake fluid and bleed hydraulic brakes (here's how)4. Check for broken or flattened suspension springs5. Check for worn or loose suspension fasteners and shackle link wear
Appliances1. Flush, clean, and inspect water heater2. Clean refrigerator components (internal and external)3. Inspect furnace and furnace vent screen for damage4. Inspect A/C Unit for cracks/damage5. Clean your A/C condenser and evaporator fins/coils6. Oil your A/C fan motor7. Inspect your A/C shroud for damage8. Clean/inspect other appliances - microwave, fireplace, stove, heaters, etc*Learn more about cleaning your A/C unit
Fluids and Fuel1. Check windshield washer fluid level2. Check motor and transmission oil3. Test generator; check oil and filters4. Check propane levels, pressure, and valves
Safety1. Test smoke detectors 2. Inspect fire extinguishers
Other1. Clean roof and inspect it for damage2. Inspect hitch for cracks, corrosion, loose bolts, etc3. Check vents, slide-outs, windows, etc. for damage/leaks; re-seal if needed4. Clean battery connections; inspect cables and terminals for corrosion

How to Store Your RV for Winter

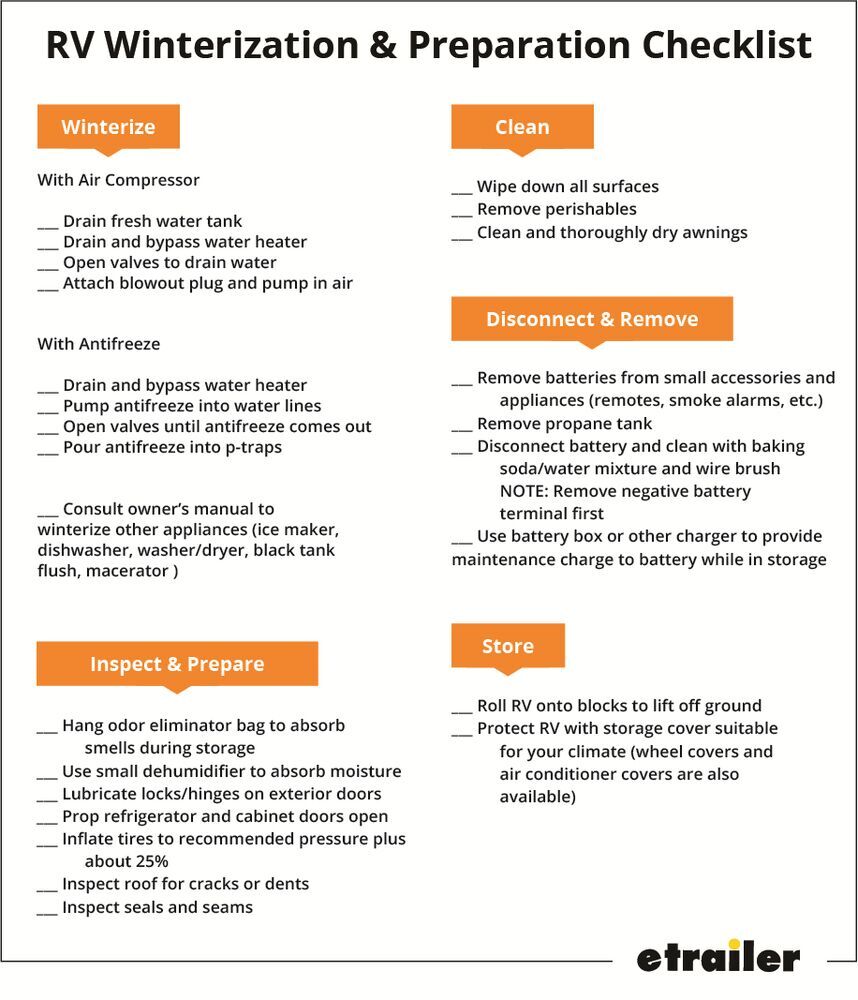
Camping season doesn't last forever, and when winter comes, you'll need to properly store your rig to prevent damage during the off season. Whether you're keeping your RV in a storage facility or your driveway, here's what you need to do to prepare.(For additional details on how to winterize and de-winterize your RV, check out our article here, where we go in depth about how to blow out your RV lines and fill them with antifreeze.)
RV Winterization and Preparation Checklist
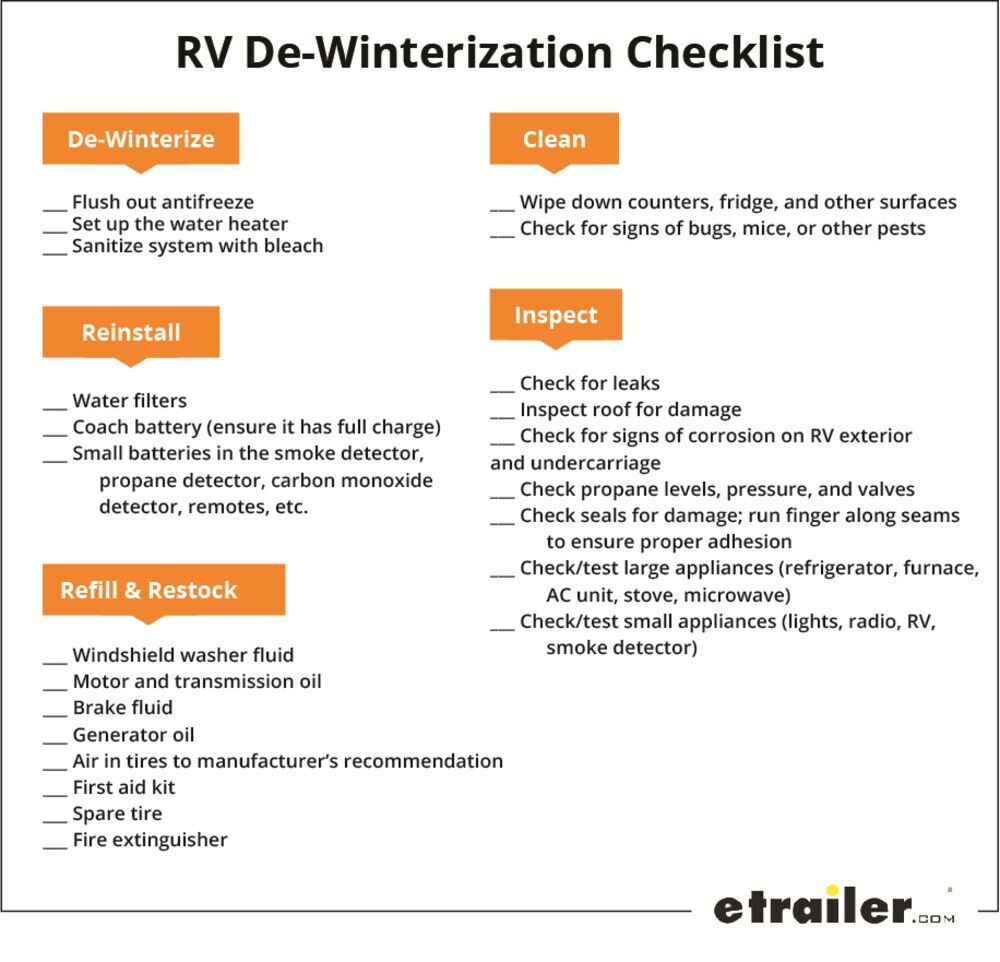
When camping season rolls back around, you'll need to break your RV out of storage and prepare for another year of adventures. Here are the main things to take care of when de-winterizing your RV.
RV De-Winterization Checklist
RVing is about discovering new things. You will make mistakes, but that's part of the journey. You'll discover things not listed here and gather your own stories to tell, but hopefully this walkthrough gives you an idea of what to expect during your first year of RV ownership. Learn from the advice included here; learn from other RVers; learn from your own successes and failures. Above all, just remain open, slow down, and enjoy the incredible journey you're about to embark on. For some more info about what to do (or not to do) when you arrive at the campground, check our our video about Campground Courtesy! Still have questions?Give our experts a call at 800-298-8924, or contact us online. We're happy to assist any way we can!
Amber S.
About Amber S.As a content writer for etrailer, I might spend my morning loading and unloading a bike on five different bike racks to figure out which is easiest to use. I might be in the parking lot, taking pictures of an impressive RV battery setup our techs came across in the shop and discussing the benefits of the setup with the owner. I might spend an afternoon in a manufacturer training classes for some hands-on experience with new products, and then sit down to assemble all this information into a coherent article.At etrailer, one of our core values is that we are always learning, and I learn something new every day. I start each morning with the goal in mind of taking all of this information and figuring out the best way to answer the questions people ask us (and the ones they don’t know to ask yet), and helping people get the solutions they need to make their lives easier, safer, and more fun. I’m a DIYer at heart, so it brings me great joy to help a fellow DIYer find what they’re looking for, whether that’s a product, an answer, or a community.
Related ArticlesRelated ProductsWritten by: Amber S.Updated on: 6/10/21


Departments

Towing

Sports and Recreation

Trailer Parts

Vehicle

What our customers are saying:

"You folks are fast. Thank you very much."

Peter
Ashland, VA

Popular Vehicles