
To see if this custom-fit item will work for you please tell us what vehicle you'll use it with.
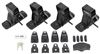
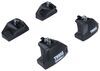
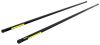
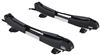
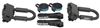
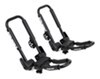
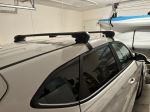
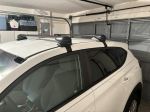
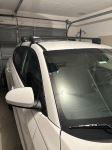
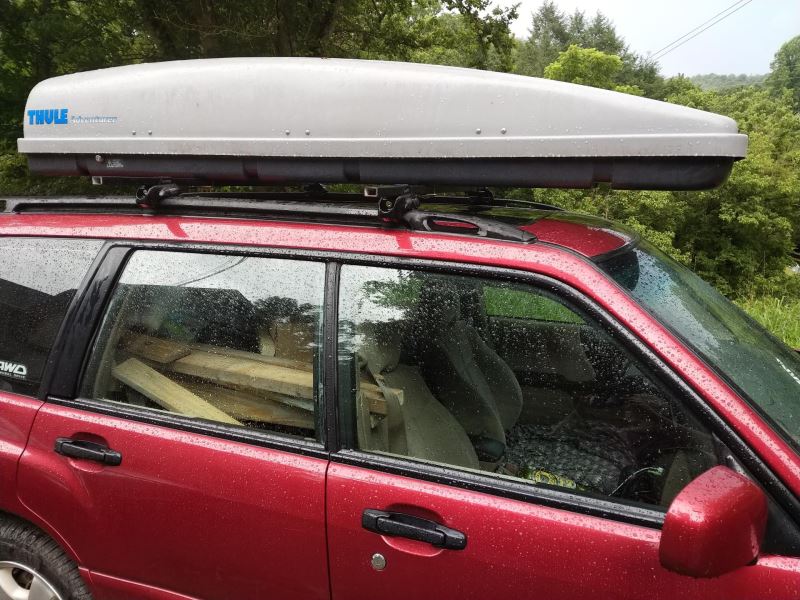
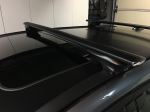
These custom-fit clamps and pads let you mount 4 Inno XS200, XS250, or INSU-K5 feet to your vehicle's naked roof to help create an aftermarket roof rack system. Clamps mount to feet with bolts. Kit includes 4 clamps and 4 pads.
Features:
Specs:

Videos are provided as a guide only. Refer to manufacturer installation instructions and specs for complete information.
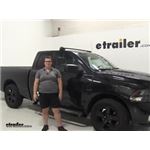
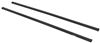
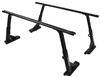
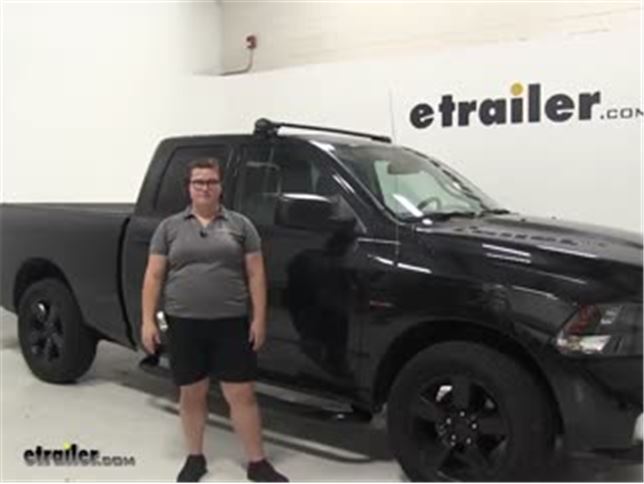
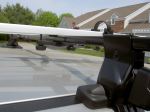
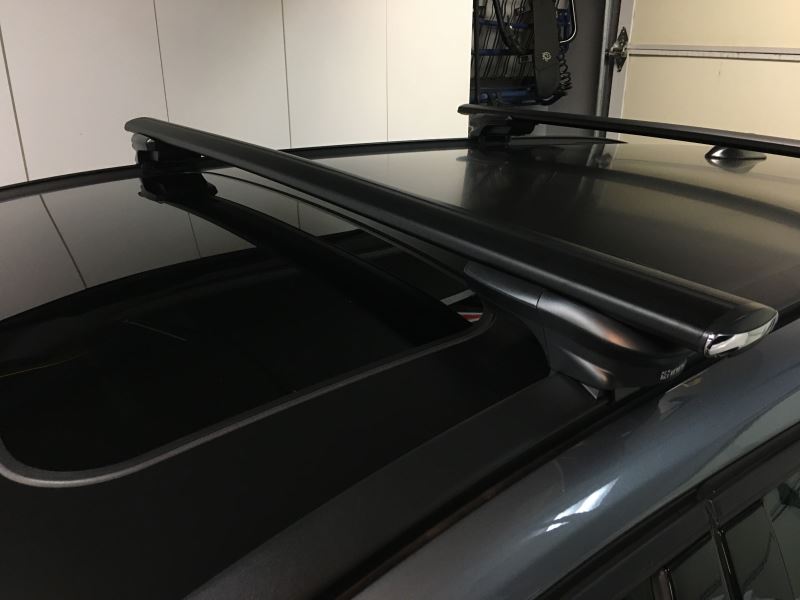
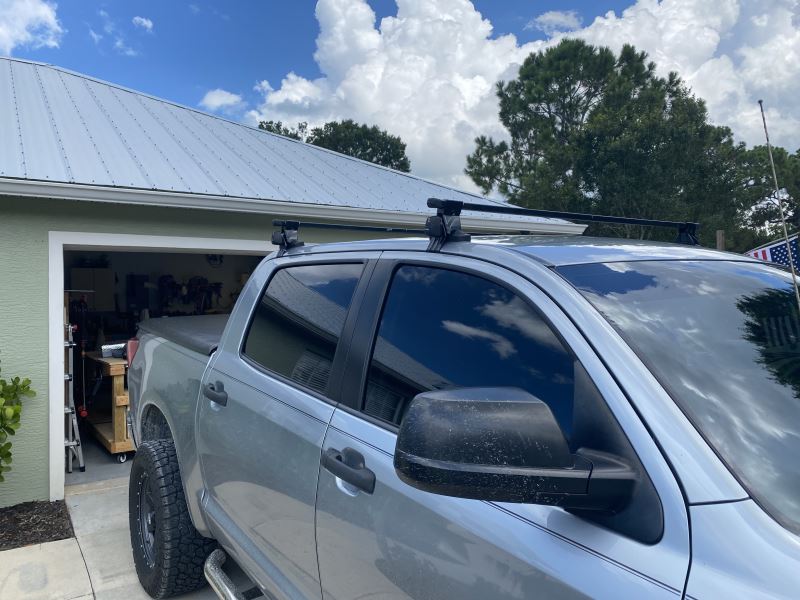
Speaker 1: Today on our 2016 Ram 1500, we're going to be taking a look at the Inno Aero flush roof rack system. This consists of three main parts. Our aero bars are going to be part number INXB130-2. That's going to be two bars that come in a 51 inch length. We're also going to have the flush feet for our Inno system. That's INXS200.
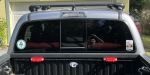
And also the custom fit kit, which is going to be INK653. Now the nice thing about this rack, in addition to its aerodynamic shape, is that it's going to be a flush system. So the bars are going to end right here at our cap. There's going to be no overhang, nothing to worry about hitting your head as you're coming out of your vehicle or anything like that.The black color is going to match our black truck, as we have in this case. So that's one nice thing that you don't have to have silver bars that don't match all your stuff, and this is going to be an aerodynamic bar or an aero blade.
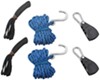
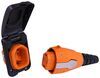
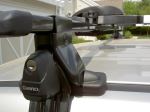
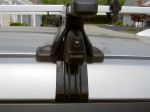
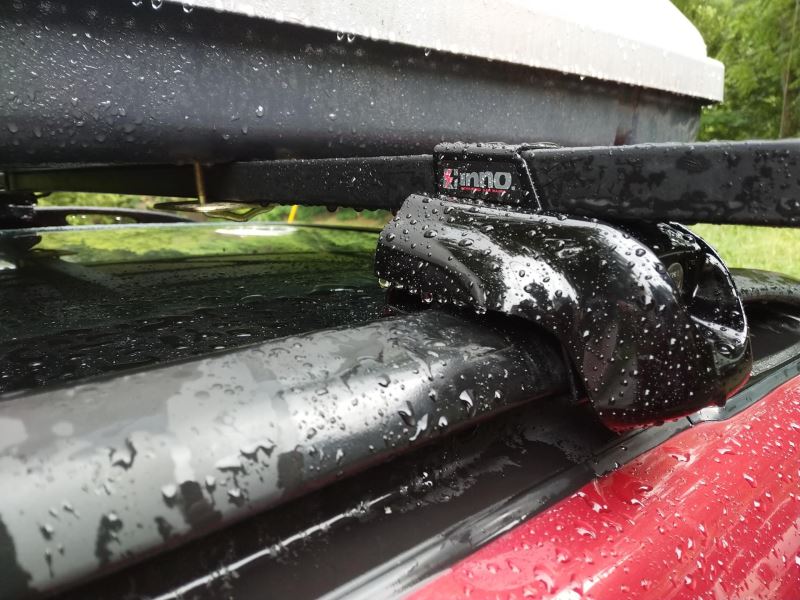
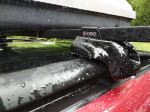
So what that means is that it's going to have an aerodynamic shape to reduce wind noise and drag. It's kind of similar to an airplane wing, so it's just going to cut through the air a lot smoother than the traditional round or square bars. So that means that you don't have to use a fairing if you don't want to reduce that wind noise.It also comes with locks, so you don't have to pick that up extra, and two keys. So if we open our cover here, you can take a closer look at our foot, and our fit kit. The foot is made of a heavy duty black plastic.
So again it's going to resist fading. And our bar itself is made of an extruded aluminum, so it's going to be lightweight but durable, it also has a glass blasted powder coat finish. So it's going to reduce scratches and scuffs.And if you look up top here, we're going to have a T-track. Now, unlike a lot of systems that they have a rubber strip in there that you have to take out, cut to length, and then replace. This just has a push down style.
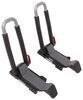
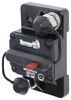
So if you push in, it'll go down, and you can slide in any of your T-track accessories. That makes it a lot more simple for those T-tracks accessories because again, it's just going to take up the gap that's in there without you having to cut anything to length and replace it afterward.Our fit kit consists of this clamp and the rubber pad underneath. The clamp is a steel construction with a rubber coating on it. So it's going to protect your truck from any scratches again. And the rubber foot is just going to give a nice sturdy hold and it's going to fit pretty well with the contour of our truck. There is a little bit of a gap, but that's intended to be there. So now that we've had a look at our front bar, let's put our rear bar together. Lock this back up.We can take a look at how this goes on. So here I have my rear bar roughly assembled with one pack on the end there. Now let's do the right side here. So these are labeled as to left and right. Here you see the embossed M or N, excuse me, R for right side. And we're going to grab the rubber foot, and this is just going to match up with the bolt head on the bottom of our foot. So you can press it into place. Now you do want to pay attention to what number is on there. A lot of times for different vehicles, they'll be a couple of different sizes, or a couple of different shapes of the pads and clamps. In the case of our Ram 1500, they're all the same. So no worries there, but just something to note, if you pick up another rack.Now we're going to take out the screw on the end there. You want to make sure that the washers come with it and then we can grab our clamp. Again, there will be a number on there. Just make sure you have the right one and we can put that bolt in place. Really this kind of loose for now, and now we can get this in place. But first, we need to get our bar ready. Now there's a little plastic channel here, we're going to slide that all the way out to the end. Grab our little nut plate and put that in place. There's a little notch in the end that's going to match the notch in that little window that comes out. Just want to make sure you have the silver side up.Then we can slide that into place until it stops. Press down on that little square button and keep sliding it into the bar. That's going to get our plate in the right position. And now we can slide the two sort of tabs here into the notches on that plate. Slide it out to the end. And now we'll want to grab a tape measure to make sure that we have this in the right place. I'm actually going to use this one so I can use the millimeters. It does have inches and millimeter measurements in there, so whichever one you feel more comfortable using, you can use those.We'll get this measured out. And you'll want to do this on both sides. I have my foot on the left side there already measured out. Just to make it a little easier. Okay, and now with that in place we can tighten it down. So you want to take the bigger Allen key and tighten down the bolt here just until it's pretty snug. You still want there to be a little bit of movement side to side. So it's a little too tight. Because it does allow us to adjust for the contour of our roof.So now with that all in place, we can get this on our roof. Before we do that, we want to open both doors, in the rear of our truck. And now we can put on our rear bar. Another thing you want to make sure to check before you put this on is that you have it facing in the right direction. And you want to make sure your clamp isn't jammed up. So again these are labeled with left and right. And once I get this in the right position here, there we go, because you can see on the end there, that little embossed R's, we want to make sure that we have that on the passenger side. And the round edge our bar should be facing towards the front.So that's not required, but it always makes it easier to have a second set of hands on the other side to get that far in place, so you don't scratch up your truck. Again, everything is rubber coated so it should be fine, but you don't want to cause any damage if you can avoid it. So I'm just going to hop up here and make sure I have this right. Again, there's going to be a little bit of a gap between that rubber pad and the roof right here. So get that adjusted. And you want that clamp to fall over the edge of the doorframe. Let's do the same thing on the other side. So this side needs to go over a little bit more. There.Now we can start tightening up our clamps. And you want to make sure you go from one side to the other, get it evenly tightened down. You don't want to pulling too much to one side or the other. Before you get it really tight though, you'll want to make sure that you have the right crossbar spread. So we're going to go from the center of the door jamb to the center of the bolts. We'll do that on the other side as well. This just ensures that you have it parallel, sitting in the correct spot, so it's nice and secure. Double check on this side and make sure we have it right.And here's where that adjustment of the foot side to side is going to come in handy, because you want to make sure that it's going in line with the vehicle. so if it's not sitting quite straight, you can adjust that side to side. And again, we're just going to tighten that down. And we're going to grab that smaller Allen key with the black handle, and that's also going to be a torque wrench so you can take that out, put the wrench in the middle, then tighten it down. Whenever it's tight enough, there's going to be an audible click. So you'll know you have it tight. Get on the other side.And whenever you're loading up your roof rack and get everything tightened down, you definitely want to double check your owner's manual on your Ram. There's typically a weight rating and you don't want to exceed that. So just make sure that any of your accessories aren't going to be too much for your vehicle's capacity. There's that audible click, so I'll close the door on this side and finish tightening on the passenger side. There it goes.Alright, now we can put our clamps in place, or our covers in place. And again these are labeled so you know which side goes where. Those are for right. Put that in, lock it up. That's a really nice integrated feature. You don't have to pick up anything extra to get these secure. Already comes with the locks.Before we go, I'm going to give you one last measurement, so you can know what kind of room you have here with your new roof rack. So if we go from the top of the roof to the bottom side of the bar it's about 1-1/2, 1-3/4 of an inch. From the top of the roof to the top of the bar. It's about 2-3/4. So it'll give you an idea of how much space you have for any ski bindings or anything like that, or any accessories that need to secure underneath and also how much space you've added to the top of your roof. So now that everything's tightened down, that's going to do it for our look at the Inno Aero flush roof rack system on our 2016 Ram 1500.
Average Customer Rating: 4.7 out of 5 stars (617 Customer Reviews)
These custom-fit clamps and pads let you mount 4 Inno XS200, XS250, or INSU-K5 feet to your vehicle's naked roof to help create an aftermarket roof rack system. Clamps mount to feet with bolts. Kit includes 4 clamps and 4 pads.I ordered these Inno Rack parts from etrailer because they where the only source that stocked them.
The Service was fantastic! Lori was friendly, extremely thorough, helpful and fast.
Definitely worth the 5 Stars in my opinion.
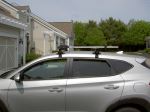
My wife and I bought a 2019 Tyson with a bare roof and wanted a rack system that would be safe affordable and easy to install and not having to Buy and installed side rails. The Inno system was perfect. . It is solid material with a solid build. The directions were a bit confusing but after some time and with the etrailer how to videos it really made the difference. Ordering was simple and fast. Madison was great to work with she was knowledgeable and helpful. The delivery was fast and exactly on time. I was going to go with another company and another rack system…. I’m glad I didn’t. I saved money and got a great product from a great company. Thanks etrailer, Inno and thanks Madison! And mostly for making my wife happy bc know we can get to kayaking!!!
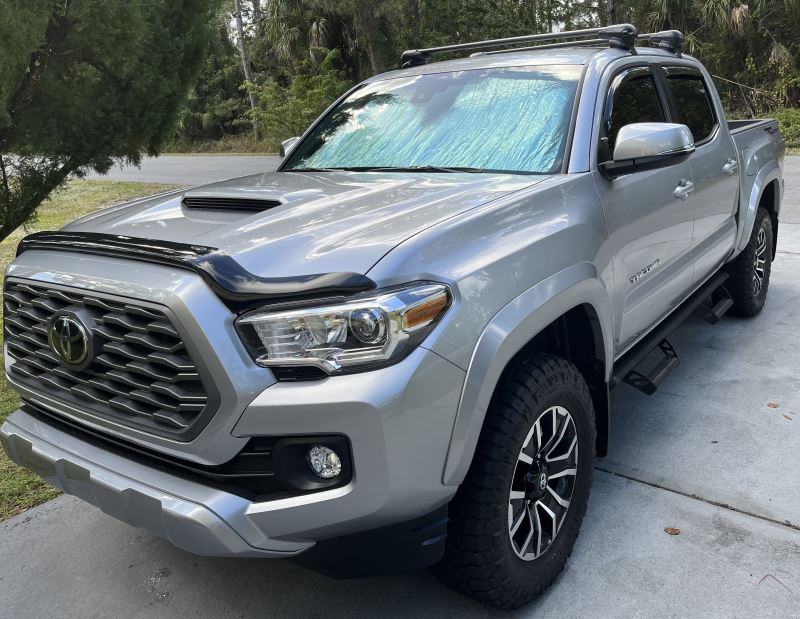
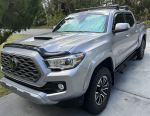
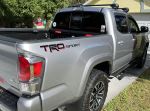
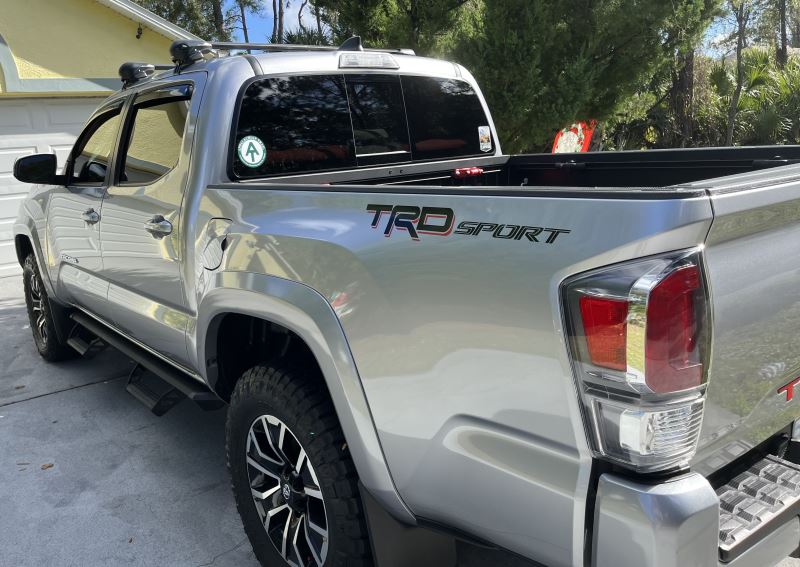
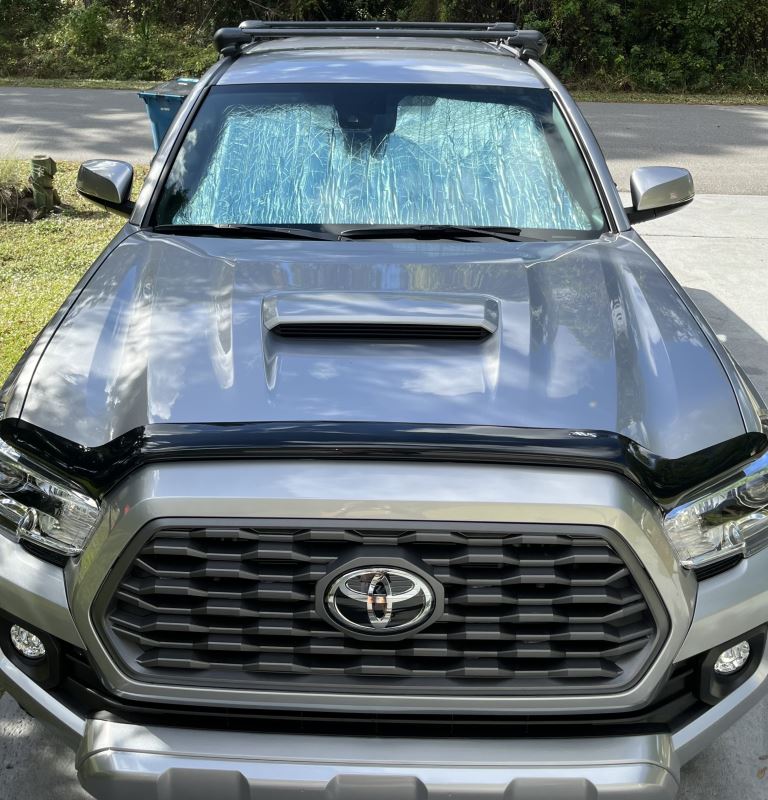
etrailer was great to order from! Going to the website makes it easy to see what roof rack will fit your vehicle. Ordering process was a breeze and the fulfillment updates were great. Ordered on the 13th and received it on the 16th so the FREE shipping was super fast. New installs of anything can always be challenging but once I read the the instructions it all went pretty smooth. Installing this Inno Roof Rack onto our 2021 Tacoma TRD Sport was pretty simple and took less than an hours from start to finish. Now we are ready to load up out Thule cargo carrier when we hit the road.
I am writing this review in the context of an owner of an old Yakima roof rack system from many vehicles before the 2021 Hyundai Tucson on which I just mounted four INNO separate sets of components to carry two bikes on top of the Tucson. Note that you need at least three sets of components to have a "base rack" system, including the hooks, in this case the INNO INK680, the INNO INSUT Feet and the INNO INB137 set of crossbars. The feet are rubber coated metal so that they will not mar the paint where they clamp to the edge of the roof just above the doors. The rubber pads are also substantial to provide a slip-proof and paint protecting bottom for the INSUT feet. Read through all the directions for all the components before beginning installation, perhaps even "rehearsing" all the steps before actual installation with tightening everything. The instructions could be clearer, but with practice walking through all the steps they make sense. Once installed, I could grab any part of the completed system and pull upwards, sideways, forwards, and backwards without any play or slack in any of the components. In fact, it was easy to rock the whole car side to side without budging the INNO components at all. Compared to the old Yakima system, the INNO is just as sturdy and substantial if not more so. Just to replace the Yakima "feet" to use my old round Yakima crossbars would have cost more than the total of the three INNO components needed to get the base system. Even better, the INNO system came with included locks to lock the system to the vehicle. Many years ago, the Yakima four lock cylinders were $[XX] extra - probably much more now. So, I think the INNO is at least as sturdy and capable for much less money.
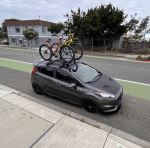
Feels premium and was pretty straight forward to install. I think it looks really good on the 2019 Honda Accord Sport. I plan to pair it with the Inno Wedge 660 cargo box. So far, it seems really well made and has a rubberized texture throughout. I installed it by myself in about 30 minutes without the instructions. It also shipped in only 2 days.

I use this rack in conjunction with some long square cross bars from Thule that I have had for a few years. They allow me to carry two lightweight Hornbecks atop a 2019 cx5 that has no rails. At this point, I have only used a couple of times and the configuration appeared to work fine, but the problem is fitting them properly, having to measure precisely. It is probably just me, but I don’t have 100% confidence that the rack and canoes will remain on the roof with the little purchase the rack provides. Wish there was a way to improve the purchase that the lamps achieve.
Waste of money. Most annoying couple hours spent in a long time. Extremely disappointed. Does not fit well. Not exactly a cheap option, but a cheap option in terms of fit and engineering. The instructions online and in the kits do not agree. Plus there are no universal set of instructions--they are all individual items for the fit kit, the bars, etc. And the engineering design is garbage--requires precise measurement yet the design is such that exact measurement is impossible due to the design.
Additionally, the parts are low quality Either low density plastic or easily stripped bolts. Even when as precise as possible, I wouldn't trust it with my kayak. What a mistake. Do yourself a favor and get a Yakima trailer or similar. It isn't that much more money in the scheme of things and then it isn't tied to your car. Can add a hitch to most vehicles anyway.
These Inno racks are very high quality, and the installation is straightforward. They look good, too.
I've been a happy etrailer customer for years. Sales staff helped me pick out the right roof rack setup for my new 2023 Escape that worked with my low-profile rails. 3 separate boxes of pieces but they all came together perfectly. Very happy with my purchase and etrailer customer support! Rack is solid, low wind noise and will work with the accessories I need, kayak carrier and cargo basket.
We bought this along with the INTR - Inno Feet for Square Crossbars. We used this to mount Thule crossbars and a Thule Adventurer cargo box on a 2001 Subaru Forester. Everything fit perfectly. The Inno mounts were completely compatible with the Thule crossbars. The fast and accurate shipping helped avert a crisis before a cross country trip.
Easy, stable and quick to mount. The only issue is that the rubber foot pads, which are specific to each auto model, would fall off when the rack isn’t mounted on the car. Solved with black electrical tape around the edges of the rubber.
THEY DID IT AGAIN! I was looking for roof racks for our 2012 Honda Crosstour. OEM was not available. I called Etrailer and spoke to Anna and she listened to make sure we got just what we needed.Today I'm going to install and hope they fit our needs. I'm really impressed with Etrailer and there customer service! They have taken care of me many times with several different vehicles! Thank you
Be a fantastic help if you labeled what clamps went on the front of back.
Works great wouldnt have bought anything else and protects paint from getn scratched since i dont roof rails
Everything is good so far...the Inno rack system appears to made of good quality, fit and finish...it took about 2-hrs to get everything built, lined up, adjusted, tightened, loosened, repositioned, then retightened down...but I’m a bit of a perfectionist with things like this...plus I was checking my Saris cargo bin and various attachments, make sure that they’d all, which they do! And very well I might add...I just need to buy some new square carriage bolts for the channel now, along with new knobs...hoping that etrailer will get back to me with info soon...I will likely get a new wind deflector too...yesterday I did a test drive, was very pleased with the minimal whistling that occurred, and that was primarily between 30-40 mph and it was much quieter than my old Saris Roof Rack....after 40 mph the whistling got much quieter, very faint high highway speeds
etrailer gave me fast shipping and a great price. Inno quality is great. I’ve had this on for several months and use it to transport bikes. I use the cheap bike racks on [online] but they work.
I purchased the Inno Rack system and Rhino Rack 581 saddles for my 2007 Mercury Montego. The instructions were easy to follow, and the rack is rock solid. It makes loading and unloading my kayak a breeze. I previously used roof pads and that was ridiculous compared to what this rack does for me now. I am amazed with how quiet with and without the kayak attached is - I don’t hear anything except the very slightest amount of wind with the windows open on the highway. I always have put a one turn twist in the bow and stern straps, but for the rest they’re all straight. I added an extra strap on the rear crossbar that goes behind the rear combing of my cockpit for extra security- but that’s just me. I’ve included a photo to show my setup. Thank you so much Mark S, Becky B, Carol C, and George J. etrailer rocks.
Great system. Got it installed the night before a road trip, and once you get the hang of if, assembly is easy and intuitive. This system is rock solid and well done.
Things I wish I knew that would have helped in my decision:
1) After you install the footbeds, the rails and tower easily remove as one unit in the future, and they include little covers to put over the feet. No more long debates about wind noise. If you find them modify or don’t like the look, take it off in five minutes. Even the Allen wrench is stored neatly in the rack.
2) I had been a long time Yakima user, so that’s where I started with my GX rack. Having searched far and wide for landing pads, I was all set. Step one of the Yakima system: remove factory rails. Having just spent good money on this truck, I’m not taking off factory rails and adding silicone around the holes to create new mounting points. Innos fits nicely to the factory rails.
I have a 2022 Lexus GX460 Premium. Fairly simple installation and a almost seem less transition from the fit kit to the cross bar system. Can be done by one person, but I would suggest a two-person system to expedite the process.
I am more than pleased by the service that I had at etrailer. I was looking for a very old roof rack for my Subaru Legacy 2007 and etrailer had it. I was suspicius about it so I wrote them and got a quick and friendly answer that confirmed the fit and availability. Delivery was quick and the tracking from etrailer website was outstanding.
I was using Yakima Bowdown Kayak racks on my OE roof racks. The shape of the OE cross rails just didn't work well with the racks, and they were always loose. I installed the Inno square tube racks from Etrailer, and all is right in my world. Easy installation (thanks for the detailed instructions!) and a solid feel! No whistling, either! Quick shipment, best price anywhere! Thanks, Etrailer!
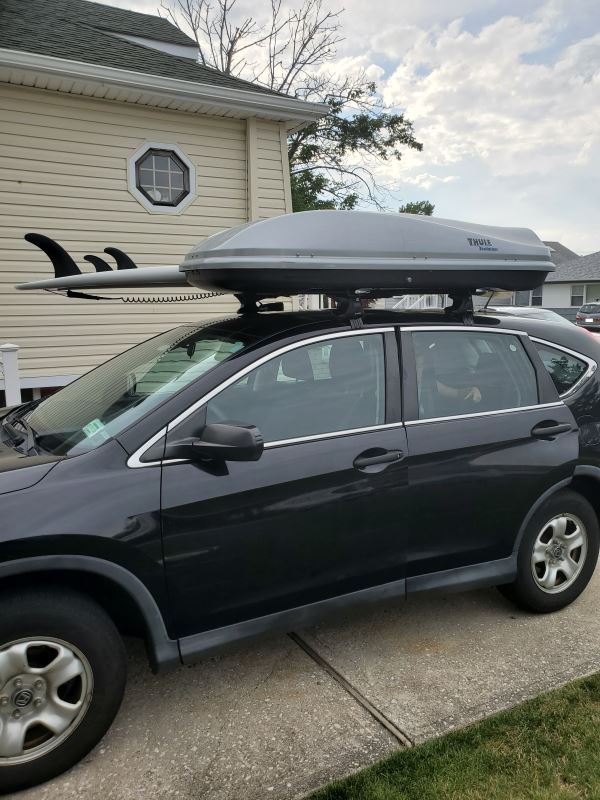
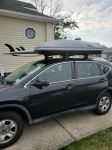
The Inno roof rack fit my 2014 Honda CRV very well. I used it immediately on a 500 mile trip and the rack is fantastic. I connected an XL Thule car box and 11'-6" paddle board to the rack and everything fit fine. The aero design is great and we did not hear any noise during the trip.
Roof racks are very loud. Probably won’t keep them on all the time like I was planning. Shipping was very slow and took almost a month to get my order that was in stock. Overall the racks do what I need them to do.
Etrailer was extremely helpful and knowledgeable about the racks for my 2008 Subaru. Delivery was super fast! Racks are solid and mount perfect! I have no worries that they can do the task for which I purchased them. The only downside is that the locking covers are not as well made as the racks and do not fit properly on my application. Basically they don't sit flush where they should. Only I would probably notice. I also purchased the matching wind fairing which looks great. I'm happy with my purchase and would recommend Etrailer for good products and service.
Do you have a question about this Roof Rack?
Info for this part was:
At etrailer.com we provide the best information available about the products we sell. We take the quality of our information seriously so that you can get the right part the first time. Let us know if anything is missing or if you have any questions.


Thank you! Your comment has been submitted successfully. You should be able to view your question/comment here within a few days.
Error submitting comment. Please try again momentarily.