
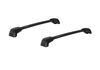
SightClip Fit Kit for Yakima SightLine and RidgeLine Roof Rack Towers
(8 reviews)
Price: $143.95
In Stock
SightClip Fit Kit for Yakima SightLine and RidgeLine Roof Rack Towers
Item # Y77UR
Our Price: $143.95
Will this fit?
To see if this custom-fit item will work for you please tell us what vehicle you'll use it with.
In Stock


- All Info
- Reviews (8)
- Q & A (0)
- Videos (2)
- Photos
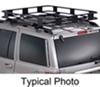
Yakima Roof Rack - Y77UR
- Fit Kits
- Yakima
- 4 Pack
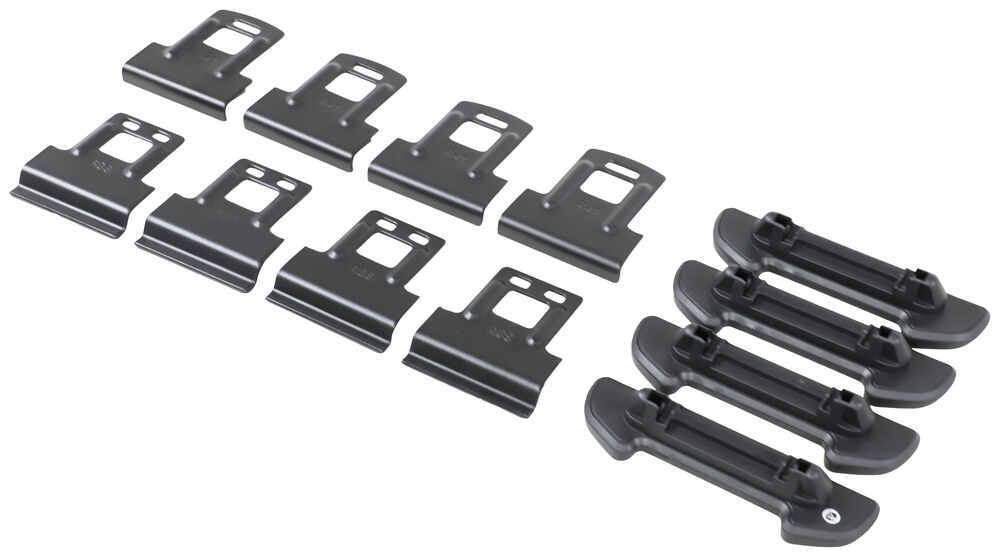
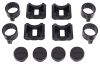
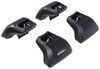
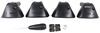
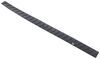
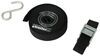
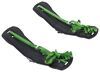
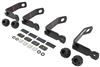
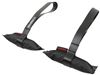
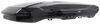
These custom clips and pads let you mount Yakima SightLine or RidgeLine towers on your vehicle with flush, factory side rails. Clips attach to hooks in tower assembly and tighten together with a single bolt. Kit includes 4 clips and 4 pads.
Features:
- Custom-fit clips and pads allow you to mount 4 SightLine or RidgeLine towers (sold separately) on your vehicle with flush, factory side rails
- Inner and outer clips tighten together with a single bolt for even, secure grip on rails
- Snap into place on DropHooks inside towers
- Powder coated stainless steel clips are durable and rust resistant
- Molded rubber pads fit the contour of your side rails
- Clip onto bottoms of towers
- Protect side rails from scratches and abrasions
Specs:
- Quantity: 4 clips and 4 pads
- Limited lifetime warranty
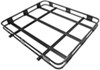
DropHook System Installation

Custom-fit SightClips let you mount SightLine and RidgeLine towers (sold separately) to your vehicle with flush, factory side rails.

The clips are easy to install - simply attach them to the hooks inside the towers. Once the clips are installed just sit the towers on top of your flush rails and tighten them down. The inner and outer clips in each tower tighten with a single bolt to ensure an even, secure grip on your rails.

The included molded rubber pads protect your side rails from scratches and abrasions. The pads easily clip onto the bottoms of the towers and are specifically designed to fit the shape and contour of your flush side rails.
8006452 Custom Sight Clips and Pads for Yakima Sight Line and Ridge Line Towers
Installation Details


Video of SightClip Fit Kit for Yakima SightLine and RidgeLine Roof Rack Towers

Videos are provided as a guide only. Refer to manufacturer installation instructions and specs for complete information.


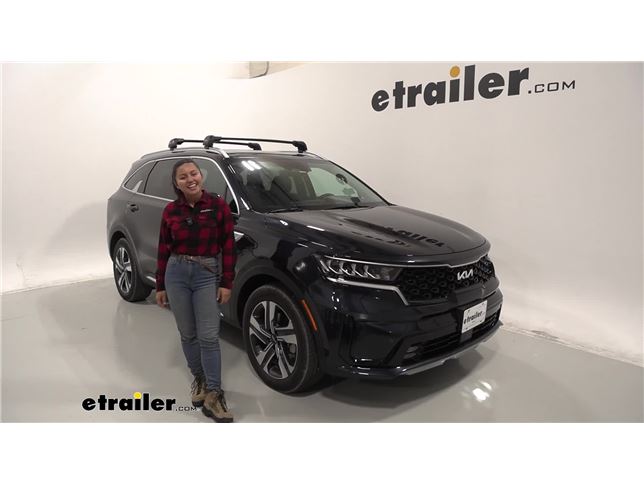
Video Transcript for Yakima SightLine FX Roof Rack Installation - 2023 Kia Sorento
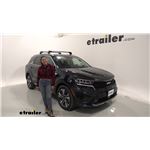
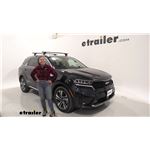
Hi, everyone, it's Evangeline here at etrailer and today we have the Yakima SkyLine FX Roof Rack. We're gonna take a look at how it fits as well as how it installs on our 2023 Kia Sorento. If you're looking to carry around some fun accessories like kayaks or bike racks, or maybe expand your cargo space with a roof box or roof basket, what you are gonna need is a roof rack system and this is gonna be the SkyLine FX designed to work with the factory flush rails of your Kia Sorento. This is also gonna be a flush roof rack system making for more low profile and sleek system where you don't have bars sticking out but you rather have a rounded roof rack. That way it matches the contours of your Sorento. Now I personally prefer the SkyLine system, which has the bars that stick out past the towers, but that's more personal preference because it makes it easier for me to reach the roof rack.
A lot of people like to get this style just because it looks more factory as if you got your roof rack straight from the dealership. Another thing about this is, even though it is a flush system, this will give you more height and clearance underneath the bars compared to a factory roof rack. So if you wanted to open up your sunroof, maybe you have clamps that's stick around the rack, this is going to give you a better chance of having that clearance. Measuring from the top of the roof to the bottom of the crossbar, we have a clearance of 3-1/2 and a half inches. And then measuring from the roof to the top of the crossbar, that's gonna be 4-1/2 inches and that's how much space you're gonna have for clamps that go around your crossbar.
Even when your sunroof opens, it only lifts up about an inch or so, and that still gives you plenty of space for most types of clamps. I say most because with the sunroof open, it may decrease that to where if you have u-bolts and wing nut style clamps, you may be concerned about that. If possible do get accessories that fit into the T track channel. There is a channel in the center of your crossbar system. That's also gonna be a measurement for the height of your cargo.
So if you have skis with extra tall bindings, you should have good clearance. But if you don't, you can take a look at our accessories and racks that give you the extra height. For security, notice how we have this full cover over our FX tower, so you can just pinch the cover to remove it, but then you have a security cover right here if you wanna remove your roof rack. Here we see the end of our crossbar system. We also see our clamps and the pads that fit over our flush rails.
Now there is a slight gap on the clamps, but we do have a very secure fit that I am not concerned about it coming off anytime soon. Plus, with this whole system enclosed, this decreases the chance for wind drag and wind noise. To help with that aerodynamicness we have an Aero bar similar to the Yakima JetStream bar with that track in the center, you have a tall part up front and it tapers towards that back helping guide the wind through making for a quieter drive. Opening up our sunroof something that I've noticed as well with my own Kia's sunroof is that this roof rack sits right over the center of the opening. So what is gonna happen, especially when you do have cargo on there, is that you will have wind drag and wind noise. So that is something to remember. If you want to fully utilize this, yes, you can still have that air come through, but no matter what type of roof rack you have because of its location, you are gonna experience more noise compared to not having a roof rack. If you're looking for a feature rich flush roof rack system where you have that T track, you have that security, you have the aerodynamic bars, the Yakima SkyLine FX is a solid premium choice. Now for a flush system though it does sit a little bit higher than some other types of roof racks. That can be a downside because you want a low profile look. But with this being or having some height, it may look a little bulky. On the other hand, it's definitely a pro because then you have more clearance underneath and with you having that glass sunroof having more clearance is very important so you don't scratch that up accidentally. Another thing to this roof rack system is it is easy to take off. Putting it on though, especially the first time does take a little bit of thought and hassle, but that's what we're here for. We're here to guide you through that process and show you what the roof rack looks like on your Sorento so that you can get the best fit for you. To set up your crossbar system, you're gonna have your two extra large crossbars, you're gonna have the foot pads and the clamps included with your fit kit. All the tools are included with this kit. So let's get started by prepping our crossbars. We're gonna take the covers off. Pinch the end cap and remove the cover. Then you have the security cap, so I use a flathead screwdriver. You can also use the back of your keys and that will clip the security block over and I have access to your clamps. Do this on all the sides. So first, loosen the clamp tensioning bolt, and then you're gonna loosen the pitch bolts here in the center. Just loosen it three full turns, 1, 2, 3. In your fit kit, you're gonna have some measurements and some numbers there, and that's gonna tell you how far apart you need to put your towers, and one for the front crossbar and three for the rear crossbar. M3 for your Sorento is 37-1/8 an inch. So that's measured from the notches from tower to tower. And then you also have a center point. So 37-1/8 is 18-9/16 of an inch. So we're gonna measure that out and then we're going to verify that from tower to tower. To tighten it down, we're gonna tighten down the pitch bolt. So for the Sorento your pitch is B, which is just centered so you don't have to pivot this too much to the side and secure it down here. Now you are using a torque tool, so tighten it down until it clicks. For the clamps, we're first going to put the foot arrow facing out. Then we're gonna press on these retaining clips so that they slip out just like that. So for the outer clip, it's gonna be the one labeled 41. Notice how it's inserts, we have to fit that past the bolt. A little tricky sometimes, but then once that's in, you can then see how it clips into the clip. But then you're gonna put the retaining clip right back in, try to get them back into their holes. This move may be a little tricky. You have to be careful with these so they don't warp. If they warp, this will be a lot more difficult. To figure out where you're gonna put the roof rack you're then going to go to measurement M2. So we're gonna go 16 inches from the front windshield, right there. That's gonna be where our front crossbar is and then our rear crossbar is going to be 32 inches from that. Carefully place your crossbars onto your roof. If you are a more cautious type, I do recommend putting down a towel on your roof, especially since you have that sunroof glass or have a second person on the other side to grab it and help you out. Now we're gonna look at it and it looks like our measurements are pretty good. The pads sit flush on our flush rails so let's get this all measured and get that second crossbar on there too. So I've found it best if you loosen this tensioning bolt as much as you can without losing the thread. That way this clamp fits down over that ridge on your raised rails and then holding that clamp down and in place, we're then going to tighten that bolt back down. So do this on both sides. And I've personally found it works best if I mostly tighten down one side where I just feel the pull and then I go to the other side and fully secure it. That way we're not torquing down on one side while the other is completely loose. Once all four towers are tightened down and I do recommend double checking them, you can then put the security cap on. If you are using the same key system lock cores, which are sold separately, now is the time to switch them out. Otherwise use your flathead screwdriver to secure and then the final step is to put the overall end cap on there and that's it for your install. That right there was a look at the Yakima SkyLine FX Flush Roof Rack and you saw it on a 2023 Kia Sorrento.
Customer Reviews
SightClip Fit Kit for Yakima SightLine and RidgeLine Roof Rack Towers - Y77UR
Average Customer Rating: 5.0 out of 5 stars (8 Customer Reviews)
These custom clips and pads let you mount Yakima SightLine or RidgeLine towers on your vehicle with flush, factory side rails. Clips attach to hooks in tower assembly and tighten together with a single bolt. Kit includes 4 clips and 4 pads.by: Stephan02/03/2024
The SightClips with bases were very easy to use with my Yakima Ridgeline Roof Towers. When the towers are loosened and off of the vehicle the clips can come off, but it is really no big deal. I just take the off when not using the rack. When I put the the rack back on I only put the inner clips on before putting the rack on the roof. Then I add the outer clips and snug everything down. It is much easier that way.
by: Stephen 02/10/2024
by: Tim 10/18/2023
One quick phone call and Gwendolyn figured out exactly what I needed for our new car to use my old Yakima rack.
by: Adam K05/14/2023
Straight forward installation
by: Nicholas07/11/2023
Order was easy to place and delivered in less than a week as promised. The sales advice was perfect fit despite multiple pieces having been ordered. Used the rack once and very sturdy
by: Scott 05/20/2024
by: Frederick 01/13/2024
by: Gary 09/02/2023
8
8
See what our Experts say about this Yakima Roof Rack
- Quiet Roof Rack for 2023 Kia Sorento With Flush RailsFor an extremely quiet roof rack that fits the flush mounted rails on your 2023 Kia Sorento I recommend the Yakima JetStream roof rack. You will need the following: -Yakima JetStream Crossbars # Y00425 -SightLine Towers for Yakima Crossbars # Y64AR -SightClip Fit Kit for Yakima SightLine and RidgeLine Roof Rack Towers # Y77UR The JetStream bars use an asymmetrical shape making them very aerodynamic. This combined with the WindRidges built into the bars results in a dramatic reduction...
view full answer...
Info for this part was:

Video Edited:
Joshua S

Video Edited:
Chris R

Video Edited:
Jonathan Y

Edited by:
Daron K

Written by:
Alex H

Updated by:
Michael B

Video by:
Aidan B

Video by:
John S

Video by:
Samuel H

Test Fit:
Evangeline M
At etrailer.com we provide the best information available about the products we sell. We take the quality of our information seriously so that you can get the right part the first time. Let us know if anything is missing or if you have any questions.
Product Experts Available Now!
Call 1-800-940-8924
Thank you! Your comment has been submitted successfully. You should be able to view your question/comment here within a few days.
Error submitting comment. Please try again momentarily.