
To see if this custom-fit item will work for you please tell us what vehicle you'll use it with.
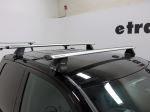
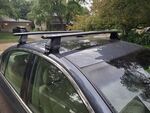
Aerodynamic, aluminum crossbars let you build an aftermarket roof rack for your vehicle. Full-length bars provide plenty of space for carriers and accessories. Vortex strips in C-channels reduce wind noise. Theft-deterring plastic locks included.
Features:
Rhino-Rack Vortex Aero Crossbars - Silver - 59" Long - Qty 2:Videos are provided as a guide only. Refer to manufacturer installation instructions and specs for complete information.
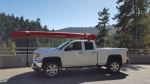
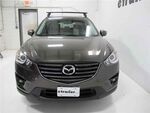
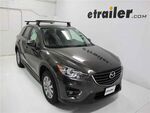
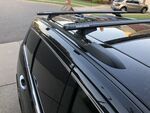
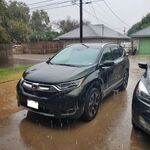
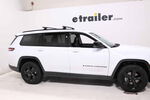
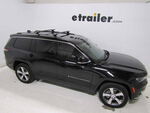
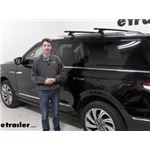
Hey, it's Ethan here at etrailer. Today we're gonna be taking a look at and showing you how to install this Rhino-Rack Vortex Aero Roof Rack system with the crossbars, the legs, and the fit kit on our 2022 Lincoln Navigator. We'll let you know a little bit more about how it all works in just a second, but you might want to use a roof rack like this in the event that you want to get some accessories on there like skis and snowboard carriers or kayak carriers. Or if you want a little bit more storage, you could put roof boxes or baskets on there as well. So let's check it out. The roof rack system will fit into your Navigator's raised rails on these fixed mounting points.
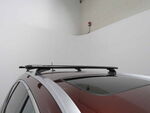
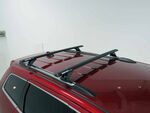
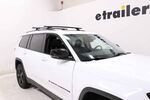
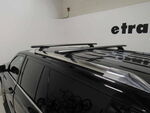
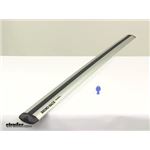
This front crossbar is always going to be in the front and it does block a little bit of this moon roof. That's pretty much going to be inevitable, but there's a ton of space still available. It might get covered up as you put longer accessories on there. The back crossbar can be mounted in the middle here, which we found is a pretty universal spread, coming in at about 28" or 29" or so, or it can be mounted further back in the event that you have some longer accessories or some longer items that you're trying to transport, like boxes or some lumber, whatever have you. The crossbars on our roof rack systems are made of an anodized aluminum.
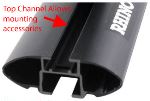
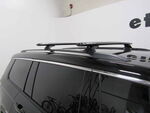
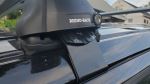
So they're lightweight. If you take the end caps off, you can see they have this H-bar construction which gives it some of that structural integrity as well, so they are light weight, but they are still able to support up to 165 pounds, keeping in mind that the roof has a rating of it's own, so make sure you check your owner's manual and make sure that it's good to go and that you can get 165 pounds on there. As you look at the top of the crossbars here, you can see that these are the vortex strips that are mentioned in the name, so you will get the strip out originally, it'll just be one strip, you'll have to trim it up according to your needs, but once you do, you'll cut down on some of that wind noise and it'll hold some of your T track accessories in place. So if I remove that end cap again, you can see that T channel which is where your accessories stored slide in and out. As I replace this end cap, you can see that there is a lock on the end.
It's just plastic for now that you'll turn with this universal plastic key, but you can upgrade those to metal locking cores if you want a little bit more security. As we look at the top of our crossbars here, you can see that these are where the vortex strips lay in your T tracks, so if you want to cut down on that wind noise while you're driving, this is where you'll trim that up and put it into place. If I take the end cap off, you can take a closer look at that T track which is useful for a lot of accessories, they'll have parts that just slide in and mount to that. The strip on top as well will give some padding to your clamp accessories if you want those, too. Seal this back into place, we can put our end cap back on and point out the fact that you can lock it up, it just comes with this plastic key, but you can upgrade to metal lock cores if you want another layer of security.
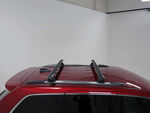
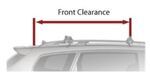
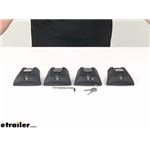
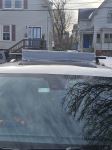
As we take a look underneath our crossbars here, there's this channel here that also can generate wind noise while you're driving, they do include a rubber strip that we do have to trim up and slide in there. It also gives you measurements, so it makes installation a little bit easier. This is just for demonstration, so we didn't actually trim the rubberized strip in our case, but you will do that, slide that in there to cut down on some of that noise. As we look at the crossbar shape itself, it has an elliptical shape which is going to cut down on some of that as well, making the whole system more aerodynamic. One thing to note about a roof rack system is that it's going to add a little bit of height to an already pretty tall vehicle, so I'll get a measurement from the top of the rails to the top of the system to give you an idea of how much height you're going to add. In the case of these crossbars, it's about 2 3/4 inches from the rail to the top, if you want to know how much room you'll have from the bottom where you're actually making contact with the roof and the bottom of the crossbars to give you an idea. That's 3 1/2 inches, so that's how much room you're gonna have for those accessories or clamps, keeping in mind that the whole system obviously is going to increase in height as you start to add accessories, so keep that first measurement in mind. Factor in what the height of your accessories are, for things like storing it in your garage or clearance issues wherever you go. In addition to the low profile, aerodynamic crossbars, we also have these legs that secure the crossbars to the fit kit and the rails. They're going to be made of a durable nylon material that's reinforced with glass to keep everything nice and sturdy, as well as they are also pretty low profile, so they don't add a ton of height. You can see that there is this included key. If we just fit that in, we can remove the front cap, and we see that it's doing it's job at protecting the hardware that secures the legs into the brackets on your rails. The fit kit consists of this bracket and the rubber skirt that hold onto the rail securely. It's nice that the rubber skirt is there to protect your rails from the metal hardware and they're secured in place by security Allen bolts, so you need a special tool to get them off. When we install, we first like to start by making sure that we have everything we're gonna need for the entire roof rack, starting with the crossbars. If you have your vortex strips, you can trim them up now if you'd like to. And we want to make sure that we have the towers, we have the fit kit which comes with the rubber skirt, the bracket, we have the Allen key, we have a trim panel tool which helps us get the spaces out of the rails. We have those here at trailer, they're not included with the set. First thing you might need to do in your case is to remove this end cap if it comes on there. Also, you're going to have to install this bolt through the bottom of the feet and this square nut, just the bolt, the spring washer, and one of the flat washers go into this side and then you'll attach the nut loosely on the other side. Next, we'll prep our crossbars. First, by removing these end caps if they're locked. In our case, they're already loose, but if they are locked, you'll just fit this plastic key in, unlock them, pull them out, and now we can slide that square nut into that track. Just like that. And then we'll tighten it up just to the point where it's tight enough that it'll stay on it's own but we can move it with just enough force. So, right about there is probably good. Next, we'll fit our skirt onto these brackets, just lining things up, doing your best to fit the bracket underneath the lip. Might have to stretch it just a little bit to get those points in to fit, you'll see them start poking through. Just lining them up again as you go. I'll try to get the sides first, if you get the sides, then the middle tends to line up a little bit better. There's not necessarily a set way to do it, just sort of maneuvering it as best you can to get those points through. Again, just trying to feed the outsides under the lip. So, there we go. And you'll see all those points coming through. We're up on the roof now for our next step which involves using this trim panel tool that I talked about earlier, to fit under these rubber fasteners. See, there are a couple different options for you to fit into your rails, we're just going to pick the middle one because we found that's about the right distance for our accessories. We'll just fit the panel tool under the fasteners and lever them out. Also, I tried this with a flathead screwdriver earlier as the first method and this panel tool is way easier. So, we got a mount on this side, we'll repeat the process for the other side. Now that we have those rubber fasteners out of the way, we can get our brackets installed. We first have to start by finding where these cap screws. We'll put a spring washer on first and then a smaller flat washer on second. And then we'll put the bracket up facing out just like this, line it up, and we'll hand thread with these cap screws, just until they start to thread enough that it'll stay in place. Then, we'll grab the other one. Repeat the process. The cap screws are hand threadable to a pretty good point. So, we'll do as much as we can before we'll use the provided Allen tool to finish tightening things down. I will say, there are a handful of times where we'll run into clearance type issues with using this Allen tool to tighten bolts down. You'll see a little bit more about that as we go. Now, we'll get our crossbar set up. It can be helpful to have an extra pair of hands here just so that you can guide the other side across, but if you place the feet loosely in the bracket, then we can slide the next one to fit in as well and that's why we didn't tighten it down all the way because now we can adjust the crossbar's thread. We'll come back and measure that in just a second. Now, we'll be fitting these hex bolts into where the feet meet the brackets. So, we'll start with one of these spring washers again and we'll place one of the larger washers on. The ratcheting wrench is helpful just because of how little clearance we have in here, but you could do it with a normal wrench if you want to, it's just going to take a little bit longer. So, we gotta hand tighten as far as we can and now we tighten it the rest of the way with that wrench. We repeated the process on the other side with this hex nut, just getting it in place. Now we'll measure the overhang to make sure we have the same distance on either side. So, in our case, we measure basically just from the inside of the end cap. You just want to make sure that you have the same on both sides and then we can use our Allen key to tighten up the square nut on the bottom of our towers. Now you see why we had those bolts at the bottom of our feet pretty much fully turned. As I try to get this Allen key under here, not only have to find where the bolt is but you have to have enough clearance to actually turn the key at the same time. So, definitely prone to not only being difficult to find, but also potentially scratching up your roof. In the front side we have our sun or moon roof in the way as well. So, as you can see, I'm actively having a tough time finding where this bolt lines up and even a tougher time turning it so having to do this fully on either side is definitely a bit of a struggle. Still just struggling to find where we line up. There we go. And just tighten that up the last couple turns. This is really a matter of having the patience to find where the key lines up with the bolt because you will have to basically just turn it one slow rotation at a time. This one's tightened up, we'll repeat the process for the other side. Once we have both of the towers tightened to the crossbars, we'll finish things up by first replacing these plastic end caps with the end of the crossbars as well as the lock to secure them in place. Then, we'll get the lock end covers for the towers in place as well and lock those up with the provided key. Repeat the process for your front crossbars and then you're ready to get some accessories on your roof. This was just a look at that Rhino-Rack Vortex Aero Roof Rack system and how it fits on a 2022 Lincoln Navigator.
Average Customer Rating: 4.6 out of 5 stars (160 Customer Reviews)
Aerodynamic, aluminum crossbars let you build an aftermarket roof rack for your vehicle. Full-length bars provide plenty of space for carriers and accessories. Vortex strips in C-channels reduce wind noise. Theft-deterring plastic locks included.Great bars. It's my second pair. Both on jeep Grand cherokee. The pair I put on my 2015 overland didn't whistle at all. This pair I put on my 2020 trailhawk whistled starting at 20mph and changed pitch throughout the acceleration process and while causing. I bought a fairing and the problem is solved. At least for now. I put the fairing on wit the label in. Looks better and Rhino Rack isn't paying me to advertise. The fairing they recommended seemed small but works so go with whatever they recommend.

The rubber molding easily compressed and served no purpose other than to fall into the channel and thus shred the aluminum gunnels on my expensive Kevlar canoe. I contacted Rhino rack and they were quick to dismiss my information with zero concern or questions. This is a product easily made better with modest changes to improve. Too bad customer service doesn’t exist…
The rhino rack is well made but suffers from the flat bottom rubber feet. Since nearly all cars and trucks have roof seams, foot pads should be stepped to engage the seam like other racks such as Thule does. It's unlikely that very many different shapes would be needed to fit most vehicles. Rhino tech didn't agree with my assessment.
Rhino-Rack installation was fairly easy. We’re using it on a 2012 model Ford Flex.
Recommand to every body rhino rack on my truck looking great thanks you
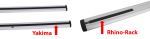
TLDR: It's a good product with (literal) strength, and some weaknesses. Its cheaper than the competitors, and its in stock now. I mainly bought this due to inventory issues from the other main competitors. That it costs about 100 bucks less is nice, but the reasons for the cost difference is noticeable if you've ever used Thule or Yakima products before.
Installation was not more or less irritating than any other roof rack (I've installed MANY over the years).
Materials are similar, but the plastic parts feel cheaper than Thule or Yakima, and they towers have exposed innards on the inside faces that make it look cheap, and may create more noise. The fit kit feet are good, but the hooks are 2 pieces pinned together instead of formed and cut to custom lengths. This makes them bulkier than the competition.
Apparently they are rated for 33% more weight than the others, and that's cool if you need to haul heavy stuff on top.
All said, I'd probably buy their stuff again in a pinch, or if I was trying to save money, but for fit and finish I would go with Thule or Yakima
Awesome cross bars
The only complaint I have about the crossbars is that it causes a high pitch sound. I've been meaning to contact you about a possible solution. Pls advise.
Other than that they are just fine.
Very nice produce give props to the designer well build nice costume fit to my car easy too install even make the vehicle looks good and thank you to Melissa A at etrailer.com really helpful and awesome ty ten stars.
Strong, quiet, easy to install. Held everything from surfboards to lumber. Very impressed.
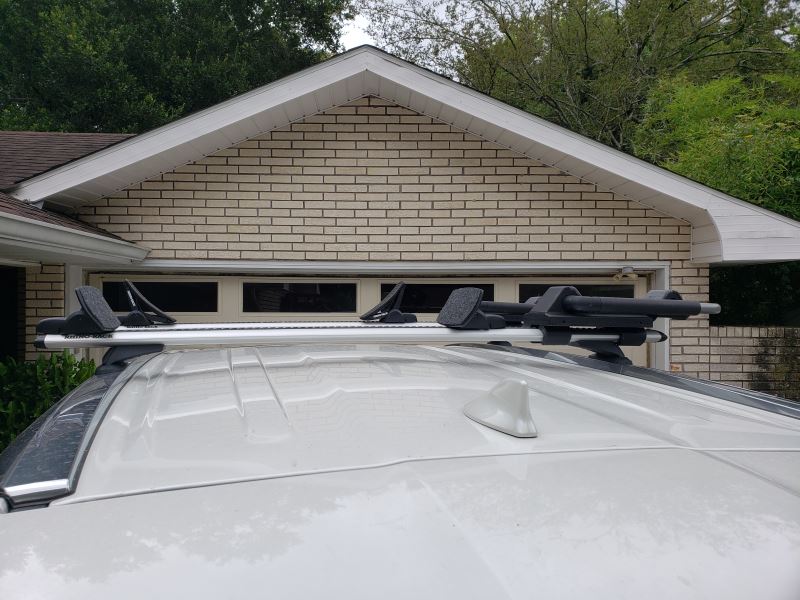
The Rhino Rack BLOCKS my SUNROOF. It was recommended for my 2018 Highlander on the etrailer website. A 2018 Highlander with a sunroof is shown on etrailer in the install video. However, I can not open my sunroof. etrailer refuses to refund or exchange it and have no options for fixing this issue!
Great build, easy install, and more importantly, easy uninstall. Flexible for various needs.
The racks look great and are solidly anchored.
I have yet to use them under load but I am pleased with the final product so far.
My only complaint was that the assembly process is difficult to understand unless you Google the help videos. The assembly process is confusing and tedious until you gain an understanding of the overall setup.
Great Fit and Great Looks. Great customer Service!!!
I have been a Thule guy for the last 20 years but thought I would give these a try based on reviews read.
Ordered the following for my 2016 Chevy Silverado:
1 Rhino-rack Vortex Aero Crossbars - 59 - Silver - Qty 2
1 Rhino-rack 2500 Leg Kit For Vortex Aero Crossbars - Qty 4
1 Dk Fit Kit For Rhino Rack 2500 Series Legs - Naked - Qty 4
Received the order from etrailer and upon opening the crossbar package I noticed that the rubber inserts were not in the box. e-mailed customer service and Carol C responded within an hour and said she would have them sent out within 24 hours.
About 30 minutes later, Carol called me as she was getting the order ready to ship and said that the Rhino racks typically put the rubber inserts inside the bars and not in the box. She waited on the line while I checked and sure enough she was right.
Installation instructions were good but I recommend watching the installation video on youtube that makes the directions easier to work with.
Fitment was perfect. And these are fit to my truck so reinstallation is a breeze especially with the small marker arrows for alignment. (unlike my old thules with the crossbars that had to be remeasured every installation) They also hold my thule kayak racks and my bike racks.
Thank you Carol and etrailer for a great product and experience.
Unfortunately it only lasted a few months! It has been a huge disappointment and kinda confirmed my concerns about using bars on a vehicle with no rails. I have kayaked for many years and never had any issues with transport until using these bars. They are now taking up space in my garage, can't use them...there are some parts missing now
Bought all parts for complete Rhino Rack roof rack for my 2022 Kia Soul Turbo. I got the 46" Vortex Aero Crossbars that were originally suggested on the etrailer website instead of the 54" listed on the RR website. The 46" bars work the best for me. The 54" would be wider than the car. All parts are well engineered. Other reviews have been critical of the finish on the bars as being easy to scratch. I think that is one area where the quality could be improved. Installation was a little more involved than I anticipated but still a doable DIY. I think the RCL leg system is probably the most challenging to install. I have ordered quit a few items from etrailer, and as previously experienced, all etrailer staff that I interacted with were very friendly, helpful and professional.
Great rack.
The bars were great. The mounts I did not like. The bars themselves were quiet, solid, and aerodynamic.
My Rhino Rack RCL Roof Rack was installed one year ago on a 2014 Honda CRV (fixed rails). It whistles very loudly. In fact, if I use my bluetooth to talk on the phone, everyone asks what the loud whistling is. If my moonroof is opened about a third of the way, the turbulence is diverted and the whistling stops. However, that obviously is not practical in cold weather. I'm disappointed because my understanding is that there was not supposed to be too much noise with these crossbars.
Proper fit on our 2023 cx-5
Exactly what I needed! No hassle ordering and great customer service.
All of the parts were a perfect / tight fit and solidly built.
Nice design.
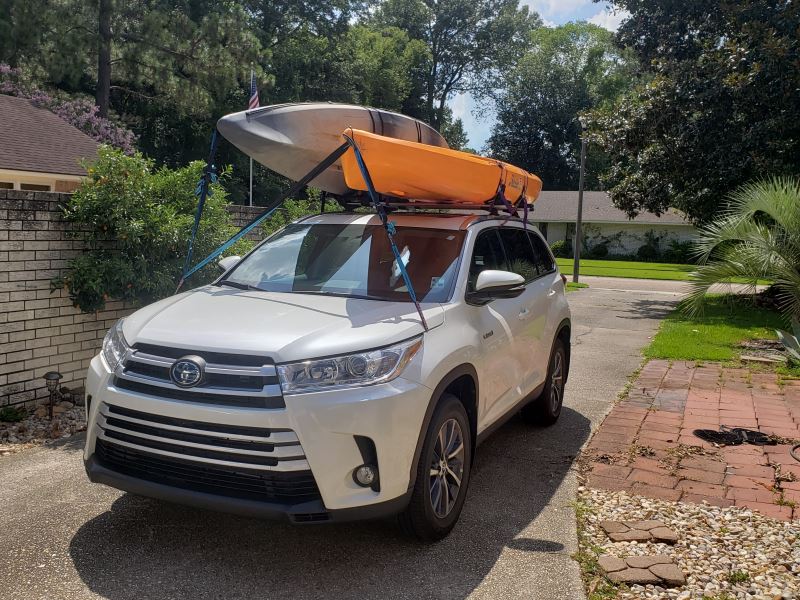
I recently purchased the Rhino rack below with these boat supports:
Rhino-Rack Nautic 581 Rear Loading Kayak Carrier - Saddle Style - Rear Loading - Channel Mount
Item # RR581
Also, I attached a Yakima Jaylow kayak carrier, all to a 2019 Toyota Highlander Hybrid.
On the 54 inch aero bars, I was able to carry a Hobie Compass Duo kayak (35" beam, carried flat on the Rhino pads) and West Marine Pompano 120 (28" beam, propped up as shown on the Jaylow racks). To have enough width, the Jaylows and the Rhino pads are mounted as far out as they can go, and the straps are looped back under the rack pillars on the car.
The bow and stern were secured with hood loops on each side (front diagonal straps on the Hobie), on the front placed under the hood where shown (this is the only place I could find a good metal-metal contact under the hood, and no electronics in the way), and in the back, tucked under the rear door.
We did a 500 mile round trip to the beach and back, with no problems at all with the mounts. Little noise, no movement. My only recommendation is to figure out some kind of load assist for the large tandem kayak, to make it easier if one of the folks loading is under 5'8" in height or so. We worked it out, but only after a few failed attempts (especially when the boat is wet, and loaders are tired).
Carol C at etrailer provided thoughtful, expert, and knowledgeable tech support for our purchase. Many thanks!


Do you have a question about this Roof Rack?
Info for this part was:
At etrailer.com we provide the best information available about the products we sell. We take the quality of our information seriously so that you can get the right part the first time. Let us know if anything is missing or if you have any questions.


Thank you! Your comment has been submitted successfully. You should be able to view your question/comment here within a few days.
Error submitting comment. Please try again momentarily.