
To see if this custom-fit item will work for you please tell us what vehicle you'll use it with.
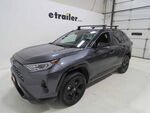
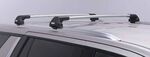
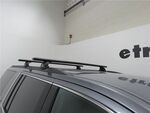
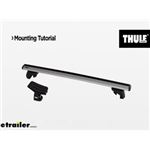
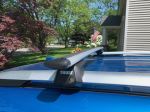
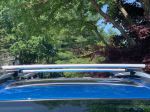
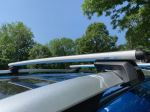
Premium, aerodynamic crossbars attach to Thule feet to create a quiet, stylish roof rack for your vehicle. Dual rubber strips in T-slots let you easily mount accessories - no trimming required. Simple to center and install with integrated scales.
Features:
Thule WingBar Evo Crossbars - 47" Long - Silver - Aluminum - Qty 2:Videos are provided as a guide only. Refer to manufacturer installation instructions and specs for complete information.
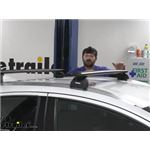
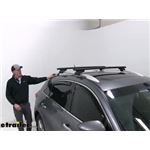
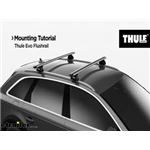
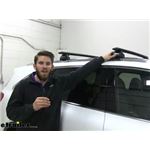
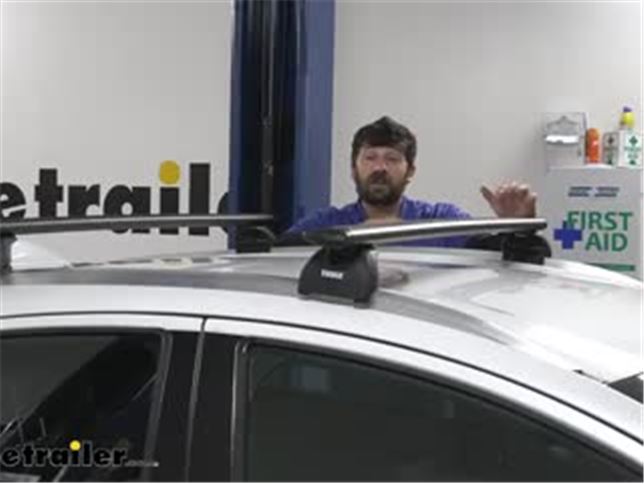
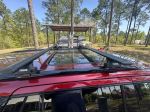
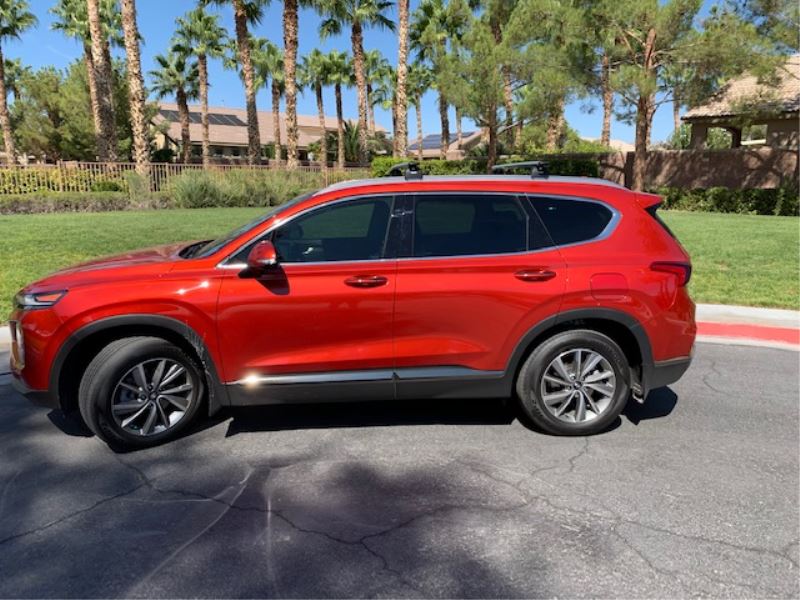
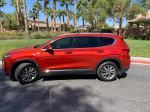
Connor: Hey everybody, Connor here today at etrailer.com. We're going to be going over and showing you how to install the Thule Evo WingBar crossbar system here for our 2019 Honda HRV.So this is what our crossbar system is going to look like installed. Now, for starters, we actually have the black crossbars installed now, but it's also offered in a silver crossbar version as well, if you think that'll better match your vehicle. It's going to provide a very sleek, streamlined finish that actually installs into factory mounting points we have. There's going to be two little plugs here on the inside of each of these feet, one on each side. So installation will be very simple.
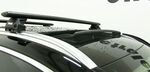
And again, it's just going to provide a nice finished install look.So one of the things I really like about this Thule crossbar system are the actual crossbars themselves, the WingBar crossbars. Now, the reason they call them this is because they actually look like an airplane wing. We have this larger round surface towards the front that tapers down and narrows to the rear. So this shape here of this crossbar, it does an excellent job of helping to reduce wind noise and also really helping you cut through that wind, so you're not providing as much wind resistance and losing as much gas mileage. It's really going to be the perfect crossbar option here for this vehicle.So in addition to the actual shape of the crossbar, something else that Thule does that I really like is that they each have integrated channels.
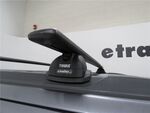
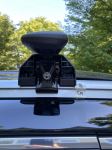
So if we we're to flip open our little cover here, you can see we have a little channel in the crossbar. Now what's this is going to be for is there's a lot of newer carriers, bike racks, cargo carriers, not so much cargo boxes, but they're channel-mounted accessories, meaning they have a little T-nut that slides into this channel, and that's how they secure themselves to the crossbar.Now, this is a little bit easier to install than the standard wraparound clamps, which simply wrap around the crossbar. You have to do it with a lot of tools and adjustments here at the top of the roof and the bottom of the crossbar. So there's a little bit more risk of damaging your vehicle. It's just also more cumbersome.
This integrated channel has a nice, smooth, sleek design that makes installation of your favorite rooftop accessories much easier.I would also like to point out that the new innovation to this channel here is that the rubber strips, normally you'd have to cut them to size, whereas now, the channels actually just open up with that rubber strip in there. There's no cutting or trimming involved or required.So the WingBars that we have on our HRV here are going to be 47 inches long. That's actually the size that Thule recommends for this vehicle. However, you can't go any shorter, but you can go a little bit longer. There's actually a 50-inch crossbar option that'll work for this roof rack as well.
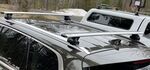
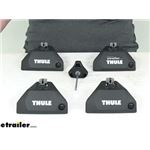
So if we have any water sport accessories and we're really trying to fit as much as we can in a roof rack, that's when we'd maybe want to opt for that longer crossbar option. But with the 47-inch bars, they only extend a couple inches past the mounting feet. So it gives it a little bit better of a clean finished install look.So these are actually the podium feet by Thule, and they're going to be designed for vehicles that have the factory-fixed mounting points like our HRV here. So this particular HRV, it comes equipped with these flush side rails here, and on the inside, there's going to be two holes. We don't actually have to drill. There's going to be some rubber plugs. We simply just remove those plugs. There's going to be two studs on the Fit Kit that fit into those studs. And then we're going to tighten a bolt and it's really going to lock everything in place and hold it together. There's going to be no modifications. We don't have to worry about denting or scratching our vehicle. It's really a nice and easy install. It provides a very sturdy finish.So this Thule crossbar system here, it's going to come pre-installed with these little lock blanks. Now, essentially what these do are, these are what hold the cover on. If we we're to remove that cover, you'd be able to gain access to the bolt that's used to install and remove the roof rack. Now, if you're worried about security and you're worried about someone coming up and stealing your roof rack, Thule has an option for this. It's an optional accessory sold separately. That's going to be lock cores. There's going to be four of them, one for each of the foot. And it replaces this blank here with a key lock you'd obviously need a key for, and you'd be able to remove the roof rack.We're going to have a couple of different weight capacities. Number one, it's going to be the crossbars. These particular crossbars here are rated for up to 220 pounds. The second weight capacity we're going to have are the mounting feet. These are going to be limited to 165 pounds for this particular application when combined with the Fit Kit. Now, we're also going to have the weight capacity of the roof. We need to check the owner's manual for this. The lowest of those three weight capacities, the crossbars, the mounting feet, and the roof, is going to be what your actual capacity is. Chances are, you're going to be limited by the feet/Fit Kit, so figure for 165 pounds total. However, that's going to be plenty of enough to carry pretty much anything you need on these crossbars.So now I have a couple of measurements here for you that are going to help you when you're selecting your roof-mounted accessories. Number one, we're going to do the crossbar spread, so the center of one crossbar to the center of the other, and that's going to be about 29-1/2". The next thing I like to do is the distance from the top of the roof to the bottom of the crossbar. Now, keep in mind, the roof is curved, so this measurement will vary. But if we take the highest point here, the lowest amount, if you will, it's going to be about 3".So to start our installation, we're going to get all the kit components laid out here in front of us. Our kit components are going to be the crossbars, the Fit Kit, and then the mounting feet. So the first thing we're going to do is we're going to draw our attention to the Fit Kit, which is what we see here. So there's going to be four of these individual. You see, we have two laid out here. Two of them are going to be the same, two of them are to be different. So what we'll notice is, in regards to the differences, it's going to be the distance or the spacing between these two pegs here. If we look very closely, we can see the one over here, the distance between those two pegs is going to be larger than the ones on the right. So the larger spacing between those pegs tells us it's going to go on the passenger side, whereas the smaller spacing tells us it's going to go on the driver's side.And again, we'll have two of these, one for each on the driver's side, and two of these, one for each on the passenger side. So now that we've gone over the Fit Kit, let's go ahead and jump into our mounting feet here. It's going to look like this. We also have a cover there, but what we're going to do is we're going to turn our attention to the inside here. We can sort of see this little clamping mechanism with our bar here. Now, in the center of the bar, we're going to have those threaded slots there. And what we need to do is we need to align those with the oblong hole here in the back of our foot. So we'll simply insert that bar like so, and press it down to lock it in place. We have these little slots here on the side that keeps it from rotating too much.But, making sure that we have the correct side here, we're going to go ahead and attach it to our Fit Kit. This is what it's going to look like. So we know we have the correct side, we sort of see this curvature here. This is going to be the outside of our Fit Kit. So we'll go ahead, line up the bolt with the threaded rod there. We can just get it started by hand. We only need a couple of threads for this step, but once we have this one done, we'll go ahead and repeat this process with our other side.So now we've got both of our feet and Fit Kit assembled, we can go ahead and take our crossbar here. Now, it is going to matter which side we install on which, because our crossbar, the shape of these is sort of like an airplane wing, as you can see. The larger end is going to be facing the front of the vehicle. So it's pretty much going to be just like this. We need to make sure again, because the spacing is going to be different on the Fit Kit, that we have the larger spacing over on this side and the smaller spacing over on this side, which is the driver's side.So what we'll do is, if you haven't already done so, we have to go ahead and remove these end caps. In order to do that, you just simply press down there and you can slide it the rest of the way off. But we'll do that on both sides, and then we'll just sort of loosely slide on the mounting foot and Fit Kit assembly. If it's too tight, you may need to loosen that bolt a couple of turns to slide it the rest of the way on.So real quick, before we set the crossbar assembly on the vehicle, if you look on the underside in these channels here, you're going to see these little covers here. Now they do one of two things. They cover the crossbars to make sure we don't get any dirt or contaminants in there, but you can also see some measurements, and that'll make sure that we can get the mounting feet evenly spaced on the crossbar, so we have the correct amount of overhang on each side.So now that we have our crossbar assembly roughly put together, what we're going to do next is we're going to take a pry tool. If you have a flathead screwdriver, that'll work as well, but a soft plastic pry tool is going to work best for this next step. So if we come to the roof of our vehicle here and we look inside our flush rails, we're going to see these two rubber plugs here. So we need to go ahead and remove those rubber plugs with our plastic pry tool here, get underneath those, then we can pop them out. We're going to have two on each side. We need to remove all four of those.So now we can take our crossbar assembly, we can set it on the vehicle, and we can line it up with those two holes that we removed the plugs from earlier. So now we're going to take our Allen key here. We're going to snug up the Allen bolts. We're going to make sure that we alternate from side to side when snugging them up. We also alternate again when torquing them down. The final torque values can be found in the instructions.Now we can finally go ahead and install our cover, slide it on like so, then we'll take a flathead screwdriver, turn that over to lock into place. Now, if you did opt for the additional lock cores or the optional lock cores, we'd obviously be using our key to secure them. Well, now we'll come back with the cap for our crossbars, just press that on. And we can just repeat this process on the other side.And that's going to do it today for our look and installation of the Thule Evo WingBar crossbar system here on our 2019 Honda HRV.
Average Customer Rating: 4.8 out of 5 stars (272 Customer Reviews)
Premium, aerodynamic crossbars attach to Thule feet to create a quiet, stylish roof rack for your vehicle. Dual rubber strips in T-slots let you easily mount accessories - no trimming required. Simple to center and install with integrated scales.Easy to assemble and install. Love the way etrailer packages everything you need and they all are correct for the vehicle you are mounting them on. Once installed they appear very strong. Installed on a 2023 Chevy Tahoe and did not interfere with the sunroof.

Very sturdy. Works well. The attachment to the roof rails on my 2023 chevy suburban works well. The "C" clamp design mechanism holds it tightly and securely in place. No fear of anything coming loose and falling off like other racks I have tried to use.
I ordered the Thule WingBar Evo Crossbars - Aluminum - Silver - 50" with the Evo Flush Rail Feet for Thule Crossbars - Flush Side Rails and the Fit Kit for Thule Evo Flush Rail and Edge Flush Rail Roof Rack Feet for my 2020 Mazda CX9. I appreciated the product selector to make sure I was getting all the correct parts. I was happy with the products, but I did run into an issue where 1 of the rail feet had a defective bolt which required a replacement. I was very satisfied with etrailer's customer support, and how well they worked with me to get the part replaced quickly. I'm giving this a 4 start only because of the hassle of receiving a defective one initially
Favorite bar Thule makes. Super solid.
Once the mounting kit was installed, the fit was great. Too expensive though. etrailer ordering and shipping process was fantastic.
Easy to install. Super-fast shipping. Quality product. Glad I shopped with etrailer.
Solid roof rack, but get help from etrailer to make sure you get the core feet.
Very pleased with order. Shipped fast, not damaged, all parts accounted for. Easy install, very sturdy, and attractive design. Slight wind noise but that was expected compared to not having a roof rack.
Excellent product. Arrived when promised. Very pleased. Thank you.
This is the first top of the line roof rack system I have purchased. I never expected to have issues but this thing is so universal, with gaps everywhere, that I can’t get it to stop whistling. I wish I could return and get my money back. I really expected something better from such an expensive system.
Fit my 2015 Kia Sorento perfectly
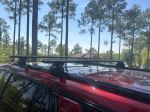
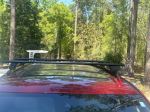
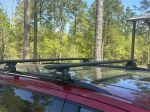
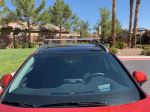
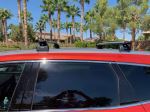
We just purchased a 2019 Hyundai Santa Fe as our retirement vehicle for traveling. We wanted to install cargo accessories but the dealer prices were WAY to high. After researching for several days we found etrailer.com. The prices were the best we found and the service was outstanding! We installed a Thule roof rack system that fits flawlessly and allows the panorama sun roof to plenty of roof to operate. The videos made in really easy to install. We also installed a trailer hitch system. The Tekonsha Trailer Wiring kit was also a piece of cake to install. If you're hesitant to work on electrical systems, there's no need to be afraid. It's actually easier than it looks in the video.
The Curt Trailer Hitch gave me major headaches. The delivery company banged the box up pretty badly. Apparently it tweaked the hitch just enough so that the holes were misaligned. No problem, after talking me through the installation one more time to be sure it was damaged, they shipped a new unit. The second hitch went in fine. It took a while, and it's not as easy as it looks in the video, but I'm 67 years old I did the installation myself...
Overall, I gave five stars because the price match guaranty makes it a wise choice price wise. he videos are a big help during installation. But the real difference is the service. A lot of folks provide good service to make a sale, but etrailer goes the extra distance to provide great service afterwards. That's unique! Thanks etrailer!
Website is easy to use & is better at putting together the correct package than Thule’s site.
etrailer had all the parts in stock for my 2020 Kia Telluride.
Payment process was simple.
Received periodic updates from staffer on my order & could actually reply if needed.
Installing the roof rack went well. Estimate start to finish was about 2 hours. Found it best to really examine each diagram in Thule’s step by step instructions to get it all right on the first try.
Hardness part of the installation was getting the crossbars installed at the proper distances. A tailor’s soft measuring tape & some masking were great aids.
Bought the Thule Wingbar Evo 118 crossbars and Thule Evo Raised Rail footers and installed them on my 2016 RAV4. Pretty easy to install and I did watch a few videos online to make sure I was doing everything right. I like the new raised rail system from Thule as it is clamp style versus the rubber strap - both work very well, but the newer clamp system is nice because the tool you use to tighten the footings clicks when it reaches the right tightness so you don't over tighten it. I recommend these rails and the footings (Thule 710401) as the system is quiet when driving and looks good.
It was hard to know what to order. We ordered 2 kits and thought that would hook up to our roof top. But no we needed a 3rd kit. I guess some people only need repair kits. It would be helpful to have one complete kit and then other parts needed for things like a repair job. Was not very had to assemble once we had everything.
Thule Rack looks awesome on my Kia Telluride. Products took a while to get to me because they were on backorder but it's not etrailer, they were on backorder everywhere. I messed up one of the pieces of rubber while installing and etrailer sent me a new one at no charge. Definitely recommend etrailer.
I spent a whole weekend looking for all these parts - no one had the entire kit in stock, they had one but not the other. I stumbled upon etrailer.com and was blown away by how easy they made the shopping experience - entered my vehicles info and they told me exactly what I needed! It doesn’t stop there, they also shipped my items within 3 days of ordering. I will definitely use them again when the time comes and recommend you do the same.
I’ve had it on my 2021 Kia Telluride now for a few months and it works great. When I was mounting the forward bar, I opened the sun roof to make sure I was comfortable with the roof window and bar clearance.
I am very pleased with my purchase, great prices, great quality parts, and excellent customer service.
I’d give a 4, since the rack is great, but the website picture gives the impression that there are core locks.
Thule makes great products
And etrailer makes it too easy to get when needed.
etrailer.com was excellent to do business with. Their website is informative, complete and easy to navigate. Phone service to help confirm availability of my product and their general knowledge of their products was impressive. Product arrived on time and in good shape. Their order tracking system is also very good. I’m very pleased with the Thule Wingbar Evo 135 racks For my BMW X5 with flush roof rails. They are super sturdy, solidly mounted and look good on the vehicle. Mine will be mainly used for surfboards and SUP’s. The assembly and installation was a breeze. The included written instructions would have been sufficient for a seamless installation but I also watched one of many YouTube videos that demonstrated very clearly every step of assembly and installation for this specific set of racks.
Love the racks!! I highly recommend etrailer.com for your roof rack needs.
Easy to install. It fit great on my 21 Tahoe. I do wish it came with the locks for the price. I do admit though, a thief would really need to want them to take the time to get them off. It is not a snatch and grab type item. All four clamps would need to be loosened. They are very solid though. I did not notice much extra wind noise either on the maiden voyage.
Quick, easy, and solid installation.

Do you have a question about this Roof Rack?
Info for this part was:
At etrailer.com we provide the best information available about the products we sell. We take the quality of our information seriously so that you can get the right part the first time. Let us know if anything is missing or if you have any questions.


Thank you! Your comment has been submitted successfully. You should be able to view your question/comment here within a few days.
Error submitting comment. Please try again momentarily.