
Summer Starts Here - Save up to 70%
To see if this custom-fit item will work for you please tell us what vehicle you'll use it with.
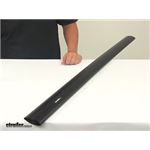
Low-profile, aerodynamic crossbar lets you build an aftermarket roof rack for your vehicle. Aluminum bar has a T-slot that lets you mount channel-mounted carriers and accessories. Rubber strip in T-slot keeps out dirt and won't need trimming.
Features:
Inno Aero Aluminum Load Bar - Black - 39" Long - Qty 1:Specs:
Inno Aero Aluminum Load Bar - Black - 39" Long - Qty 1:Videos are provided as a guide only. Refer to manufacturer installation instructions and specs for complete information.
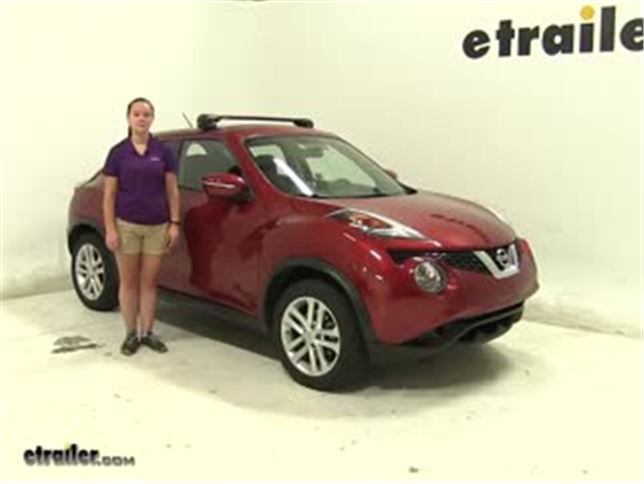
Today on our two thousand sixteen Nissan Juke, we're doing a test it of the inno aero crossbars. The part number for the crossbar we're using today are INXB93, which is the bar for our back and INXB100 for the front. Our foot pack today is INXS200 and the fit kit for this vehicle is INK399. Now we already have our front bar put together. We've got one of our foot packs for the back bar. I'm going to show you how to put the last one together and then how we load it up onto our vehicle. Everything that you see here is included, the only thing you want to provide is a flat tape measure, even though regular tape measure, just to measure everything. We're going to start off with our foot pack here.
We're going to undo our bolts. That's simply twist loose. Then we'll pick our clamp and fit it over here. Then start to tighten down our bolt, just enough so that it stays connected and doesn't come loose. Perfect.
We'll flip this over. We can take the rubber portion here and secure it to the bottom of our foot pack. When that is completely attached, we're going to connect our two pieces here to the two holes and make sure that that bolt in the center is in the center hole here. Inaudible 00:01:48 that. You tighten down on there. We'll take the larger of our two alan keys and there's a bolt down in the center there that we made sure was inside of that plate.
We're just going to tighten that up. This is going to prevent our foot pack from moving back and forth. We'll still be able to pivot it a little bit just to adjust it to fit our vehicle. Now we can open up our doors and we'll load up our crossbar. Now when we load up our crossbar, we want to make sure that the thicker side of the bar is facing towards the front since this is an aero style crossbar. We'll just reach it around and make sure that it clamps around the edge of our vehicle.
Perfect. Then I kind of just like to eyeball it, make sure that it's sitting evenly on the roof. Now we'll take our measurement. This measurement is going to be from the inside edge of the door jam to the center of our crossbar or our fit kit here. This is going to be forty-three and a half inches. This will make sure that we have the right crossbar spread for any of our accessories and make sure that our crossbar's actually sitting evenly from side to side. Perfect. Now we can go back and forth tightening it down. I like to start by tightening it down so that the clamp sits just up against our door here. It only takes a few turns. I'll do the same to this side. Notice that we'll go back and forth evenly tightening it down, making sure we do measurements back and forth the same, just so that we don't have our crossbars sitting uneven or even tightening down evenly to the point where it's pulling to one side or the other. Now we'll just go back and forth doing about ten to fifteen turns. Now a great thing about these aero crossbars is our weather stripping here in the center. You won't have to remove that to actually load up any of you channel mount accessories. You'll actually just push down on that weather strip, insert the channel mount inside and slide it along and then you can tighten down your accessories. You won't have to worry about having those extra strips or even having to cut them and possibly having any wind noise or whistling. These are also those aero bars like I mentioned before. They're aerodynamic. They're a good cut down on drag. You might have heard that pop noise, that's going to be our torque end of this tool. It'll pop when you have enough torque behind the bolt, just like so. We'll move that and we can place on our end caps. With those channel mounted accessories, if we have our end cap here and those are mounted into the channel, we won't have to worry about theft or tampering because they'll be locked inside there. We've got those locked into place. We can now load up our accessories and hit the road with our all new inno aero bars and how they fit on our two thousand sixteen Nissan Juke.
Average Customer Rating: 5.0 out of 5 stars (7 Customer Reviews)
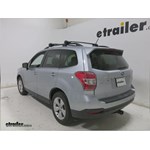
Low-profile, aerodynamic crossbar lets you build an aftermarket roof rack for your vehicle. Aluminum bar has a T-slot that lets you mount channel-mounted carriers and accessories. Rubber strip in T-slot keeps out dirt and won't need trimming.The rails completed the parts I needed to install my roof rack on my 2010 Forester. What was particularly important were the buying and installation guides and video for the products I selected. Order placement was simple, and the order follow up from eTrailers was greatly appreciated.
The quality of this product is 5 start and fit exactly with my 2017 nissan rogue..

Awesome product. It has everything in it needed to mount to multiple different vehicles. From what I remember it was a little confusing to figure out which pieces I needed to use. To have specific instructions for every possible combination would be impossible. The instructions are vastly better than IKEA's instructions.
The only problem that I am having is that I need to move the rack to a different vehicle and I do not remember where I put the extra parts.
These are great! Easy to use and easy to install. Thanks George!
Inno makes the best products
Very helpful staff. Great product and super fast shipping.
Info for this part was:
At etrailer.com we provide the best information available about the products we sell. We take the quality of our information seriously so that you can get the right part the first time. Let us know if anything is missing or if you have any questions.


Thank you! Your comment has been submitted successfully. You should be able to view your question/comment here within a few days.
Error submitting comment. Please try again momentarily.