
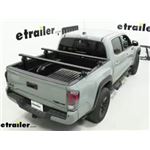
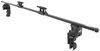
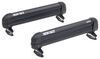
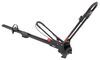
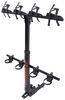
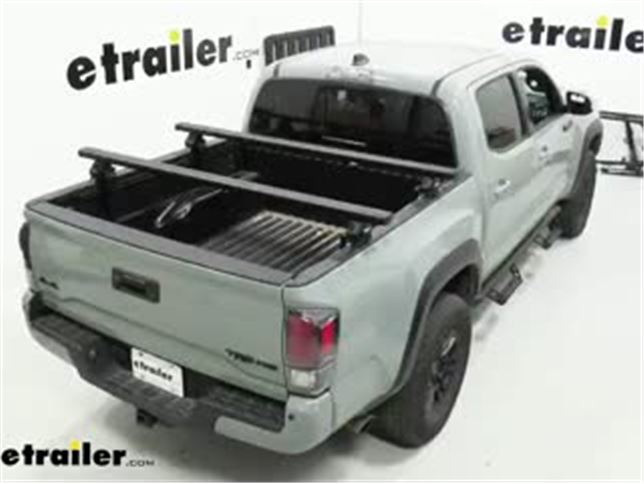
This fixed-height rack sits at bed level so you can easily carry a roof top tent, bike rack, or cargo carrier andhave room in your truck bed for other gear. Mounts to truck bed's side rails - no drilling required.
Features:
Specs:

Videos are provided as a guide only. Refer to manufacturer installation instructions and specs for complete information.
What's up everybody It's AJ with etrailer.com. Today we'll be checking out the Thule Xsporter Pro Low on our 2021 Toyota Tacoma. This is going to be bed rails that attach to the track in your bed. And that way you have a low-profile way to take more cargo on top of your bed and still leave your bed open for extra stuff. Let's check it out. This'll be great for mid-sized trucks like our Tacoma or maybe a Gladiator, or you don't have the biggest bed, but you wanna maximize what you got.
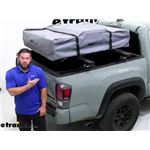
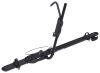
So, like I said earlier, this adds a second level to that to help you maximize how much stuff you can take. For instance, whatever accessories you wanna put up there, you can put a bike rack, maybe another cargo carrier for a basket or something to throw more of your stuff up on the second level, or if you add a tent here, too. The nice thing about it is it's a low profile one, so something against the higher ones, the ladder racks and other ones that come up even with the cab, is this is gonna be higher up in the air. So one can be harder to access it, to throw stuff in there. And the second thing, if you have this tent higher up and especially around here in the Midwest when you're driving around with all those trees if you're going camping, it can snag this vinyl coating, rip it off, or cause issues to your tent.
It's gonna less likely to happen when it's down here and level with the cab. Now the bars are gonna have a weight capacity of 220 pounds. So make sure you don't exceed that. Keep in mind what accessories you wanna throw on there, what you're thinking about hauling. Make sure you just don't go over that and you won't cause any issues.
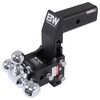
When I was working with this today, I was trying to think of some other bedrail systems I worked with. One of the ones that come to mind is the BedRock system, so that one's gonna latch on to the rails and it has a screw at the bottom that you're gonna use and that's gonna push up on it. And then you push down the lever to get leverage and you can also lock that so they can't mess with it when nobody's ground. I like that system. It's easier to put it all in there.
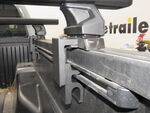
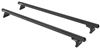
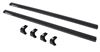
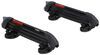
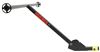
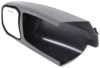
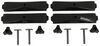
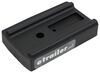
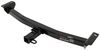
The bar's gonna be a little bit different though. They're gonna be a little bit thinner of a bar. So if you're using more clamp-on related accessories, that might be a better way to go, because like I said, this one is kind of fixed. You gotta be careful even though the clamps are gonna fit around there for most of them. Another thing to go with that one though, is I like this system better with the brackets that go into the track. They just feel sturdier to me. And I know when I'm tightening 'em down with that tool and then it clicks. I know that it's in there. I don't have to worry about it coming undo or anything or maybe I didn't get it hand tight. I kind of like that, 'cause I didn't wanna leave it on there. I'm only gonna take it off if I absolutely need full-bed access. Something else that's important, security. So it's got built in lock cores on each one of the covers that is all keyed alike so the same key's gonna work on all of 'em. I like that. But then there's also gonna be on each rail, there's gonna be a lock on here on the inside. So it locks the bolt so no one can detach or loosen the clamp when you're not around. And again, that's the same key as the covers on the outside. So I like having that one key just to go all the way around, lock it up or unlock it. Now let's get some measurements. So we're gonna measure from the raised portion of the bed to the bottom of our bar. It's gonna be about, looks like it's right there. Looks like it's gonna be 22-3/4". And then from our bed rail here to the top of the bar, it's gonna be about 6". So it's gonna add a little bit to the top of your bed rail, but not too much. If you look in the back window, you see it's still underneath the headrest there, so it shouldn't impede your view at all when you're using that rearview mirror. Now another thing to think about is how much these brackets stick out, 'cause it will take a little bit away from your bed, but not a whole bunch. Measure out there, So it looks like 1-3/4". It's gonna stick out and that's gonna take a little bit, but not too much. You see towards the back, maybe easier to look up here. It doesn't stick out any more than your wheel wells do already, so it's not gonna take up that much bed space. With nothing on here, you can take a better look at it. The whole thing is gonna have a black powder coat aluminum, so it's gonna resist rust and corrosion. You don't have to worry about that. The rubber strip at the top is also awesome. We learned that when we did the video on the full one on the full truck there. we threw a tent up here, and the tent, as we put it under, we we're allowed to push it along the rubber strip, so it wasn't scratching the aluminum. It wasn't doing anything to the bar itself cause this sits up a little bit higher. So that's nice that it's there as kind of protection for your accessories you might put up there and slide back and forth. Another measurement to look at is gonna be from the bottom of your track to the top of the bar. It's gonna be a good thing to do. Every truck is a little different. Your track might be in a different spot. So I just suggest getting this measurement yourself. Think about what accessory you're gonna put on there. And then just know that this is what it's gonna add to your vehicle. So bottom of the track, the top where the bars would be, about 8-1/2". Looking at the bar at the end, it is gonna be kind of a thick bar. It's gonna be 2-3/4" wide. So think about that with your clamp-on accessories. Maybe look at those clamps, make sure they're gonna work with it 'cause it is a little bulkier than some other bars out there. I also like the aero-shape design, so that's gonna make it aerodynamic when it's going down the road. It won't make as much noise or have as much resistance. We're gonna do some assembly before we set this rail up. So what we're gonna do is we're gonna take our tower, slide it in that track at the bottom. Now when you go to put both of 'em on there, you put the other one facing the other way. We've already got it pushed over. And we have the cover. That's gonna go right here at the end. It's gonna keep it from coming off. I started to screw in there just to make it easier so I don't have to line that up when it's down on that track. But you push that in, billfold should be lined up. Come back with the Allen wrench and tighten that down. The last step for the bar is you're gonna be putting the weather strip in. We found the easiest way to do that is get some soap and water. That's gonna help it ease into the track. And you kind of just work it in very slowly all the way across the bar. And then you cut off your extra so that it matches the bar length. Next part of the install is gonna be putting our bracket in the track here. So make sure you get the right side. This bigger side would be for if it hooked up to underneath the bed. But since we have the track, we're gonna use the smaller side. I like that it's the same bracket, so you don't have to buy anything extra. It's gonna work it in like that. And now it's in place, so it's gonna stay right there. We're gonna try and line up with the one across the way since we've already measured that one out. And then we'll go to add our base. You have a bolt that drops through the back section here. And we're gonna line that up with the hole on the top of our bracket And I'll use my hands to get it hand tight, and then come back with the tool to run down some more. Looking at the bolts that drop in there, there is gonna be two flat washers and two spacers. I suggest putting a spacer on each bar, because when you do that, you're gonna add that lock on top of there. Let's get some measurements while that's still loose so we can slide it back and forth. What we did to get the first one lined up is we did 16" from the bulkhead to the center of the base or the tower right there so that we can see that that's 16" like we want. And then we're gonna go from the center of this one to the center of our base here, we wanna get 28". That's spot-on right there, so I can finish tightening it down. Now the bar and the bases are assembled and ready to go. I can set them in the place. I'm just gonna bring it up here and line up with the bases the best I can, try and lash that one in or get it close, but I can adjust this side and make sure this one gets in. You wanna make sure you loosen these bolts quite a bit so it'll slide in the place and lock in. All right, so this one's in, I'll come back with the tool. Well, I can hand tighten it here just a little bit to keep this base right there, and we'll go on the other side and lash it in too. Now we'll come back with the tightening tool and tighten it down. We measured out from the silver part here to the end of the metal bar and it's gonna be 4-1/2" of hangover on each side. Just do that so it's nice and even before you tighten it down. I'm gonna kind of go back and forth and tighten these at the same time. I'll try and do 'em evenly. And then the cool thing about this tool is it's gonna snap when you're done tightening it. I like knowing when it's done. I don't have to worry about not tightening it enough or over tightening it. I'm gonna jump over there and do this even. We'll come back and show you that click. Last thing we're gonna do is just pop our cover on. We've already put the lock cords in there so you just kind of line this up, push it in, and use the key. They're all key to like, that's the nice part, and lock it. Now nobody can mess with this one when you're not around. Overall I do like the system. It was sturdy like I want it to be, and I don't have to worry about it going anywhere when I'm driving down the road. Those tools really helped me know that I got it tightened down just as much as I should. Not too much, not too little. I like how easy it is to put in the tracks and install or take out if I wanted to completely remove it. A lot of people if you look at overlanding stuff use the mid-range ones, but I like the low-profile one better. Like I said, keeps my tent out of danger. Don't have to worry about branching and stuff and I still get to use the bed. So it is low profile, but there's still plenty of room to put gear and you can even stack it a little bit before it's gonna make contact with the bar. That means I can still use the trunk bed for whatever I may need. Well, I think that does it. Thanks for hanging out and hope this helps..
Do you have a question about this Ladder Rack?
Info for this part was:
At etrailer.com we provide the best information available about the products we sell. We take the quality of our information seriously so that you can get the right part the first time. Let us know if anything is missing or if you have any questions.


Thank you! Your comment has been submitted successfully. You should be able to view your question/comment here within a few days.
Error submitting comment. Please try again momentarily.