
Aries Grille Guard - 1 Piece - Semi-Gloss Black Powder Coated Steel
(14 reviews)
Price: $563.70
Aries Grille Guard - 1 Piece - Semi-Gloss Black Powder Coated Steel
Item # AA4080
Retail:$789.95
Our Price: $563.70
You Save: $226.25
Will this fit?
To see if this custom-fit item will work for you please tell us what vehicle you'll use it with.


Need help with installation?
Locate installers near me- All Info
- Reviews (14)
- Q & A (0)
- Videos (1)
- Photos
Aries Automotive Grille Guards - AA4080
- Steel
- Black
- Full Coverage Grille Guard
- Aries Automotive
- 1-1/2 Inch Tubing
Protect your vehicle's front end, and give it an aggressive aftermarket look with this carbon steel grille guard. Integrated mounting points in middle crossbar let you add off-road lights. Bolt on installation with included hardware.
Features:
- Custom-fit, 1-piece grille guard protects your vehicle's front end from dents and scratches
- Acts as a brush guard for your grille, headlights, and bumper
- Uprights have heavy-duty rubber stripping to protect your vehicle's finish
- Large-diameter, contoured tubing wraps around front end for maximum coverage and sleek lines
- Integrated mounting points on middle crossbar let you add off-road lights (sold separately)
- Removable light guards provide access to headlights
- Rust-resistant, black powder coated steel is great for off-road adventures
- Welded construction creates a strong, durable guard
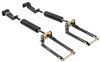
- Simple bolt-on installation with included mounting hardware - no drilling required
Specs:
- Tube diameter: 1-1/2"
- Limited lifetime warranty
Note: This grill guard may interfere with forward-facing cameras or sensors
4080 Aries Automotive Brush Guard - 1 Piece - Black Powder Coated Steel
Installation Details
This Product Fits The Following Vehicles
- 2004 - 2012 GMC Canyon
- 2004 - 2012 Chevrolet Colorado
California residents: click here


Video of Aries Grille Guard - 1 Piece - Semi-Gloss Black Powder Coated Steel

Videos are provided as a guide only. Refer to manufacturer installation instructions and specs for complete information.

Video Transcript for Aries Grille Guard Installation - 2012 Chevrolet Colorado
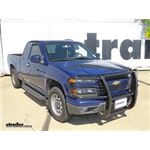
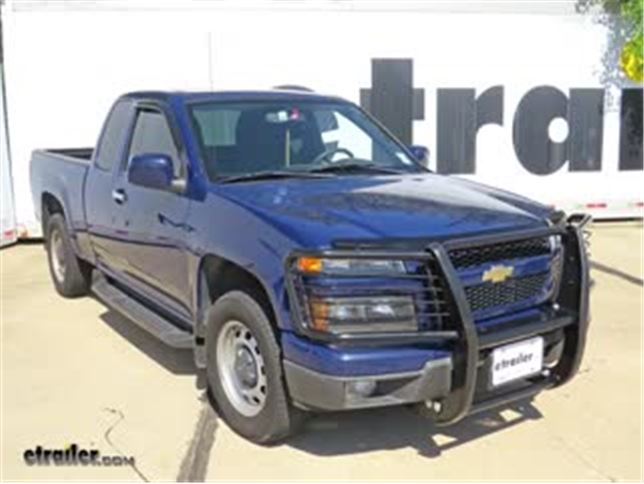
Today on our 2012 Chevrolet-Colorado, we're going to be taking a look at and installing the Aries black grille guard, part number AA4080. Also available in polished stainless steel, part number AA4080-2. Here's what this grille guard is going to look like once it's installed on the vehicle. As you can see, it's going to give us a nice heavy duty clean look to the front of the truck. It's made of a heavy duty carbon steel construction with 1-1/2 inch tubing. Here in front of the headlights, it's got these cages.
They can help protect things that may kick up from potentially breaking your headlight lenses and these are also removable so that way, depending on what look you want, you can take these out or leave them in. It's got this rubber that goes over the risers here on the very front of the guard and those are going to help protect it if you possibly bump into something whether that be in a parking lot or a garage, something like that. What this grille guard is going to do is give you that nice clean look on the truck and make it look a little bit beefier. It also gives you the option with 2 grommets that are in pre-drilled holes here in the center cross bar that you can mount up a light bar if you'd like to for any off-road use. It can also help protect the front of your vehicle if you're going through any light brush from too much of kicking against the front and prevents some potential scratches. What I like most about this grille guard is it does give a nice heavier duty look but it also leaves it open and accessible to the front grille here and to down at the license plate. You can still see the license plate and you'll still get good airflow through the grille.
Now, let's show you how to install it. First thing what I'm going to need to do to begin our installation is we're going to need to remove this lower lip on the front fascia here. That lip is over at the fender. There's going to be a push pin fastener in each side. You can use a flat head screw driver or a pair of side cutters.
You want to pull that center out and then once you pull it out the body will come with it. Keep in mind when installing this, whatever we do on one side, we'll be doing that exact same thing on the other side. Now there's tabs all along the front here that hold this up into place. You can take a flat head screw driver and work up underneath there so that you can pull the tabs out. Then we just continue along the front and release all of our tabs. We'll reach around the edge of it here, pull that out and release it and we can pull that lower lip of our fascia off.
Now we'll remove this plastic splash guard underneath. There's a 13mm bolt on both sides that holds it in. Now we can take one of our long 12mm bolts. We'll put one of the flat washers onto it. Then we can take our bracket, because with this one, it doesn't have the other mounting locations so we'll need to create it using this bracket and you'll want the longer end of the bracket which is up here to go up on the outside of the frame. The bolt will go through the bracket and then through that hole right there in order to come out the other side. Then on the inside of the frame rail, we can take a large mounting bracket, slide it up into position to line that upper hole up with where that bolt's coming through. Then we'll put on another flat washer, a split lock washer in the hacks 00:03:56 nut. You just want to get that started. Then from the lower mounting point, what we'll do is we'll take one of our 10mm bolts with flat washer, insert it through and then on this side we'll do flat washer, split lock washer and nut. Just under the inside edge of the headlight here, there's a bolt that mounts up the bumper. I'm going to use a 15mm wrench in order to loosen that. Once you've got the bolt loosened up and there's a good little gap there, we'll be able to take our upper bracket and we'll take the open end here and we'll slide it underneath the head of that bolt. You want to be sure to refer to the instructions so that you can make sure that you have the correct side. Then we'll get that pretty straight and leave that right about there. We'll leave it loose just to make sure in case we need to adjust this a little bit. When we put the grille guard up into place, we don't want it to be tight. Now with the help of an assistant, take our grille guard and carefully slide it into place and wind up the holes in the lower bracket. Then we'll take our shoulder 12mm bolts with flat washers and insert them through the holes. Then on the other side of each bolt, we'll put a flat washer, lock washer and nut. Now we'll carefully take our grille guard and get it lined up with the holes in the upper brackets. Then we'll take one of these bolts with the Allen head on it and a flat washer and send it through. Then on the inside we'll install flat washer, split lock washer and 10mm nut. With all the hardware installed, we can make sure that our grille guard is level and make any adjustments necessary. Now we can begin tightening all of our hardware down to make sure that our grille guard's nice and secure in the position that we want it. Then we use a 5/8ths socket and you'll need a 6mm Allen key for the head of the bolt in order to tighten it up. Then on these 12mm bolts and nuts, we'll be using a 3/4 inch socket and wrench. Then on this 10mm bolt here at the bottom, it will be a 5/8ths socket and wrench. Then we'll torque it down to the specification listed in the instructions. Then we can reinstall our splash guard. That's going to complete our look at and installation of the Aries black grille guard, part number AA4080 on our 2012 Chevrolet-Colorado.
Customer Reviews
Aries Grille Guard - 1 Piece - Semi-Gloss Black Powder Coated Steel - AA4080
Average Customer Rating: 4.5 out of 5 stars (14 Customer Reviews)
Protect your vehicle's front end, and give it an aggressive aftermarket look with this carbon steel grille guard. Integrated mounting points in middle crossbar let you add off-road lights. Bolt on installation with included hardware.by: C.J.04/26/2018
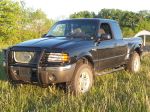
I have searched the internet when deciding to purchase a grill guard for my Ranger. After a few days of seeing several grill guard designs from several manafacturers, I found what I was looking for. Aries offered, in my opinion, the best looking guard without smashing the wallet. When I received the guard, which was shipped fully protected against scratches & dings, the thing looked better than the pictures. My son & I installed it onto the truck within an hour. Basic socket tools gets it done.
I gotta say, the guard is awesome. Installation was a breeze. And the wallet lives another day...an excellent value for the money.

by: jcole03/18/2019
Arrive undamaged.
Easy install.
Mounted cb antenna on guard.
Good quality and looks good on truck!


by: Teresa12/26/2018
This was exactly what I was looking for! I got a great price on it and it shipped quickly. I can’t say enough about their customer service, either. My original product had to sit unopened in my house as the weather prevented me from installing it. Months later when I finally unpacked it it was really damaged. Etrailer made it right and sent me a new one with no additional charges and made it very easy! I will definitely be purchasing from them again!

by: Robert01/12/2019
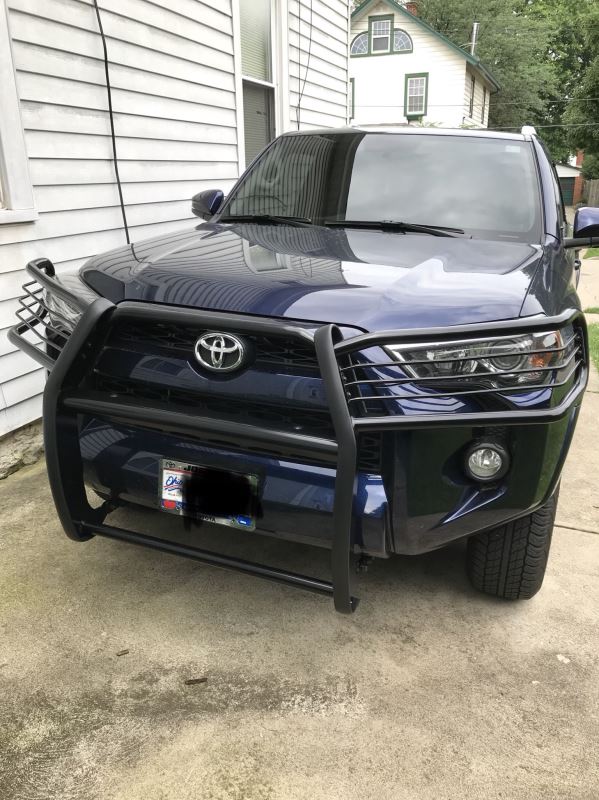
It's very streamline and doesn't completely mask the entire front end giving the truck an agressive but stable look which I love. It also lines up perfectly with all the contours and Installation was easy too.
by: Adam07/17/2018
It was a really nice looking grill. It fit snug and tight. The only thing I didnt like about it, no matter how tight it was installed, it fibrated like a pitch fork in the wind and I felt vibration around 60 to 70 miles per hour on the free way. I got rid of it after 3 months. Not sturdy enough to protect from hitting a deer, probably just bend it up and your truck as well.
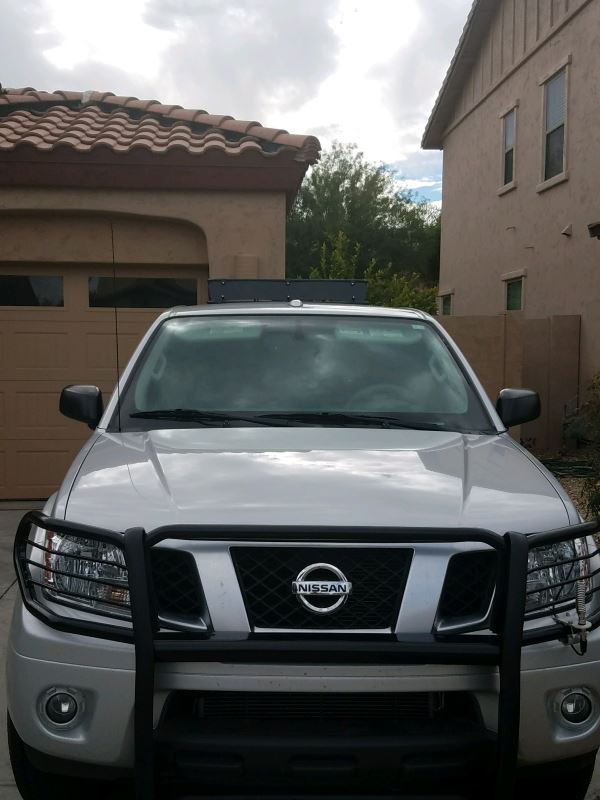
by: Dean11/05/2018
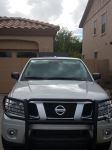
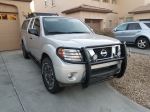
The grill guard fit the 2016 Nisan Frontier Pro 4X perfectly.
The only thing you lose is the front tow hook.
Great product, execellent service & shipping and fantastic pricing.
by: Rob01/15/2019
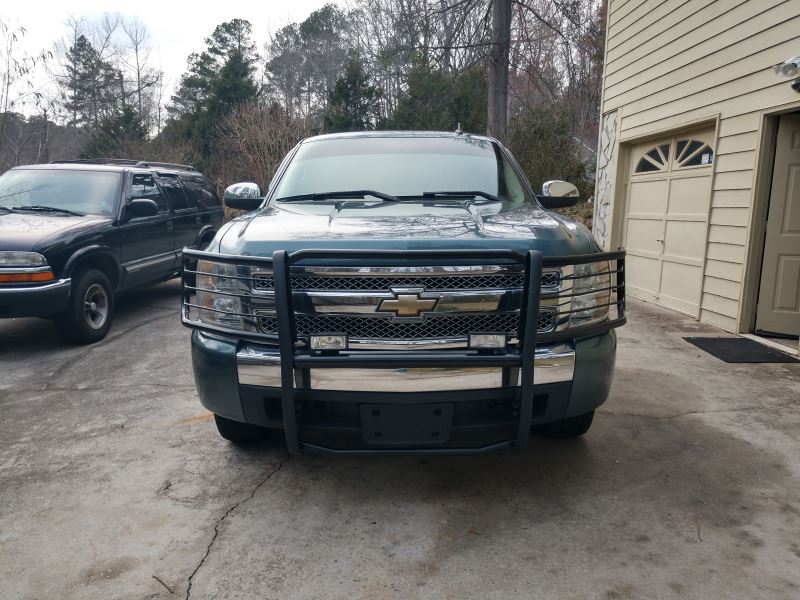
Very pleased with my grill. Highly functional and adds a great off-road look. I recommend this product.
by: Woody01/16/2020
It has held up great, paint is still got the high gloss look.Would buy again if needed.
by: DynoTheBiker08/26/2020
LOVE it!! Fit perfect was easy to have installed looks badass!!
by: Pam11/29/2018
Product was just as described and super easy to install.
by: Bao11/08/2018
Cheaply made not worth the price will not recommend to anyone
by: Jeroen01/24/2018
As described, pretty easy install
by: 06/04/2023
by: James 06/15/2021
14
14
See what our Experts say about this Aries Automotive Grille Guards
Info for this part was:

Edited by:
Tyler C

Video Edited:
Joshua S

Written by:
Daron K

Updated by:
Jessie B
At etrailer.com we provide the best information available about the products we sell. We take the quality of our information seriously so that you can get the right part the first time. Let us know if anything is missing or if you have any questions.
Product Experts Available Now!
Call 1-800-940-8924
Thank you! Your comment has been submitted successfully. You should be able to view your question/comment here within a few days.
Error submitting comment. Please try again momentarily.