
Summer Starts Here - Save up to 70%
To see if this custom-fit item will work for you please tell us what vehicle you'll use it with.
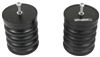
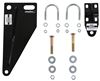
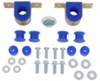
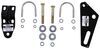
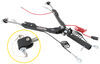
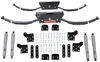
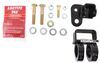
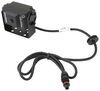
This gas spring steering stabilizer will give your motorhome a responsive steering experience that keeps your rig from wandering. Custom mounting brackets included.
Features:
Specs:
Notes:
The Exact Center works better than other steering stabilizers because it's always working to prevent unwanted movement.
Other steering stabilizers slowly activate to control steering only after your motorhome has already begun to wander or make a turn. Basically, other steering stabilizers are reactive - they fight against the unwanted movement, but only after the movement has already started. They will get your RV back in line and absorb shock while doing so, but they still allow some play in the steering because of their soft centers, which can cause the steering to feel spongy.
Roadmaster's Exact Center is proactive. It uses a nitrogen-charged gas spring that applies full force right when you need it. This helps prevent the unwanted wandering and white-knuckling you typically get when driving your RV. The improved responsiveness makes driving to your next adventure less of an exhausting chore.

Videos are provided as a guide only. Refer to manufacturer installation instructions and specs for complete information.
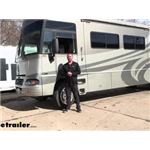
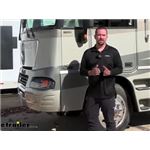
Hello neighbors, it's Brad here at etrailer and today we're taking a look and installing the Roadmaster Exact Center Steering Stabilizer on a 2005 Workhorse W Series. So we're gonna go here on our test course and I'm gonna just kind of let the steering wheel naturally kind of do what it needs to do. Now we have some off center bumps here and we'll see if the steering wheel moves. And a little bit of jostling there. But what I'm gonna do here is a long wide sweeper and then as I kind of get to the straight portion of it I'm gonna kind of just let the steering wheel center itself. And it does a pretty good job.
But you can see we're still kind of angling off. So I have to kind of reel it back a little bit just to straighten that out, which doesn't seem like much. But we're also doing 10 miles per hour in a parking lot. I'm not necessarily on the main roads at a higher speed where it's gonna be a little bit more apparent. So I'm gonna do a long sweeper here and then I'm just gonna hands off the wheel and see how it actually, you know responds to straightening back out.
And this is, I've never done one of these installations, so I'm pretty curious to see the difference that it makes and really just how much better on the driving experience it becomes. So I'm gonna swing wide here again, I'm doing about, yeah I'd say about 10 miles per hour. And then just as I let it naturally go it definitely we're still kind of pulling to that left which is to kind of be expected. That's the stock steering. So let's, we'll take it back out on the test course here and then I'm gonna do a little bit of slalom action and that's where I think we're really gonna see a big difference because each time we're having to kind of counter steer to bring that back to a center whereas hopefully the steering stabilizer does the work for us and just makes it a little bit better.
So as I cut here, it kind of comes back. As I cut here, it kind of comes back But it's definitely on its own it's not gonna straighten out. You can see the steering wheel still point me in this direction here. So as I accelerated, still wanting to pull to that, right. So hopefully we can correct that.
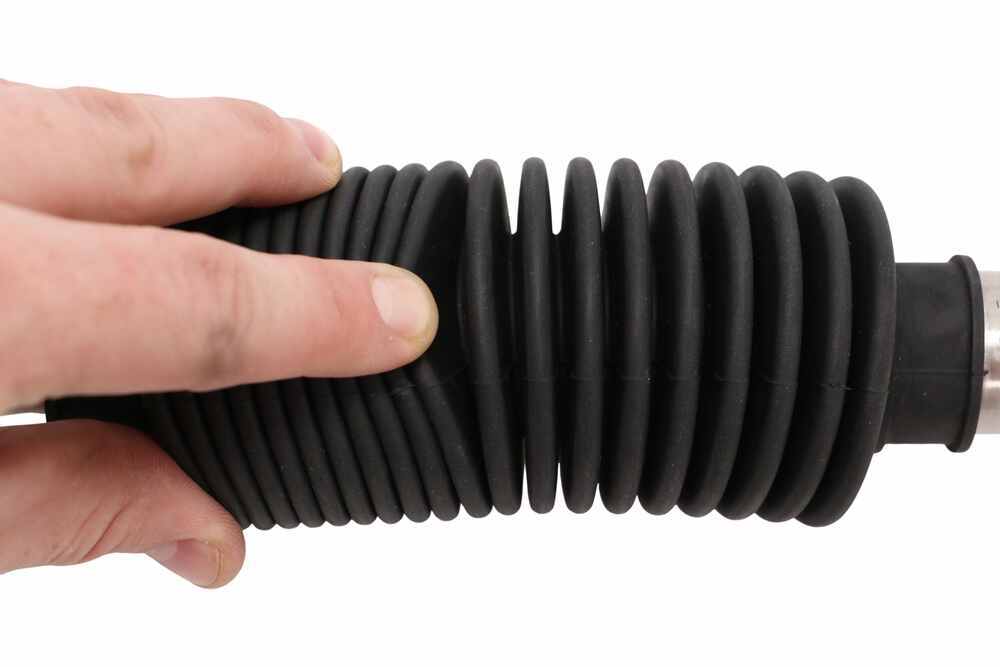
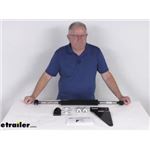
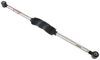
Now while we're out here on the test course something that we're gonna do is we're gonna find our center of our steering wheel. And that's not gonna be how straight this is. You're gonna want this tracking as straight as possible on a flat road. And then what I'm gonna do is take a piece of tape and I'm gonna run it from the steering wheel to the dash and that's gonna be our reference point. And that way when we need to make adjustments we can go ahead and do that. So just a nice little pro tip here just to help you with it. So we're gonna go ahead and just drive straight here and I'm gonna go have a little line in the concrete that I'm gonna try to follow here and just follow along with that and then see where the steering wheel naturally stays. So that looks to be pretty straight here. So I'm gonna just stop, hold my steering wheel here. And then I'm just gonna take my piece of tape and again, run it just from the dash to the steering wheel and then I'll just kind of cut down the center. But that way we can again line these up when we need to do our adjustments and we'll be good to go. Here we are. So now it's time to take it back in the shop and get this installed and see the difference. So with our stabilizer back on we still have our reference marks. So I'm really curious to see how this performs. And so I'm gonna go through the same kind of basically path that I went before. And the main thing that I'm going to really be looking for is how quickly does this respond back and bring it back to center And that's just gonna make that driving down the highway a lot easier. So we'll make this wide turn here and before it would start tracking to the other side we're gonna see what it does here. Already there is a little bit more steering feel just a little bit more response and that definitely comes back way faster. And I am here on a straightaway. So let's get me right in the center groove here. Our steering is nice and even it's not pulling So that means we've adjusted properly. Now if it is pulling to the left or right you're just gonna adjust those U bolts a little bit loosen those down and move that bracket. And that should align your steering. So just kind of use your reference marks again. And I also recommend using a paint marker underneath and just kind of marked that. And then you can move the bracket. But once we have it dialed in we're gonna see the benefits here. So doing a little bit of slalom here it definitely wants to bring it back especially the harder I turn, it seems like it fires back exactly where it's supposed to go whereas before it still kind of just drift wherever I left off with input. So pretty quickly it goes back and as I mentioned, the steering field is it's more responsive so it actually it feels a little bit heavier but in a good way there's feedback whereas before it was just kind of loose and it kind of just felt aimless in its own way. But this definitely gives it a more car-like handling in a good way. And it's pretty simple concept. You have a bracket here that bolts to your U bolts. And in between this bracket and the bracket that we attached here it's just going to go along your steering. So when this is moved it's just going to compress in the nitrogen charged gas spring and that's going to just bring that back to the center each time so it acts like suspension. So as it compresses, it's gonna fight that back and put it right in the center every time. You know, as far as the construction, it's pretty simple. This is gonna be stainless steel so it's gonna be extremely durable, especially being on the vehicle that stainless is gonna hold up. And also where you have the gas cylinder here you're going to have the boot around it so that's gonna protect it from that road grim. Now your brackets are also nice black powder coat so those are gonna hold up as well. After it was installed, I was able to make some adjustments on our U bolts here just to kind of center that up a little bit by just kind of laying on my back underneath the RV without having it raised up. So installation should be about the same as well. This can be done just kind of laying underneath there just obviously make sure you're careful underneath. Now speaking of the installation, let's take a look at that now. To begin our installation, we're gonna be on our passenger side on the rear portion of the front axle and we're gonna have our U bolt nuts here and we're gonna get those removed because our plate is going to go in place there. So these are going to be a little bit tricky here. So just because of rust you can see I've put some penetrating oil just to kind of loosen that up. And I'm gonna be using a 15/16th socket on my impact to kind of get these going. But you may need to get some leverage here depending on you know, what the underside of your RV looks like. So let's go ahead, we'll get these taken off. So now we're gonna take our plate and it should look something like this and we're gonna slide this back over and then I'm gonna replace my hardware. Now as far as orientation that slotted side should go towards the passengers so just make sure that you have that in place. And then I'm gonna go ahead and get these snugged down. And then we're gonna come back with our torque wrench and make sure they're torque down properly. Now we're gonna go back with our torque wrench and I'm just using the manufacturer's recommendation for their U bolts. Now if you need a torque wrench we have these available here at etrailer. You can generally rent them at an auto parts store but this is gonna make sure that these are gonna be properly tightened down not become loose over time. So now I'm gonna go ahead and I'm gonna grab my tie rod bracket and we want this whole facing towards the back. And we're gonna just run our U bolts that are supplied in the kit through here. And then I'm gonna finish these up with a flat washer. And then we have nylon lock nuts here and I'm just gonna hand tighten these on just to kind keep this in place. And this is gonna allow for some adjustment but we'll have this mounted up at least to be able to kind of determine our length. So just go through here and get our nylon lock nuts put on. So now I have my stabilizer in hand and we're gonna get this mounted up to our bracket but we need to make sure that we're choosing the right hole in this instance here. Now the Roadmaster logo is right here. We want that facing towards the front or close to it. So what we'll do here is kind of line this up just kind of eyeball it. But what we're looking for is to try to make this as parallel as possible once it's mounted up. It looks like this one here is gonna be a little bit too tight and this gives us a little better a little more parallel to our factory steering rod here. So what we'll do to get this in place, pretty easy, we'll pass this through and then we're gonna put a flat washer on there and then follow it up here with the stabilizer. And then I'm gonna go ahead and put another flat washer and then we're just gonna follow that all up with a nut here. And I'm just gonna keep this finger tight for now. Then gonna go over to my other bracket here and I'm gonna go ahead with my bolt and flat washer and we're gonna pass this through. We're then gonna finish that with a flat washer here. Pass that through our bracket. And then again, I'm just gonna hand tighten this on there. So now I'm gonna go ahead and get these tightened down and these are gonna be three quarter inch. So I'm gonna go ahead and put my wrench up top and my socket below. We don't have to get too crazy here, we just kind of want it snug where it's not just walking around like this because the torque setting isn't particularly high. So just kind of crank this down. And main reason that torque setting isn't high is because you still want this to be able to swivel a little bit. It does have movement, so cranking this down doesn't necessarily do anything for it. In fact, it might hinder it. So get this snug. And then I'm gonna go ahead and do the same here on our bracket. So now with our bracket here what I'm gonna do is just kind of if you wanna make sure it's not pulling or you know have too much slack I'm just gonna kind of just push this straight up and I want this nice and level with our bar here so we don't want it twisting like this so just kind of hold this up and that bracket should be looking pretty level as well. So let's go ahead, we'll get these tightened down. The torque setting's gonna be the same actually for this hardware. So I'll come back with my torque wrench right now. I'm just gonna kind of snug these up so it holds it in place with my 9/16. And I'll also make sure that this bracket is nice and perpendicular to the bar too. You don't want this off to the side and as you tighten it should kind of center itself up as it kind of makes its way. So I'm gonna just kind of make sure that I evenly tighten as we go and then we'll get this all snugged down. So now I'm just gonna go through and torque these down properly. So now I'm just gonna go back with that three quarter inch and with my wrench, get these torque down properly. But really other than that that's gonna be the main portion of getting this installed. Now we may need to come back and do some fine tune adjusting once we're out driving but this is really gonna do it. So it's a pretty easy install overall. And that was a look and installation of the Roadmaster Exact Center Steering Stabilizer on a 2005 Workhorse W series..
Average Customer Rating: 4.6 out of 5 stars (158 Customer Reviews)
This gas spring steering stabilizer will give your motorhome a responsive steering experience that keeps your rig from wandering. Custom mounting brackets included.Want to thank Rodger for his help!! Product works great

Hey RV'rs.... I upgraded from the Roadmaster stabilizer and the difference was phenomenal... Prince Edward county to Key West with minimal steering correcting
For what this cost,I notice no difference in the steering handling from the prior factory set-up. My RV mechanic tells me it's because I have a shorter motor coach at 32 foot. It just gets blown around and handles like a a short wheel base vehicle.
Driving our 30 ft. Class C motor homes, is like driving a sports car, haven’t had steering problems with road ruts, no more white nuckle driving, sure help driving between big
rigs. I glad I waited on them during the Covid shortages instead of buying some other product. You need to put ty raps on the end of the boots that’s keeping it in place. Great investment.
Super easy install on a 2019 Leprechaun 319MB ,Class C RV. Hardest part was taking off the old hardware. Followed the instructions and test drove at 60mph and it drove totally straight and did not have to make any micro adjustments. A very well made product.
I really like the way the vehicle handles after finally getting it centered. I had issues with the rubber boot constantly sliding off one side or the other. This would cause major vehicle pulling one way or the other especially after one heavy rain storm. I placed hose clamps on the boot and clamped it to the steering stabilizer, that fixed the issue.
Tips for installation;
1) Drive and find straight/center with masking tape as described; DO NOT SKIP THIS STEP or rely on if the wheels just look straight.
2) Wire brush (with drill attachment) U-bolts to remove rust.
3) Spray with PB Rust breaker type product and let soak on U-bolts
4) Remove U-bolts with torque wrench to help determine torque setting
5) Follow remainder of etrailer video instructions as they are clear and correct EXCEPT; the black end pieces in which the shock screws into should be set to a thread depth you are comfortable with prior to install to leave room to perform fine adjustments. I reset bracket to make sure the threads had plenty of bite.
The hardest part is the fine tuning. I have only put approx. 10miles on it at this point searching for center as I did not do step #1 at first and had to reset the bracket on the drag-link to ensure proper thread depth.
As far as performance; Not sure how I feel about it yet. Does hold straight but requires more effort during turns and constant effort to maintain the turn. My rig takes a lot of mico adjustments on the steering wheel going down the road to keep straight and I am concerned this will cause more fatigue rather than less. Getting ready for road trip and will report more after.
As far as Etrailer; Excellent communication, quick shipping, good instructional video.
easy to install on my 2011 e450 super duty jayco grayhawk. test drive proved good control. will know more when towing our jeep grand cherokee.
make sure steering wheel is straight before you start. test drive was vastly improved. almost no wander. my roads suck in the country, so its really hard to tell how good until i get on a real highway.
I experienced more steering issues with this on.
I had it inspected and reinstalled by three separate installation sites.
I now have it sitting in a cupboard. Waste of money. Major regret
I can always count on e trailer for the right part at a good price. In addition, their product knowledge and customer service is outstanding.
Auto repair shop had to remove it to get the steering corrected on my motorhome and put the original back on
This was my second stabilizer for a 38 ft class a motorhome. Big improvement from past experiences. Much more balanced stabilizer because it's not reliant on pushing in one direction for centering.
Suggest this is one of the first steps ever new class c owner do to replace the OEM component. The OEM component on my unit was complete trash with less than 5K miles.
Get one, you won't be sorry. I traveled 7250 miles around the US this past summer and the stabilizer performed perfectly keeping the RV from drifting out of lane. This makes driving so much easier. Even in wind gusts the stabilizer was a tremendous aid controlling the RV from lurching left or right. I believe its a good investment.
I added this Roadmaster exact center stabilizer to my 2022 Entegra Odyssey 26M class C RV and it was a game changer. I felt like I was driving a car i didn’t have to keep making huge adjustments with the steering wheel and it helped so much when pass Semi trucks. It also helped on roads that were rutted. I didn’t feel like I was going all over the road. I think that the combo of this stabilizer and the Sumo Springs that I added to the bump stops on the frame (1000 lb front springs, 3000 lb rear springs) have made RV travel way more enjoyable. No more white knuckle driving.
This made driving way more enjoyable. My unit had no stabilizer. I wish it did.
Delivered on time. Great videos available for installation. It may have taken a half hour to install. I bought this for a 2021 Cross Trek 22XG on E350 chassis. It made a big difference. It's not like driving my F150, but with this set up I'm 90% there. So instead of having to concentrate on staying in my lane so much I could actually enjoy the scenery! Game changer!
Helped tremendously with the push you get when a tractor trailer passes by. It helped my wife relax while traveling .
Made such a big difference when doing our c class motorhome. We definitely recommend your company with getting this Roadmaster .
Roadmasters quality of work,and the way you make sure everything is good.
The unit was super easy to install and worked super well..at first. Later, the rubber boot bunched up and the stabilizer didn't work nearly as well. I kind of wished I would have purchased a different type.
Do you have a question about this Anti-Sway Bar?
Info for this part was:
At etrailer.com we provide the best information available about the products we sell. We take the quality of our information seriously so that you can get the right part the first time. Let us know if anything is missing or if you have any questions.


Thank you! Your comment has been submitted successfully. You should be able to view your question/comment here within a few days.
Error submitting comment. Please try again momentarily.