
Summer Starts Here - Save up to 70%


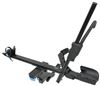
These RockyMounts lock cores let you add new locks or replace existing cores for all your lockable RockyMounts products. These keyed-alike cylinders let you lock your racks, accessories, and other gear with 1 key.
Features:
Videos are provided as a guide only. Refer to manufacturer installation instructions and specs for complete information.
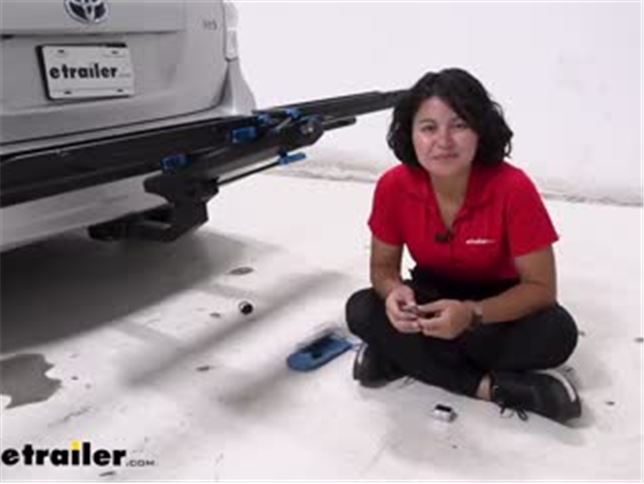
Hi everyone, It's Evangeline. And today we're taking a look at the replacement lock cores for your RockyMounts bike racks or RockyMounts accessories right here at etrailer. So I have a set of two lock cores, which includes two keys. And these lock cores are keyed alike. We can also get them in different quantities. I only need two because there's two lock cores on the RockyMounts GuideRail.
But if you have multiple RockyMounts accessories maybe more than one bike rack, you may wanna check out our larger quantities. So this is a very important part of your biking experience. You have your chain locks to lock up your bike. You also have your locks for your hitch receiver or in the case of the MonoRail here, the same lock or same type of lock that's used for both your bikes and your bike rack. This is made of zinc oxide just to make sure that it's corrosion and rust resistant.
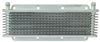
You also have a slight dust cap on the inside. That way, when your keys are not in place, this is covered. And some of your bike racks have a rubber dust cap that goes over it for extra protection. So some of your RockyMounts racks have a plastic core and you just add the metal lock core to it. But other times maybe you broke your lock core or you wanna switch the old one out so that everything is now keyed alike.
So I'm gonna show you how to replace the old lock core and then add in the new one. So the main thing here is you need to access this wafer. So look on your own bike rack or lock core and see if you can find where that wafer is. For example, on your hitch lock. If you take off the dust cap, you can find there's the hole where you can access the wafer underneath.
Or for some bike racks in the case of the GuideRail if you take out two bolts and pop out the end cap, you can then access the wafer from inside the end cap. Make sure your keys are in the unlocked position, twist it so it is still in the unlocked position. And then you can see where you can push in that wafer. So I'm using a bobby pin. You can use a paper clip or really small screwdriver. So with one hand, I'm holding the key in the unlocked position. And with the other hand, I'm pushing on that wafer until it depresses. Now, get your new lock core. And this next step is very important because you wanna make sure you put it in the right way. If you put it in the wrong way, you will lose that lock core. So let's line it up properly. So make sure that wafer is facing the hole where you depress it. If it's facing the other way, that's incorrect. So make sure it's facing the correct way. And then you can just pop your new lock core in. Once it clicks in, you can then remove the key, pop that back in, try it out a couple times, make sure it operates properly and do this exact same process with your other lock cores. But that's how you replace your RockyMounts lock cores..
Average Customer Rating: 5.0 out of 5 stars (3 Customer Reviews)
These RockyMounts lock cores let you add new locks or replace existing cores for all your lockable RockyMounts products. These keyed-alike cylinders let you lock your racks, accessories, and other gear with 1 key.
Perfect fit. Great price.
Very helpfully making a switch to an in stock item
Info for this part was:
At etrailer.com we provide the best information available about the products we sell. We take the quality of our information seriously so that you can get the right part the first time. Let us know if anything is missing or if you have any questions.


Thank you! Your comment has been submitted successfully. You should be able to view your question/comment here within a few days.
Error submitting comment. Please try again momentarily.