
This wiring kit allows your auxiliary lamps to be controlled by your vehicle's headlight circuit without overloading the circuit and blowing the fuse. Includes an illuminated power switch, 40-amp relay, fuses, and all necessary connectors.
Features:
Specs:
Videos are provided as a guide only. Refer to manufacturer installation instructions and specs for complete information.
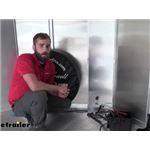
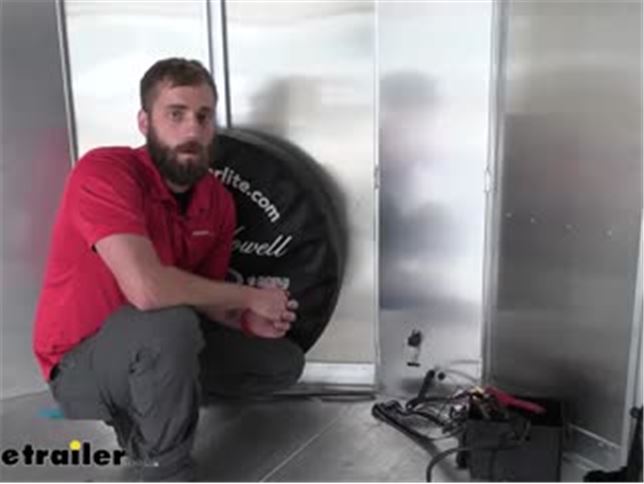
Hey guys, Kevin here, with etrailer and today I'm gonna be showing you how to install the Blazer complete relay kit here on our enclosed Featherlite trailer. So, our relay kit is going to come with plenty of wires, connectors to get onto our spade terminals here on the actual relay itself. It's also gonna come with a toggle switch, which just for our application today, we did not use just because it doesn't really fit the aesthetics of our trailer and since we already had a metal on off toggle switch, we wanted to kind of keep that look, just to go along with our race trailer. So, this relay kit is going to have a variety of different uses. For our use today, we just wanted to be able to manually power some exterior lights that we had already put on the back of this trailer and wired into our reverse light. That way, if our neighbor needs to pull his race car into his trailer, he doesn't have to worry about hooking up his truck and then powering on the reverse lights just to get his extra brightness off the back.
He can easily just flip the switch and pull his car right into the trailer. As far as installation difficulty goes it's really gonna depend on your setup and just how far you have to run the wiring. On the bottom of your relay, there's going to be four prongs, each coded with a number. Up top is gonna be 87. We are running this wire from 87 down to our junction box, for our seven way, and then tying that in to our reverse lights so that we can power the exterior lights every time that our trailer is in reverse.
To the right of that is 85. We've paired that up with 30 right here which would go to your battery normally. We spliced those together, ran that out and then ran that over to our light switch so that we can also control the power flowing to our light switch to manually turn on our exterior lights. And then on 86, we just had that grounded straight to the wall of our trailer. But with all that done, now we can go ahead and mount our relay back up onto the wall.
So, because I'm installing a relay, I yanked out the original switch that we had right here and I cut into our power 'cause I'm gonna make a little jumper over to our new switch. And then I ran our other power wire coming from our relay right over through our ceiling, down into our railing here. And then we're going to make our connections. Doesn't matter which wire that you use when you're doing this. So, I'm just gonna hook up my left side here to my wire, ran over to our relay.
That in. Then we can crimp it down. And then on my other side, I've already stripped a wire back on each side and I'm gonna make a little jumper from our power wire to our other switch and then place that onto my other wire right over here. So, I'll twist these together. We'll put on our butt connector. Crimp it down. Then we can crimp on our other side of our power wire so that we have a connection back to our first switch. And then we'll use another butt connector between our new switch and our jumper wire. Now we can go ahead and place our wiring back up into our wall here and then put on our plates so we have a nice cover, you don't see these ugly holes in the way. Pull off our on off. Take our cover. Slide that right through. I'm actually gonna have to take this one off as well, just for this switch. Drop that on, drop on our on off. And this is only gonna go one way, 'cause there's a little tooth right there that's gonna go right into this gap. So, you don't have to worry about putting it on the wrong way. And twist on the cap. Back in place. And now I'm just gonna take some self tappers and shoot 'em right through to hold our cover in place. Now that our switch is in place we can test our relay out and make sure that it allows us to manually power our lights. Well guys, I think that about does it for today's installation of the Blazer complete relay kit here on our enclosed Featherlite trailer. Mine name's Kevin. Thanks for watching..
Average Customer Rating: 3.9 out of 5 stars (8 Customer Reviews)
This wiring kit allows your auxiliary lamps to be controlled by your vehicle's headlight circuit without overloading the circuit and blowing the fuse. Includes an illuminated power switch, 40-amp relay, fuses, and all necessary connectors.When converting 4 pin to 7 pin, I used this kit as a source for trailer aux (4-pin brown) after other troubleshooting failed. A shop installed my 4 pin controller and it turns out my car doesn't supply a voltage to the quick-clipped lead for brown (and has an empty light bulb holder reserved for another model). Yes the leads in the kit are thin, but so are stock leads pumping 12v.
Material quality not as high as I had hoped. Thank you

I ended up NOT using this for my project, the wires appears to be of low quality, surprised since everything else I have purchased from ET I've been VERY pleased with.
Fast shipment, and product fit just wright. Excellent company. will be buying more products in the future from this awesome company.
Loved the lights and easy hookup,thank you
Product received as advertised.
Do you have a question about this Accessories and Part?
Info for this part was:
At etrailer.com we provide the best information available about the products we sell. We take the quality of our information seriously so that you can get the right part the first time. Let us know if anything is missing or if you have any questions.


Thank you! Your comment has been submitted successfully. You should be able to view your question/comment here within a few days.
Error submitting comment. Please try again momentarily.