
Thank you! Your comment has been submitted successfully. You should be able to view your question/comment here within a few days.
Error submitting comment. Please try again momentarily.


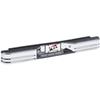
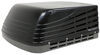
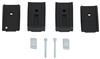
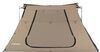
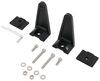
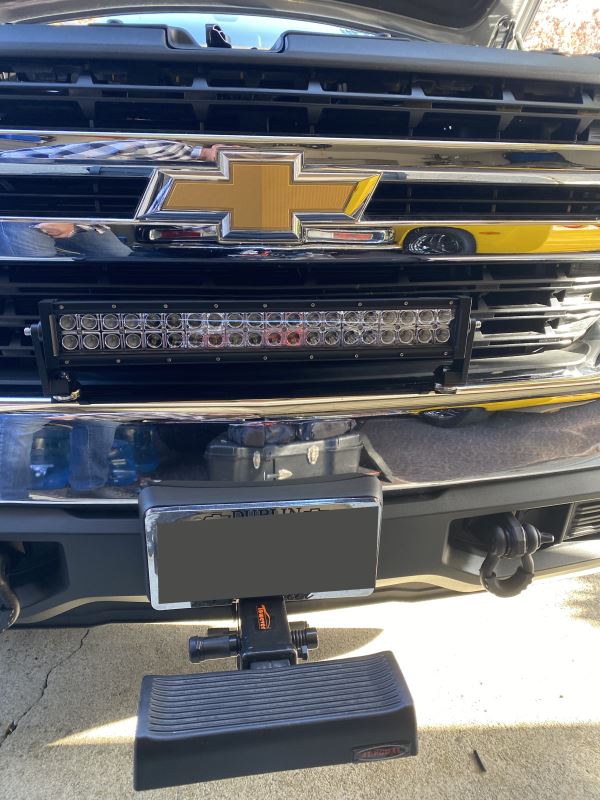
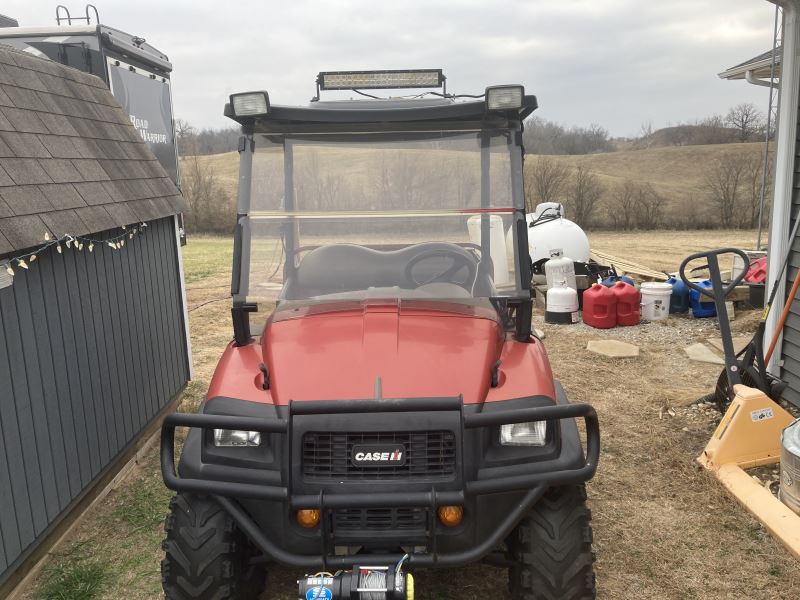
LED light bar with durable aluminum housing produces a bright white light. The combination spot beam and flood beam lets you see at a distance, as well as off to both sides. Hardware, brackets, and wiring harness included. 24 Diodes.
Features:
Specs:
Lumens are used to measure the amount of usable light that is put out by a light source. Raw lumens represent the number of lumens that the manufacturer claims the LEDs are capable of producing. It does not include the light's drive method or the amount of light lost from the lens or reflector. Effective lumens take these factors into account and represent the number of lumens that are actually produced by the complete light assembly, not just the amount of light that the diodes are capable of producing. This light has a 5,000 raw lumen capacity and produces 2,700 effective lumens.
California residents: click here
Videos are provided as a guide only. Refer to manufacturer installation instructions and specs for complete information.
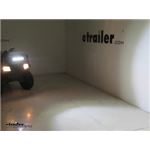
Speaker 1: Today we're going to take a look at and show you how to install the Optronics 16 and 1/2 inch long LED offroad light bar. This is the mixed beam offering both spot and flood with double row LED's. Part number is UCL21CB.Now here's a really good example of the effectiveness that we get out of a light bar such as this. As you can see, we've got just our standard headlights on down there. They do a fair job of lighting the trail ahead of you. But once you turn that light bar on, makes a world of difference.
Really is going to brighten up the trail ahead, make sure we get where we're going safely.Now here's what our light bar is going to look like installed and working. As you can see, it delivers a lot of light out of a pretty small compact light bar for that matter. You have both spot and flood beams. The spot beams that we have in the middle are going to be the middle eight. Basically, four on top, four on bottom.
And the reflector is a high polish reflector. So it shoots that light way out in front of us, allowing us to see where we're heading. And then on each side, we're going to have eight more LED's, four on top, four on bottom. And if you notice, that reflector is kind of diffused. What that does, is it spreads that light out over a greater area, giving us that flood effect.
So not only can we see a long way ahead of us, but we'll also be able to see near the ground in front of us and out to both sides.Something else I really like about these lights. You can see these cooling fins on the back. The whole housing's made out of aluminum, so of course it's going to be corrosion resistant. But even though they are LED lights, the do generate heat. These cooling fins help to dissipate that heat much more effectively than what you see out of the other light bars that would just be a strip.
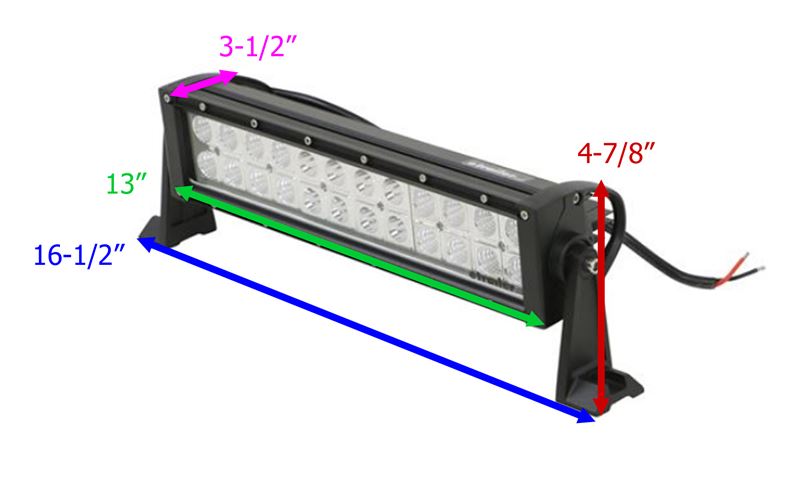
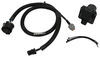
Without that on back, it's going to help everything last much longer and be much more effective.Now it's a nice compact design, but you get a lot of light output. The raw lumens about 5,000 but realistically you'll expect the real world lumens to be around 2,700 or so. You've got 24 total LED's all the way across. The lens itself is going to be very resilient. It's a polycarbonate lens, so we're not going to have to worry about the cracking and braking we used to have with the glass. And overall, it'll hold up to any of the little rock chips and stuff like that, that will probably going to put it through.Now of course with offroad lights, we want something that's going to be moisture and dust resistant. This light does have that IP 65 rating. So we can be sure it's going to give us years of good service. We're not going to have to worry about moisture or dust getting in behind that lens causing us issues. Now the lights also designed to work with both the 12 and 24 volt electrical systems. So you should be in good shape regardless of how you got your rig set up.Now with the overall quality and feel of the light are right in line with what we see out of even much more expensive LED style light bars. This uses a traditional style LED. It has surface mount technology which is going to help keep it durable. It kind helps to isolate the vibrations and stuff that you're typically subjected to. But when you go to like a vision x light, much, much more expensive but they do use Cree LED technology which tends to be the most reliable. Not saying this isn't going to be a very good and effective long lasting light. Just saying sometimes those higher end lights do have more options available.Now overall we're going to have 16 and 1/2 inches from side to side on our light. It's going to be about four and 7/8 of an inch tall. The light bar itself is going to be 13 and 1/4 inches wide. Three and 1/2 inches tall and about three and 1/2 inches deep.Now for installing our light, we've got the brackets on each side, which are going to allow us to attach and the hardware to do that. Depending on your application, we've got an Arctic Cat here. We're going to be installing it on. You may need to provide some additional hardware. Whatever your attachment point's going to be, you want to be sure you have the accommodations for that. Something else we recommend in the install side is a relay harness. This one happens to be from Blazer, part number is MM510.What this allows us to do is take all of the power from running through our switch. Without a relay installed, when you switch your light on all the power goes through the switch itself and generally they wear out very quickly. With the relay harness, our switch is going to control our relay, not necessarily the light. So when we flip our switch, our relay closes and that's going to send power through the relay to our lights. We're not running all the power through our switch, which eventually just causes failure.Once we've decide where we're going to mount our light, it's time to get it put in place. You can see the rubber right here. That keeps it kind of isolated. It's going to dampen any of the vibrations coming through. So you want to be sure you have that installed between your mounting surface and your light. We've got the bolt through. Putting a lot larger flat washer here on the outside. Then to spread out our energy a little bit further, you can see I'm using some larger washers. You can see that's just going to spread that energy out over a greater area, give it a lot more purchase to hang on to. Done that with a couple of them here, so we can just kind of bring that down. Then eventually we'll add on our original flat washer, lock washer and nut and we'll do that on the other side as well. Just going to get it hand tight for now so we can get all of our spacers adjusted and make everything look appropriate.With our hardware in place, we're going to use a five millimeter hex bit and a 10 millimeter socket. We can get these tighten down. We don't need to over tighten them. That lock washer does a good job of keeping everything in place. What I like to do is just compress that rubber a little bit. Ensure I've got a little torque on there. And then of course over use, if you're going to be beating this thing up offroad a lot, you'll want to check it periodically, make sure it remains tight.Now we've got about a 13, 14 inch lead coming on off of our light here. But then a lot of applications you're going to need to extend that out to get to the point where you're going to get your power hook up to your relay, that kind of thing. So what we're going to use just a pice of 12-2 wire. On our website we sell it by the foot, 12-2-1 is the part number. Get as much as you need. Also in this application, we're going to be using heat shrink butt connectors. The yellow ones here, part number DW05745. See I've already got them connected to my duplex. I've staggered them, so they'll kind of delay a little bit nicer, we won't have a little fat point there. I'm going to stagger out these just the same. So I'm going to trim this back a little, that way it'll be a nice neat wiring connection.We just want to cut through the outer layer here. Careful not to actually get into our wires underneath. You can see there, pull that back. Just get that trimmed off. Now we're going to make our connection here. Just want to place our for consistency sake, we're going to hook the black to the black wire. The white will from this point on be our red wire. Get that in there, just get it crimped down. Always want to give it a good pull, make sure you got a good connection. Lay this one up there, figure out where we need to cut it. We can get it stripped back too.Now we'll get those shrank down. To do that, you just want to use a heat source. We're going to use a lighter here. You could also use a heat gun or a mini torch. The idea is just to give it gentle heat, not over heat it. You can see how it starts to shrink down. The wire actually looks like it magnifies or like it gets bigger. And then you'll have a little bit of clear gel that comes out of the end of it there. Now we're going to use a piece of wire loom. Just go around this give it a nice clean look. We'll start getting zip tied off where we want it. Use just a little bit of tape spaced six to eight inches apart as go down and that'll keep everything nice and snug in there.Now you can see we're just going to route it along our path. Yours is likely going to be different and use some zip ties to get it secure. Now we've got our light wire ran now. Going to gain access to our battery here and we'll start getting that relay put in place. Next we'll decide on the position for our switch. See it comes in a housing and you do have screws that will go into those holes in the back. So if you want to mount this up against something, you can do that. We're going to take a little bit different approach. This is a two piece set up here. This is just kind of like a switch plate and then we've got our actual switch. If we squeeze on the top here and the bottom here, we can actually push the switch out.Now I'm going to use this as a template for a hole that I'm going to create in the side here. Of course, you want to make sure you don't have anything back behind there because we need to room for that switch to go in and for our connections. We're going to mark that out and get it trimmed. Now if you're going to take this approach, definitely try to cut it a little bit smaller first. You can always make the hole bigger. You can't always make it smaller. So keep that in mind.We've got our hole cut out there. And this is ideally what you're looking for, side to side. You want it to be almost an exact fit. You want no movement this way. And if you'll notice, we've got a little bit of up and down movement. That'll allow for our tabs to slide in and lock onto that plastic. Just like that, really nice and secure. We're not going to leave it permanently installed right now because I still want to make sure I'm connecting my wires to the right spot. So we can just push down that tab, get it pulled out.Now this is an illuminated switch. You can see here on the middle is our accessory. That's the power wire that lights that. So what we're going to do is tie that into the headlight circuit. So that way when the headlights come on, our light comes on. When the headlights are off, the light's off. So when you need lights, it'll be lit. When you don't, it won't.So what we're going to do is take the plug that goes into our headlight or whatever other trigger that you want to use to make the light come on. And we need to verify which side has the power. So this will be our ground. You see we're getting no signal. That's going to be our power. That's on that white wire, so we'll strip this back and we can splice that wire right in line. Before we do that, we do want to remove the negative terminal from the battery so we don't have to worry about any kind of shorts.All right we know it's the white wire off this plug. So we can just splice that. Now we're going to strip both ends back here. The end closest to the plug, I'm going to strip back about twice as far as you normally would. I'm going to twist that wire and double it over. Since we're using two wires coming out of that other side, we'll have to use a little bit bigger butt connector and that's going to give that plenty to hang on to. The red wire that comes with our kit, we want to strip back. You don't want to cut the end that has the plug on it. You want to strip the bare end here. Pretty thin wire, so I'm going to double it over. I'm going to twist it together with our headlight lead here. Then those will both go on the other side of our butt connector and we'll get that crimped down.Now we can shrink that down like we did our ones before. For no other reason really than aesthetics, we're going to go ahead and tape this back up kind of like it was when we found it. Now we'll get that wire replaced. And the other end of our red wire here is going to run back towards the switch. So pick the direction you want to go with that.All right we've got our red wire routed over here to the switch like we talked about. Next thing we need to do is kind of separate the two wires we have in our duplex here. Just like before, cut the sheathing. We do not want to cut the wires themselves. Now with our set up, we're going to have three grounds that we need to deal with. One is the black wire coming off of our light. Then we need to ground our switch and our relay.Now we're going to do those all through one connection right here on this bolt. We're going to use 3/8 inch diameter ring terminal. To do that, you do have ground wires in the relay kit. They're just both about six inches long. That makes it a little bit of more of a challenge to make the connection or get a ground close enough. So if those will work for you, great use them. If not, we're going to extend ours with a piece of 16 gauge wire, 16-1-1 is our part number for it. Strip back the wire coming from our light. Get those kind of twisted together. Slide on that 3/8 diameter ring terminal. You want to make sure both wires go up in there really well. We'll get it crimped down.See that had a flange nut on the back. Bring my terminal down, I'm going to place it over that and we'll just re secure it with that nut. I'm just going to get that secured up and out of the way with some zip ties. Now additionally in your relay kit, you're going to have the wire that runs from your positive terminal on your battery here up to the relay. Since our battery's here, we're going to putting our relay further up front here. We're going to run and secure this at the same time. This wire especially, but all your wires, just make sure you put them in a safe area. You don't want these to be on sharp edges, anything that gets really hot will be an issue for them. Just anywhere that damage might be caused to wire you want to avoid that.Now we've said we need to have two ground wires up here. We just brought one forward. We're going to split this and just like we did on our headlights, we're going to splice two wires together. So we can turn one into two coming out. And you just take that loop and split it. That gives you your two grounds that we can get connected. Now we'll trim both of those off. Of course, you want to trim them off long enough to make it to your relay and to make it to your switch. We're going to strip each one of those and we're going to add on a 14/16 gauge female spade connector.Now we're ready to grab our relay. You'll notice that three of our terminals run this way and the one runs across. The one down here at the bottom is number 30. That's the one we're going to connect our black wire to. This is the wire that runs directly from our battery. So slide that down on. Number 86, which is going to be, this is the way we we're just looking at it. So this runs straight up and down, this runs straight up and down, this runs straight up and down. It's also labeled. It's going to be right there. That needs to get one of our ground connections.On 85, we're going to place the green wire comes in our relay kit. And then the last one will be the top one here. That's going to go out to our light. Remember our white thicker wire here coming out of that duplex is the red wire on our light. That's going to go as we said to that other open slot on our relay there. Just get that stripped back. As you can see, that relay kit is going to come with most of the stuff you're going to need to make your connections. It gives you your relay and stuff, but depending on the application you might have to add some of your own wires, some of your own connectors and things like that.Now we've got our three wires that are going to run to our switch. We've got our red wire, which comes from our headlight signal. Got our ground wire here. We've got our green wire that comes from our relay. Now on our switch, there's going to be a series of four lines with a line that comes off of the top and it's labeled ground. That's going to be where our white wire goes. Next up we've got our ACC. That's for our lights, that's where our red wire goes. And last up is our power, that's going to be our green wire. Now we're ready, just slide that in place just like that.You can see our green wire is quite long here. You can wrap this up, just like this. Put a few zip ties around it or if you prefer a cleaner install, just cut it, strip back the ends and add in a butt connector. Now when testing our switch, we've turned the headlights on that's our trigger to get our light. We realized that the switch was labeled wrong. So instead of following the labels on the side of the switch, you want to reverse that red and green wire and follow the instructions.Now the last connection we need to make of course is going to be our power wire for that light to our battery. I'm going to zip tie these off and just pick your route. You want to run that to the positive side. In our case, we've got a pretty heavy duty wire loom right up above here. We're going to go around that, get everything secured. In your application, it might be a little bit different, but do what you need to do.Now of course for your application, you want to replace anything that you had to remove to get the job done. Now with our light all hooked up, basically when we turn on the key into the headlight position, that's going to activate our switch. That'll make it to where we can turn it on, turn it off. So now we can hit that switch and you really have options on how you want it to come on. You could leave your switch on. When your headlights go out, that light's going to go out with it. Turn your headlights back on, that light's going to come back on. Or you can use it selectively if you just want to use the headlights, use your headlights. When the time comes you want to use your LED spotlights there, just get that turned on.As you can see, also with our switch in the on position, that's going to be illuminated. That's going to indicate to us that our lights are on. And when it's off, it'll go back off. And that'll complete our look at the Optronics LED offroad light bar, part number UCL21CB.
Average Customer Rating: 4.7 out of 5 stars (64 Customer Reviews)
LED light bar with durable aluminum housing produces a bright white light. The combination spot beam and flood beam lets you see at a distance, as well as off to both sides. Hardware, brackets, and wiring harness included. 24 Diodes.
Mounted on tractor with loader. Excellent option for night time work. Lights up work area well.
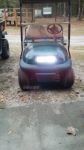
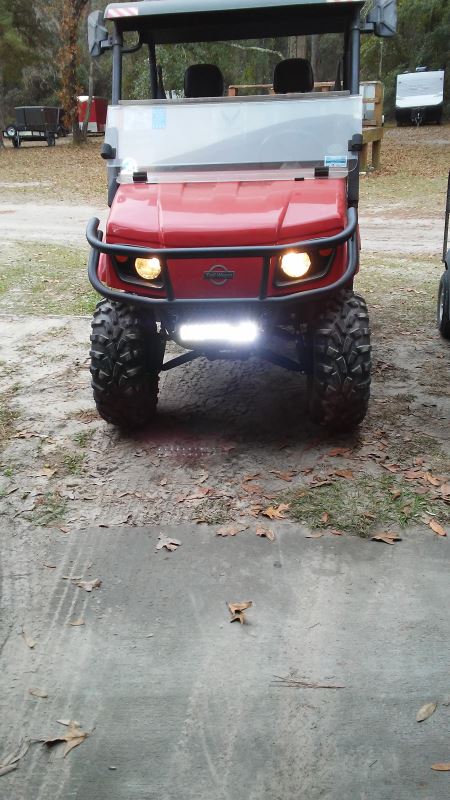
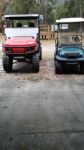
Great light bar for the price. Perfect size for my golf cart and UTV. Very bright. Easy to install and wire.
HAVE NOT PUT THEM TO USE YET BUT THEY ARRIVED TIMELY AND IN GOOD CONDITION.
I have these on the bumper of my service truck to check fences with. They are holding up well with the dirt road and vibration.
other than the slight shipping delay all is well, i like the construction of the product and it will fit my application as i intended. thanks.
Fast shipping and good products
Beautifully made! Super Bright! Nice wiring in protective sheathing!
I just received this product yesterday afternoon. I opened it up and product is as advertised. Quality of product appears good.
Easy wiring bright easy fitment
nice and bright!!!
Does it's job and lights up the road and sides to keep you out of the ditches on rainy and foggy nights. A "must have" for me!
Very nice package, Very easy to install,It took a little extra time for me. I added a remote control switch to it that I can turn on and off from hundreds of feet away.
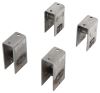
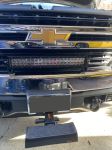
I also didn’t want to drill holes in my bumper so I found these rare earth magnets that I attach the brackets to.
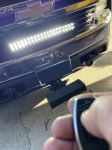
With the magnets on the bumper, I couldn’t even pull it off but I did put a wire tie around one of the cooling fins around my grill Just as a safety precaution, primarily for bumpy roads.
Never worked, and unfortunately I didn’t install it until well after the return policy had expired. Too bad, it could have been perfect for my needs
Mounted on Polaris ATV. Great light for around the farm or on the trails.
I really like this light bar. Very bright and works really well when I am moving snow early in the morning or at night
This light works great. The only reason I didn't give 5 stars, is it didn't come with a switch to make it work. Used it on my Gator.
Easy to install. It lights the area behind my trailer very well. Great purchase.
Installed this on a golf cart for additional lighting. It’s been a year and it has been an excellent addition. Easy to install and all necessary hardware was included.
We have purchased this product before with great results. These are being used on big equipment trucks.
The sales representative we spoke with Lori B. Was excellent she even did research for us to find this item, because we had ordered it two years ago and we could not find the information on it, she found it and also sent us the invoice on it. Your system was down and she called us back when it came back up. She has sent us a follow up email to make sure the product is what we needed. Now that’s customer service with a smile!
Do you have a question about this Off Road Light?
Info for this part was:
At etrailer.com we provide the best information available about the products we sell. We take the quality of our information seriously so that you can get the right part the first time. Let us know if anything is missing or if you have any questions.


Noel P.
12/21/2020
Perfect, not a problem