How To Install The Fastway E2 Weight Distribution System FA92-00-0450
Question:
Hello, thank you for your help. We have a Fastway e2 weight distribution hitch 4500/450 pound, model 92-00-0450, but we have switched tow vehicles and now need a longer shank for more rise. Do you have a longer shank available that will fit? We just need another 1-2 Additionally: 1. What size socket do you recommend for the various bolts? 2. How do we determine what angle to set the head? Or how many washers to use? 3. When we dont want to use the trunnions navigating a dip, or trying to be quiet in a campground, for instance is there a quick/easy way to remove them, or store them out of the way? 4. Is there an easy way to adjust the height of the head/ball if we are towing a different trailer with a lower coupler? probably without the trunnions 5. How do we determine how high to position the L-brackets for the spring arms? If details matter, our trailer is a Safari Condo Alto A2124 recommended coupler height 20.5, and our tow vehicle is a Tesla Model Y with factory tow package 14inch to the top of the receiver. An added fun detail from the Tesla Model Y manual: The Model Y hitch receiver supports a ball mount with a length of up to 8.5” 22 cm and a rise of up to 0.75” 2 cm. Do not use any type of ball mount that does not meet these requirements.inch This limits us to trailers with very low couplers, so I think we will have to use inch hitch/shanks/mounts in the rise position to tow most trailers. Am I right? Id like to keep the ball as close to the car as possibleis that the right move? Many thanks!
asked by: Aiyana G
Helpful Expert Reply:
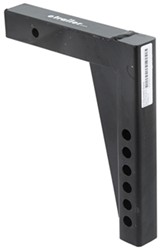
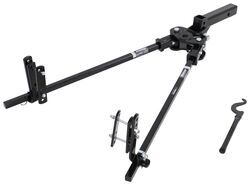
The Fastway e2 Weight Distribution w/ 2-Point Sway Control # FA92-00-0450 comes with a shank that is 8" From center of hitch pin hole to center of adjustment holes, which is about the max length that your 2021 Tesla Model Y allows for according to what the manual told you. Also, since the manual says that it only allows for up to 0.75" rise, you will not need a different shank as this has a max rise of 6" and max drop of 2". If the 0.75" rise is not enough to level your trailer, then it is possible that your trailer is not meant to be towed with your vehicle. If you still wish to go with a shank that offers more rise, I recommend the Fastway e2 Weight Distribution Shank # FA92-02-4315, which has up to 12-1/2" rise.
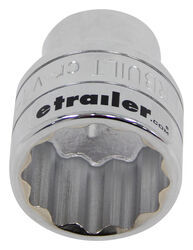
The 1-1/2" 12pt Socket # ALL643210 is recommended for installation of the hitch ball. You will also need a 16mm socket for the shank bolts, a 5/8" socket for L brackets, and a 9/16" socket for angle bolts.
In regard to determining head angle and how many washers to use, first start with the trailer completely level and measure from the ground to the inside top of the trailer coupler. The hitch ball should initially be placed as close to this height as possible. Insert the shank into the receiver on the tow vehicle and secure it with the hitch pin and clip. Insert the spacer rivet and washers into the back of the hitch head. If your tongue weight is less than 350lbs, start with 2 washers; if it is over 350lbs, start with 3 washers. If any part of the shank hole is lower than the bolt channel slot, drop the head down to align the holes for the initial setup. If you cannot see the lower hole in the shank, raise the hitch head so that the top slot aligns with the shank hole slightly above it, and use this hole for the initial setup. There will be a few more setups and measurements to finish installation. I have attached a few photos of the instructions explaining this whole process.
This system is already much quieter compared to a lot of weight distribution systems. But if you were wanting to remove part of the system at any point, you could use your trailer jack and lift the trailer to relive the stress on trunnion bars and remove them.
In order to adjust the head ball, you will need to remove the coupler head and add a washer or remove a washer depending on what is needed. The L brackets are initially installed in the default middle position, leaving two holes at the top and two holes at the bottom. This normally isn't adjusted from this point, but I will attach the instructions which explain further adjustments (if they are necessary). I have attached a very detailed installation video explaining this entire process. I have also attached a link to the instructions for this system.

Products Referenced in This Question
1-1/2" 12pt Socket - 3/4" Drive - Chromium-Vanadium Steel
- Hand Tools
- Ratchets and Sockets
- Sockets
- SAE
- 3/4 Inch Drive
- 1-1/2 Inch
- Alloy Steel
- Powerbuilt
more information >
Fastway e2 Weight Distribution Shank - 12" Long - 12-1/2" Rise 9-3/4" Drop - 1.2K TW
- Accessories and Parts
- Weight Distribution Hitch
- Shanks
- 1400 lbs TW
- 14000 lbs GTW
- Fits 2 Inch Hitch
- e2
- Round - 9 Inch Drop
- Trunnion - 8 Inch Drop
- Round - 12 Inch Rise
- Trunnion - 12 Inch Rise
- Fastway
more information >
Product Page this Question was Asked From
Fastway e2 Weight Distribution w/ 2-Point Sway Control - Trunnion - 4,500 lbs GTW, 450 lbs TW
- Weight Distribution Hitch
- WD With Sway Control
- Some Sway
- Includes Shank
- Electric Brake Compatible
- Surge Brake Compatible
- Fits 2 Inch Hitch
- Allows Backing Up
- 200 lbs
- 300 lbs
- Fastway
more information >
Featured Help Information
Instructions
Miscellaneous Media

Continue Researching
- Shop: Fastway e2 Weight Distribution w/ 2-Point Sway Control - Trunnion - 6,000 lbs GTW, 600 lbs TW
- Shop: Fastway e2 Weight Distribution w/ 2-Point Sway Control - Trunnion - 4,500 lbs GTW, 450 lbs TW
- Q&A: Recommended Fastway WDH For 2007 Toyota Tacoma Towing 3,000 Pound Trailer
- Q&A: Recommended Weight Distribution System With Sway Control For 3,500-Lb Trailer
- Q&A: Weight Distribution System for Trailer that Weighs 300 lbs
- Q&A: Tuson Electronic Sway Control Experiencing Tail Wag At Speeds Over 65 MPH On 2015 Toyota Tundra
- Shop: Blue Ox TrackPro Weight Distribution w/ Sway Control - 7-Hole Shank - 6K GTW, 600 lbs TW
- Q&A: Should Weight Distribution System be Used for 2015 Subaru Outback Pulling Safari Condo Alto 1713
- Q&A: Should WDS and Sway Control be Used for 2007 Lexus RX350 Pulling Safari Condo Alto 1743
- Shop: Trailer Hitch
- Video: Fastway e2 Weight Distribution System Installation - 2017 Chevrolet Colorado
- Video: Review of Fastway Weight Distribution Hitch - e2 600 LBS TW WD With Sway Control - FA92-00-0600
- Shop: Fastway e2 Weight Distribution w/ 2-Point Sway Control - Round - 6,000 lbs GTW, 600 lbs TW
- Q&A: Difference Between Fastway Weight Distribution Systems # FA94-00-0600 and # FA92-00-0600
- Shop: Draw-Tite Max-Frame Trailer Hitch Receiver - Custom Fit - Class III - 2"
- Article: 5 Tips to Confidently Choose Your Weight Distribution Hitch
- Search Results: equalizer hitch
- Search Results: blue ox wd hitch
- Search Results: weight distribution hitch
- Shop: etrailer Tongue Weight Scale for Campers and Utility Trailers - 2,000-lb Capacity
- Shop: Curt RockerBall Shock Absorbing 2" Hitch Ball - 1" Diameter Shank - Chrome - 7.5K
- Search Results: 7 pin connector
- Search Results: 7 pin
- Search Results: 7 pin connector cover
- Shop: Brake Controller
- Article: How to Measure for Trailer Hitch Drop


