What Parts are Needed to Install a Brake Controller on a 2000 Chevrolet Blazer
Question:
We almost always recommend using a proportional controller, especially if your new to brake controllers. They are easier to use and brake the trailer in sync with the vehicle. The proportional controllers detect how hard or how light you are braking and match that so the trailer brakes evenly with your vehicle. One of our most popular and one of the easiest to use brake controllers is the Tekonsha Prodigy P3, part # 90195. You will also need a 7-Way trailer connector to provide the needed circuits for a trailer equipped with brakes. The 7-Way install kit we sell requires a 4-Way to already be installed on your truck. The 4-Way is the basic light functions, and those 4 circuits are used as the base for any kind of trailer connector. I will start by recommending a 4-Way and how to install it. If you already have one, you can skip to the portion below about the 7-Way. If you need a 4-Way, you can use part # 18252. It is a basic hard-wire kit. You will need to locate the tail light wires either behind the tail lights or behind one of the panels in the cargo area. Use the circuit tester to identify which wires serve which function. The white wire is ground and should be connected to any good grounding point. The yellow is for left brake and turn. The green is for right brake and turn, and the brown is for running lights. Once you have a properly functioning 4-Way installed, you would need to add a 7-Way. We have a 7-Way install kit, part # ETBC7, that includes everything you will need to prepare a vehicle for a brake controller with a 7-Way. You would mount the 7-Way to the vehicle or hitch. Plug the 4-Way connectors together. Connect the loose white wire from the 7-Way to a good ground point on the Blazer. The purple wire is for reverse lights. If you do not need them, tape this wire up and out of the way. The blue wire is for the brake controller and the black wire is for a 12V power source. Take the included piece of jacketed two wire and use it to extend the blue and black wires up to the front. The blue needs to go to the cab for the brake controller output, and the black needs to be run to the positive battery terminal for 12V power with the included 40amp breaker wired in line. Once you have the 7-Way setup, you can install the brake controller. Mount it in the cab according to the controller instructions. Match the blue wire from the controller, to the blue wire extended from the 7-Way. Run the black wire from the controller to the positive battery terminal with 20amp breaker wired in line. Run the white wire from the controller to the negative terminal on the battery. Finally, connect the red wire to the stop light switch wire that goes hot when the brake pedal is pressed. Use the circuit tester included in 18252 to identify the proper wire. I have added links to the parts below as well as a page on installing a brake controller from scratch that should be pretty helpful.
asked by: Tom
Expert Reply:
We almost always recommend using a proportional controller, especially if your new to brake controllers. They are easier to use and brake the trailer in sync with the vehicle. The proportional controllers detect how hard or how light you are braking and match that so the trailer brakes evenly with your vehicle.
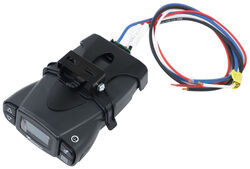
One of our most popular and one of the easiest to use brake controllers is the Tekonsha Prodigy P3, part # 90195. You will also need a 7-Way trailer connector to provide the needed circuits for a trailer equipped with brakes. The 7-Way install kit we sell requires a 4-Way to already be installed on your truck. The 4-Way is the basic light functions, and those 4 circuits are used as the base for any kind of trailer connector. I will start by recommending a 4-Way and how to install it. If you already have one, you can skip to the portion below about the 7-Way.
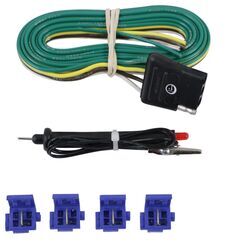
If you need a 4-Way, you can use part # 18252. It is a basic hard-wire kit. You will need to locate the tail light wires either behind the tail lights or behind one of the panels in the cargo area. Use the circuit tester to identify which wires serve which function. The white wire is ground and should be connected to any good grounding point. The yellow is for left brake and turn. The green is for right brake and turn, and the brown is for running lights.
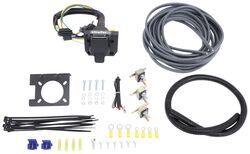
Once you have a properly functioning 4-Way installed, you would need to add a 7-Way. We have a 7-Way install kit, part # ETBC7, that includes everything you will need to prepare a vehicle for a brake controller with a 7-Way. You would mount the 7-Way to the vehicle or hitch. Plug the 4-Way connectors together. Connect the loose white wire from the 7-Way to a good ground point on the Blazer. The purple wire is for reverse lights. If you do not need them, tape this wire up and out of the way. The blue wire is for the brake controller and the black wire is for a 12V power source. Take the included piece of jacketed two wire and use it to extend the blue and black wires up to the front. The blue needs to go to the cab for the brake controller output, and the black needs to be run to the positive battery terminal for 12V power with the included 40amp breaker wired in line.
Once you have the 7-Way setup, you can install the brake controller. Mount it in the cab according to the controller instructions. Match the blue wire from the controller, to the blue wire extended from the 7-Way. Run the black wire from the controller to the positive battery terminal with 20amp breaker wired in line. Run the white wire from the controller to the negative terminal on the battery. Finally, connect the red wire to the stop light switch wire that goes hot when the brake pedal is pressed. Use the circuit tester included in 18252 to identify the proper wire.
I have added links to the parts below as well as a page on installing a brake controller from scratch that should be pretty helpful.
Products Referenced in This Question
4-Way Flat Trailer Connector w/ 72" Harness, Circuit Tester and Wire Taps
- Custom Fit Vehicle Wiring
- Trailer Hitch Wiring
- No Converter
- 6 Feet Long
- Universal Fit
- 4 Flat
- Tekonsha
more information >
Tekonsha Prodigy P3 Trailer Brake Controller - 1 to 4 Axles - Proportional
- Trailer Brake Controller
- Proportional Controller
- Electric
- Electric over Hydraulic
- Automatic Leveling
- Under-Dash Box
- Dash Mount
- Up to 4 Axles
- LCD Display
- Up to 360 Degrees
- Tekonsha
more information >
Universal Installation Kit for Trailer Brake Controller - 7-Way RV and 4-Way Flat - 10 Gauge Wires
- Accessories and Parts
- Trailer Brake Controller
- Installation Kits
- etrailer
more information >


